Page 2 - Contents
Contents 2 IMPORTANT SAFETY INSTRUCTIONS ................................................................... 5 Caring for the environment ......................................................................................... 9 Guide to the washer .....................................................
Page 4 - Technical data; Special-purpose detergents
Contents 4 Electrical connection ..................................................................................................... 81 Technical data ................................................................................................................ 82 Programmable functions ...........
Page 5 - IMPORTANT SAFETY INSTRUCTIONS
IMPORTANT SAFETY INSTRUCTIONS WARNING To reduce the risk of fire, electric shock or injury to persons whileusing your appliance follow basic safety precautions, including thefollowing: Read all instructions before using the appliance. GROUNDING INSTRUCTIONS This appliance must be grounded. In ...
Page 6 - Use
IMPORTANT SAFETY INSTRUCTIONS Do not repair or replace any part of the appliance or attempt any servicing unless specifically recommended in these operatinginstructions. If the power cord is damaged it must only be replaced by a Miele Service technician with a genuine Miele power cord. Under c...
Page 7 - SAVE THESE INSTRUCTIONS; Miele tumble dryers and Miele washing machines can be installed; FCC Declaration of Conformity; These devices comply with FCC Rules Part 15. This equipment has
IMPORTANT SAFETY INSTRUCTIONS SAVE THESE INSTRUCTIONS Miele tumble dryers and Miele washing machines can be installed as a washer-dryer stack. A Miele washer-dryer stacking kit is requiredas an optional accessory for this. Please ensure that the washer-dryer stacking kit is suitable for the Miele ...
Page 8 - FCC Radiation Exposure Statement
IMPORTANT SAFETY INSTRUCTIONS FCC Radiation Exposure Statement This equipment complies with FCC radiation exposure limits set forth for an uncontrolled environment. This equipment should beinstalled and operated with minimum distance 8" (20 cm) betweenthe radiator and your body. Industry Canad...
Page 9 - Caring for the environment; Disposal of the packing material
Caring for the environment 9 Disposal of the packing material The cardboard box and packingmaterials protect the appliance duringshipping. They have been designed tobe biodegradable and recyclable.Ensure that any plastic wrappings, bags,etc. are disposed of safely and kept outof the reach of childre...
Page 10 - Guide to the washer; Control panel; Add laundry
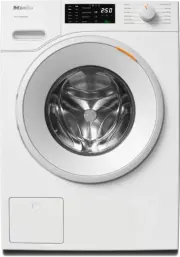
Guide to the washer 10 Control panel a Control field The control field consists of a timedisplay and various sensor buttons.The individual sensor buttons areexplained in the following sections. b Temperature sensor buttons for selecting the temperature. c Spin speed sensor...
Page 11 - Time display; After touching the; Start/Add laundry sensor button; Start; Optical interface; How the control field works; The
Guide to the washer 11 g Time display After the program has started, theprogram duration will appear on thedisplay in hours and minutes.When Delay Start is being used, theprogram duration will appear afterthe delay-stat period has elapsed. h sensor buttons The delay-start period selected wil...
Page 12 - Before using for the first time; Damage from incorrect
Before using for the first time 12 Damage from incorrect installation and connection.Installing and connecting thewashing machine incorrectly willcause serious damage to property.See “Installation”. Removing the protective filmand stickers Remove: - any protective film from the door- any sticker...
Page 13 - Availability of the Wi-Fi connection
Before using for the first time 13 Miele@home Your washing machine is equippedwith an integrated WiFi module. To use this feature, you will need: - A WiFi network- The Miele@mobile app- A Miele user account. The user account can be created via theMiele@mobile app. The Miele@mobile app will guide you...
Page 14 - Removing the shipping struts; Logging in via the Miele app; Logging in via WPS; MobileStart
Before using for the first time 14 1. Removing the shipping struts Damage resulting from failure to remove the shipping struts.Failure to remove the shipping strutscan result in damage to the washingmachine and to adjacent cabinetry orappliances.Remove the shipping struts asdescribed in “Installat...
Page 15 - must
Before using for the first time 15 3. Starting the calibrationprogram For optimum water and energyconsumption and excellent washresults, it is important to calibrate thewashing machine.To do this, the Normal program must be run without laundry and withoutdetergent. Turn on the faucet. Turn the p...
Page 16 - Environmentally friendly washing; Energy and water consumption; Express; Detergent consumption
Environmentally friendly washing 16 Energy and water consumption - Make use of the maximum load that the wash program can accommodate.This will keep the energy and waterconsumption to a minimum in relationto the size of the load. - When smaller amounts of laundry are washed, the washing machine’saut...
Page 17 - Prepare the laundry; Sort the laundry
1. Prepare the laundry 17 Empty all pockets. Damage due to foreign objects. Nails, coins, paper clips, and so oncan cause damage to garments andcomponents in the machine.Check the laundry before washingand remove any such foreign objects. Sort the laundry Only wash items that are labeledmachine ...
Page 18 - Selecting a program; program; To use
2. Selecting a program 18 Switching on the washingmachine Turn the program selector to aprogram. 1. Selecting wash programsusing the program selector Turn the program selector to therequired program. The program duration appears on thetime display. 2. Selecting programs via theMobileStart pr...
Page 19 - Loading the washing machine; Opening the door; Take hold of the door and pull it open.; Closing the door; Shut the door with a gentle swing.
3. Loading the washing machine 19 Opening the door Take hold of the door and pull it open. Check the drum for pets or foreignobjects before loading it with laundry. The most efficient use of energy andwater is achieved when a full load iswashed. However, do not overload asthis reduces cleaning eff...
Page 20 - Selecting program settings; Selecting extra options; You can select multiple extra
4. Selecting program settings 20 Selecting a temperature andspin speed The wash program’s pre-settemperature and spin speed light upbrightly. The choice of temperaturesand spin speeds selectable for thewash program light up dimly. The temperatures reached inside thewashing machine might not be thesa...
Page 21 - Detergent dispenser drawer; Filling with detergent
5. Add detergent 21 Detergent dispenser drawer This washing machine requires highefficiency detergent. Adhere strictly tothe dispensing amounts supplied by thedetergent manufacturer. The detergentsmust be marked with the followinglabel: Filling with detergent Pull out the detergent drawer and addd...
Page 23 - Sensor button; Inserting a capsule
5. Add detergent 23 CapDosing Three different types of capsule areavailable: = Fabric care (e.g., fabric softener, proofing agent) = Additives (e.g., detergent enhancers) = Detergent (for the main wash only) Each capsule contains the correctamount for one wash cycle. Capsules are available to ...
Page 24 - Color run and dye removers; Damage due to color run/dye
5. Add detergent 24 Close the lid and press it firmly shut. Close the detergent dispenser drawer. The capsule is opened by the act ofinserting it in the detergent dispenserdrawer. The contents can run out ofthe capsule if you then remove itfrom the drawer before it is used.Dispose of opened caps...
Page 25 - Starting a program; Energy savings
6. Starting a program 25 Starting a program Touch the flashing Start / Add laundry sensor button. The door will lock and the wash programwill start. If a delay-start period has beenselected, this counts down on the timedisplay. At the end of the delay-startperiod or immediately after the programh...
Page 27 - Spin cycle; Final spin speed; Program; Ending a program without a spin cycle
Spin cycle 27 Final spin speed Program Selectable spin speeds in words and numbers (rpm) Max 1,6 00 High 1, 2 00 Med 800 Slo w 6 00 Normal – – – X X Delicates – – X X X Sanitize X – – X X Handwash – X X X X Dress Shirts – – X X X Darks/Denims – X X X X Express – X X X X Extra White...
Page 28 - Delay start/SmartStart; Delay Start; Selecting Delay Start
Delay start/SmartStart 28 Delay Start With the Delay Start function, you candelay the start of the program.This function is active when the SmartGrid programmable function isswitched off. You can delay the start of a programfrom 30 minutes up to a maximum of24 hours. This allows you to make us...
Page 29 - SmartStart; Setting the time period
Delay start/SmartStart 29 SmartStart The SmartStart function lets youdefine a time period during which yourwashing machine will startautomatically based on an externalsignal. The start takes place via asignal, e.g., from your energy supplier,that indicates that the electricity rateis particularly ...
Page 30 - Program guide
Program guide Temperature with garment care label symbols Item/Tip Normal Full load (17.6 lb/8 kg) Hot+ 140°F/60°C Cotton, linen, and mixed fiber textiles made ofboth cotton and linen. Hot 120°F/50°C Warm+ 105°F/40°C Warm 85°F/30°C Cold Cold USA test program in accordance with: DOE Federal...
Page 31 - Delicates
Program guide Temperature with garment care label symbols Item/Tip Dress Shirts Small load (4.4 lb/2 kg) Hot+ 140°F/60°C Pre-treat collars and cuffs depending on thelevel of soiling. Wash dress shirts and silk blouses in the Delicates program. Hot 120°F/50°C Warm+ 105°F/40°C Warm 85°F/30°C ...
Page 32 - Proofing
Program guide Temperature with garment care label symbols Item/Tip Outdoor Small load (5.5 lb/2.5 kg) Warm+ 105°F/40°C Performance outerwear (e.g., jackets andtrousers) made from membrane fabric such asGore-Tex®, SYMPATEX®, WINDSTOPPER®,etc. - Zip up or close any jackets with Velcro before washi...
Page 33 - Extra options; Lightly soiled
Extra options 33 You can supplement the wash programswith extra options. Extra options are selected anddeselected using the relevant sensorbuttons on the control field. Touch the sensor button for the extraoption you require. The relevant button will light up brightly.Not all the extra options can...
Page 34 - Program sequence; Main wash
Program sequence Main wash Rinses Spin cycle Water level Wash rhythm Water level Rinses Normal 2-3 1,2 Delicates 2-4 1,2 Sanitize 3-4 1,2 Handwash 2 Dress Shirts 3-4 2 Darks/Denims 3-5 1,2 Express 2 Extra White 2-5 1,2 Outdoor 3-4...
Page 35 - = ultra sensitive rhythm
Program sequence 35 = low water level = medium water level = high water level = intensive rhythm = normal rhythm = sensitive rhythm = ultra sensitive rhythm = handwash rhythm = carried out – = not carried out This washing machine has fullyelectronic controls with automatic loadcont...
Page 36 - Changing the program sequence; Canceling a program; Selecting a new program
Changing the program sequence 36 Changing a program (safetylock) A program, temperature, spin speed, orselected extra options cannot bechanged once the machine has beensuccessfully started. This prevents themachine being operated unintentionally,e.g., by children. If the washing machine is switched ...
Page 37 - Detergent; Detergents recommended by Miele
Detergent Detergents recommended by Miele Miele Detergents have been specially designed for day-to-day use in MieleWashing Machines. See “Detergents and care products” for more informationabout these detergents. Miele Detergents Miele Capsules UltraWhite UltraColor Normal – Delicates –...
Page 38 - General detergent recommendations
Detergent General detergent recommendations The wash programs that are not listed do not have a detergent recommendation Universal detergent Color detergent Detergent for Woolens and delicates Bleach 1 Normal – Delicates – – – Sanitize – Handwash – – – Dress Shirts – Darks/Deni...
Page 39 - Cleaning and care; Risk of electric shock.
Cleaning and care 39 Cleaning the housing andcontrol panel Risk of electric shock. Mains voltage is present when thewashing machine is switched offDisconnect the machine from theelectricity supply before cleaning ormaintenance. Risk of damage due to ingress of water.The pressure of a water jet c...
Page 40 - Cleaning the
Cleaning and care 40 Removing and cleaning the insert forliquid detergents An insert for liquid detergents is locatedin the compartment of the detergent dispenser drawer. Remove the insert. Clean the insertthoroughly with warm water. Cleaning the compartment Compartment 1 has a siphon for be...
Page 41 - Cleaning the siphon and the; compartment no
Cleaning and care 41 Cleaning the siphon and the / compartment channel Liquid starch results in clogging. Thesiphon in the / compartment no longer works and the compartmentcan overflow.Clean the siphon particularlythoroughly after using liquid starch afew times. 1. Remove the siphon from the...
Page 42 - Sanitize; Cleaning the water-inlet filter; Cleaning the filter in the inlet hose
Cleaning and care 42 Sanitize info(Cleaning the drum) Washing at low temperatures and/orusing liquid detergent can causebacteria and unpleasant odors to buildup in the washing machine. Use the Sanitize program to clean the washing machine. Clean the drum no later thanthe point at which the indica...
Page 43 - Frequently asked questions; A wash program cannot be started
Frequently asked questions Many malfunctions and faults that can occur in daily operation can be easilyremedied. You can save time and money in many cases, as you do not need tocontact Miele Customer Service.Information to help you rectify faults yourself can be found at www.miele.com/service.The fo...
Page 44 - bileStart
Frequently asked questions Problem Possible cause and solution The fault indicator light lights up, and ap- pear alternately on thetime display, and thebuzzer sounds. The water intake is blocked or restricted. Check whether the water supply is turned onproperly. Check whether the intake h...
Page 46 - General problems with the washer; General problems with the washing machine; Problem
Frequently asked questions General problems with the washer Problem Possible cause and solution The washing machine isemitting an odor. The indicator light lighting up and appearing on the time display was ignored. When washing, a washprogram using a temperature of Hot+ has not been run for a lo...
Page 47 - Poor wash results
Frequently asked questions Problem Possible cause and solution At the end of the pro-gram there is still liquidin the capsule. The small pipe in the detergent dispenser draweronto which the capsule is placed is blocked. Clean the small pipe. Not a fault.For technical reasons, a small amount of wat...
Page 48 - Use the; The drum door cannot be opened; The drum is locked during a program.; and; The door lock has jammed.
Frequently asked questions Problem Possible cause and solution White residues whichlook like powder deter-gent are seen on darktextiles after washing. The detergent contained compounds (zeolites) to aidwater softening which are not soluble in water. Thesehave ended up on the laundry. Try and brush...
Page 49 - Turn off the washing machine.; Blocked drain outlet; Risk of scalding due to hot suds.; Draining the washing machine; Once the flow of water stops:
Frequently asked questions 49 Opening the door in the eventof a blocked drain outlet and/orpower outage Turn off the washing machine. Open the drain pump flap. Blocked drain outlet If the drain outlet is blocked, a largerquantity of water can remain in thewashing machine. Risk of scalding due ...
Page 50 - Clean the drain filter thoroughly.; Danger of injury due to rotating
Frequently asked questions 50 Clean the drain filter thoroughly. Remove any foreign objects (e.g.,buttons, coins, etc.) and clean theinterior. Turn the impellers by hand tocheck that they rotate freely. Replace the drain filter correctly andtighten it securely. Close the drain pump flap. R...
Page 51 - Customer Service; Contact in the event of a fault
Customer Service 51 Information to help you rectify faultsyourself and about Miele spare partscan be found at www.miele.com/service. Contact in the event of a fault In the event of a fault which you cannotremedy yourself, please contact yourMiele dealer or Miele Customer Service. You can book a Miel...
Page 52 - Installation; Front view
Installation *INSTALLATION* 52 Front view a Drain hose b Hot-water inlet hose (pressure-proofto 870 psi/6,000 kPa) c Cold-water inlet hose (pressure-proof to 870 psi/6,000 kPa) d Electrical connection e Control panel f Detergent dispenser drawer g Door h Flap for drain filters, drain pump, andemerge...
Page 53 - Rear view; Drain hose
Installation *INSTALLATION* 53 Rear view a Drain hose b Transport clips for inlet and drainhoses and power cord c Electrical connection d Protruding lid for holding whenmoving the machine e Cold-water inlet hose (pressure-proof to 870 psi/6,000 kPa) f Hot-water inlet hose (pressure-proofto 870 psi/6...
Page 54 - Installation surface; If installing on a wooden joist floor:; Dimensions; Danger of injury due to unsecure
Installation *INSTALLATION* 54 Installation surface A concrete floor is the most suitableinstallation surface for this machine. It isfar less prone to vibration during thespin cycle than wooden floorboards or acarpeted surface.Please note: The machine must be level andsecurely positioned. To avo...
Page 55 - Removing the shipping struts; Removing the left-hand shipping strut; Pull out the shipping strut.
Installation *INSTALLATION* 55 Removing the shipping struts Removing the left-hand shipping strut Open the cover and use the wrenchsupplied with the washing machine toturn the shipping strut 90°. Pull out the shipping strut. Removing the right-hand shippingstrut Open the cover and use the wren...
Page 56 - Covering the holes; Risk of injury from sharp edges.; Securing the shipping struts; Risk of damage from incorrect; Installing the shipping struts; Opening the covers; The struts will slide in more easily if
Installation *INSTALLATION* 56 Covering the holes Risk of injury from sharp edges. There is a risk of injury from reachinginto holes that are not covered.Cover the holes for the shippingstruts after they have been removed. Press the covers firmly shut until theyclick into place. Securing the shi...
Page 57 - Leveling the machine; Unscrewing and adjusting the feet
Installation *INSTALLATION* 57 Leveling the machine The washing machine must standperfectly level on all four feet to ensuresafe and proper operation.Incorrect installation may increaseelectric and water consumption andmay cause the machine to move about. Unscrewing and adjusting the feet The four a...
Page 58 - Risk of tipping over due to; Washer-dryer stack dimensions; Frame
Installation *INSTALLATION* 58 WTV 502 Risk of tipping over due to incorrect washer-dryer stack statics.The washing machine must never bemounted on the tumble dryer. Thiswill impair the statics of the washer-dryer stack.Always use the washing machine asthe base for the washer-dryer stack. Washer-d...
Page 59 - Preparing the stacking kit
Installation *INSTALLATION* 59 Preparing the stacking kit Remove the screen from the stackingkit. Set the screen aside. The screen will notbe needed until the end of theinstallation process. 180° Place the stacking kit upside down ona soft surface, e.g., a blanket. Stick the 6 sealing rings to...
Page 60 - Aligning the stacking kit; Unscrew the 4 tumble dryer feet.
Installation *INSTALLATION* 60 Aligning the stacking kit Align the stacking kit centrally on thewashing machine lid. Use the front edge of the washingmachine lid and the edges of thestacking kit for this purpose. Fastening the stacking kit in place Use the 6 countersunk screwsincluded with the...
Page 61 - This step must be carried out by; people; Securing the tumble dryer
Installation *INSTALLATION* 61 Mounting the tumble dryer on thewasher-dryer stacking kit Placing the tumble dryer on the washingmachine This step must be carried out by 2 people . Place the tumble dryer on thewasher-dryer stacking kit. Push the tumble dryer feet all the wayback in the mounting r...
Page 63 - Turn the stacking kit upside down.
Installation *INSTALLATION* 63 Preparing the stacking kit Leave the cardboard inlay in thedrawer. 180° Turn the stacking kit upside down. Stick the sealing rings to theunderside of the stacking kit. 180° Turn the stacking kit the right way upand place it on the washing machinelid. Aligning the...
Page 64 - Fastening the stacking kit in place; Press against the drawer.
Installation *INSTALLATION* 64 Fastening the stacking kit in place Use the flathead screws supplied tofasten the stacking kit to the washingmachine lid. T20 Carefully tighten the screws by hand.Do not overtighten the screws. Removing the drawer The drawer must be removed from thestacking kit whe...
Page 65 - Preparing the tumble dryer; Then set down the front feet.
Installation *INSTALLATION* 65 Preparing the tumble dryer 9/16“ (15mm) Unscrew the 4 tumble dryer feet. Mounting the tumble dryer on thewasher-dryer stacking kit Placing the tumble dryer on the washingmachine This step must be carried out by 2 people . Lift the tumble dryer and tilt it backsligh...
Page 66 - Inserting the drawer
Installation *INSTALLATION* 66 Inserting the drawer Press against the two runners. The runners move out slightly. Pull the runners all the way out. Place the drawer on the runners. Push the drawer into the base. The drawer audibly engages. Tip: Open and close the drawer again to check that i...
Page 67 - Damage resulting from failure to; Installing under a countertop; Risk of electric shock due to; Setting up the cabinet
Installation *INSTALLATION* 67 Turn the screw to move the drawerfront to the right or left. Additional installationrequirements The washing machine must beinstalled in accordance with therelevant local regulations. Damage resulting from failure to remove the shipping struts.Failure to remove the...
Page 68 - For closets at room height; Risk of damage due to; Installation on a plinth
Installation *INSTALLATION* 68 For closets at room height You can also insert a ventilationopening at the top of the closet. Inaddition, you must provide an openingon the bottom side of the door. Risk of damage due to overheating of the washing machine.The air supply must not be hinderedby an addi...
Page 69 - Components of the base
Installation *INSTALLATION* 69 Components of the base a Base b Connecting pieces c Adhesive strips for rear panel d Raised head screws, CEM 4 x 10 e Spacer sleeves f Set screws, M 10 x 40 mm g Rear panel for the base h Installation kit for fastening to thefloor Removing the drawer ...
Page 70 - Installing the connecting pieces
Installation *INSTALLATION* 70 Left-hand hinging Installing the connecting pieces The connecting pieces are installed onthe feet of the base. Removing the feet from the base The feet must be removed from thebase in order to mount the connectingpieces. Using a wrench, turn the counter nut b...
Page 71 - Damage to washing machine and; Repeat the process for; all 4 feet
Installation *INSTALLATION* 71 Preparing the rear panel of theWTS 510 Stick the sealing strips from theaccessory pack to the inside of therear panel as shown in the image. Connecting the washing machine tothe base Damage to washing machine and floorThe washing machine and the floormay be damaged...
Page 72 - Using a wrench, tighten all; threaded bolts; alternately and evenly
Installation *INSTALLATION* 72 Push the base and the washingmachine together. The set screwsmust be inserted in the holes of thefeet that have been removed from thewashing machine. Using a wrench, tighten all 4 threaded bolts alternately and evenly inside the base. The base is screwed securely t...
Page 74 - Aligning the drawer front; Removing the cover cap
Installation *INSTALLATION* 74 Aligning the drawer front If the drawer front is not exactly in linewith the tumble dryer or the washingmachine, it can be adjusted. Removing the cover cap Open the drawer. There is a cover cap on each side ofthe drawer. Remove the cover caps by hand. Aligning th...
Page 75 - Adjusting the inclination of the drawer; Drawer with round rail
Installation *INSTALLATION* 75 Turn the screw to move the drawerfront to the right or left. Adjusting the inclination of the drawer There are two different types of drawer. 1. Drawer with round rail2. Drawer with square rail Drawer with round rail Push the top panels outward frominside and set t...
Page 76 - Drawer with square rail; Slide the two covers back.
Installation *INSTALLATION* 76 Place the bottom of the panels inposition and press the panels inwardat the top. Drawer with square rail Slide the two covers back. To adjust the inclination of the drawer,turn the two rails using a screwdriver. Preparing the washing machine forwashing The follow...
Page 77 - Connecting the bases
Installation *INSTALLATION* 77 Installing the tumble dryer andwashing machine side by side If the tumble dryer and washingmachine are installed side by side, thebases must be connected using theconnecting pieces on the feet of thewashing machine base. If theconnecting pieces are on the right-handsid...
Page 78 - The water protection system; and overflow protection; Inlet hoses; - Protection against the hoses bursting; Electronics and housing
Installation *INSTALLATION* 78 The water protection system The Miele water protection systemprotects all parts of the washingmachine and its surroundings fromwater damage.The system consists of the followingmain components: - the inlet hose- the electronic module and drainage and overflow protection...
Page 79 - Water intake; Maintenance; Water drainage
Installation *INSTALLATION* 79 Water intake Health risk and risk of damage due to contaminated incoming water.The quality of the incoming watermust comply with the requirementsfor drinking water in the country inwhich the washing machine is beingoperated.Always connect the washing machineto the dr...
Page 80 - Installing the elbow; Attach the elbow
Installation *INSTALLATION* 80 Installing the elbow Use the elbow supplied to stop thedrain hose from slipping. Attach the elbow to the drain hose . Place the end of the drain hose in asink. Use a strap with eyelet to stop the elbow from slipping.
Page 81 - Electrical connection; ELECTRICAL INSTRUCTIONS
Installation *INSTALLATION* 81 Electrical connection GROUNDING INSTRUCTIONSThis appliance must be grounded. Inthe event of a malfunction orbreakdown, grounding will reduce therisk of electric shock by providing apath of least resistance for electriccurrent. This appliance is equippedwith a cord havi...
Page 83 - Accessing the programming level
Programmable functions 83 The programmable functions are usedto alter the machine’s electronics tosuit changing requirements.Programmable functions can bealtered at any time. Programming is carried out in 8 steps( , , ... ) using the sensor buttons. Accessing the programming level Before you...
Page 84 - Exiting the programming level
Programmable functions 84 Editing and saving theprogrammable function You can either switch a programmablefunction on/off or select differentoptions. Touch the or sensor button to switch the programmable functionon/off or to select an option: Programmable function Available options ...
Page 85 - PIN code; Stop; Control field switch-off
Programmable functions 85 PIN code The PIN code prevents the washingmachine being used without yourknowledge. When the PIN code has been activated,you have to enter it after switching thewashing machine on. Otherwise, thewashing machine cannot be operated.Options = PIN code is switched off ...
Page 86 - Gentle action; Normal; Reducing the temperature
Programmable functions 86 = Cold water The washing machine will beoperated with cold water only. = Hot water Hot water is used in the mainwash. Risk of damage from incorrect water connection.Connection to a hot water supplyonly is not permitted. When beingoperated with hot water, the washi...
Page 87 - Low water pressure
Programmable functions 87 - To prevent the danger of scalding if the drain hose is hooked over theedge of a sink or basin. - Where the drainage pipes do not comply with DIN 1986. Options = Suds cooling is switched off = Suds cooling is switched on Anti-crease The Anti-crease function hel...
Page 88 - normal; Operating hours
Programmable functions 88 = Welcome tone is switched off = Welcome tone is switched on at normal volume = Welcome tone is switched on at loud volume Operating hours You can read off how many hours thewashing machine has been inoperation for. The total washing time is shown on thetime...
Page 89 - RemoteUpdate; Activating /deactivating; Postponing the update
Programmable functions 89 Use the sensor button to set a SmartStart time period. The washingmachine will then start within the timeperiod specified by you when it receivesan external signal. If an external signalhas not been received by the latest starttime set, the washing machine will startauto...
Page 90 - Switching off WiFi
Programmable functions 90 The duration of the selected programappears on the time display.The next time you switch on theappliance, you will be prompted to startthe update again. Switching off WiFi Turn the program selector to the MobileStart program. appears on the time display. Touch the ...
Page 91 - Detergents and care products; Miele UltraPhase 1 and 2
Detergents and care products 91 Detergent, fabric care products,additives, and machine care productsare available for this washing machine.All the products have been designed forMiele washing machines.These and many other useful productscan be ordered via the Miele onlineshop, from your Miele dealer...
Page 92 - Caps Sport
Detergents and care products 92 Special-purpose detergents These special-purpose detergents areavailable as convenient single-usecapsules. Caps Sport - For synthetic fabrics- Neutralizes unpleasant odors thanks to odor absorber - Prevents static charge in clothes- Retains the shape and breathabil...
Page 93 - Fabric care
Detergents and care products 93 Fabric care These fabric-care products are availableas convenient single-use capsules. Fabric softener capsules - Fabric softener for freshly scented laundry - Pure and thorough cleanliness with a fresh scent - For soft, bouncy laundry- Prevents static charge in cl...
Page 95 - National Headquarters; Canada; Headquarters and Miele Centre; International Headquarters
9 Independence WayPrinceton, NJ 08540www.mieleusa.com U.S.A. Miele, Inc. National Headquarters Please have the model and serial numberof your appliance available whencontacting Customer Service. Canada ImporterMiele Limited Headquarters and Miele Centre Customer Support Phone: 888-99-MIELE (64353)[e...


 Miele APCL 043
User Manual
Miele APCL 043
User Manual
 Miele APWM 065
Installation Manual
Miele APWM 065
Installation Manual
 Miele APWM 070
Installation Manual
Miele APWM 070
Installation Manual
 Miele SC
Installation Manual
Miele SC
Installation Manual
 Miele PR
Installation Manual
Miele PR
Installation Manual
 Miele APCL 047
User Manual
Miele APCL 047
User Manual
 Miele PLW 8505
Installation Manual
Miele PLW 8505
Installation Manual
![Miele PT 7186 Vario [EL]](https://manualsarea.com/img/product/thumbs/180/69/3e/693e1219f5c0d53fde982888bd54a3ec.webp) Miele PT 7186 Vario [EL]
User Manual
Miele PT 7186 Vario [EL]
User Manual
 Miele CM/1
User Manual
Miele CM/1
User Manual
![Miele PLW 8617 [EL/S TH]](https://manualsarea.com/img/product/thumbs/180/fe/90/fe9010c5f8c3c4aada5d83b417c78507.webp) Miele PLW 8617 [EL/S TH]
Installation Manual
Miele PLW 8617 [EL/S TH]
Installation Manual
![Miele PWM 908 [EL DP MAR 3 AC 400-480V 50-60Hz]](https://manualsarea.com/img/product/thumbs/180/20/e5/20e5e929bcb336fc6b2f128d9c857a3d.webp) Miele PWM 908 [EL DP MAR 3 AC 400-480V 50-60Hz]
User Manual
Miele PWM 908 [EL DP MAR 3 AC 400-480V 50-60Hz]
User Manual
![Miele PWM 906 [EL DP MAR 3 AC 400-480V 50-60Hz]](https://manualsarea.com/img/product/thumbs/180/57/c8/57c81dd8d0abe05852b709a3fa9b80db.webp) Miele PWM 906 [EL DP MAR 3 AC 400-480V 50-60Hz]
Installation Manual
Miele PWM 906 [EL DP MAR 3 AC 400-480V 50-60Hz]
Installation Manual
![Miele PWM 906 [EL DP MAR 2N AC 400V 50-60Hz]](https://manualsarea.com/img/product/thumbs/180/ce/23/ce232ceeda728532882a2a2f56bf2abc.webp) Miele PWM 906 [EL DP MAR 2N AC 400V 50-60Hz]
User Manual
Miele PWM 906 [EL DP MAR 2N AC 400V 50-60Hz]
User Manual
![Miele PLW 8617 [EL TH]](https://manualsarea.com/img/product/thumbs/180/e8/4a/e84a63b24dca64279b26bca714985678.webp) Miele PLW 8617 [EL TH]
User Manual
Miele PLW 8617 [EL TH]
User Manual
![Miele PDR 908 [EL MAR 3N AC 400V 50-60Hz]](https://manualsarea.com/img/product/thumbs/180/05/b7/05b705998b251f92b271e908423e1ecb.webp) Miele PDR 908 [EL MAR 3N AC 400V 50-60Hz]
Installation Manual
Miele PDR 908 [EL MAR 3N AC 400V 50-60Hz]
Installation Manual
![Miele PLW 8615 [EL CT]](https://manualsarea.com/img/product/thumbs/180/70/ff/70ff37b9174e78db8d00ddce8cf08ee3.webp) Miele PLW 8615 [EL CT]
Installation Manual
Miele PLW 8615 [EL CT]
Installation Manual
![Miele PLW 8616 [EL/S]](https://manualsarea.com/img/product/thumbs/180/37/f4/37f4255dee3c9942a13241f3ccd5fe93.webp) Miele PLW 8616 [EL/S]
Installation Manual
Miele PLW 8616 [EL/S]
Installation Manual
![Miele PWM 916 [EL DV DD SOM]](https://manualsarea.com/img/product/thumbs/180/21/65/21657a907bb735f3acf5a7bdbbc78c8a.webp) Miele PWM 916 [EL DV DD SOM]
Manual
Miele PWM 916 [EL DV DD SOM]
Manual
![Miele PFD 104 SCVi XXL [120V]](https://manualsarea.com/img/product/thumbs/180/0a/20/0a20c04430aaa9be6a985688f5bb5580.webp) Miele PFD 104 SCVi XXL [120V]
Installation Manual
Miele PFD 104 SCVi XXL [120V]
Installation Manual
![Miele PDR 507 HP [MAR]](https://manualsarea.com/img/product/thumbs/180/58/9e/589e9ba94b88174fa0cdb27b4bbaac5b.webp) Miele PDR 507 HP [MAR]
User Manual
Miele PDR 507 HP [MAR]
User Manual