Page 2 - Contents
Contents 2 Warning and Safety instructions .............................................................................. 5 Operating the washing machine ................................................................................ 10 Control panel....................................................
Page 3 - Cleaning and care
Contents 3 Fabric conditioner and liquid starch ............................................................................ 34 Detergent recommendations (according to Ecodesign no. 2019/2023) ............. 35 Cleaning and care ...........................................................................
Page 4 - Technical data
Contents 4 Technical data ................................................................................................................ 59 Programmable functions ............................................................................................. 60 Opening the programming level ...........
Page 5 - Warning and Safety instructions; Correct application
Warning and Safety instructions 5 This washing machine complies with all current local and nationalsafety requirements. However, inappropriate use can lead to per-sonal injury and damage to property.Read the operating instructions carefully before using the washingmachine. They contain important inf...
Page 6 - Technical safety
Warning and Safety instructions 6 Please supervise children in the vicinity of the washing machine and do not let them play with it. Technical safety Please observe the instructions in “Installation” and “Technical data”. Before setting up the washing machine, check it for any externally visib...
Page 8 - Correct use
Warning and Safety instructions 8 Correct use Do not install the washing machine in a room where there is a risk of frost. Frozen hoses may burst or split. The reliability of the elec-tronic control unit may be impaired at temperatures below freezingpoint. Before using the machine for the first ...
Page 9 - Accessories and spare parts
Warning and Safety instructions 9 If the correct amount of detergent is dispensed, the machine should not need to be descaled. If, however, you do wish to descaleit, only use a proprietary natural citric acid based descaling agent.Miele recommends using Miele descaling agent which is available too...
Page 10 - Operating the washing machine; Control panel; Start
Operating the washing machine 10 Control panel a Sensor control (temperature) for selecting the temperature b Sensor control (spin speed) for selecting the spin speed c Sensor control (extra options) for selecting the extra options d Sensor control (CapDosing...
Page 11 - Programme selector; and
Operating the washing machine 11 j Programme selector for selecting programmes and forswitching off the appliance. Thewashing machine is switched onwhen you select a programme, andswitched off by turning the pro-gramme selector to the position. How the sensor controls work The sensor controls cont...
Page 12 - Caring for the environment; Disposing of your old appliance
Caring for the environment 12 Disposing of the packaging ma-terial The packaging material is used for hand-ling and protects the appliance fromtransport damage. The packaging ma-terial used is selected from materialswhich are environmentally friendly fordisposal and can generally be recycled.Recycli...
Page 13 - Before using for the first time; Damage resulting from incorrect; Removing the open spanner; Remove the elbow piece.
Before using for the first time 13 Damage resulting from incorrect installation and connection.Installing and connecting the wash-ing machine incorrectly will causeserious property damage.See “Installation”. Removing the open spanner Take out the open spanner for remov-ing the transit bars from ...
Page 14 - Running the first programme; must; Cottons
Before using for the first time 14 Removing the protective foiland stickers Remove: - Any protective film from the door- Any stickers from the front and the lid Please do not remove any labels (e.g.the data plate) which are visiblewhen you open the door. Running the first programme For optimum wat...
Page 15 - Washing environmentally and economically; Energy and water consumption; Detergent
Washing environmentally and economically 15 Energy and water consumption - To get the most out of your machine, load the maximum dry load size forthe wash programme you are using.This will keep the energy and waterconsumption to a minimum in relationto the size of the load. - Programmes that are mor...
Page 16 - Prepare the laundry; Sort the laundry
1. Prepare the laundry 16 Empty all pockets. Damage due to foreign objects. Nails, coins, paper clips, and so oncan cause damage to garments andcomponents in the machine.Check the laundry before washingand remove any foreign objects. Sort the laundry Sort the laundry by colour and by carelabel...
Page 17 - Load the washing machine; Open the door; Please note the maximum load size; Close the door; Shut the door with a gentle swing.
2. Load the washing machine 17 Open the door Reach under the door grip and pullthe door open. Check the drum for pets or foreignobjects before loading it with laundry. The most efficient use of energy andwater is achieved when a full load iswashed. However, do not overload asthis makes cleaning le...
Page 18 - Select a programme; Programme selection; Short
3. Select a programme 18 Programme selection The washing machine is switched on byturning the programme selector to awash programme. Turn the programme selector to therequired programme. The estimated wash time is shown onthe time display and the pre-set tem-perature and spin speed light up. Selec...
Page 19 - Detergent dispenser drawer; Adding detergent; Detergent for the pre-wash; Using liquid detergent with a pre-wash
4. Add detergent 19 Detergent dispenser drawer Any detergent suitable for automaticfront loading washing machines can beused. Please observe the instructionsfor use and dosage on the detergentpackaging. Adding detergent Pull out the detergent drawer and adddetergent to the compartments. Detergen...
Page 20 - Once; Inserting a capsule
4. Add detergent 20 CapDosing Three different types of capsule areavailable: = Fabric care (e.g. fabric condi- tioner, proofing agent) = Additives (e.g. detergent en- hancer) = Detergent (for the main wash only) Each capsule contains the correctamount for one wash cycle. Caps are available to ...
Page 21 - Tips on dosing; Too little detergent:
4. Add detergent 21 Close the lid and press it firmly shut. Close the detergent dispenser drawer. The capsule is opened by the act ofinserting it in the detergent dispenserdrawer. The contents can run out ofthe capsule if you then remove itfrom the drawer before it is used.Dispose of opened caps...
Page 22 - Start the programme; Starting a programme
5. Start the programme 22 Starting a programme Touch the sensor control. The door will lock and the programmewill start. If a Delay start time has been selected,this counts down on the time display. Atthe end of the Delay start time or imme-diately after the programme has started,the prog...
Page 24 - Spinning; Rinse and interim spin; tons; Ending a programme with a spin cycle
Spinning 24 Final spin speed in wash pro-grammes When a programme is selected, thesensor control for the optimum spinspeed for that programme will bebrightly lit up in the control field.A faster spin speed can be selected forcertain wash programmes.The highest selectable spin speed is in-dicated in ...
Page 25 - Delay start; Selecting the Delay start function; Proofing; Starting Delay start
Delay start 25 With Delay start you can choose whenyou want the programme to start. Youcan delay the start of the programme by30 minutes up to a maximum of 24hours, allowing you to make use ofnight-time economy electricity rates, forexample. Selecting the Delay start function Delay start is not poss...
Page 26 - Programme chart
Programme chart 26 ECO 40-60 Max. load 8,0 kg Items For normally soiled cotton garments Tip A laundry load consisting of mixed cottons that are intended forwashing at 40 °C or 60 °C can be washed in the same wash cycle. This programme is the most efficient in terms of energy and waterconsumption for...
Page 27 - Outerwear; ing
Programme chart 27 Express 20 Cold to 40 °C Max. load 3,5 kg Items Cotton garments that have hardly been worn or are only very lightlysoiled Tip The Short extra option is activated automatically. Dark garments/Denim Cold to 60 °C Max. load 3.0 kg Items Black and dark items made of cotton, mixed fib...
Page 28 - Separate rinse/Starch
Programme chart 28 Separate rinse/Starch Max. load 7.0 kg Items - Rinsing hand-washed items - Table cloths, serviettes and workwear requiring starching Tip - Reduce the final spin speed for fabric that creases easily. - Laundry that is to be starched should be washed but not treated with fabric cond...
Page 29 - Extra options; Separate; Soak
Extra options 29 You can use the extra options buttons toaugment the wash programmes. Use the sensor control to select or deselect extra options. Touch the sensor control: - Once : the Short extra option is selec- ted and lights up. - 2 times : the Water + extra option is selected and ligh...
Page 30 - Programme sequence; Main wash
Programme sequence 30 Main wash Rinse Spin Water level Wash rhythm Water level Rinse cycles ECO 40-60 2–3 2 Cottons 2-5 1,2,3 Minimum iron 2-4 2,3 Woollens 2 Delicates 2-4 2,3 Express 20 1 Dark garments/Denim 3-5 2,3 Outerwear 3-4 3 P...
Page 31 - Woollens
Programme sequence 31 = low water level = medium water level = high water level = intensive rhythm = normal rhythm = sensitive rhythm = handwash rhythm = carried out – = not carried out This washing machine has fully elec-tronic controls with automatic load con-trol. The washing mach...
Page 32 - Changing the programme sequence; Cancelling a programme; Turn the programme selector to the; Selecting a new programme; Touch the
Changing the programme sequence 32 Changing a programme (safetylock) A programme, temperature, spin speedor selected options cannot be changedonce the machine has been successfullystarted. This prevents the machine be-ing operated unintentionally, e.g. by chil-dren. If the washing machine is switche...
Page 33 - Garment care label symbols
Garment care label symbols 33 Washing The figure quoted in the bucket is themaximum temperature at which thegarment can be washed. Normal agitation Reduced agitation Much reduced agitation Hand wash Do not wash Programme selection examples Programme Care label symbols ECO 40-60 Cottons ...
Page 34 - - the soiling level of the load; Damage due to colour run/dye; Always; put detergent tablets or pods
Detergent 34 The correct detergent All detergents produced for automaticwashing machines are suitable. Followthe manufacturer's instructions anddosage recommendations on the pack-aging.For users in Asia:please use a low foaming detergentsuitable for use in front-loading ma-chines The right amount to...
Page 36 - Risk of electric shock!; Removing the dispenser drawer
Cleaning and care 36 Cleaning the external casingand the control panel Risk of electric shock! Mains voltage is present when thewashing machine is switched offDisconnect the machine from theelectricity supply before cleaning ormaintenance. Risk of damage due to ingress of water.The pressure of a...
Page 37 - Cleaning the siphon and the; Remove the siphon from
Cleaning and care 37 Cleaning the siphon and the / compartment channel Liquid starch results in clogging. Ifclogged, the siphon in the / compartment will not work and thecompartment can overflow.Clean the siphon particularly thor-oughly after using liquid starch a fewtimes. 1. Remove the sip...
Page 38 - Cleaning the water inlet filter; Cleaning the filter in the inlet hose
Cleaning and care 38 Hygiene info(Cleaning the drum) Washing at low temperatures and/or us-ing liquid detergent can cause bacteriaand unpleasant odours to build up in thewashing machine. Use the Cottons 90 °C programme to clean the washingmachine. Clean the drum at the latestwhen the indicator li...
Page 39 - Problem solving guide; The programme does not start
Problem solving guide 39 Many malfunctions and faults that can occur in daily operation can be easilyremedied. You can save time and money in many cases, as you do not need to callthe Miele Customer Service Department.Information to help you rectify faults yourself can be found at www.miele.com/ser-...
Page 40 - During the programme, a symbol appears in the time display
Problem solving guide 40 Problem Cause and remedy The fault indicator light lights up, and ap- pear alternately in thetime display and thebuzzer sounds. The water inlet is blocked or restricted. Check whether the stopcock is opened properly. Check whether the inlet hose is kinked. Check...
Page 41 - General problems with the washing machine; Problem
Problem solving guide 41 General problems with the washing machine Problem Cause and remedy The washing machinesmells. The indicator light was ignored. When washing, a wash programme using a temperature above 60 °Chas not been run for a long time. In order to prevent bacteria and unpleasant odo...
Page 42 - Clean the small pipe.; An unsatisfactory wash result
Problem solving guide 42 Problem Cause and remedy At the end of the pro-gramme there is still li-quid in the capsule. The small pipe in the detergent dispenser draweronto which the capsule is placed is blocked. Clean the small pipe. This is not a fault.For technical reasons a small amount of water...
Page 43 - Use the; The door will not open; The drum is locked during a programme.
Problem solving guide 43 Problem Cause and remedy White residues whichlook like powder deter-gent are seen on darktextiles after washing. The detergent contained compounds (zeolites) to aidwater softening which are not soluble in water. Thesehave ended up on the laundry. Try and brush off the resi...
Page 44 - Switch off the washing machine.; Blocked drain outlet; Risk of scalding due to hot suds.; Draining the washing machine; Once the flow of water ceases:
Problem solving guide 44 Opening the door in the eventof a blocked drain outlet and/orpower cut Switch off the washing machine. Open the access panel for the drainpump. Blocked drain outlet If the drain outlet is blocked, there maybe a large quantity of water left behindin the washing machine. ...
Page 45 - Clean the drain filter thoroughly.; Danger of injury due to rotating
Problem solving guide 45 Clean the drain filter thoroughly. Remove any foreign objects (e.g., but-tons, coins etc.) and clean the interior.Turn the impellers by hand to checkthat they rotate freely. Replace the drain filter correctly andtighten it securely. Close the drain pump access panel....
Page 46 - Service; Contact in the event of a fault; Warranty
Service 46 Information to help you rectify faultsyourself and about Miele spare partscan be found at www.miele.com/ser-vice. Contact in the event of a fault In the event of any faults which you can-not remedy yourself, please contactyour Miele dealer or the Miele Cus-tomer Service Department. You ca...
Page 47 - Installation; Front view; Mains connection cable
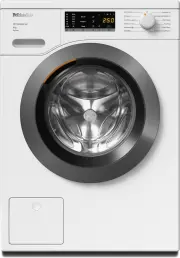
Installation *INSTALLATION* 47 Front view a Water inlet hose (pressure tested to7000 kPa) b Mains connection cable c Flexible drain hose (with detachableswivel elbow) d Control panel e Detergent dispenser drawer f Door g Access to drain filters, drain pumpsand emergency release h Four height-adjusta...
Page 48 - Rear view; Drain hose
Installation *INSTALLATION* 48 Rear view a Drain hose b Transport clips for inlet and drainhoses and mains connection cable c Mains connection cable d Protruding lid for holding when mov-ing the machine e Water inlet hose (pressure tested to7000 kPa) f Safety caps for transit bars g Transport clips ...
Page 49 - Installation surface; If installing on a wooden joist floor:
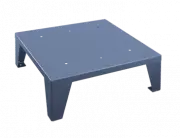
Installation *INSTALLATION* 49 Installation surface A concrete floor is the most suitable in-stallation surface. It is far less prone tovibration during the spin cycle thanwooden floorboards or a carpeted sur-face.Please note: The machine must be level and se-curely positioned. To avoid vibratio...
Page 50 - Removing the transit bars; Removing the left-hand transit bar; Removing the right-hand transit bar; Withdraw the transit bar.
Installation *INSTALLATION* 50 Removing the transit bars Removing the left-hand transit bar Push the cover out and turn the left-hand transit bar 90° using the span-ner supplied. Withdraw the transit bar. Removing the right-hand transit bar Push the cover out and turn the left-hand transit bar...
Page 51 - Covering holes; Risk of injury from sharp edges.; Securing the transit bars; Risk of damage from incorrect; Fitting the transit bars; Opening the covers; The bars will slide in more easily if
Installation *INSTALLATION* 51 Covering holes Risk of injury from sharp edges. There is a risk of injury from reachinginto holes that are not covered.Cover the holes for the transit barsafter they have been removed. Push the covers in firmly until theyengage in position. Securing the transit bar...
Page 52 - Levelling the machine; Screwing out and adjusting the feet
Installation *INSTALLATION* 52 Levelling the machine The washing machine must stand per-fectly level on all four feet to ensure safeand proper operation.Incorrect installation may increase elec-tricity and water consumption and maycause the machine to move about. Screwing out and adjusting the feet ...
Page 53 - Installing under a continuous worktop; Risk of electric shock due to ex-; building under kit; at least 2 cm
Installation *INSTALLATION* 53 Installing under a continuous worktop Risk of electric shock due to ex- posed cablesThere is a risk of coming into contactwith live parts while the lid is re-moved.Building under kits* must only be in-stalled/dismantled by a suitably qual-ified fitter in accordance w...
Page 54 - The water protection system; overflow protection; Inlet hose; - Protection against bursting; Electronic module and housing; - Leak protection: any leaking water that; Connection to the water supply; Health risk and risk of damage; Connecting the water inlet hose
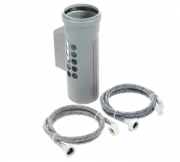
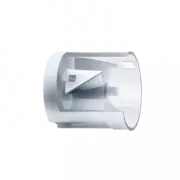
Installation *INSTALLATION* 54 The water protection system The Miele water protection system pro-tects all parts of the washing machinefrom water damage.The system consists of three main com-ponents: - the inlet hose- the electronic unit and drainage and overflow protection - the drain hose Inlet ho...
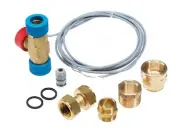
Page 55 - Hose extension; Water drainage
Installation *INSTALLATION* 55 Damage caused by dirty water. A filter is located in the open end ofthe inlet hose and another in the in-take point to protect the inlet valve inthe washing machine.These filters must not be removed. Hose extension Longer hoses 2.5 or 4.0 m in length areavailable fro...
Page 56 - Fitting the elbow
Installation *INSTALLATION* 56 Fitting the elbow Use the elbow supplied to stop thedrain hose from slipping. Attach the elbow to the drain hose . Place the end of the drain hose in asink. Use a strap and the eye to stop the elbow from slipping. Direct connection to a sink drain ...
Page 57 - Electrical connection; Risk of fire from overheating.
Installation *INSTALLATION* 57 Electrical connection The washing machine is supplied withan electrical connection cable withmoulded plug ready for connection to aswitched socket.The socket must be easily accessibleafter the washing machine has been in-stalled. If that is not possible, ensurethat a s...
Page 58 - Consumption data
Consumption data 58 Pr ogr amme Load Energy W a ter Running time Temper a tur e 1 R esidual moistur e Speed kg kWh Litr es h:min °C % rpm E C O 4 0-6 0 * 8,0 0,66 4 6 2,30 3:39 35 5 2,5 0 14 00 4,0 0,39 6 5 3, 7 0 2:4 8 29 5 1,6 0 14 00 2,0 0, 19 0 28, 2 0 2:29 25 5 7,30 14 00 Cott ons 6 0 8,0 1,65...
Page 60 - Opening the programming level
Programmable functions 60 The programmable functions are usedto alter the washing machine’s elec-tronics to suit changing requirements.Programmable functions can bealtered at any time. Opening the programming level Programming is carried out in 8 steps( , , ... ) using the sensor con- tro...
Page 61 - Exit programming level
Programmable functions 61 Programmable function Available options = Can be selected = Factory default setting Touch the sensor control to con- f...
Page 62 - Indicator switch-off behaviour; hours; Gentle action
Programmable functions 62 Indicator switch-off behaviour The indicators will switch off after10 minutes to save energy. Options = Off (factory default setting) The indicators will remain lit upwhile the washing machine isswitched on. = On The indicators will switch offafter 10 minutes if...
Page 63 - Reduce temperature
Programmable functions 63 Reduce temperature The boiling point for water is lower athigh altitudes. In order to avoid waterboiling, Miele recommend activatingthe reduce temperature setting at alti-tudes of more than 2000 m above sealevel. The maximum temperature is re-duced to 80 °C even when a ...
Page 64 - Suds cooling
Programmable functions 64 Suds cooling When this is activated, additional wa-ter flows into the drum at the end ofthe main wash to cool the suds down.Hot suds can damage plastic drainagepipes. Suds cooling takes place when a tem-perature of 70 °C or higher is selectedfor the Cottons programme.Su...
Page 65 - Detergents and care products; Descaling agent
Detergents and care products 65 Detergent, fabric care products, addit-ives and machine care products areavailable for this washing machine. Allproducts have been designed for Mielewashing machines.These and many other products can beordered from www.shop.miele.com, theMiele Customer Service Departm...
Page 67 - United Kingdom
United Kingdom Miele Co. Ltd., Fairacres, Marcham Road, Abingdon, Oxon, OX14 1TWTel: 0330 160 6600, Internet: www.miele.co.uk, E-mail: [email protected] Australia Miele Australia Pty. Ltd.ACN 005 635 398ABN 96 005 635 398Level 4, 141 Camberwell RoadHawthorn East, VIC 3123Tel: 1300 464 353E-mail: [em...


 Miele APWM 063
Installation Manual
Miele APWM 063
Installation Manual
 Miele APWM 066
Installation Manual
Miele APWM 066
Installation Manual
 Miele UO 811-30
Installation Manual
Miele UO 811-30
Installation Manual
 Miele UO 413-30
Installation Manual
Miele UO 413-30
Installation Manual
 Miele UO 814-25
Installation Manual
Miele UO 814-25
Installation Manual
 Miele UO 818/418-25
Installation Manual
Miele UO 818/418-25
Installation Manual
 Miele APCL 043
User Manual
Miele APCL 043
User Manual
 Miele APWM 062
Installation Manual
Miele APWM 062
Installation Manual
 Miele APWM 065
Installation Manual
Miele APWM 065
Installation Manual
 Miele APWM 070
Installation Manual
Miele APWM 070
Installation Manual
 Miele APWM 069
Installation Manual
Miele APWM 069
Installation Manual
 Miele APWM 020
Installation Manual
Miele APWM 020
Installation Manual
 Miele SC
Installation Manual
Miele SC
Installation Manual
 Miele PR
Installation Manual
Miele PR
Installation Manual
 Miele FP 900
Installation Manual
Miele FP 900
Installation Manual
 Miele RP 900
Installation Manual
Miele RP 900
Installation Manual
 Miele APCL 046
User Manual
Miele APCL 046
User Manual
 Miele APCL 047
User Manual
Miele APCL 047
User Manual
 Miele APWM 019
Installation Manual
Miele APWM 019
Installation Manual