Page 2 - Energy saving tips; Energy and water consumption; Caring for the environment
Disposal of the packingmaterial The transport and protective packinghas been selected from materials whichare environmentally friendly for disposaland should be recycled. Ensure that any plastic wrappings,bags etc. are disposed of safely andkept out of the reach of babies andyoung children. Danger o...
Page 3 - Contents
Caring for the environment . . . . . . . . . . . . . . . . . . . . . . . . . . . . . . . . . . . . . . . . . . 2 Warning and Safety instructions . . . . . . . . . . . . . . . . . . . . . . . . . . . . . . . . . . . . . 5 Operating the washer-extractor and tumble dryer stack . . . . . . . . . . . . ....
Page 5 - It is; essential; to read these instructions.; Correct application; Only use the washer-extractor to wash items which are specified; Warning and Safety instructions
~ It is essential to read these instructions. This washer-extractor and tumble dryer stack conforms to currentsafety requirements. Inappropriate use can, however, lead topersonal injury and damage to property.To avoid the risk of accidents and damage to the machines,please read these instructions ca...
Page 7 - Technical safety
Technical safety ~ Before setting up the appliance stack, check it for any externally visible damage.Do not install or use a damaged appliance. ~ The electrical safety of this appliance stack can only be guaranteed when it is correctly earthed. It is most important that thisbasic safety requirement ...
Page 8 - Do not
~ In the event of a fault or for cleaning purposes, the appliance is only completely isolated from the electricity supply when: – the connection plugs on the washer-extractor and on the tumble dryer have been withdrawn, or – the on-site fuse has been disabled for both the washer-extractor and tumble...
Page 9 - Correct use; Do not install the appliance stack in a room where there is a risk of
Correct use ~ Do not install the appliance stack in a room where there is a risk of frost occurring. Frozen hoses may burst or split. The reliability of thecontrol unit may be impaired at temperatures below freezing point.The ambient room temperature should be between +2°C and +50°C. ~ Always keep t...
Page 14 - In many programmes, the heating phase is followed by a cooling; Warning; : Do not switch the tumble dryer off before the end of the
~ In many programmes, the heating phase is followed by a cooling down phase to ensure that the items are not too hot to handle whenyou remove them (this also avoids the danger of the laundryself-igniting). The programme is not finished until the cooling downphase has been completed.Ensure that you a...
Page 15 - Chlorine and component damage; Notes on using chlorine bleach and perchlorethylene; Frequent use of chlorine increases the risk of component; Anti-chlorine treatment
Chlorine and component damage Notes on using chlorine bleach and perchlorethylene ~ Frequent use of chlorine increases the risk of component damage.The use of agents containing chlorine, such as sodium hypochloriteand chlorine bleach in powder form, can damage the protectiveupper surface of stainles...
Page 16 - Accessories; Accessory parts may only be fitted when expressly approved by; Disposing of your old appliance; Before disposing of an old washer-dryer and tumble dryer stack,
Accessories ~ Accessory parts may only be fitted when expressly approved by Miele. If other parts are used, guarantee, performance and productliability claims will be invalidated. Disposing of your old appliance ~ Before disposing of an old washer-dryer and tumble dryer stack, disable the washer-ext...
Page 17 - Control panel; See the following pages for more information.; Before using for the first time; Operating the washer-extractor and tumble dryer stack
Control panel Right-hand side for the washer-extractor, left-hand side for the tumble dryer a Display See the following pages for more information. b Short cut buttons For selecting an individual programme quickly. These buttons can beprogrammed to select your own favourite programmes. c Start butto...
Page 18 - Display; Entry menu; Tumble dryer display:; Multi-function selector; the multi-function selector moves the highlighting to; Pressing; the multi-function selector selects the highlighted; Shortcut buttons; will appear in the
Display Entry menu Washer-extractor display: 1 Cottons Uni. 60°C Programme selection... 2 Minimum iron 40°C Settings F ... 3 Delicates 40°C 4 Woollens H 30°C 10:00 Tumble dryer display: 1 Cottons Programme selection ... 2 Minimum iron Settings F ... 3 Woollens handcare 4 Smoothing 10:00 When switche...
Page 19 - Programme selection; Programme selection menu
Programme selection There are two ways of selecting a programme: – Option 1: Select the Programme selection menu in the display and confirm your selection by pressing themulti-function selector. – Option 2: Press shortcut button D , E , F or G . This will automatically take you into the main menu fo...
Page 20 - Wash programme main menu; Extras; Drying programme main menu; Low temperature
Wash programme main menu Cottons Uni. 60°C 1300 rpm Duration: 0:53 h Extras H Timer Y H Save H Back A H Turn the multi-function selector to highlight programme,temperature or spin speed. Pressing the multi-functionselector selects the highlighted option and opens the relevantsub-menu. The sub-menus ...
Page 21 - Settings menu; Settings; Operating a wash-salon machine; Controls; WS shortcut keys, basic; Settings/supervisor level
Settings menu J The Settings menu is used to alter the electronics of the washer-extractor and tumble dryer stack to suit differentrequirements. See the relevant section of the separatewasher-extractor or tumble dryer "Commissioning,Programme chart and Settings" booklet for further informati...
Page 23 - Sort the laundry for washing; Removing marks; Notes and tips on laundry care
1. Sort the laundry for washing ^ Empty all pockets. , Foreign objects (e.g. nails, coins, paper clips, etc.) can causedamage to textiles and tocomponents in the washer-extractor. Removing marks ^ Badly soiled areas, stains etc. shouldbe cleaned as soon as possible,preferably whilst still fresh. Spi...
Page 24 - Make sure that no items are; Select a programme
2. Load the washer-extractordrum ^ Switch the washer-extractor on withthe On/Off button K . ^ To open the drum door pull on thehandle. Do not use force as it is fitted with asafety device to prevent it beingopened by mistake. Forcing the doorhandle can cause damage to thelocking mechanism (see "...
Page 25 - ac; Garment care label symbols
Washing The figure quoted in the bucket is themaximum temperature the garmentcan be washed at. The number ofbars under the symbol indicate thelevel of agitation permitted. 9 No bar under the symbol:= normal agitation 4 One bar under the symbol:= reduced agitation c Two bars under the symbol:= much r...
Page 26 - Sort the laundry for drying; Before drying
1. Sort the laundry for drying Before drying – Wash heavily soiled items very thoroughly, ensuring that you usesufficient detergent and select a hightemperature. If in doubt, wash theitems several times. – Do not put soaking wet items into the tumble dryer Make sure that yourlaundry is thoroughly sp...
Page 27 - Machine iron
2. Load the tumble dryer , Using the tumble dryer incorrectly could cause a fire. Readthe "Warning and Safety instructions"before using the dryer. , Make sure that objects, e.g. detergent dispensing balls, havebeen removed from the laundry.They could melt and cause damageto the dryer or the ...
Page 28 - It is very important to read the; Sort the laundry; Open the drum door with the handle.; Short washing instructions
, It is very important to read the "Notes and tips on laundry care"section before proceeding. A Sort the laundry B Load the washer-extractor drum ^ Switch on the washer-extractor. ^ Open the drum door with the handle. ^ Unfold the laundry and load looselyinto the drum. , Make sure that no it...
Page 29 - Select a programme; Payment system
C Select a programme Programme descriptions – See separate booklet "Commissioning, Programme chartand Settings". You can select a programme either by: – Using the appropriate short cut button to select one of the fourprogrammes listed in the display("favourites"), or – Select the pro...
Page 30 - Add detergent
D Add detergent Take the level of soiling and waterhardness into account. Too little detergent results in: – Laundry not getting properly clean, and with time may become grey andhard to the touch. – Greasy particles clinging to laundry. – Limescale deposits on the heater elements. Too much detergent...
Page 32 - Selecting/changing a programme; Press short cut button; Main menu; Selecting a washing programme
Selecting/changing a programme Entry menu 1 Cottons Uni. 60°C Programme selection... 2 Minimum iron 40°C Settings F ... 3 Delicates 40°C 4 Woollens H 30°C 15:00 ^ Press short cut button D . Main menu Cottons Uni. 60°C 1300 rpm Duration: 0:53 h Extras H Timer Y H Back A H ^ By turning the multi-funct...
Page 34 - Saving a programme as a favourite; Save; Selecting a short cut button
Saving a programme as a favourite You can programme the short cut buttons to call up thefour wash programmes you use most frequently. The Save option must be activated via the Settings / Supervisor level menu before the short cut buttons can be programmed. Cottons Uni. 40°C 1300 rpm Pre-washDuration...
Page 35 - To open the Extras sub-menu; Starch stop
You can use the Extras option to augment the basic wash programmes. To open the Extras sub-menu Cottons Uni. 60°C 1300 rpm Duration: 0:53 h Extras H Timer Y H Back A H ^ Press short cut button D . This opens the Extras sub-menu. Select an Extra option(s) Cottons Uni. 60°C 1300 rpm Extras Pre-wash Ba...
Page 36 - Rinse hold; For heavy soiling or where staining is visible.
Rinse hold The laundry is not spun after the last rinse and remainssuspended in the final rinse water. This reduces creasing ifthe laundry is not going to be removed from the drum imme-diately after the end of the programme. Intensive* For heavy soiling or where staining is visible. The duration of ...
Page 37 - To open the Timer sub-menu; To select a delay start time; Start; To cancel the timer; Timer
The timer can be used to select the time you want theprogramme to finish. The start of a programme can bedelayed from 30 minutes up to a maximum of 24 hours, To open the Timer sub-menu Cottons Uni. 60°C 1300 rpm Duration 0:53 h Extras H Timer Y H Back A H ^ Press short cut button E below the word Ti...
Page 38 - Maximum final spin speed; Rinse and interim spin; Spinning
Maximum final spin speed The maximum final spin speed willdepend on the programme chosen. You can reduce the final spin speed.However, you cannot select a final spinspeed higher than that permitted for theprogramme selected. Rinse and interim spin There is a spin after the main wash andbetween the r...
Page 39 - Changing the programme sequence
Payment system Credit will be lost if the programmecancelled after it has started. Interrupting a programme You can interrupt a programme whichis in operation at any time. ^ Switch the washer-extractor off withthe K button. To continue with the same programme: ^ Switch the washer-extractor back onag...
Page 40 - Detergent dispensing; – The size of the load; Water softeners; in the; Detergent
Detergent dispensing Please follow the detergentmanufacturer's instructions. Instructions for use and recommendedamounts for a full load are given on thedetergent packaging. The right amount to dispense willdepend on the following: – The size of the load – The soiling level of the load – The water h...
Page 42 - External dispensing system; Empty sensor; When the
External dispensing system The washer-extractor is fitted with an adapter for an externaldispensing system. Up to six dispensing hoses (not supplied)can be connected to the washer-extractor. The externalpumps are controlled by relays in the washer-extractor. Eachrelay is switched on for 2 minutes at...
Page 43 - Disinfection programme
If a Disinfection programme is running, the following message is displayed: Fault Container empty O OK H The programme will be cancelled. ^ Press short cut button D to delete the message in the display, and refill the container. ^ Start the programme again. , If the container is empty for a disinfec...
Page 44 - To avoid damaging your laundry,; Short drying instructions
, It is very important to read the "Notes and tips on laundry care"section before proceeding. A Sort the laundry B Load the tumble dryer ^ Open the door. ^ Load the drum. , To avoid damaging your laundry, when shutting the door check thatno items of laundry have becometrapped in the door ope...
Page 46 - Before the end of a programme; Cooling down; Remove the laundry when the; Finish
Programme duration/Estimated timeremaining When a programme is selected, theestimated duration will appear in thedisplay. Please be aware that it is onlyan estimate. The following factors all affect theestimated time remaining: residualmoisture content after spinning; type offabric; size of load; ro...
Page 48 - Press shortcut button; – Programme selection; Selecting a drying programme
Selecting/changing a programme Entry menu 1 Cottons Programme selection ... 2 Minimum iron Settings F ... 3 Woollens handcare 4 Smoothing 10:00 ^ Press shortcut button D . Main menu Cottons Normal Duration 1:03 h Low temp. H Timer Y H Save H Back A H ^ By turning the multi-function selector you can ...
Page 49 - – Programmes with drying levels (sensor drying); – The display will show which drying levels can be selected; – Programmes where the time can be altered; – Other programmes
Note: If you do not make a selection in the sub-menu withinapprox. 20 seconds, the display will revert to the main menu. – Programmes with drying levels (sensor drying) Cottons Normal+ Drying levels from c Machine iron - Extra dry ^ Use the multi-function selector to select the drying level youwant,...
Page 51 - Delay start; To start the timer; Cancel
Depending on the Delay start setting, you can use the Timer to set the time you wish a programme to finish orstart at, or you can delay the start of the programme. To open the Timer sub-menu Cottons Normal+ Low temp.Duration 1:20 h Low temp. B Timer Y Save Back A H H H H ^ Use shortcut key E Timer t...
Page 53 - Housing and control panel; Cleaning the washer-extractor; Maintenance programme; Cleaning and care
, Disconnect both the washer-extractor and the tumbledryer from the mains electricitysupply. Cleaning the washer-extractorand tumble dryer stack , Do not use solvents, abrasive cleaners, glass cleaners ormulti-purpose cleaning agents.These could damage plasticsurfaces and other parts. Housing and co...
Page 55 - Cleaning the water inlet filters; To clean the filter in the inlet hose:
Cleaning the water inlet filters The machine has two filters to protectthe water inlet valve. These filtersshould be checked every six months orso, or more often if there are frequentinterruptions to the external watersupply. To clean the filter in the inlet hose: ^ First turn off the stopcock. ^ Un...
Page 56 - Cleaning the fluff filter; The fluff filter should be checked; Removing the filter; Pull the filter out by the handle.; Taking the filter apart; . Pull the two sections of the fluff filter
Cleaning the fluff filter Fluff from items being dried is collectedby a two-part cartridge fluff filter in theducting. This needs to be removed andtaken apart for cleaning. , The fluff filter should be checked and cleaned regularly, but alwaysclean immediately if the Clean out airways message comes ...
Page 57 - Dry the two sections thoroughly; Replacing the filter; If there is a heavy build-up of
Cleaning the filter whilst dry The fluff filter can be hygienically andeasily cleaned using a vacuumcleaner. ^ Remove the fluff with your fingers, oruse a vacuum cleaner. Cleaning the fluff filter with water If there is a great deal of compactedfluff on either part of the filter, they canbe cleaned ...
Page 58 - Cleaning the filter housing; Quick cleaning; – from the cover in the door opening; Extra cleaning
Cleaning the filter housing The filter housing should bechecked from time to time, andcleaned when there is a build-up offluff there. Quick cleaning ^ Use a vacuum cleaner to remove thefluff – from the cover in the door opening (above), and – from the ducting area in front of the impeller (below) if...
Page 59 - – The cover in the door opening; The cover in the door opening
– The cover in the door opening , The cover in the door opening should only be removed if theybecome severely clogged. ^ Look inside the drum. ^ Feel under the edge of the cover atthe back* (see arrows) and pull thecover up and out. * You can use the two screwssupplied to stop the cover beingremoved...
Page 60 - Spin; button is; Problem solving guide
With the help of the following notes, minor faults in the performance of theappliance, some of which may result from incorrect operation, can be put rightwithout contacting the Service Department. , Repair work to electrical appliances should only be carried out by a suitably qualified person in str...
Page 61 - Low water; not; or
Message in the display Possible cause Remedy A p Water intake faultOpen the stopcockandcheck the inlet hose. The water inlet isblocked or restricted. Check whether – the stopcock is opened properly. – the inlet hose is kinked. The water pressure istoo low. – Select Low water pressure in the Settings...
Page 64 - Water plus
Problem Possible cause Remedy The pump makesstrange noises. This is not a fault. These noises occur at the end of a pumpsequence as a normal part of the operation. Large amounts ofdetergent residueremain in thedetergentdispenser drawer. The water pressureis too low. – Clean the filters in the water ...
Page 66 - – Finish drying using the
Problem Possible cause Remedy The laundry is notsufficiently dry. The load consisted ofdifferent fabrics. – Finish drying using the Hot air programme (timed drying). – Next time, select a more suitable programme (see"Programme chart" in theseparate booklet"Tumble dryerCommissioning,Progr...
Page 67 - The fluff filter is blocked.
Problem Possible cause Remedy The drying processgoes on too long oreven switches off. You might be asked toclean the ducting systemagain. Please check all possiblecauses described below. The fluff filter is blocked. – Remove any fluff. The filter housing is blockedwith e.g. fluff and hair. – Clean t...
Page 70 - Changing the lamp; Open the door of the dryer.
Changing the lamp Disconnect the washer-extractorand tumble dryer from the electricitysupply. A Open the door of the dryer. The lighting is at the top of the dooropening on the right-hand side. B Remove the screw. C Lower the cover. D Replace the lamp. The temperature resistant lamp shouldonly be or...
Page 71 - Service interval
Peak load cut-out If the peak-load cut out function is activated the heating willswitch itself off and any programme running will be stopped.The following message will appear in the display: Washer-extractor display: Cottons Hygiene 60°C 1300 rpm Main wash 0:43 h Peak load Tumble dryer display: Cott...
Page 72 - Repairs; – your Miele dealer, or; Optical interface PC; The indicator or check light marked; PC; Optional accessories; After sales service
Repairs In the event of any faults which youcannot remedy yourself, or if thewasher-extractor and tumble dryerstack is under guarantee, pleasecontact: – your Miele dealer, or – the Miele Service Department (see back cover for contact details). When contacting your Dealer or theService Department, pl...
Page 73 - Front view; Installation and connection
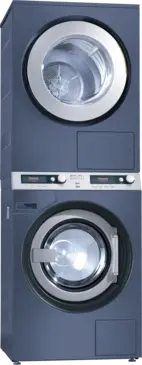
Front view a Inlet hose (cold water) b Inlet hose (hot water) c Detergent dispenser drawer d Vent ducting e Door f Filter access panel g Control panel h Door with handle i Access panel to fluff filter and drainpump j Height adjustable feet Installation and connection 73
Page 74 - Rear view
Rear view a Mains connection cable b Slot for communication module(washer-extractor) c Valve for grey water d Inlet hose (hot water) e Inlet hose (cold water) f Adapter for external dispensingsystem g Drain hose h Transit bars i Restraining clip for inlet hoses anddrain hose j Air inlet vents k Slot...
Page 75 - lift it by the drum door.
Installing the washer-extractorand tumble dryer stack All installation work must be carriedout by a suitably qualified technicianin strict accordance with local andnational safety regulations. ^ Transport the washer-extractor andtumble dryer separately to theirinstalltion site. , Ensure that each ap...
Page 76 - The appliance stack; must; secured using clamps.
View from the side View from above , The appliance stack must be secured using clamps. ^ Secure all four feet on the appliancestack with the clamps supplied. Follow the fitting instructions supplied. Payment system This appliance stack can be fitted witha payment system.* The payment system can be s...
Page 77 - Installation surface; Do not install the appliance; Removing the transit bars; Then withdraw the transit bar.
Installation surface , Do not install the appliance stack near or directly above an opengully or floor drain. Moisture fromthese can penetrate the stack anddamage electrical components. , Ensure that the feet of the washer-extractor and the floor aredry to prevent the washer-extractorfrom slipping d...
Page 78 - Re-fitting the transit bars
^ Release the catch and turn the righthand transit fitting anti-clockwise by90°. ^ Then withdraw the transit bar. , To avoid the risk of injury the holes for the transit bars must becovered after they have beenremoved. ^ Plug the holes with the plastic capssupplied. , The appliance stack must not be...
Page 79 - Levelling the washer-extractor; Screwing out and adjusting the feet
Levelling the washer-extractor Ensure that the feet of thewasher-extractor and the floor are dryto prevent the washer-extractor fromslipping during the spin cycle. , The appliance stack must stand perfectly level on all four feet toensure safe and proper operation. Incorrect installation may increas...
Page 80 - Installing the tumble dryer; Use a suitable lifting device if possible.
Installing the tumble dryer ^ Loosen the 2 screws on the controlpanel of the washer-extractor, thendisconnect the plugs from theelectronic unit and from the switchand carefully place the control panelto one side where it cannot getdamaged. When disconnecting theplugs please ensure that the pins dono...
Page 83 - Plumbing; Cold water connection; suitable; Maintenance and care
Plumbing Cold water connection The stack should be connected to amains water supply in accordance withlocal and national safety regulations. Water regulations UK only This washer-extractor and tumble dryerstack is approved for all UKapplications as suitable for category 5.The product is listed in th...
Page 85 - Water drainage; Drain pump; . Connected securely to a plastic
Water drainage Drain pump The washer-extractor drains via a drainpump with a delivery head of 1 metre*.The drain hose must not be kinked asthis restricts drainage. The swivel elbowat the end of the hose can be turned ineither direction, or can be detached ifrequired, with a sharp twist and pull. Dra...
Page 86 - Electrical connection; The voltage, rated load and fuse; THIS APPLIANCE
Electrical connection The appliance stack is supplied withtwo flexible mains connection cableswithout plugs. , The voltage, rated load and fuse rating are given on the data plate.Please ensure these match theon-site mains supply. The appliance stack must beconnected to the electrical supply inaccord...
Page 87 - General; danger of; Installation - extraction ducting
General , Before operating the appliance stack, a suitable ducting systemmust be installed to carry the moistair from the dryer to the outside. The appliance stack must becompletely disconnected from themains electricity supply whilst theducting system is installed. The venting outlet (e.g. in a wal...
Page 89 - Calculation example; View from above
Calculation example A Wall pipe, with louvred vent = 1 x 3.8 m Additional ductlength = 3.8 m B/D 2 bends, 90° plastic piping = 2 x 0.8 m Additional ductlength = 1.6 m C 0.5 m plastic piping = 0.5 x 1 m Additional ductlength = 0.5 m Total duct length = 5.9 m Result: A duct diameter of 100 mm isadequa...
Page 92 - Adapter for flexible ducting hose
Example: Window vent 1. Window vent kit (fitted in a "plexiglass" pane)(separate fitting instructions aresupplied with the Miele window ventkit) 2. Adapter for flexible ducting hose Installation - extraction ducting 92
Page 93 - For each dryer there; installed
Venting more than one dryervia the same venting system Building regulations approval maybe required. Contact your localplanning authority for advice. , For each dryer there must be one non-return flap R installed directly on the main venting duct.The items required for this areavailable as optional ...
Page 95 - Technical data
Height 1930 mm Width 700 mm Depth 752 mm Depth with door open 1248 mm Weight 209 kg Max. load bearing in operation 3 0 Newton (approx. 3 kg) Capacity .0 kg dry weight each (weight of dry laundry) Voltage See data plate Connected load See data plate Fuse rating See data plate Lamp wattage See data pl...


 Miele APCL 043
User Manual
Miele APCL 043
User Manual
 Miele APWM 065
Installation Manual
Miele APWM 065
Installation Manual
 Miele APWM 070
Installation Manual
Miele APWM 070
Installation Manual
 Miele SC
Installation Manual
Miele SC
Installation Manual
 Miele PR
Installation Manual
Miele PR
Installation Manual
 Miele APCL 047
User Manual
Miele APCL 047
User Manual
 Miele PLW 8505
Installation Manual
Miele PLW 8505
Installation Manual
![Miele PT 7186 Vario [EL]](https://manualsarea.com/img/product/thumbs/180/69/3e/693e1219f5c0d53fde982888bd54a3ec.webp) Miele PT 7186 Vario [EL]
User Manual
Miele PT 7186 Vario [EL]
User Manual
 Miele CM/1
User Manual
Miele CM/1
User Manual
![Miele PLW 8617 [EL/S TH]](https://manualsarea.com/img/product/thumbs/180/fe/90/fe9010c5f8c3c4aada5d83b417c78507.webp) Miele PLW 8617 [EL/S TH]
Installation Manual
Miele PLW 8617 [EL/S TH]
Installation Manual
![Miele PWM 908 [EL DP MAR 3 AC 400-480V 50-60Hz]](https://manualsarea.com/img/product/thumbs/180/20/e5/20e5e929bcb336fc6b2f128d9c857a3d.webp) Miele PWM 908 [EL DP MAR 3 AC 400-480V 50-60Hz]
User Manual
Miele PWM 908 [EL DP MAR 3 AC 400-480V 50-60Hz]
User Manual
![Miele PWM 906 [EL DP MAR 3 AC 400-480V 50-60Hz]](https://manualsarea.com/img/product/thumbs/180/57/c8/57c81dd8d0abe05852b709a3fa9b80db.webp) Miele PWM 906 [EL DP MAR 3 AC 400-480V 50-60Hz]
Installation Manual
Miele PWM 906 [EL DP MAR 3 AC 400-480V 50-60Hz]
Installation Manual
![Miele PWM 906 [EL DP MAR 2N AC 400V 50-60Hz]](https://manualsarea.com/img/product/thumbs/180/ce/23/ce232ceeda728532882a2a2f56bf2abc.webp) Miele PWM 906 [EL DP MAR 2N AC 400V 50-60Hz]
User Manual
Miele PWM 906 [EL DP MAR 2N AC 400V 50-60Hz]
User Manual
![Miele PLW 8617 [EL TH]](https://manualsarea.com/img/product/thumbs/180/e8/4a/e84a63b24dca64279b26bca714985678.webp) Miele PLW 8617 [EL TH]
User Manual
Miele PLW 8617 [EL TH]
User Manual
![Miele PDR 908 [EL MAR 3N AC 400V 50-60Hz]](https://manualsarea.com/img/product/thumbs/180/05/b7/05b705998b251f92b271e908423e1ecb.webp) Miele PDR 908 [EL MAR 3N AC 400V 50-60Hz]
Installation Manual
Miele PDR 908 [EL MAR 3N AC 400V 50-60Hz]
Installation Manual
![Miele PLW 8615 [EL CT]](https://manualsarea.com/img/product/thumbs/180/70/ff/70ff37b9174e78db8d00ddce8cf08ee3.webp) Miele PLW 8615 [EL CT]
Installation Manual
Miele PLW 8615 [EL CT]
Installation Manual
![Miele PLW 8616 [EL/S]](https://manualsarea.com/img/product/thumbs/180/37/f4/37f4255dee3c9942a13241f3ccd5fe93.webp) Miele PLW 8616 [EL/S]
Installation Manual
Miele PLW 8616 [EL/S]
Installation Manual
![Miele PWM 916 [EL DV DD SOM]](https://manualsarea.com/img/product/thumbs/180/21/65/21657a907bb735f3acf5a7bdbbc78c8a.webp) Miele PWM 916 [EL DV DD SOM]
Manual
Miele PWM 916 [EL DV DD SOM]
Manual
![Miele PFD 104 SCVi XXL [120V]](https://manualsarea.com/img/product/thumbs/180/0a/20/0a20c04430aaa9be6a985688f5bb5580.webp) Miele PFD 104 SCVi XXL [120V]
Installation Manual
Miele PFD 104 SCVi XXL [120V]
Installation Manual
![Miele PDR 507 HP [MAR]](https://manualsarea.com/img/product/thumbs/180/58/9e/589e9ba94b88174fa0cdb27b4bbaac5b.webp) Miele PDR 507 HP [MAR]
User Manual
Miele PDR 507 HP [MAR]
User Manual