Page 2 - Caring for the environment; Disposal of the packaging material; - To get the most out of your machine, load the; maximum; dry load; Detergent; - Do not exceed the amounts of detergent recommended by the man-
Caring for the environment 2 Disposal of the packaging material The packaging is designed to protect the washing machine againsttransport damage. The packaging materials used are selected frommaterials which are environmentally friendly for disposal and cantherefore be recycled.Recycling the packagi...
Page 3 - Contents
Contents 3 Caring for the environment ........................................................................................................ 2 Disposing of your old machine .................................................................................................... 2 Warnings and safety no...
Page 4 - Water intake; Changing the programme sequence
Contents 4 Manual control ............................................................................................................................... 34 Switching to manual control ................................................................................................... 34 Water intake...
Page 5 - Supervisor level
Contents 5 Supervisor level ............................................................................................................................ 65 Opening the supervisor level ....................................................................................................... 65 Code-bas...
Page 6 - Technical data
Contents 6 Technical data ................................................................................................................................ 74 Technical data ..................................................................................................................................
Page 7 - Warnings and safety notes; Original operating instructions; Explanation of the safety notes and warnings on the machine
Warnings and safety notes 7 Original operating instructions Explanation of the safety notes and warnings on the machine Read the operating instructions Read all the instructions, e.g. the installation instructions Warning, hot surfaces Warning, voltage up to 1000 volts Earthing Equipotential bonding...
Page 8 - Appropriate use
Warnings and safety notes 8 Appropriate use The washing machine is only suitable for washing fabrics with a care label stating that they are suitable for machine washing. Anyother applications may be dangerous. The manufacturer cannot beheld liable for damage resulting from incorrect or improper u...
Page 9 - Foreseeable misuse; Risk of fire and explo-
Warnings and safety notes 9 Foreseeable misuse Never use solvent-based cleaning agents, e.g. those containing benzine, in this machine. Doing so may result in damage to compon-ent parts and create toxic steam and fumes. Risk of fire and explo- sion! When washing with high temperatures, remember ...
Page 10 - Technical safety
Warnings and safety notes 10 Technical safety Before setting up the washing machine, check it for any externally visible damage. Do not install or use a damaged washing machine. The electrical safety of this washing machine can only be guaran- teed when correctly earthed. It is most important th...
Page 11 - Correct use
Warnings and safety notes 11 Correct use The maximum load size for PWM 909 is 9.0 kg of dry laundry. See the “Programme chart” for the maximum recommended load sizes forindividual programmes. Before using the washing machine for the first time, check that the transit bars have been removed (see ...
Page 12 - Do not use a pressure washer or hose to clean the washing ma-
Warnings and safety notes 12 Avoid contact of stainless steel surfaces with liquid cleaning and disinfecting agents which contain chlorine or sodium hypochlorite.These agents can have a corrosive effect on stainless steel. Aggress-ive chlorine bleach vapours can also be corrosive. Do not store ope...
Page 13 - Chlorine and component damage; Frequent use of chlorine products increases the risk of damage to
Warnings and safety notes 13 Chlorine and component damage Frequent use of chlorine products increases the risk of damage to components. The use of substances containing chlorine, such as sodium hypo- chlorite and chlorine bleach in powder form, can result in damage tothe protective layer of sta...
Page 14 - Accessories; Accessory parts may only be fitted when expressly approved by
Warnings and safety notes 14 Accessories Accessory parts may only be fitted when expressly approved by Miele. If other parts are used, warranty, performance and/or productliability claims will be invalidated. Disposing of yourold machine Ensure that the door locks are unusable when disposing of ...
Page 15 - Description of the machine
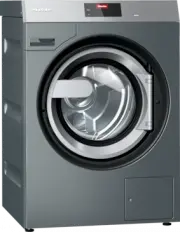
Description of the machine 15 Description of the machine ⑥⑦ ⑫ ① ② ③ ⑬ ⑭ ⑯ ④ ⑰ ⑤ ⑧ ⑨ ⑱ ⑩ ⑪ ⑫ ⑮ a Access to drain filter and drain pump or drain valve b Drum door c Door handle d Detergent drawer e Display (further information can be found in the “Operation” section) f Electrical connection g Interfac...
Page 16 - Control panel; Takes you back one level in the menu.
Description of the machine 16 Control panel ⑥ ① ② ③ ④ ⑤ a Language sensor control For selecting the current user language.The supervisor language is displayed againat the end of the programme. b Back sensor control Takes you back one level in the menu. c Touch display with system-specific sy...
Page 17 - Operation; Sensor controls and touch display; Programmes”; grammes; Supervisor”
Operation 17 Sensor controls and touch display The sensor controls , and Start/Stop and the elements in the display respond to finger tip contact. Every touch of a sensor control isconfirmed with an audible keypad tone. You can adjust the volume ofthe keypad tone or switch it off (see “Supervis...
Page 18 - Examples of how to operate the machine; Selection lists
Operation 18 Examples of how to operate the machine Selection lists “ Programmes ” menu (single selection) 11:02 Whites Coloureditems Coloursintensive Programmes ColoursEco short You can scroll right or left by swiping your finger across the screen. Todo this, place your finger on the to...
Page 19 - visor level; OK; OK
Operation 19 Setting numericalvalues You can set numerical values in some menus. The following example shows how to set the time of day. The “ Super- visor level ” section describes how to get to this level. OK 12 00 10 58 14 02 11 59 13 01 Time Enter the numbers by swiping up or down.Place...
Page 20 - Help display; Operating a launderette machine; Laundrette Logo
Operation 20 Pull-down menu The following example describes the display for an ongoing washprogramme. The “Programme start – programme end” section de-scribes how to get to this level. 11:02 2:27 Status Washing and heating Time left Kochwäsche prog. info If an orange bar appears at the to...
Page 21 - Washing; Preparing for use; Emptying pockets; Loading and switching on the washing machine
Washing 21 Preparing for use Emptying pockets Empty all pockets. Damage due to foreign objects. Nails, coins, paper clips, etc. can cause damage to garments andcomponents inside the machine.Check laundry before washing and remove any foreign objects. Sorting laundry Sort the laundry according ...
Page 22 - Open the drum door with the handle.
Washing 22 Open the drum door with the handle. Unfold the laundry and load loosely into the drum.
Page 23 - Make sure that no items are caught between the drum door and
Washing 23 Make sure that no items are caught between the drum door and the opening. Close the drum door by pressing it until the pre-latch engages. The drum door engages, but is not locked yet. The drum door locksautomatically as soon as the machine starts.
Page 24 - Washing with detergent drawer; Do
Washing 24 Washing with detergent drawer Adding detergentusing the deter-gent drawer For the standard programmes, add powder detergent to the drawer for the main wash. If desired, add detergent for a pre- wash to the drawer. Add fabric conditioner to the front of the drawer. Adding fabric...
Page 25 - The dispensing amount will depend on:
Washing 25 Detergent dis-pensing Detergent dispens-ing Avoid dispensing more than the required amount as this can cause ex-cessive foaming. - Only use low foaming detergents.- Dispense according to the detergent manufacturer ’s recommenda- tions. The dispensing amount will depend on: - The amount of...
Page 26 - Selecting a programme
Washing 26 Selecting a programme Programmes There are different ways to select a programme. 11:02 Programmes Favourites Supervisor You can select a programme from the Programmes menu. Touch the Programmes selection area. 11:02 Whites Coloureditems Coloursintensive Programmes ...
Page 27 - Selecting programme settings; Touch the; Enter a valid value for the load size.; Press the; The display will change to the
Washing 27 In the case of favourite programmes, the majority of the programmesettings are already fixed and cannot be changed. Selecting programme settings Selecting the loadsize To enable load-specific external dispensing and an adapted pro-gramme sequence, you can specify the load size for some pr...
Page 30 - Selecting Extras
Washing 30 Selecting Extras Selecting Extras You can select Extras for some wash programmes. Touch the Extras selection area. 11:02 Timer Whites 9,0/9,9 kg °C rpm 90 0:56 h 1300 Overview Extras Details 11:02 OK Pre-wash Rinse plus Soak Extras Rinse hold Select one or more Extr...
Page 31 - Programme start – programme end; Timer
Washing 31 Programme start – programme end Starting a pro-gramme The programme can be started as soon as the Start/Stop sensor con- trol is flashing on and off. Touch the Start/Stop sensor control. The door will lock ( symbol) and the wash programme will start. 11:02 2:27 Status Time ...
Page 32 - Setting the timer; Deleting the timer
Washing 32 Check the door sealing ring for any foreign objects. Switch the washing machine off with the button. Tip: Leave the detergent drawer slightly open to allow it to dry. Timer The timer can be used to select a programme start date, programmestart time or programme end time. This mode ...
Page 33 - Special features in the programme sequence; Spinning; Final spin speed
Special features in the programme sequence 33 Spinning Final spin speed When a programme is selected, the maximum spin speed for thiswash programme is shown in the display in the pre-start menu.You can reduce the final spin speed.Depending on the programme, it may also be possible to increase thespe...
Page 34 - Manual control
Special features in the programme sequence 34 Skip The Skip function enables users to skip forwards or backwards in theprogramme sequence. The programme sequence is continued fromthe selected step.If a programme is interrupted using the Start/Stop sensor control, the Skip function is available in...
Page 35 - Dispensing
Special features in the programme sequence 35 Confirm the password entry with the OK sensor control. The Manual control menu is displayed: 11:02 Water intake Manual control Dispensing Washing andheating Unlock the door Exit The current level, spin speed and temperature statuses of ...
Page 36 - Spin
Special features in the programme sequence 36 Select the desired dispensing pump and dispensing quantity, e.g. D1 50 ml . Confirm your selection with the Execute sensor control. Press the Start/Stop sensor control. The wash programme will start or continue. Washing and heat-ing Spin speed, ...
Page 37 - Changing a programme
Changing the programme sequence 37 Changing a programme Altering the washprogramme You will need to cancel the current programme before you can select anew one. Cancelling a programme You can cancel a wash programme at any time after it has started. The payment programmes or the disinfection program...
Page 38 - Adding or removing laundry
Changing the programme sequence 38 Adding or removing laundry You can add or remove laundry items during the first few minutes afterthe programme has started. 11:02 Coloured items Status h 0:49 Add laundry prog. info Washing and heating Time left Touch the Add laundry selection area. If t...
Page 39 - Problem solving guide; Troubleshooting; Opening the door in an emergency in the event of a power failure; The drum door cannot be opened.
Problem solving guide 39 Troubleshooting Opening the door in an emergency in the event of a power failure The drum door cannot be opened. Warning! Danger from rotating drum and danger of scalding. Before inserting the Torx wrench, make sure that the machine is disconnected from theelectricity supp...
Page 41 - sensor control; Check whether the drum door is closed correctly.
Problem solving guide 41 Problem Cause and remedy The programme is on thepre-start screen and the Start/Stop sensor control is not flashing. The drum door has been pushed to but is not closed cor-rectly. Check whether the drum door is closed correctly.
Page 42 - Programme cancellation and fault message
Problem solving guide 42 Programme cancellation and fault message Problem Cause and remedy F - Water drainage fault. If restart fails, call Service. The drain is blocked or restricted. The drain hose has beenfixed too high. Clean the drain filter and the drain pump. The maximum delivery head i...
Page 43 - A fault message appears in the display
Problem solving guide 43 A fault message appears in the display Problem Cause and remedy Container empty One of the external detergent containers is empty. Refill the detergent container. Hygiene info: run a pro- gramme of at least 60°C During the last wash, a wash programme with a temperat-ur...
Page 44 - Insufficient wash results; Pour stain remover powder into drawer
Problem solving guide 44 Insufficient wash results Problem Cause and remedy Liquid detergent does notgive the required result. Liquid detergents usually contain no bleaching agents. Theydo not remove fruit, coffee or tea stains. Use a general purpose powder detergent containing ableaching agent. ...
Page 45 - General problems with the washing machine
Problem solving guide 45 General problems with the washing machine Problem Cause and remedy The washing machine vi-brates during the spincycle. The machine feet are not level and not secured. Level the washing machine and secure the feet. Strange pump noises canbe heard. Not a fault. These slurpin...
Page 46 - The door will not open; or
Problem solving guide 46 The door will not open Problem Cause and remedy The door cannot beopened. The door is locked during the wash process. Touch the Start/Stop sensor control. Select Programme cancellation or Add laundry . The door will unlock and you will be able to pull it open. There is ...
Page 48 - Put the drain filter back in place and secure it.; Machines with drain valve
Problem solving guide 48 Remove any foreign objects (e.g. buttons, coins, etc.) and clean the interior. Turn the im-pellers by hand to check that they rotate freely. Put the drain filter back in place and secure it. Make sure the drain filter is reinserted and securely tightened. Otherwise the...
Page 49 - Cleaning and care; machine casing, control panel and plastic parts
Cleaning and care 49 Carry out cleaning and maintenance of the washing machine afteruse if possible. Do not use a pressure washer or hose to clean the machine. Clean the machine casing, control panel and plastic parts with a mild, non-abrasive cleaning agent or with a soft, damp cloth only.Wipe ...
Page 51 - Clean the fabric conditioner channel using a brush and warm water.; Cleaning the water inlet filters; First turn off the stopcock.
Cleaning and care 51 Clean the fabric conditioner channel using a brush and warm water. Clean the siphon and fabric conditioner channel particularly thor-oughly after using liquid starch a few times. Liquid starch results inclogging. Use a bottle brush to remove detergent residues and limescale ...
Page 52 - Clean the plastic filter.
Cleaning and care 52 Clean the plastic filter. Reassemble in reverse order. Turn on the stopcock and check the connection is watertight. If wa-ter drips out, tighten the connection. Cleaning the filtersin the water intakevalves Using pliers, carefully loosen the ribbed plastic nut on the intak...
Page 53 - Installation; Installing the washing machine; Transport the machine on a pallet truck inside the room.; Securing the machine; Have the installation site inspected and seek the advice of a spe-
Installation 53 Installing the washing machine The washing machine must be installed by Miele Customer ServiceDepartment or by an authorised dealer. Please observe the informa-tion on the installation plan. This washing machine is only intended for items of laundry thathave not been proofed with dan...
Page 54 - For easy maintenance
Installation 54 For easy maintenance For ease of future maintenance and servicing, the minimum dimen-sions and distance to the wall must be observed to enable access. The minimum dimensions and distance to the wall must be ob-served. Minimum safety distance to the wall approx. 400 mm to allow form...
Page 55 - Transport the washing machine to the installation site.; Installation on a plinth; Follow the installation instructions supplied.
Installation 55 Installing the washing machine Transport the washing machine to the installation site. Ensure that it is stable during transportation. Do not pick it up by the drum door. The washing machine must not be installed under a counter. Installation on a plinth The machine may be in...
Page 56 - Transit bars; Removing the transit bars; Release the catch and turn the left-hand transit bar 90° clockwise.
Installation 56 Transit bars Removing the transit bars Release the catch and turn the left-hand transit bar 90° clockwise. Pull out the transit bar. Release the catch and turn the right-hand transit bar 90° anti-clock-wise. Pull out the transit bar.
Page 57 - Fit the supplied stoppers onto the two holes.; Refitting the transit bars; Refitting is carried out by reversing the procedure.
Installation 57 Fit the supplied stoppers onto the two holes. Retain the transit bars. They need to be refitted should the machineever need to be moved again. Refitting the transit bars Refitting is carried out by reversing the procedure.
Page 58 - Levelling the machine; Use a spirit level to check the machine is standing level.; Water connection
Installation 58 Levelling the machine Ensure that the machine feet and the installation surface are dry toprevent the machine from slipping during the spin cycle.Incorrect installation may increase water and energy consumption andmay cause the machine to move about. The four adjustable feet are used...
Page 59 - The connection points are subject to water supply pressure.
Installation 59 The flow pressure must be a minimum of 100 kPa and must not ex-ceed 1000 kPa. If the flow pressure is higher than 1000 kPa, a pres-sure reducing valve must be used.The machine must be connected to the water supply using the inlethoses included in the scope of supply. The connection...
Page 60 - Unscrew the hot water hose.
Installation 60 Cold water con-nection For the cold water connection one stopcock each with a ¾" screwthread is required.If a water connection is not available, only a qualified installer mayconnect the washing machine to the mains water supply. The water inlet hose for cold water is not suitabl...
Page 61 - Outflowing suds can be as hot as 95 °C. Danger of burning!
Installation 61 Drain valve (de-pending on model) In the case of washing machines with a drain valve, a motorised valveis used to drain the machine. An HT DN 70 angle connector can beused for draining the machine directly into the waste water system(without a siphon) or into an on-site floor drain (...
Page 62 - Electrical connection; Preventing hazards; Reference to external machines; A reference to external hardware appears.; Optional accessories; Connector Box
Installation 62 Electrical connection The electrical connection must only be carried out by a suitably quali-fied electrician in accordance with local and national regulations suchas BS 7671 in the UK.It is recommended to connect the product to the electrical supplywith a suitably rated plug and soc...
Page 63 - Payment device
Installation 63 The energy management system monitors the energy consumptionof a system and deactivates individual pieces of equipment tempor-arily by means of the peak-load negotiation in order to ensure thatcertain total load limits are not exceeded. When the peak-load function is activated, the h...
Page 64 - Connected machines must also comply with SELV.
Installation 64 WiFi/LAN inter-face The washing machine is equipped with a WiFi/LAN interface for ex-changing data.The data interface provided on the LAN connection complies withSELV (Safety Extra Low Voltage) in accordance with EN 60950. TheLAN connection uses a RJ45 connector in accordance with EI...
Page 65 - Opening the supervisor level; Changing the code
Supervisor level 65 Opening the supervisor level Switch on the washing machine. 11:02 Programmes Favourites Supervisor Touch the Supervisor sensor control. The display will change to the Supervisor level menu. Code-based access The supervisor level is accessed using a code. The c...
Page 66 - Language; Set languages; Display brightness
Supervisor level 66 Operation/display Language The display can be set to appear in one of several different lan-guages. To select the permanent supervisor language you want, go tothe Languages sub-menu. When a programme is running, you can change the user language us-ing the sensor control. Langu...
Page 67 - Time
Supervisor level 67 Time After selecting the clock format, you can set the time of day. Time format - 24 h clock- 12 h clock- No clock Set - The time can be set. Date The date can be set after selecting the date format. Date format - DD.MM.YYYY- YYYY.MM.DD- MM.DD.YYYY Date - The date can be set. Vol...
Page 69 - Programme selection; Controls; Start by configuring all necessary settings and changes to the
Supervisor level 69 Programme selection Controls Tip: Start by configuring all necessary settings and changes to the washing machine before adjusting any of the options below.If “Laundrette, basic” or “Laundrette Logo” is selected, the supervisorlevel can no longer be opened from the display after t...
Page 70 - ites; Prog. colour allocation; Changing favourite programmes; Sort programmes
Supervisor level 70 Programme pack-ages The selection of programmes can be expanded by activating singleprogrammes from the target group programme packages. The programmes selected from the programme packages (marked inorange) are displayed during programme selection. Favourite pro-grammes After swi...
Page 71 - Process technology
Supervisor level 71 Process technology Anti-crease The Anti-crease function reduces creasing after the end of the pro-gramme. At the end of the programme, the drum continues to turn atintervals for up to 30 minutes. The washing machine door can be opened at any time.Factory default: on
Page 72 - Service; Service interval; External applications; Connector box; Deactivate disp. pump
Supervisor level 72 Automatic drain-age Automatic water drainage can be switched on or off. Automatic waterdrainage means that the suds are always drained away after the end ofa programme. This is also the case for programmes that reach the pro-gramme end with water still in the drum. Service Servic...
Page 73 - Container size; Appliance parameters; The maximum spin speed can be set via a keypad.; Legal information; Open source licences
Supervisor level 73 - Container size - Adv. warning level reminder - Reset adv. warning - Level reminder - Flow meter Peak load preven-tion The peak-load prevention function can be switched on or off. With thisfunction, the execution of a wash programme is not affected when apeak-load signal is in p...
Page 74 - Connectivity; Pairing instructions; System requirements for WiFi
Connectivity 74 Pairing instructions Follow the steps below to connect the washing machine to your network. Opening the supervisor level Select the Supervisor menu option in the appliance display. Select the Access via code menu option. Enter the 3-digit supervisor code. Establishing the netwo...
Page 75 - System requirements for LAN; The signal strength can be adversely affected by many factors:
Connectivity 75 System requirements for LAN - DHCP activated- Multicast DNS / Bonjour / IGMP snooping activated- Ports 443, 80, 53 and 5353 open- IP DNS server = IP standard gateway/router WiFi signal strength – Guide values The WiFi signal strength is only a rough guide. These details do not provid...
Page 77 - Product safety; UK declaration of conformity; EU declaration of conformity; name of the product or the serial number
Technical data 77 Product safety Product safety standard EN 60335-1, EN 50571, IEC 60335-1, IEC 60335-2-7, EN 50570, IEC 60335-2-11 UK declaration of conformity UKCA mark (UK only) The Supply of Machinery (Safety) Regulations 2008 This Statement of Compliance confirms this Miele product fully compli...
Page 78 - WiFi data protection; Data protection and data security
WiFi data protection 78 Data protection and data security When you activate the networking function and connect your machineto the Internet, your machine sends the following data to the MieleCloud: - Machine serial number- Machine model and technical features- Machine status- Information about the s...
Page 80 - United Kingdom
Malaysia Miele Sdn BhdSuite 12-2, Level 12Menara Sapura Kencana PetroleumSolaris Dutamas No. 1, Jalan Dutamas 150480 Kuala Lumpur, MalaysiaPhone: +603-6209-0288Fax: +603-6205-3768 Miele New Zealand LimitedIRD 98 463 6318 College HillFreemans Bay, Auckland 1011, NZTel: 0800 464 353Internet: www.miele...


 Miele APCL 043
User Manual
Miele APCL 043
User Manual
 Miele APWM 065
Installation Manual
Miele APWM 065
Installation Manual
 Miele APWM 070
Installation Manual
Miele APWM 070
Installation Manual
 Miele SC
Installation Manual
Miele SC
Installation Manual
 Miele PR
Installation Manual
Miele PR
Installation Manual
 Miele APCL 047
User Manual
Miele APCL 047
User Manual
 Miele PLW 8505
Installation Manual
Miele PLW 8505
Installation Manual
![Miele PT 7186 Vario [EL]](https://manualsarea.com/img/product/thumbs/180/69/3e/693e1219f5c0d53fde982888bd54a3ec.webp) Miele PT 7186 Vario [EL]
User Manual
Miele PT 7186 Vario [EL]
User Manual
 Miele CM/1
User Manual
Miele CM/1
User Manual
![Miele PLW 8617 [EL/S TH]](https://manualsarea.com/img/product/thumbs/180/fe/90/fe9010c5f8c3c4aada5d83b417c78507.webp) Miele PLW 8617 [EL/S TH]
Installation Manual
Miele PLW 8617 [EL/S TH]
Installation Manual
![Miele PWM 908 [EL DP MAR 3 AC 400-480V 50-60Hz]](https://manualsarea.com/img/product/thumbs/180/20/e5/20e5e929bcb336fc6b2f128d9c857a3d.webp) Miele PWM 908 [EL DP MAR 3 AC 400-480V 50-60Hz]
User Manual
Miele PWM 908 [EL DP MAR 3 AC 400-480V 50-60Hz]
User Manual
![Miele PWM 906 [EL DP MAR 3 AC 400-480V 50-60Hz]](https://manualsarea.com/img/product/thumbs/180/57/c8/57c81dd8d0abe05852b709a3fa9b80db.webp) Miele PWM 906 [EL DP MAR 3 AC 400-480V 50-60Hz]
Installation Manual
Miele PWM 906 [EL DP MAR 3 AC 400-480V 50-60Hz]
Installation Manual
![Miele PWM 906 [EL DP MAR 2N AC 400V 50-60Hz]](https://manualsarea.com/img/product/thumbs/180/ce/23/ce232ceeda728532882a2a2f56bf2abc.webp) Miele PWM 906 [EL DP MAR 2N AC 400V 50-60Hz]
User Manual
Miele PWM 906 [EL DP MAR 2N AC 400V 50-60Hz]
User Manual
![Miele PLW 8617 [EL TH]](https://manualsarea.com/img/product/thumbs/180/e8/4a/e84a63b24dca64279b26bca714985678.webp) Miele PLW 8617 [EL TH]
User Manual
Miele PLW 8617 [EL TH]
User Manual
![Miele PDR 908 [EL MAR 3N AC 400V 50-60Hz]](https://manualsarea.com/img/product/thumbs/180/05/b7/05b705998b251f92b271e908423e1ecb.webp) Miele PDR 908 [EL MAR 3N AC 400V 50-60Hz]
Installation Manual
Miele PDR 908 [EL MAR 3N AC 400V 50-60Hz]
Installation Manual
![Miele PLW 8615 [EL CT]](https://manualsarea.com/img/product/thumbs/180/70/ff/70ff37b9174e78db8d00ddce8cf08ee3.webp) Miele PLW 8615 [EL CT]
Installation Manual
Miele PLW 8615 [EL CT]
Installation Manual
![Miele PLW 8616 [EL/S]](https://manualsarea.com/img/product/thumbs/180/37/f4/37f4255dee3c9942a13241f3ccd5fe93.webp) Miele PLW 8616 [EL/S]
Installation Manual
Miele PLW 8616 [EL/S]
Installation Manual
![Miele PWM 916 [EL DV DD SOM]](https://manualsarea.com/img/product/thumbs/180/21/65/21657a907bb735f3acf5a7bdbbc78c8a.webp) Miele PWM 916 [EL DV DD SOM]
Manual
Miele PWM 916 [EL DV DD SOM]
Manual
![Miele PFD 104 SCVi XXL [120V]](https://manualsarea.com/img/product/thumbs/180/0a/20/0a20c04430aaa9be6a985688f5bb5580.webp) Miele PFD 104 SCVi XXL [120V]
Installation Manual
Miele PFD 104 SCVi XXL [120V]
Installation Manual
![Miele PDR 507 HP [MAR]](https://manualsarea.com/img/product/thumbs/180/58/9e/589e9ba94b88174fa0cdb27b4bbaac5b.webp) Miele PDR 507 HP [MAR]
User Manual
Miele PDR 507 HP [MAR]
User Manual