Page 2 - Contents
Contents 2 Caring for the environment ........................................................................................................ 6 Warning and Safety instructions ............................................................................................. 7 Appropriate use ..............
Page 3 - Programme overview
Contents 3 Timer ............................................................................................................................................... 27 Prerequisite for setting the timer ........................................................................................... 27 Settin...
Page 4 - Connectivity
Contents 4 Process technology ....................................................................................................................... 49 Anti-crease ................................................................................................................................ 49 Dry...
Page 5 - Installation
Contents 5 Installation ..................................................................................................................................... 66 Installation locations .......................................................................................................................
Page 6 - Caring for the environment; Disposal of the packing material
Caring for the environment 6 Disposal of the packing material The packaging is designed to protect the appliance from damage dur-ing transportation. The packaging materials used are selected frommaterials which are environmentally friendly for disposal and shouldbe recycled.Recycling the packaging r...
Page 7 - Warning and Safety instructions; It is essential to read these instructions.; Appropriate use; above conditions are met.
Warning and Safety instructions 7 It is essential to read these instructions. This tumble dryer complies with all current local and national safety requirements. How-ever, inappropriate use can lead to personal injury and damage to property.Read the operating instructions carefully before using th...
Page 8 - Foreseeable misuse
Warning and Safety instructions 8 This tumble dryer is only intended for drying fabrics which have been washed in a water solution, and marked on the manufacturer's care label as being suitable for tumble drying.“Dry cleaning kits” for freshening up garments in a tumble dryer are increasingly avai...
Page 9 - ter cover. Use the appropriate handles and release catches only.; Technical safety; or authorised Miele Service Dealer.
Warning and Safety instructions 9 To prevent the risk of fire, the following items must not be dried in this tumble dryer: - Items which have not been washed.- Items which have not been thoroughly cleaned and are still soiled with grease, oil or other deposits (such as kitchen linens or cosmetics ...
Page 11 - Follow the instructions in “Installation of the ducting”.; Correct use; Do not use a pressure washer or water jet to clean the tumble dryer.
Warning and Safety instructions 11 Please always seek approval from your building regulations inspector to confirm that the ap-pliance can be operated without risk and that negative pressure of over 4 Pa can be preven-ted. If multiple tumble dryers are to be connected to one vent ducting, a non-re...
Page 12 - For tumble dryers with stainless steel surfaces:; Accessories; ing and Safety instructions.; Decommissioning the tumble dryer
Warning and Safety instructions 12 Wash heavily soiled items thoroughly by increasing the amount of detergent and selecting ahigh washing temperature. If in doubt, wash the items several times. Do not install the tumble dryer in a room where there is a risk of frost. At temperatures around freezin...
Page 13 - Description of the machine
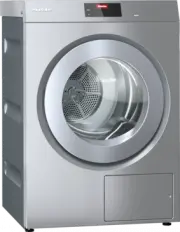
Description of the machine 13 PDR 910 (electrically heated) 1 2 3 4 6 5 7 8 9 10 a Control panel with touch display b Door c Fluff filter flap d 4 height-adjustable screw feet e Electrical connection f Communication module slot g Intake vents for drying air h Exhaust duct Ø 100 mm i Connection for c...
Page 14 - Operating the tumble dryer; Control panel; Takes you back one level in a menu.
Operating the tumble dryer 14 Control panel a Language sensor control For selecting the current user languageAt the end of the programme, the language is automatically reset to the language set atthe supervisor level. b Back sensor control Takes you back one level in a menu. c Touch display ...
Page 15 - Sensor controls and touch display with sensor controls; Programmes” menu; Favourite programmes; Supervisor” menu; Supervisor level; Operating examples; Selection lists
Operating the tumble dryer 15 Sensor controls and touch display with sensor controls The sensor controls , and Start/Stop and the sensor controls in the display re- spond to finger tip contact. Every touch of a sensor control is confirmed with an audiblekeypad tone. You can adjust the volume of...
Page 16 - Extras; Setting numerical values; OK
Operating the tumble dryer 16 The orange scroll bar in the bottom display area shows that there are further options tochoose from. To select the required drying programme, touch the programme name with your finger. The display will now change to the standard menu for that programme. “Extras” menu ...
Page 17 - Exiting the menu; Help display
Operating the tumble dryer 17 12:00 3 4 2 1 5 6 7 8 0 9 Clock display OK To enter the numerical value, touch the numbers on the right-hand side and then confirmwith OK . Pull-down menu The pull-down menu can be used to display information (e.g. about a drying programme). 11:02 Time left h 2:...
Page 18 - Initial commissioning; Risk of injury or damage to property due to improper installation.; Switching on the tumble dryer; Press the; Setting the display language; Briefly touch the required language with your finger.; Reference to optional external devices
Initial commissioning 18 Risk of injury or damage to property due to improper installation. Incorrect installation of the tumble dryer can lead to personal injuryor damage to property.Before commissioning the tumble dryer for the first time, make sureit has been installed.Connect the tumble dryer ...
Page 19 - Setting the display brightness; Setting the date; July; Confirming the time of day display query
Initial commissioning 19 Setting the display brightness You will be asked to select the brightness of the display. Darker Brighter Display brightness OK Touch the segment bar for the required level of brightness. The selected level of brightness is represented by the length of thesegment bar. Co...
Page 20 - Selecting programme packages; Setting up a payment device; Completing the initial commissioning process
Initial commissioning 20 Confirm with the OK sensor control. The display will change to the next setting. Selecting programme packages You can select various programmes from the programme packages.Any programmes already active are highlighted in orange. 11:02 Cottons Cottons PRO Label Cottons M...
Page 21 - In the main menu, touch the; Swipe to the left with your finger until the; Touch the; Touch the flashing
Initial commissioning 21 If the power is interrupted prior to the start of the first drying pro-gramme (e.g. if the machine is switched off with the button), the initial commissioning process can be completed again. Once a dryingprogramme has been running for over 10 minutes, the initial commis-s...
Page 22 - Notes on correct laundry care; Damage due to foreign objects which were not removed from; Care symbols; Drying; Ironing; Loading the tumble dryer
Drying 22 1. Notes on correct laundry care Washing beforedrying Heavily soiled laundry must be washed particularly thoroughly. Usesufficient detergent and select a high wash temperature. If in doubt,wash the items several times. The tumble dryer must not be used for drying items of laundrywhich have...
Page 23 - Closing the door; Selecting a programme
Drying 23 Load laundry into the tumble dryer. Risk of damage with laundry getting trapped.Laundry can be damaged by getting trapped when closing the door.When closing the door, make sure that laundry does not get trappedin the door opening. Do not overload the drum. Overloading can cause unnecessa...
Page 24 - Selecting programme settings
Drying 24 11:02 Programmes Favourites Supervisor Help Touch the Favourites sensor control. 11:02 Favourites Cottons Cottons Cottons Delicates With your finger, swipe to the left until you reach the required pro-gramme. Touch the required programme. The display will chang...
Page 26 - Starting a programme; The programme can be started as soon as the
Drying 26 5. Starting a programme Payment device(optional) If your machine is connected to a payment device, the amount of pay-ment required will appear in the display. Money may be lost if the drum door is opened or the programme iscancelled.Depending on the settings, money may be lost in the payme...
Page 27 - End of the programme; End of programme; Timer; Delay start; Setting the timer
Drying 27 When using the programmes for the first time, the displayed timesometimes deviates significantly from the real time left. The differ-ence between the estimated and achieved time becomes smaller ifthe corresponding programme is run more often. If different loadsizes are dried in one program...
Page 28 - “Label” programme package
Programme overview 28 “Label” programme package Programme name Suitable fabrics Selectable drying levels (residual moisture in %) Selectable extras Load size Cottons Cotton items with normalresidual moisture - Machine iron ( 40 %) - Hand iron ( 25 %) - Hand iron plus ( 15 %) - Slightly dry ( ...
Page 29 - “Standard” programme package
Programme overview 29 “Standard” programme package Programme name Suitable fabrics Selectable drying levels (residual moisture in %) Selectable extras Load size Cottons Single and multi-layercotton/linen items - Machine iron ( 40 %) - Hand iron ( 25 %) - Hand iron plus ( 15 %) - Slightly dry ( ...
Page 32 - “Sport” programme package
Programme overview 32 “Sport” programme package Programme name Suitable fabrics Selectable drying levels (residual moisture in %) Selectable extras Load size Sportswear Polyester or polyamide with and without span- dex - Machine iron ( 40 %) - Hand iron ( 20 %) - Hand iron plus ( 8 %) - Slightl...
Page 33 - “Flatwork” programme package
Programme overview 33 “Flatwork” programme package Programme name Suitable fabrics Selectable drying levels (residual moisture in %) Selectable extras Load size Cottons, dry plus Single and multi-layercotton/linen items - Extra dry ( -4 %) - Anti-crease * 10 kg Cottons, dry Single and multi...
Page 34 - “Bedding” programme package
Programme overview 34 “Bedding” programme package Programme name Suitable fabrics Selectable drying levels (residual moisture in %) Selectable extras Load size Down bedding Down duvets and pillows - Normal ( 0 %) - Anti-crease * 8 kg Synthetic bedding Synthetic duvets and pil-lows - Normal ...
Page 35 - “Buildings maintenance” programme package
Programme overview 35 “Buildings maintenance” programme package Programme name Suitable fabrics Selectable drying levels (residual moisture in %) Selectable extras Load size Mops Cotton mops - Machine iron ( 20 %) - Hand iron ( 15 %) - Hand iron plus ( 10 %) - Slightly dry ( 2 %) - Normal ( 0 ...
Page 36 - “Fire brigade” programme package
Programme overview 36 “Fire brigade” programme package Programme name Suitable fabrics Selectable drying levels (residual moisture in %) Selectable extras Load size Masks Breathing masks withhead straps Breathing masks mayonly be tumble dried ifthey are held in place inthe drum by special hold-ers...
Page 37 - “WetCare” programme package
Programme overview 37 “WetCare” programme package Programme name Suitable fabrics Selectable drying levels (residual moisture in %) Selectable extras Load size WetCare sensitive Non-washable outerwear - - Anti-crease * 4 kg WetCare silks Non-washable outerwearwhich creases easily - Machine i...
Page 38 - “Equestrian” programme package; Risk of damage due to metal buckles, hooks and eye fasteners.
Programme overview 38 “Equestrian” programme package Risk of damage due to metal buckles, hooks and eye fasteners. Metal buckles, hooks and eye fasteners may damage fabrics and the dryer drum.Remove all metal buckles, hooks and eye fasteners before tumble drying.If the metal buckles, hooks and eye...
Page 39 - “Special programmes” programme package
Programme overview 39 “Special programmes” programme package You can put together 5 special programmes on the appliance and assign your own pro-gramme names. Enter the programme names in the table. Programme name Suitable fabrics Selectable drying levels (residual moisture in %) Selectable extras Lo...
Page 40 - “Individual programmes” programme package
Programme overview 40 “Individual programmes” programme package You can put together 20 individual programmes in the Miele Benchmark ProgrammingTool (see “Miele Benchmark Programming Tool Manual”) and assign your own programmenames. Enter the programme names in the table. Programme name Suitable fab...
Page 41 - Changing the programme sequence; Changing a programme once it has started; Adding laundry during ongoing Delay start period
Changing the programme sequence 41 Changing a programme once it has started You cannot change to another programme once a programme hasstarted (this prevents unintentional alterations). You will need to can-cel the current programme before you can select a new one. Risk of fire due to incorrect us...
Page 42 - Opening the Supervisor level; Access via code; Languages; Language entry
Supervisor level 42 Opening the Supervisor level 11:02 Programmes Favourites Supervisor Help Touching the sensor control takes you to the Supervisor level. Access via code Supervisor level is accessed using a code. Factory default: The code is 000 . Change code You can alter the Superviso...
Page 43 - Set languages
Supervisor level 43 Language settingThe sensor control can be used to select a language. All languages are available (fact- ory default).You can change the order of the first 4 languages. These slots are allocated to the mostcommonly used languages.Standard languageThe user language cannot be cha...
Page 44 - Res. moisture display
Supervisor level 44 - Finish tone The finish tone signals the end of the drying programme. - Keypad tone - Welcome tone - Fault alarm The fault tone signals a fault and can be switched off. The volume of the fault tone cannotbe adjusted. Res. moisture display In addition to displaying the drying lev...
Page 45 - Programme selection
Supervisor level 45 Machine off status In order to save energy, the tumble dryer will switch off automatically after the end of theprogramme or if no further selection is made. You can change this setting. Changing this setting leads to increased energy consumption. - No switch off- Factory default:...
Page 47 - Changing Favourite programmes; Res. moisture programme
Supervisor level 47 Favourite programmes After switching on, you can also select a programme via: Favourites . 12 programmes can be stored as favourites based on your own priorities and require-ments. These favourites will also be made available in the control options - Launderette ext. (12 prog...
Page 48 - Sort programmes; Moving programmes/favourites
Supervisor level 48 – Pause: 2–5 seconds – Drum reversal : 15–120 seconds - Anti-crease – Drum rotation, main direction : 0–500 seconds – Pause : 100–3000 seconds – Drum reversal : 0–500 seconds Timed drying : - Running time : 5–180 minutes - Temperature (Process air): cold – 65 °C - Cooling down te...
Page 49 - Prog. colour allocation; Process technology; Drying levels
Supervisor level 49 Prog. colour allocation You can assign a specific colour to a favourite programme. In the list of favourites, each fa-vourite programme is given a coloured frame, which can be adjusted. - Factory default: Off- On Process technology Anti-crease At the end of the programme, the dru...
Page 50 - Service; Clean out the airways; The reminder only appears when there is a heavy build-up of fluff.; Clean the filters; You can then select a time interval from 1–9999 hours.
Supervisor level 50 Service Clean out the airways The tumble dryer ’s electronic module calculates the degree to which fluff or detergentresidues in the fluff filters and vent ducting are impairing performance. A message tocheck the contamination appears. You can decide at what level of fluff this r...
Page 51 - External applications
Supervisor level 51 Enter your message for your planned maintenance work. You can edit one, two or all threeof the 1/2/3 messages.Reset displayThe message appears until the display is permanently reset. The message then appearsagain once the next interval is reached. External applications External e...
Page 52 - Peak load prevention
Supervisor level 52 - Peak load with 230 V - Peak load with 0 V - COM module Peak load prevention - Factory default: Off - On COM module selection This tumble dryer is equipped with an integrated WiFi module. However, the dryer can alsobe equipped with an external module. - Factory default: Off - In...
Page 53 - Remote; The RemoteUpdate can take a few minutes.; Machine parameters; Legal information; You can view information here.
Supervisor level 53 Remote External programme selection is possible via an external terminal (programme may only bestarted on the machine). However, programmes may also be selected and started on themachine. Factory default: on Remote update The RemoteUpdate function is used for updating the softwar...
Page 54 - Setting for payment systems; The next settings are skipped.
Supervisor level 54 Payment system The Miele Connector Box accessory unit or the COM module is required to connect a pay-ment device. Setting for payment systems If you wish to change the settings after the commissioning process, please contact MieleService. - No payment system The next settings are...
Page 55 - Pairing instructions; Opening the supervisor level
Connectivity 55 Pairing instructions Follow the steps below to connect the tumble dryer to your network. Opening the supervisor level Select the Supervisor menu option in the appliance display. Select the Access via code menu option. Enter the 3-digit supervisor code. Establishing the network ...
Page 56 - Technical data; System requirements for WiFi; The signal strength can be adversely affected by many factors:
Connectivity 56 Technical data System requirements for WiFi - WiFi 802.11b/g /n- 2.4 GHz band- WPA/WPA2 encryption- DHCP activated- Multicast DNS / Bonjour / IGMP snooping activated- Ports 443, 80, 53 and 5353 open- IP DNS server = IP standard gateway/router- Mesh/repeater use: same SSID and passwor...
Page 57 - Cleaning and care; Cleaning the fluff filter; Check and clean the fluff filter at the latest when the; Kontrollieren und reinigen Sie; Drehen Sie das innere Flusensiebteil.; To open, press against the right side of the fluff filter flap.; Kontrollieren und reinigen Sie; Drehen Sie das innere Flusensiebteil.; Reinigung und Pflege; Use the handle to pull out the fluff filter.
Cleaning and care 57 Cleaning the fluff filter A two-part fluff filter in the air supply area collects fluff released bytextiles. Remove and dismantle the fluff filter for cleaning. Check and clean the fluff filter at the latest when the Clean out air- ways message appears. Tip: You can also use a v...
Page 58 - Hold the fluff filter by the handles.; Flusensiebteile trocken reinigen; Die Flusensiebteile vor Wieder-; Flusensieb einsetzen; Bei einer starken, sichtbaren; Shake out the fluff and/or pick it off with your fingers.
Cleaning and care 58 Dismantling thefluff filter Flusensieb reinigen Ein zweiteiliges Flusensieb im Luftfüh-rungsbereich fängt anfallende Flusenauf. Es wird zur Reinigung entnommenund demontiert. , Kontrollieren und reinigen Sie das Flusensieb spätestens bei derPrüfmeldung: Luftwege reinigen . Tipp:...
Page 59 - Cleaning the air supply area; Rapid cleaning; Luftführungsbereich reinigen; Schnellreinigung; – von der Abdeckung im Einfüllbereich; Zusätzliche Reinigung
Cleaning and care 59 Insert the inner fluff filter part into the outer part. Turn the inner part of the fluff filter clockwise slightly until you feel itengage. Hold the fluff filter by its handle and push it as far as it will go intothe lower air supply area. Do not rotate the handle as this ...
Page 60 - Risk of damage due to solvent-based cleaning agents and abras-; Fan impeller; Also clean the area in front of the fan impeller.
Cleaning and care 60 Risk of damage due to solvent-based cleaning agents and abras- ive cleaners.Solvent based cleaning agents, abrasive cleaners, glass cleaners orall-purpose cleaners can cause damage to plastic surfaces andother parts.Clean the tumble dryer with a slightly damp cloth and a mild ...
Page 61 - Cover in door area; heraus; – Abdeckung im Einfüllbereich; abnehmen; Reach under the edge of the cover (see arrows) and lift off the cover.
Cleaning and care 61 - Cover in door area Only remove the cover in the door area in the event of a majorblockage. Removing thecover Look in the drum. – Abdeckung im Einfüllbereich , Die Abdeckung im Einfüllbereich sollten Sie nur im Falle einer extremstarken Verstopfung entnehmen. ^ Schauen Sie in...
Page 63 - Problem solving guide; Fault diagnosis; The display remains dark.
Problem solving guide 63 Fault diagnosis Message Cause and remedy The display remains dark. There is no power to the tumble dryer. Check the mains plug, main switch and fuses (on site). Problem Cause and remedy The efficiency of the tumbledryer decreases. The fluff filter in the tumble dryer is di...
Page 64 - The laundry has not been spun sufficiently.
Problem solving guide 64 Problem Cause and remedy Check and clean all components in the vent ducting (e.g.wall pipe, external grille, bends, elbows, etc.). The flow of air is insufficient (e.g. because it is installed in asmall room). When drying, open a door or window to ensure sufficientventil...
Page 65 - Customer Service Department; Contact in case of malfunction
Customer Service Department 65 Contact in case of malfunction In the event of any faults which you cannot remedy yourself, please contact your MieleDealer or Miele Service. Contact information for Miele Service can be found at the end of this document. Please note that telephone calls may be monitor...
Page 66 - Installation locations; Front view; Vent ducting; Side view; Seitenansicht; Netzanschlussleitung; Draufsicht; Bei Aufstellung auf einem bau-; Kassiergerät
Installation *INSTALLATION* 66 Installation locations Front view Aufstellsituationen Vorderansicht a Abluftanschluss b Netzanschlussleitung c Bedienungsblende d Tür e Flusenfilterklappe f Vier höhenverstellbare Schraubfüße Installation 3 7 a Vent ducting b Electrical connection cable c Control panel...
Page 67 - Rear view
Installation *INSTALLATION* 67 Rear view 1 2 3 4 5 6 a Electrical connection b Communication module slot c Intake vents for drying air d Exhaust duct Ø 100 mm e Connection for communication box f Communication box (optional)For setting up a connection with external systems View from above Seitenansi...
Page 68 - Risk of injury and damage due to missing tumble dryer fasten-; Payment systems; Aufstellen; Transportieren; Achten Sie beim Transport des; Ausrichten; Im Schwenkbereich der Trock-; Risk of injury caused by the tumble dryer tipping over.; Levelling
Installation *INSTALLATION* 68 Risk of injury and damage due to missing tumble dryer fasten- ings.When installing on a plinth, an unsecured tumble dryer can slip andfall off the plinth.If the tumble dryer is installed on a plinth, it must be secured.The plinth must be secured to the floor. Payment...
Page 69 - Trockner gegen Verrutschen sichern; Der Trockner; muss; an den
Installation *INSTALLATION* 69 Aufstellen Transportieren Transportieren Sie den Trockner zumAufstellungsort. , Achten Sie beim Transport des Trockners auf dessen Standsicher-heit. Ausrichten , Im Schwenkbereich der Trock- nertür darf keine abschließbare Tür,Schiebetür oder entgegengesetztangeschlage...
Page 70 - All 4 of the machine’s feet must be secured.
Installation *INSTALLATION* 70 All 4 of the machine’s feet must be secured.
Page 71 - Electrical connection; Supply air and exhaust air management; Ventilation
Installation *INSTALLATION* 71 Electrical connection The electrical connection must be established by a qualified electri-cian. The electrical connection may only be made to an electrical system provided in accordance with all appropriate local and national legisla-tion, regulations and guidelines...
Page 73 - Table I; – 1 m laid straight or 1 m straight pipe; Table II; Required diameter
Installation *INSTALLATION* 73 Use: - For the vent ducting: exhaust hose* or a plastic waste water pipe (e.g. HT piping systems) with a minimum diameter of 100 mm. - *optional accessories Calculating thetotal ductinglength The friction of the vent ducting with its bends and various compon-ents provi...
Page 74 - Sample calculation; Total ducting length; the total ducting length is less than 20 m (as per Table II). A; View from above; Berechnungsbeispiel; Ausnahmen bei der Auslegung; Mauerrohr, mit Gittereinsatz; Bemaßung Abluftanschluss; Zuluftführung und Abluftführung
Installation *INSTALLATION* 74 Sample calculation A 1 bend, 90° = 1 x 0.8 m relative pipe length = 0.8 m B/D 2 bends, 90° = 2 x 0.8 m relative pipe length = 1.6 m C 0.5 m pipe = 0.5 x 1 m relative pipe length = 0.5 m Total ducting length = 2.9 m Result: the total ducting length is less than 20 m (as...
Page 75 - You will need; Abluftführung mit Alu-Flex; Wrap heat-resistant metallic tape around plug connections.
Installation *INSTALLATION* 75 Berechnungsbeispiel , Ausnahmen bei der Auslegung der Abluftführung sind gemäß Bau-ordnung der Länder auszuführen.Fragen Sie den Bezirksschornstein-fegermeister/die Bezirksschornstein-fegermeisterin. A Mauerrohr, mit Gittereinsatz = 1 x 3,8 m Vergleichsrohrlänge = 3,8 ...
Page 77 - Abluftsammelleitung; müssen; Risk of electric shock and injury due to using the tumble dryer
Installation *INSTALLATION* 77 Abluftsammelleitung , Ausnahmen bei der Auslegung der Abluftführung sind gemäß Bau-ordnung der Länder auszuführen.Fragen Sie den Bezirksschornstein-fegermeister/die Bezirksschornstein-fegermeisterin. , Sie müssen pro Trockner eine Rückstauklappe installieren! , Bei Nic...
Page 78 - Optional accessories; Communication box; Data protection and data security
Optional accessories 78 Accessory parts may only be fitted when expressly approved by Miele. If other parts are used, warranty, performance and product liability claims will be invalidated. Communication box The optional communication box allows external hardware from Miele and other suppliersto b...
Page 79 - Copyright and licences; . The liability and warranty arrangements for the open; Danger due to improperly performed service and repair work.
Optional accessories 79 Copyright and licences For the purpose of operating and controlling the communication module, Miele uses propri-etary or third-party software that is not covered by open source licensing terms. This soft-ware/these software components are protected by copyright. The copyright...
Page 80 - EU declaration of conformity; name of the product or the serial number; UK declaration of conformity
Technical data 80 Height 1020 mm Width 700 mm Depth 763 mm Depth with door open 1293 mm Weight 72 kg Drum volume 180 l Maximum load size 10 kg (weight of dry laundry) Length of supply lead 1600 mm Supply voltage See data plate Rated load See data plate Fuse rating See data plate Lamp wattage See dat...
Page 82 - International Service Contacts
www.miele.com/marine-service America: +1 866 694 5849Australia, Asia, Oceania: +61 3 9764 7880Europe, Africa, Middle East: +49 5241 89 66 877 International Service Contacts E-mail: [email protected] Manufacturer: Miele & Cie. KG, Carl-Miele-Straße 29, 33332 Gütersloh, Germany Alteration rights r...


 Miele APCL 043
User Manual
Miele APCL 043
User Manual
 Miele APWM 065
Installation Manual
Miele APWM 065
Installation Manual
 Miele APWM 070
Installation Manual
Miele APWM 070
Installation Manual
 Miele SC
Installation Manual
Miele SC
Installation Manual
 Miele PR
Installation Manual
Miele PR
Installation Manual
 Miele APCL 047
User Manual
Miele APCL 047
User Manual
 Miele PLW 8505
Installation Manual
Miele PLW 8505
Installation Manual
![Miele PT 7186 Vario [EL]](https://manualsarea.com/img/product/thumbs/180/69/3e/693e1219f5c0d53fde982888bd54a3ec.webp) Miele PT 7186 Vario [EL]
User Manual
Miele PT 7186 Vario [EL]
User Manual
 Miele CM/1
User Manual
Miele CM/1
User Manual
![Miele PLW 8617 [EL/S TH]](https://manualsarea.com/img/product/thumbs/180/fe/90/fe9010c5f8c3c4aada5d83b417c78507.webp) Miele PLW 8617 [EL/S TH]
Installation Manual
Miele PLW 8617 [EL/S TH]
Installation Manual
![Miele PWM 908 [EL DP MAR 3 AC 400-480V 50-60Hz]](https://manualsarea.com/img/product/thumbs/180/20/e5/20e5e929bcb336fc6b2f128d9c857a3d.webp) Miele PWM 908 [EL DP MAR 3 AC 400-480V 50-60Hz]
User Manual
Miele PWM 908 [EL DP MAR 3 AC 400-480V 50-60Hz]
User Manual
![Miele PWM 906 [EL DP MAR 3 AC 400-480V 50-60Hz]](https://manualsarea.com/img/product/thumbs/180/57/c8/57c81dd8d0abe05852b709a3fa9b80db.webp) Miele PWM 906 [EL DP MAR 3 AC 400-480V 50-60Hz]
Installation Manual
Miele PWM 906 [EL DP MAR 3 AC 400-480V 50-60Hz]
Installation Manual
![Miele PWM 906 [EL DP MAR 2N AC 400V 50-60Hz]](https://manualsarea.com/img/product/thumbs/180/ce/23/ce232ceeda728532882a2a2f56bf2abc.webp) Miele PWM 906 [EL DP MAR 2N AC 400V 50-60Hz]
User Manual
Miele PWM 906 [EL DP MAR 2N AC 400V 50-60Hz]
User Manual
![Miele PLW 8617 [EL TH]](https://manualsarea.com/img/product/thumbs/180/e8/4a/e84a63b24dca64279b26bca714985678.webp) Miele PLW 8617 [EL TH]
User Manual
Miele PLW 8617 [EL TH]
User Manual
![Miele PDR 908 [EL MAR 3N AC 400V 50-60Hz]](https://manualsarea.com/img/product/thumbs/180/05/b7/05b705998b251f92b271e908423e1ecb.webp) Miele PDR 908 [EL MAR 3N AC 400V 50-60Hz]
Installation Manual
Miele PDR 908 [EL MAR 3N AC 400V 50-60Hz]
Installation Manual
![Miele PLW 8615 [EL CT]](https://manualsarea.com/img/product/thumbs/180/70/ff/70ff37b9174e78db8d00ddce8cf08ee3.webp) Miele PLW 8615 [EL CT]
Installation Manual
Miele PLW 8615 [EL CT]
Installation Manual
![Miele PLW 8616 [EL/S]](https://manualsarea.com/img/product/thumbs/180/37/f4/37f4255dee3c9942a13241f3ccd5fe93.webp) Miele PLW 8616 [EL/S]
Installation Manual
Miele PLW 8616 [EL/S]
Installation Manual
![Miele PWM 916 [EL DV DD SOM]](https://manualsarea.com/img/product/thumbs/180/21/65/21657a907bb735f3acf5a7bdbbc78c8a.webp) Miele PWM 916 [EL DV DD SOM]
Manual
Miele PWM 916 [EL DV DD SOM]
Manual
![Miele PFD 104 SCVi XXL [120V]](https://manualsarea.com/img/product/thumbs/180/0a/20/0a20c04430aaa9be6a985688f5bb5580.webp) Miele PFD 104 SCVi XXL [120V]
Installation Manual
Miele PFD 104 SCVi XXL [120V]
Installation Manual
![Miele PDR 507 HP [MAR]](https://manualsarea.com/img/product/thumbs/180/58/9e/589e9ba94b88174fa0cdb27b4bbaac5b.webp) Miele PDR 507 HP [MAR]
User Manual
Miele PDR 507 HP [MAR]
User Manual