Miele PDR 514 ROP [G] - Manuals
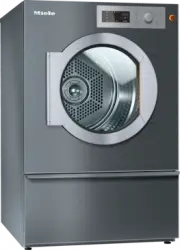
User Manual Miele PDR 514 ROP [G]
Manual Miele PDR 514 ROP [G]
Summary
Caring for the environment 2 Disposal of the packing material The packaging is designed to protect the appliance from damage dur-ing transportation. The packaging materials used are selected frommaterials which are environmentally friendly for disposal and shouldbe recycled.Recycling the packaging r...
Contents 3 Caring for the environment ........................................................................................................ 2 Warning and Safety instructions ............................................................................................. 5 Appropriate use ..............
Warning and Safety instructions 5 It is essential to read these instructions. This tumble dryer complies with all current local and national safety requirements. How-ever, inappropriate use can lead to personal injury and damage to property.Read the operating instructions carefully before using th...
Warning and Safety instructions 6 Foreseeable misuse Do not make any alterations to the tumble dryer, unless authorised to do so by Miele. Do not lean on the tumble-dryer door. Otherwise, the tumble dryer may tip over, causing injury to yourself or others. Do not use a pressure washer or water...
Warning and Safety instructions 7 Faulty components may only be replaced by genuine Miele spare parts. Miele can only guarantee the safety standards of the appliance when Miele replacement parts are used. In the event of a fault and for cleaning and maintenance purposes, the tumble dryer must be...
Warning and Safety instructions 8 Gas-heated tumble dryers In the event of a fault or when carrying out cleaning and maintenance, the on-site manual gas shut-off valve and the shut-off device on the gas meter must be closed. Before completing commissioning, maintenance, conversion and repair wor...
Warning and Safety instructions 9 For tumble dryers with stainless steel surfaces: The stainless steel surfaces must not come into contact with liquid cleaning and disinfect-ing agents which contain chlorine or sodium hypochlorite. These agents can have a corros-ive effect on stainless steel.Aggre...
Description of the machine 10 ① ② ④ ⑤ ⑥ ⑨ ⑩ ⑦ ③ ⑧ a Control panel with rotary control b Door c Fluff filter flap d 4 height-adjustable screw feet e Electrical connection f Communication module slot g Intake vents for drying air h Exhaust duct i Connection for communication box j Communication box (o...
Operating the tumble dryer 11 Machines with residual moisture control (ROP) 1 2 3 4 5 6 7 8 9 a Control field b Sensor controls for the drying levels c Status displays Light up when necessary. d sensor control Activates the Intermittent fan operation to perfectly dry light fabrics, e.g. be...
Operating the tumble dryer 12 Drying programmes - position = “ Cottons ” programme For drying cotton and linen fabrics. - position = “ Cottons Low temperature ” programme For drying delicate cotton and linen fabrics. - position = “Synthetics/Delicates” programme For drying synthetic fibr...
Operating the tumble dryer 14 Timed programmes - 5 position = Timed drying : 05 minutes - 10 – 55 position = Timed drying : 10–55 minutes - 60 position = Timed drying : 60 minutes - position = machine off
Operating the tumble dryer 16 - position range = “high” temperature setting For drying cotton and linen fabrics. - position = machine off
Operating the tumble dryer 17 How the control field works The sensor controls react to fingertip contact. If a sensor control is lit, it can be selected. If a sensor control is brightly lit, this means it is currently selected.If a sensor control is dimly lit, this means it can be selected. Sensor c...
Initial commissioning 18 Risk of injury or damage to property due to improper installation. Incorrect installation of the tumble dryer can lead to personal injuryor damage to property.Before commissioning the tumble dryer for the first time, make sureit has been installed correctly.Connect the tum...
Drying 19 1. Notes on correct laundry care Washing beforedrying Heavily soiled laundry must be washed particularly thoroughly. Usesufficient detergent and select a high wash temperature. If in doubt,wash the items several times. The tumble dryer must not be used for drying items of laundrywhich have...
Drying 20 Open the door. Load the washed laundry into the tumble dryer. Do not overload the drum.Overloading the drum will cause unnecessary wear and tear to thelaundry and affect the drying results. This can also increase thecreasing in the laundry. Closing the door Damage caused by laundry g...
Drying 21 Warm air You can set the duration in one-minute incrementsfrom minutes to hours. Touch the or sensor control repeatedly until the required pro- gramme running time appears in the time display. The drying result is preset by the tumble dryer and cannot be al...
Drying 23 5. Unloading laundry from the tumble dryer End of the pro-gramme The tumble dryer can be configured so that a buzzer sounds at theend of the programme. At the end of the programme ( is indicated on the time display), the laundry has cooled down and can be removed.If Anti-crease has be...
Changing the programme sequence 24 Changing a programme once it has started You cannot change to another programme once a programme hasstarted (this prevents unintentional alterations). You will need to can-cel the current programme before you can select a new one. Risk of fire due to incorrect us...
Changing the programme sequence 25 Time left Altering the programme sequence can cause the programme durationshown in the display to be adjusted.
Supervisor level (programming mode) 31 Pro- gramme Designation Possible set value Standard setting Explanation Door opening status = Off = programme cancelled when door is opened = On = programme interrupted when door is opened Pressure sensor (external) = Of...
Supervisor level (programming mode) 32 Process air temperature Set value in the display Temperature Cold 30 °C/86 °F 31 °C/88 °F 32 °C/90 °F 33 °C/91 °F 34 °C/93 °F 35 °C/95 °F 36 °C/97 °F 37 °C/99 °F 38 °C/100 °F 39 °C/102 °F 40 °C/104 °F 41 °C/106 °F 42 °C...
Supervisor level (programming mode) 33 Set value in the display Temperature 72 °C/162 °F 73 °C/163 °F 74 °C/165 °F 75 °C/167 °F Reversing cycle Set value in the display Seconds 20 s 22 s 24 s 26 s 28 s 30 s 32 s 34 s 36 s 38 s 40 s 42 s 44 s 46 s...
Supervisor level (programming mode) 34 Set value in the display Seconds 94 s 96 s 98 s 100 s 102 s 104 s 106 s 108 s 110 s 112 s 114 s 116 s 118 s 120 s Pauses Set value in the display Seconds 2 s 3 s 4 s 5 s 6 s 7 s 8 s 9 s 10 s ...
Cleaning and care 35 Cleaning the fluff filter Risk of fire if the tumble dryer is operated without a fluff filter. If there is no fluff filter, the air channels, heating elements and ventducting can become clogged during drying and may catch fire.The fluff filter must not be removed for cleaning....
Cleaning and care 36 Risk of damage due to solvent-based cleaning agents and abras- ive cleaners.Solvent based cleaning agents, abrasive cleaners, glass cleaners orall-purpose cleaners can cause damage to plastic surfaces andother parts.Clean the tumble dryer with a slightly damp cloth and a mild ...
Problem solving guide 37 Fault diagnosis Message Cause and remedy The display remains dark. There is no power to the tumble dryer. Check the mains plug, main switch and fuses (on site). Problem Cause and remedy The efficiency of the tumbledryer decreases. The fluff filter in the tumble dryer is di...
Problem solving guide 38 Problem Cause and remedy Check and clean all components in the vent ducting (e.g.wall pipe, external grille, bends, elbows, etc.). The flow of air is insufficient (e.g. because it is installed in asmall room). When drying, open a door or window to ensure sufficientventil...
Customer Service Department 39 Contact in case of malfunction In the event of any faults which you cannot remedy yourself, please contact your MieleDealer or Miele Service. Contact information for Miele Service can be found at the end of this document. Please note that telephone calls may be monitor...
Installation 40 Installation requirements Risk of injury or damage to property due to improper installation. Incorrect installation of the tumble dryer can lead to personal injury or damage to prop-erty.The tumble dryer must only be installed and commissioned by Miele Customer ServiceDepartment or...
Installation 42 After the machine has been aligned, screw the nuts on the adjustable feet tightly to thebase plate using an open spanner. Securing the machine The tumble dryer must be secured to the floor by fitting the tensioning strips suppliedover the machine feet. Fittings supplied are for b...
Installation 43 It is recommended the tumble dryer is connected with a suitable plug and socket in accord-ance with IEC 60309-1, however if the installation requires a hard-wired connection, an all-pole means of isolation must be provided on site. Switches with a minimum contact gapgreater than 3 mm...
Connectivity 45 Pairing instructions Follow the steps below to connect the tumble dryer to your network. Opening the Supervisor level Switch on the appliance by turning the rotary control from the position to any other po- sition. Open the door of the tumble dryer. Press and hold the / s...
Connectivity 46 Establishing the network connection using a LAN cable The optional XKM 3200 WL PLT communication module is required for wired networkconnection. On the supervisor level, select using the or arrow buttons. Then select the COM module using the or arrow buttons...
Connectivity 47 - Varying radio signal sources or interference- Other appliances with Bluetooth or WiFi wireless technology Terms in network technology Access point Access point WiFi access point to the network, which is either integrated into the router or implemented with aseparate device. The acc...
Connectivity 49 Proxy server Proxy server Properties: - Central access points to the Internet- Suitable for large user groups- Cache memory: data that is used frequently can be saved on the proxy server; the data is cached. This reduces the amount of data transferred. - Proxy servers are used as con...
Connectivity 50 WiFi Wireless Local Area Network Wireless data transmission in a network WiFi 802.11b Wireless network: 2.4 GHz Data transfer: 11 Mbit/s – corresponds to ap-prox. 1.4 MB/s in practice WiFi 802.11g Wireless network: 2.4 GHz Data transfer: 54 Mbit/s – corresponds to ap-prox. 6.75 MB/s ...
Optional accessories 52 Communication box The optional communication box allows external hardware from Miele and other suppliersto be connected to the Miele Professional machine. External hardware includes, e.g. pay-ment system, peak-load system, pressure sensor or an external vent flap.The communic...
Optional accessories 53 Furthermore, this communication module contains software components which are distrib-uted under open source licence conditions. The open source components contained in themachine along with the corresponding copyright notices, copies of the licensing terms validat the time a...
Technical data 54 Technical data PDR 514 PDR 518 PDR 522 PDR 528 PDR 544 Height 1400 mm 1400 mm 1400 mm 1640 mm 1640 mm Width 906 mm 906 mm 906 mm 1206 mm 1206 mm Depth 852 mm 1035 mm 1162 mm 1019 mm 1385 mm Depth with door open 1456 mm 1639 mm 1768 mm 1623 mm 1989 mm Drum volume 250 l 325 l 400 l 5...
Malaysia Miele Sdn BhdSuite 12-2, Level 12Menara Sapura Kencana PetroleumSolaris Dutamas No. 1, Jalan Dutamas 150480 Kuala Lumpur, MalaysiaPhone: +603-6209-0288Fax: +603-6205-3768 Miele New Zealand LimitedIRD 98 463 6318 College HillFreemans Bay, Auckland 1011, NZTel: 0800 464 353Internet: www.miele...
Miele Manuals
-
Miele APCL 043
User Manual
-
Miele APWM 065
Installation Manual
-
Miele APWM 070
Installation Manual
-
Miele SC
Installation Manual
-
Miele PR
Installation Manual
-
Miele APCL 047
User Manual
-
Miele PLW 8505
Installation Manual
-
Miele PT 7186 Vario [EL]
User Manual
-
Miele CM/1
User Manual
-
Miele PLW 8617 [EL/S TH]
Installation Manual
-
Miele PWM 908 [EL DP MAR 3 AC 400-480V 50-60Hz]
User Manual
-
Miele PWM 906 [EL DP MAR 3 AC 400-480V 50-60Hz]
Installation Manual
-
Miele PWM 906 [EL DP MAR 2N AC 400V 50-60Hz]
User Manual
-
Miele PLW 8617 [EL TH]
User Manual
-
Miele PDR 908 [EL MAR 3N AC 400V 50-60Hz]
Installation Manual
-
Miele PLW 8615 [EL CT]
Installation Manual
-
Miele PLW 8616 [EL/S]
Installation Manual
-
Miele PWM 916 [EL DV DD SOM]
Manual
-
Miele PFD 104 SCVi XXL [120V]
Installation Manual
-
Miele PDR 507 HP [MAR]
User Manual







