Page 2 - Contents
Contents 2 Warning and Safety instructions ............................................................................... 4 Before using for the first time ..................................................................................... 13 Installation ............................................
Page 4 - Warning and Safety instructions; Correct application
Warning and Safety instructions 4 This microwave oven complies with current safety requirements.Inappropriate use can, however, lead to personal injury andmaterial damage.Read the operating instructions carefully before using theappliance. They contain important information on safety,installation, u...
Page 5 - Safety with children
Warning and Safety instructions 5 The oven compartment is fitted with a special lamp to cope with particular conditions (e.g. temperature, moisture, chemicalresistance, abrasion resistance and vibration). This special lamp mustonly be used for the purpose for which it is intended. It is not suitab...
Page 6 - Technical safety
Warning and Safety instructions 6 Technical safety A damaged appliance could be dangerous. Check the appliance for visible signs of damage. Do not use the appliance if it is damaged. If the electrical connection cable is faulty, it must only be replaced by a Miele authorised technician to protec...
Page 7 - The electrical safety of this microwave oven can only be
Warning and Safety instructions 7 The electrical safety of this microwave oven can only be guaranteed when continuity is complete between it and an effectiveearthing system. It is essential that this standard safety requirementis met to avoid the risk of damage or electric shock. If in any doubt,p...
Page 8 - Correct use
Warning and Safety instructions 8 Correct use Risk of burning due to the grill. When grilling with or without the microwave function, themicrowave oven can get hot. You could burn yourself on the ovencompartment, the grill element, food, accessories or the appliancedoor.Use oven gloves when placin...
Page 9 - and
Warning and Safety instructions 9 The appliance can be damaged if it is used without food being placed in it or if it is incorrectly loaded. Therefore do not use theappliance to preheat crockery or to dry herbs or similar items. Always ensure that food or a suitable microwave browning dish has b...
Page 10 - Oils and fats can ignite if allowed to overheat. Never leave the
Warning and Safety instructions 10 Oils and fats can ignite if allowed to overheat. Never leave the microwave oven unattended when cooking with oil or fats. Do notuse the appliance for deep-fat frying. Never attempt to put out oil orfat fires with water. Switch the oven off and extinguish the flam...
Page 12 - Accessories; Only use original Miele accessories. If other parts are used,
Warning and Safety instructions 12 Accessories Only use original Miele accessories. If other parts are used, warranty, performance and product liability claims will be invalidated. Miele will guarantee to supply functional spare parts for a minimum of 10 years and up to 15 years following the di...
Page 13 - Before using for the first time; Risk of suffocation due to
Before using for the first time 13 After transportation, let the unpackedappliance stand for approx. 2 hoursat room temperature before using it. This is to allow time for the temperatureto equalise between the temperature inthe room and the appliance. This isimportant for the correct electronicfunct...
Page 14 - Installation; Installation dimensions; Dimensions are given in mm.
Installation *INSTALLATION* 14 When building in the appliance,ensure that there is adequateventilation to the front of theappliance.Do not obstruct the air vents withany objects! Ensure that the distanceto the surrounding furniture fronts isa minimum 2.5 mm at the sides and4 mm at the top. The appli...
Page 15 - Wall unit installation M 2224 SC
Installation *INSTALLATION* 15 Wall unit installation M 2224 SC 495 462 350 +6 +2 310 Wall unit installation M 2234 SC 562 350 +6 +2 310 595
Page 16 - Tall unit installation
Installation *INSTALLATION* 16 Tall unit installation 595 360 562 310 +6 +2
Page 17 - Wall unit side view
Installation *INSTALLATION* 17 Wall unit side view 16 22 372 Tall unit side view 372 6 22
Page 18 - Wall unit connection M 2224 SC; Wall unit connection M 2234 SC; Front view
Installation *INSTALLATION* 18 Wall unit connection M 2224 SC 15 62 372 495 1 2 3 a Front view b Mains connection cable, Length = 1600 mm c No connections permitted in this area Wall unit connection M 2234 SC 3 15 62 372 595 1 2 a Front view b Mains connection cable, Length = 1600 mm c No connection...
Page 19 - Tall unit connection
Installation *INSTALLATION* 19 Tall unit connection 15 62 372 595 1 2 3 a Front view b Mains connection cable, Length = 1600 mm c No connections permitted in this area
Page 21 - Carrying out installation
Installation *INSTALLATION* 21 Building-in kit The following items are supplied in theaccessory pack for installing theappliance: Carrying out installation The microwave oven must be built inbefore it can be used. The accessories include an adapter,which helps to position the hook strip.There are 2 ...
Page 25 - Electrical connection; Risk of injury caused by a faulty
Installation *INSTALLATION* 25 Electrical connection Risk of injury caused by a faulty appliance.Before connecting the appliance,ensure that it has not been damagedin any way.Never use a faulty appliance. The appliance is supplied ready forconnection with a cable and plug. Fire hazard due to ove...
Page 26 - Caring for the environment; Disposing of your old appliance
Caring for the environment 26 Disposing of the packagingmaterial The packaging material is used forhandling and protects the appliancefrom transport damage. The packagingmaterial used is selected from materialswhich are environmentally friendly fordisposal and can generally be recycled.Recycling the...
Page 27 - Guide to the appliance
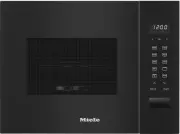
Guide to the appliance 27 a Door b Door lock c Grill d Control panel e Turntable f Grilling rack g Gourmet plate
Page 28 - Accessories supplied; Grilling rack; except; for; Gourmet plate; These products and other
Accessories supplied 28 Grilling rack The grilling rack can be used for allfunctions with and withoutmicrowave power, except for Microwave Solo mode. To avoid the grilling rack being usedinadvertently with Microwave Solo, itshould not be stored inside the ovencompartment. Gourmet plate The gourmet p...
Page 29 - Control panel; OK
Control panel 29 a Display for showing the time of dayand information on operation b Arrow buttons and for scrolling through lists and changing values c OK button for confirming values, selecting functions and savingsettings d Various power levels of themicrowave oven e Grill operation f Comb...
Page 30 - Description of function
Description of function 30 The microwave oven contains amagnetron. This converts electricalenergy into electromagnetic waves(microwaves). These microwaves aredistributed evenly throughout the ovencompartment, and are reflected off themetal appliance walls. This enables themicrowaves to reach the foo...
Page 31 - Modes of operation; Functions; Microwave Solo mode; - 5 defrosting programmes
Modes of operation 31 Food is cooked, reheated or defrostedquickly in a microwave oven.You can use the microwave oven in thefollowing ways:– Food can be defrosted, reheated orcooked by entering a power setting anda duration.– Deep-frozen, ready meals can bedefrosted and then reheated or cooked.– The...
Page 32 - Suitable containers for microwave ovens; Fire hazard due to unsuitable; Material and shape; Risk of injury due to hollow; Metal
Suitable containers for microwave ovens 32 Microwaves: - are reflected by metal. - pass through glass, porcelain, plastic and cardboard. - are absorbed by food. Fire hazard due to unsuitable container.Containers which are not suitable foruse in microwave ovens can be badlydamaged and cause damage ...
Page 33 - - Pieces of aluminium foil
Suitable containers for microwave ovens 33 Do not place aluminium foil dishes onthe rack in case the dish sparks orarcs. - Pieces of aluminium foil Make sure that the aluminium foil isat least 2 cm from the oven walls atall times. It must not touch the walls. - Metal meat skewers or clamps These sho...
Page 34 - Single-use containers
Suitable containers for microwave ovens 34 Single-use containers Fire hazard due to unsuitable container.Single-use containers made ofplastic, paper or other inflammablematerials can ignite.Do not leave the applianceunattended when reheating orcooking food in single-use containersmade of plastic, ...
Page 35 - A heat-retaining cover; Damage due to heat-sensitive; Do not use a heat-retaining cover; - food coated with breadcrumbs is
Suitable containers for microwave ovens 35 A heat-retaining cover - prevents too much steam escaping, especially when cooking foods withlonger reheating times. - speeds up the reheating process.- prevents food from drying out.- helps keep the oven compartment clean. When using Microwave Solo mode,...
Page 36 - Setting the time; Altering the time of day
Before using for the first time 36 The microwave oven must be built inbefore it can be operated. The microwave oven is ready to use assoon as it has been connected to theelectricity supply. Setting the time Connect the appliance to theelectricity supply. 12:00 will appear in the display. Thenumber...
Page 37 - Operation; Opening the door; and the microwave power level will
Operation 37 Opening the door Press the door release to open thedoor. If the microwave oven is in use, openingthe door will interrupt the cookingprocess. Placing the dish in the oven Ideally the dish should be placed in themiddle of the oven. Turntable If the appliance is built-in or installed ata...
Page 38 - “door” message; Altering settings; microwave power level; Cancelling a programme
Operation 38 - the type and texture of the food. Fresh vegetables contain more water andcook more quickly than storedvegetables. - the frequency of stirring or turning the food. Frequent stirring or turning heats thefood more evenly, and it is thereforeready in a shorter time. - the amount of food. ...
Page 39 - At the end of a programme; Changing the time and power level
Operation 39 At the end of a programme An audible tone will sound when thecooking programme is complete. Theinterior lighting goes off.The audible tone will sound briefly as areminder every 5 minutes for20 minutes after the end of theprogramme. If you want to stop the audible tone,press the Stop/C...
Page 40 - System lock; Activating the system lock; Press and hold the; Deactivating the system lock; To cancel the system lock, press the
Operation 40 System lock The system lock prevents the appliancebeing used by children, for example. Activating the system lock Press and hold the OK sensor for 6 seconds, which counts down in thedisplay, until a buzzer sounds and thekey symbol appears in the display: The key symbol will go out aft...
Page 41 - Using the minute minder; Altering a minute minder entry; Deleting the minute minder duration
Operation 41 Using the minute minder The minute minder can be used to timeany activity in the kitchen, e.g. boilingeggs. The time set counts down in onesecond steps. Press the button. Use the arrow buttons to set theminutes for the minute minder youwant and confirm with OK . Then enter the ...
Page 42 - Operation – grilling; Changing the grilling duration
Operation – grilling 42 The grill has 4 settings: grill solo and3 combination settings where the grill isused together with a specific microwavepower level.If the total grilling duration required isless than 15 minutes, the grill should bepre-heated for approx. 5 minutes.Thin, flat cuts of fish and ...
Page 43 - Combining grill and microwave; Changing the power level
Operation – grilling 43 Combining grill and microwave This function is very good for baking andbrowning. The microwave cooks thefood, and the grill browns it.The grill can be combined with3 different microwave power levels:150, 300 and 450 watts.It is possible to switch between these3 combination le...
Page 44 - Tips for use; Risk of burning due to hot dishes.; Fire hazard due to overheating.
Gourmet plate 44 Tips for use Risk of burning due to hot dishes. The gourmet plate gets extremely hotwhen in use.Always use oven gloves whenhandling it to avoid burns. Place it ona suitable heat-resistant mat orstand. Before using for the first time Before using the gourmet plate for thefirst time...
Page 45 - Recipes; Ingredients
Gourmet plate 45 Examples of use: Pre-heat the gourmet plate directly onthe turntable for up to max. 5 minutes at450 W + Grill . - Fish fingers (frozen), 150 g + 2 tbsp oil , 3 – 4 minutes each side - Hamburgers, 2 burgers + 2 tbsp oil , 3 – 4 minutes each side - Croquette potatoes (frozen)...
Page 46 - Total time required: 25 – 35 minutes; Total time required: 15 – 20 minutes; Pork fillet in a Roquefort sauce; Total time required: 10 – 12 minutes; Method
Gourmet plate 46 Vegetable medley (serves 3) Total time required: 25 – 35 minutes - Ingredients 2 onions2 tbsp oil100 g oyster mushrooms or buttonmushrooms, cleaned150 g sliced carrots100 g broccoli florets1 red pepper or 100 g frozen slicedpeppers1 tomatoSalt and pepper30 g grated Parmesan cheese M...
Page 47 - tsp Tabasco; Total time required: 5 – 10 minutes
Gourmet plate 47 Curried chicken (serves 3) Total time required: 25 – 35 minutes - Ingredients 600 g chicken or turkey breast fillets2 tbsp oil2 tbsp white wine2 tbsp apple juice1 tbsp lemon juiceSalt and freshly ground black pepper1 tsp curry powder1 pinch rosemary, ground1 pinch ginger, ground1 p...
Page 48 - Operation - Automatic programmes; Automatic defrosting; Cooking food from frozen; French fries
Operation - Automatic programmes 48 All of the automatic programmes areweight dependent.The weight of the food can be displayedas metric (g) or imperial (lb) (see“Changing settings”).After selecting a programme, enter theweight of the food. The applianceautomatically calculates the durationaccording...
Page 49 - Cooking fresh food; Using an automatic programme
Operation - Automatic programmes 49 Cooking fresh food A 10 VegetablesA 11 PotatoesA 12 Fish in sauceA 13 KebabsA 14 Grilled chickenA 15 Chicken thighsA 16 Fish pieA 17 Gratins/bakes,e.g. potato gratin Using an automatic programme Press the button. Select the programme...
Page 50 - Recipes for automatic programmes; Vegetables; tsp mustard; Setting: Cooking fresh food A 10
Recipes for automatic programmes 50 Below are some recipe suggestions forthe “Cooking fresh food” automaticprogrammes. These can be adapted tosuit your requirements. If the weight guidelines for therelevant programme are exceeded,the food will not cook sufficiently.It is important to follow the weig...
Page 51 - Setting: Cooking fresh food A 11; Setting: Cooking fresh food A 17
Recipes for automatic programmes 51 Golden curried potatoes (serves 3) Total time required: 25 – 35 minutes - Ingredients 500 g peeled potatoes1 onion, finely diced10 g butter1 – 2 tbsp curry powder250 ml vegetable stock (instant)50 ml double cream125 g peas (frozen)Salt and pepper Method Coarsely d...
Page 52 - Total time required: 45 minutes
Recipes for automatic programmes 52 Potato cheese gratin (serves 4) Total time required: 45 minutes - Ingredients For the gratin600 g potatoes, floury75 g Gouda, grated For the topping 250 ml double cream1 tsp saltPepperNutmeg For sprinkling 75 g Gouda, grated For the dish 1 clove of garlic Accessor...
Page 53 - tsp paprika; Chicken thighs
Recipes for automatic programmes 53 Chicken kebabs (makes8 kebabs) Total time required: approx. 25 –35 minutes + 1 hour standing time - Ingredients 4 chicken breasts each approx. 120 g4 tinned pineapple rings16 tinned apricot halves For the marinade 4 tbsp oil4 tbsp sesame oilSalt and pepper 1 / 2 ...
Page 54 - Total time required: 35 – 45 minutes; Setting: Cooking fresh food A 12; Setting: Cooking fresh food A 16
Recipes for automatic programmes 54 A 12 Fish: Fish curry (serves 4) Total time required: 35 – 45 minutes - Ingredients 300 g pineapple chunks1 red pepper1 small banana500 g firm white fish3 tbsp lemon juice30 g butter100 ml white wine100 ml pineapple juiceSalt, sugar and chilli powder2 tbsp cornf...
Page 56 - Changing settings; Appliance setting
Changing settings 56 Some of the standard settings for the appliance have an alternative.Please consult the chart for the different options for appliance settings.The factory settings are marked with a star* on the chart.To change a setting, proceed as follows: Press the button. The display sho...
Page 58 - Reheat; Drinks; Tips on reheating; Danger of explosion due to
Reheat 58 Select the following microwave powerlevels to reheat food: Drinks 800 W Food 600 W Food for babies andchildren 450 W Risk of burning due to hot food. Food for babies and children mustnot be too hot.Only heat it for 1/2 to 1 minute at450 watts. Tips on reheating Danger of explosion due ...
Page 59 - After reheating; Risk of burning due to hot food.
Reheat 59 After reheating Be careful when taking out acontainer. It may be hot. Although the container is not normallyheated by the microwaves (apart fromstoneware), heat may transfer from thefood to the container.Allow food to stand for a few minutes atroom temperature at the end of areheating proc...
Page 60 - Cooking; rice; or; semolina; , first select a power level of; Tips on cooking; Health risk due to insufficient; Food with a thick skin or peel; Risk of injury due to eggs with; After cooking
Cooking 60 Place the food in a microwave safecontainer and cover it.When cooking, it is a good idea to selecta power level of 800 W to start withand then when the food is hot reducethe power level to 450 W for moregentle continued cooking.For dishes such as rice or semolina pudding , first select a ...
Page 61 - Defrost; Health risk due to refreezing.; Defrosting and cooking
Defrost 61 Health risk due to refreezing. Thawed or defrosted food losesnutritional value through refreezingand can go off.Do not refreeze food once it hasthawed. Use it as quickly as possible.Defrosted food may only be re-frozenafter it has been cooked. - 80 W for defrosting very delicate food, e...
Page 62 - Examples of use
Examples of use 62 Food Quantity MWpowerlevel (W) Duration(inminutes) Notes Melting butter/margarine 100 g 450 1:00 – 1:10 Do not cover Meltingchocolate 100 g 450 3:00 – 3:30 Do not cover, stir halfwaythrough melting Dissolvinggelatine 1 packet + 5 tbsp water 450 0:10 – 0:30 Do not cover, stir halfw...
Page 63 - Note for test institutes; Notes
Note for test institutes 63 Test food acc. toEN 60705 Microwavepower level(W)+Grill/Automaticprogramme Duration(min)/weight Standingtime*(min) Notes Custard, 750 g 300 26–28 120 Container seeStandard, dimensionsat the upper rim (21 x21 cm) Sponge cake, 475 g 600 8 5 Container seeStandard, externaldi...
Page 64 - Cleaning and care; Risk of burning due to hot oven
Cleaning and care 64 Disconnect the microwave oven fromthe power supply before cleaning. Under no circumstances should apressure cleaner be used to clean themicrowave oven.The steam from a steam cleaningappliance could reach live electricalcomponents and cause a shortcircuit. Oven interior and insid...
Page 65 - Health risk caused by a faulty; To clean the interior:
Cleaning and care 65 Health risk caused by a faulty appliance.If any damage to the door is noticed,the appliance should not be useduntil the fault has been rectified by aMiele authorised and trained servicetechnician. Operating a damagedappliance can result in microwaveleakage and present a hazard...
Page 66 - Appliance front; acids or chlorides
Cleaning and care 66 Appliance front Do not let water or any object find itsway into or block the air vents in thedoor frame. Soiling that is left too long mightbecome impossible to remove andcould cause the surfaces to alter ordiscolour.Remove any soiling on the front ofthe appliance straight away....
Page 67 - Rack
Cleaning and care 67 Accessories supplied Rack Wash and dry the rack after each use. Itis dishwasher-proof. Remove stubbornsoiling with a stainless steel cleaner. Gourmet plate Do not use wire wool, or abrasivesponges, aggressive or abrasivecleaning agents.Do not clean the gourmet plate in adishwash...
Page 68 - Problem solving guide; Problem; the appliance door is closed.
Problem solving guide 68 Many malfunctions and faults that can occur in daily operation can be easilyremedied. You can save time and money in many cases, as you do not need to callthe Miele Customer Service Department.Information to help you rectify faults yourself can be found at www.miele.com/serv...
Page 70 - Service; Contact in the event of a fault
Service 70 Information to help you rectify faultsyourself and about Miele spare partscan be found at www.miele.com/service. Contact in the event of a fault You can book a Miele CustomerService Department call-out online atwww.miele.com/service.Contact information for the MieleCustomer Service Depart...
Page 71 - United Kingdom
United Kingdom Miele Co. Ltd., Fairacres, Marcham Road, Abingdon, Oxon, OX14 1TWTel: 0330 160 6600, Internet: www.miele.co.uk, E-mail: [email protected] Australia Miele Australia Pty. Ltd.ACN 005 635 398ABN 96 005 635 398Level 4, 141 Camberwell RoadHawthorn East, VIC 3123Tel: 1300 464 353E-mail: [em...


 Miele APCL 043
User Manual
Miele APCL 043
User Manual
 Miele APWM 065
Installation Manual
Miele APWM 065
Installation Manual
 Miele APWM 070
Installation Manual
Miele APWM 070
Installation Manual
 Miele SC
Installation Manual
Miele SC
Installation Manual
 Miele PR
Installation Manual
Miele PR
Installation Manual
 Miele APCL 047
User Manual
Miele APCL 047
User Manual
 Miele PLW 8505
Installation Manual
Miele PLW 8505
Installation Manual
![Miele PT 7186 Vario [EL]](https://manualsarea.com/img/product/thumbs/180/69/3e/693e1219f5c0d53fde982888bd54a3ec.webp) Miele PT 7186 Vario [EL]
User Manual
Miele PT 7186 Vario [EL]
User Manual
 Miele CM/1
User Manual
Miele CM/1
User Manual
![Miele PLW 8617 [EL/S TH]](https://manualsarea.com/img/product/thumbs/180/fe/90/fe9010c5f8c3c4aada5d83b417c78507.webp) Miele PLW 8617 [EL/S TH]
Installation Manual
Miele PLW 8617 [EL/S TH]
Installation Manual
![Miele PWM 908 [EL DP MAR 3 AC 400-480V 50-60Hz]](https://manualsarea.com/img/product/thumbs/180/20/e5/20e5e929bcb336fc6b2f128d9c857a3d.webp) Miele PWM 908 [EL DP MAR 3 AC 400-480V 50-60Hz]
User Manual
Miele PWM 908 [EL DP MAR 3 AC 400-480V 50-60Hz]
User Manual
![Miele PWM 906 [EL DP MAR 3 AC 400-480V 50-60Hz]](https://manualsarea.com/img/product/thumbs/180/57/c8/57c81dd8d0abe05852b709a3fa9b80db.webp) Miele PWM 906 [EL DP MAR 3 AC 400-480V 50-60Hz]
Installation Manual
Miele PWM 906 [EL DP MAR 3 AC 400-480V 50-60Hz]
Installation Manual
![Miele PWM 906 [EL DP MAR 2N AC 400V 50-60Hz]](https://manualsarea.com/img/product/thumbs/180/ce/23/ce232ceeda728532882a2a2f56bf2abc.webp) Miele PWM 906 [EL DP MAR 2N AC 400V 50-60Hz]
User Manual
Miele PWM 906 [EL DP MAR 2N AC 400V 50-60Hz]
User Manual
![Miele PLW 8617 [EL TH]](https://manualsarea.com/img/product/thumbs/180/e8/4a/e84a63b24dca64279b26bca714985678.webp) Miele PLW 8617 [EL TH]
User Manual
Miele PLW 8617 [EL TH]
User Manual
![Miele PDR 908 [EL MAR 3N AC 400V 50-60Hz]](https://manualsarea.com/img/product/thumbs/180/05/b7/05b705998b251f92b271e908423e1ecb.webp) Miele PDR 908 [EL MAR 3N AC 400V 50-60Hz]
Installation Manual
Miele PDR 908 [EL MAR 3N AC 400V 50-60Hz]
Installation Manual
![Miele PLW 8615 [EL CT]](https://manualsarea.com/img/product/thumbs/180/70/ff/70ff37b9174e78db8d00ddce8cf08ee3.webp) Miele PLW 8615 [EL CT]
Installation Manual
Miele PLW 8615 [EL CT]
Installation Manual
![Miele PLW 8616 [EL/S]](https://manualsarea.com/img/product/thumbs/180/37/f4/37f4255dee3c9942a13241f3ccd5fe93.webp) Miele PLW 8616 [EL/S]
Installation Manual
Miele PLW 8616 [EL/S]
Installation Manual
![Miele PWM 916 [EL DV DD SOM]](https://manualsarea.com/img/product/thumbs/180/21/65/21657a907bb735f3acf5a7bdbbc78c8a.webp) Miele PWM 916 [EL DV DD SOM]
Manual
Miele PWM 916 [EL DV DD SOM]
Manual
![Miele PFD 104 SCVi XXL [120V]](https://manualsarea.com/img/product/thumbs/180/0a/20/0a20c04430aaa9be6a985688f5bb5580.webp) Miele PFD 104 SCVi XXL [120V]
Installation Manual
Miele PFD 104 SCVi XXL [120V]
Installation Manual
![Miele PDR 507 HP [MAR]](https://manualsarea.com/img/product/thumbs/180/58/9e/589e9ba94b88174fa0cdb27b4bbaac5b.webp) Miele PDR 507 HP [MAR]
User Manual
Miele PDR 507 HP [MAR]
User Manual