Page 2 - IMPORTANT SAFETY INSTRUCTIONS
IMPORTANT SAFETY INSTRUCTIONS 2 WARNING: If the information in this manual is not followed exactly, a fire or explosion may result causing property damage, personal injury, or death. - Do not use or store gasoline or other combustible liquids or vapors in the vicinity of this or any other applianc...
Page 3 - Contents
Contents 3 IMPORTANT SAFETY INSTRUCTIONS ............................................................ 2 IMPORTANT SAFETY INSTRUCTIONS ............................................................ 5 Caring for the environment ...............................................................................
Page 4 - Customer Service
Contents 4 Customer Service .............................................................................................. 42 Contact in the event of a fault ............................................................................. 42Appliance warranty and product registration .....................
Page 5 - Appropriate use; This cooktop is intended for domestic use and use in other similar
IMPORTANT SAFETY INSTRUCTIONS 5 This cooktop complies with all relevant local and national safetyrequirements. Inappropriate use can, however, lead to personal in-jury and material damage. Read the operating and installation instructions carefully beforeusing the cooktop. They contain important info...
Page 6 - Safety with children
IMPORTANT SAFETY INSTRUCTIONS 6 Safety with children Do not leave children unattended: Children should not be alone or unsupervised in the area where the appliance is installed. Do not al-low them to sit or stand on the appliance. Be sure to supervise any children in the vicinity of the cooktop,...
Page 7 - Technical safety
IMPORTANT SAFETY INSTRUCTIONS 7 Technical safety Unauthorized installation, maintenance, and repairs can cause considerable danger for the user. Installation, maintenance, and re-pairs must only be carried out by a Miele authorized technician. Maintenance by the user: Never repair or replace any...
Page 9 - During installation, maintenance, and repair work, the appliance
IMPORTANT SAFETY INSTRUCTIONS 9 During installation, maintenance, and repair work, the appliance must be completely disconnected from the household electricitysupply. The gas supply must be shut off. Ensure that this is the caseby: - removing the fuse - “tripping” the circuit breaker, or - unplugg...
Page 10 - Correct use
IMPORTANT SAFETY INSTRUCTIONS 10 Correct use The cooktop gets hot when in use and remains hot for a while af- ter being turned off. There is a potential hazard until the residual heatindicator goes out. WARNING NEVER use this cooktop as a space heater to heat or warm theroom. Doing so may result...
Page 14 - Cleaning and maintenance; Do not use a steam cleaner to clean the cooktop.; SAVE THESE INSTRUCTIONS AND REVIEW THEM PERIODICALLY
IMPORTANT SAFETY INSTRUCTIONS 14 Cleaning and maintenance Do not use a steam cleaner to clean the cooktop. The steam may reach electrical components and cause a short cir-cuit. Miele will guarantee to supply functional parts for a minimum of 10 years and up to 15 years following the discontinuat...
Page 15 - Caring for the environment; Disposal of your old appliance
Caring for the environment 15 Disposal of the packing mate-rial The cardboard box and packing materi-als protect the appliance during ship-ping. They have been designed to bebiodegradable and recyclable. Ensure that any plastic wrappings,bags, etc. are disposed of safely andkept out of the reach of ...
Page 16 - Overview; Cooktop; k j
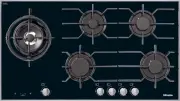
Overview 16 Cooktop KM 3054-1 g h i 8 . 8 . a c k j b d e f a Wok burner b Power burner c Economy burner d Normal burner e Normal burner f Grates g Symbols for allocation of knobs h In-operation/residual heat indicator i Kitchen timer control elements/indicators j Delete kitchen timer durations k Kn...
Page 17 - Control knobs; Wok burner
Overview 17 Control knobs Wok burner a b d c e a Burner off The gas supply is turned off b Strongest flame The outer and inner burners are on the highest setting c Strong flame The outer burner is on the lowest setting, the inner burner on the highest setting d Weak flame The outer bur...
Page 19 - Burner
Overview 19 Burner Wok burner a b c e f d a Outer burner cap b Inner burner cap c Burner head d Burner base e Thermocouple f Ignitor Economy, normal, and power burners a Burner cap b Burner head c Burner base d Thermocouple e Ignitor
Page 20 - Kitchen timer control elements/indicators; Sensor controls
Overview 20 Kitchen timer control elements/indicators Sensor controls a Activate system lock/set the time b Kitchen timer- On/Off- Switch between timer functions- Select a burner Displays/Indicator lights c Timer indicator d Burner timer indicatorA timer has been set for the burner e Time display ...
Page 21 - Included accessories; Wok ring
Overview 21 Included accessories The accessories supplied with your ap-pliance, as well as a range of optionalones, are available to order from Miele(see “Optional accessories”). Wok ring The Wok ring supplied with your appli-ance can be used in instances whereextra stability is required. It is part...
Page 22 - Before first use
Before first use 22 Cleaning the cooktop for thefirst time Before first use, wipe down the appli-ance with a damp cloth and dry it. Using a soft sponge, clean all remov-able burner parts with a solution ofwarm water and a small amount ofliquid dish soap. Dry the parts thor-oughly after cleaning ...
Page 23 - Cookware
Cookware 23 - Select cookware that fits the size of the burner:Large diameter = large burnerSmall diameter = small burner - A wok burner is particularly suitable for wok pans. Do not allow the baseof the wok pan to come into contactwith the burner. There must be a gapof at least 3/8" (1 cm) betw...
Page 25 - Energy saving tips; - Reduce the power setting once the
Energy saving tips 25 - Whenever possible, keep pots and pans covered while cooking. Doingso will prevent unnecessary heat loss. - Wide, shallow cookware heats up faster and is therefore preferable totall, narrow cookware. - Cook with as little water as possible. - Reduce the power setting once the ...
Page 26 - Operation; Fire hazard due to overheated; Rapid ignition system; - Rapid ignition without the need to; Turning the appliance on; The ignitor “clicks” and ignites the gas.
Operation 26 Fire hazard due to overheated food.Unattended food can overheat andignite.Do not leave the cooktop unattendedwhile it is being used. Rapid ignition system The cooktop is supplied with a rapid ig-nition system with the following fea-tures: - Rapid ignition without the need to hold the ...
Page 27 - Switching on during a power outage; Adjusting the flame
Operation 27 Switching on during a power outage In case of a power outage, the flamecan be ignited manually. Press in the relevant control knob andturn it counterclockwise to the largeflame symbol. Hold the control knob pressed downand light the gas at the burner with amatch. Keep the control ...
Page 28 - Switching off; Turn the knob clockwise to
Operation 28 Switching off Turn the knob clockwise to burner off. This stops the flow of gas and the flamegoes out. In-operation/residual-heat indi-cators The in-operation/residual heat indicatorlights up when a burner is ignited. Theygo out when the cooktop is switchedoff. If a burner is hot, ...
Page 29 - Kitchen timer; Timer; Setting
Kitchen timer 29 A duration of between 1 minute ( ) and 6 hours ( . ) can be set. Use the - sensor to reduce the time from . to , and the + sensor to in- crease the time from to . . The se- lection stops at . and . To continue making the setting, briefly remove yourfinder from th...
Page 30 - Setting the timer for a burner; Easy switch-off function; System lock, kitchen timer; Activating
Kitchen timer 30 Setting the timer for a burner A timer can be allocated for any burnerthat is switched on. This function canbe used on all burners at the sametime. Turn on the burner you wish to use. Keep touching the sensor control until the indicator light for this burnerstarts to flash. I...
Page 31 - Safety features; Ignition safety; burner off, the burner
Safety features 31 Ignition safety The cooktop is equipped with an igni-tion safety device. If a gas flame is ex-tinguished (e.g., by food boiling over orby a draft) and re-ignition does notwork, the gas supply is switched off.This prevents the release of gas. If youturn the knob to burner off, t...
Page 32 - Cleaning and care; Unsuitable cleaning agents
Cleaning and care 32 Danger of burning due to hot surfaces.The cooktop surface, grates, andburners will be hot after use.Allow the cooktop to cool down be-fore cleaning it. Risk of damage due to moisture ingress.The steam from a steam cleaning ap-pliance could reach electrical com-ponents and ca...
Page 33 - Cleaning the ceramic surface; Risk of damage caused by
Cleaning and care 33 The entire cooktop should be cleanedafter each use. Soften any stubborn soiling before-hand. Dry the cooktop after using water toclean it. This helps prevent lime de-posits. Cleaning the ceramic surface Risk of damage caused by pointed objects.The seal between the cookto...
Page 34 - Cleaning the grates
Cleaning and care 34 Cleaning the grates Remove the grates. Clean the grates in a dishwasher orwith a solution of warm water and alittle liquid dish soap applied with asoft sponge. Soften any stubbornsoiling beforehand. Dry the the grates thoroughly with aclean cloth. Cleaning the knobs The kn...
Page 35 - Cleaning the burner
Cleaning and care 35 Cleaning the burner Do not clean any parts of the burnerin a dishwasher. The surface of the burner cap will be-come more matte with time. This isquite normal and does not indicatedamage to the burner cap. The burner should be dismantled andthen cleaned only by hand using asolu...
Page 36 - Assembling the burner; Assembling the wok burner
Cleaning and care 36 Assembling the burner Assembling the economy, normal,and power burners Place the burner head onto the burner base so that the thermo- couple and the ignitor extend through their respective holes in theburner head. The burner head mustclick into place correctly. P...
Page 37 - Checking burning properties
Cleaning and care 37 Checking burning properties Ignite all burners to check that theyare operating correctly: - The flame must not go out on the lowest setting, or when the knob isturned quickly from the highest to thelowest setting. - On the highest setting, the flame must have a distinctive and...
Page 38 - Frequently asked questions; Problem
Frequently asked questions 38 Many malfunctions and faults that can occur in daily operation can be easily reme-died. You can save time and money in many cases, as you do not need to contactMiele Customer Service. Information to help you rectify faults yourself can be found at www.miele.com/ser-vice...
Page 41 - Optional accessories
Optional accessories 41 Miele offers a range of useful acces-sories, as well as cleaning and condi-tioning products for your appliance. These products can be easily orderedfrom the Miele webshop or your Mieledealer. Ceramic and stainless steelcleaner 250 mL Removes heavy soiling, lime scale, andalum...
Page 42 - Contact in the event of a fault
Customer Service 42 Contact in the event of a fault In the event of a fault which you cannot remedy yourself, please contact yourMiele dealer or Miele Customer Service. You can book a Miele Service Call online at www.miele.com/service. Contact information for Miele Customer Service can be found at t...
Page 43 - Installation; IMPORTANT SAFETY INSTRUCTIONS - INSTALLATION; Risk of damage caused by incorrect installation.
Installation *INSTALLATION* 43 IMPORTANT SAFETY INSTRUCTIONS - INSTALLATION Risk of damage caused by incorrect installation. Incorrect installation can damage the cooktop.The cooktop must only be installed by a qualified specialist. Damage from falling objects. Take care not to damage the cookto...
Page 44 - An air curtain or other overhead range hood, which operates by
Installation *INSTALLATION* 44 An air curtain or other overhead range hood, which operates by blowing a downward airflow onto a cooktop, shall not be used inconjunction with the cooktop unless the hood and cooktop havebeen designed and tested in accordance with the Standard for Do-mestic Gas Range...
Page 45 - Safety distances; Position
Installation *INSTALLATION* 45 Safety distances Position Dimensions Description 13" (330 mm) Maximum depth of wall cabinet 2" (50 mm) Minimum distance to back wall 18" (457 mm) Minimum safety distance to bottomedge of adjacent wall cabinet ≥ cooktop width See “Installation – Ins...
Page 46 - Installation notes; Damage caused by incorrect in-
Installation *INSTALLATION* 46 Installation notes Seal between cooktop and counter-top Damage caused by incorrect in- stallation.Using sealant under the cooktopcould result in damage to the cook-top and the countertop if the cook-top ever needs to be removed forservicing.Do not use sealant between...
Page 47 - Installation dimensions; Front
Installation *INSTALLATION* 47 Installation dimensions All dimensions in this instruction booklet are given in mm and inches. KM 3054-1 d (91 6 mm) 20 11/16" (526mm) 37 1/1 6" (7mm) (46mm) b ß 3/16" ( 29mm) 0 (379mm) (14mm) (14mm) 2 1/2" e 16 15/1 6" d 8 7/8" 5/8" c a +-1...
Page 48 - Preparing the countertop
Installation *INSTALLATION* 48 Installation Preparing the countertop Create the countertop cut-out. Re-member to maintain the minimumsafety distances (see “Installation” –“Safety distances”). Seal any cut surfaces on wooden countertops with a special varnish, silicone rubber, or resin to prevent...
Page 49 - Securing the cooktop
Installation *INSTALLATION* 49 Securing the cooktop Secure the cooktop using the brack-ets supplied. Checking for proper function After installing the appliance, ignite allburners to check that they are operat-ing correctly: - The flame must not go out on the lowest setting, or when the knob ...
Page 50 - Gas connection; Connection to the gas supply
Installation *INSTALLATION* 50 Gas connection Connection to the gas supply may only be performed by a duly au-thorized technician. This technician isresponsible for proper function at theinstallation site.In Massachusetts, the gas connec-tion may be performed only by a cer-tified gas installer. Th...
Page 52 - Gas pressure regulator
Installation *INSTALLATION* 52 Gas pressure regulator The included pressure regulator corre-sponds with the gas type of the appli-ance. Verify before installing. The adjusted pressure is:Natural gas 4“ w.c.LP gas 10” w.c. a Appliance b ½ " NPT gas connection c Regulator The regulator must be ins...
Page 53 - Burner ratings; Nominal ratings
Installation *INSTALLATION* 53 Burner ratings Nominal ratings Burner Gas type kW BTU/hr Economy burner Natural gasLiquid propane 1.110.97 3,7503,300 Normal burner Natural gasLiquid propane 1.701.88 5,8006,400 Power burner Natural gasLiquid propane 2.732.87 9,3009,800 Wok Natural gasLiquid propane 4....
Page 54 - Electrical connection
Installation *INSTALLATION* 54 Electrical connection ATTENTION: During installation, maintenance andrepair work, the appliance must bedisconnected from the electricitysupply. It is only completely isolatedfrom the electricity supply if the plugfuses have been fully unscrewed(where applicable), the...
Page 55 - Power cord and plug
Installation *INSTALLATION* 55 Power cord and plug The appliance is equipped with a flexi-ble power cord and a 3-prong ground-ing plug for your protection againstshock hazard. The plug must be in-serted into a properly grounded outlet. Do not cut or remove the grounding prong from this plug. Total...
Page 59 - National Headquarters; Canada; Headquarters and Miele Centre
9 Independence WayPrinceton, NJ 08540www.mieleusa.com U.S.A. Miele, Inc. National Headquarters Please have the model and serial numberof your appliance available whencontacting Customer Service. Canada ImporterMiele Limited Headquarters and Miele Centre Customer Support Phone: 888-99-MIELE (64353)[e...


 Miele APCL 043
User Manual
Miele APCL 043
User Manual
 Miele APWM 065
Installation Manual
Miele APWM 065
Installation Manual
 Miele APWM 070
Installation Manual
Miele APWM 070
Installation Manual
 Miele SC
Installation Manual
Miele SC
Installation Manual
 Miele PR
Installation Manual
Miele PR
Installation Manual
 Miele APCL 047
User Manual
Miele APCL 047
User Manual
 Miele PLW 8505
Installation Manual
Miele PLW 8505
Installation Manual
![Miele PT 7186 Vario [EL]](https://manualsarea.com/img/product/thumbs/180/69/3e/693e1219f5c0d53fde982888bd54a3ec.webp) Miele PT 7186 Vario [EL]
User Manual
Miele PT 7186 Vario [EL]
User Manual
 Miele CM/1
User Manual
Miele CM/1
User Manual
![Miele PLW 8617 [EL/S TH]](https://manualsarea.com/img/product/thumbs/180/fe/90/fe9010c5f8c3c4aada5d83b417c78507.webp) Miele PLW 8617 [EL/S TH]
Installation Manual
Miele PLW 8617 [EL/S TH]
Installation Manual
![Miele PWM 908 [EL DP MAR 3 AC 400-480V 50-60Hz]](https://manualsarea.com/img/product/thumbs/180/20/e5/20e5e929bcb336fc6b2f128d9c857a3d.webp) Miele PWM 908 [EL DP MAR 3 AC 400-480V 50-60Hz]
User Manual
Miele PWM 908 [EL DP MAR 3 AC 400-480V 50-60Hz]
User Manual
![Miele PWM 906 [EL DP MAR 3 AC 400-480V 50-60Hz]](https://manualsarea.com/img/product/thumbs/180/57/c8/57c81dd8d0abe05852b709a3fa9b80db.webp) Miele PWM 906 [EL DP MAR 3 AC 400-480V 50-60Hz]
Installation Manual
Miele PWM 906 [EL DP MAR 3 AC 400-480V 50-60Hz]
Installation Manual
![Miele PWM 906 [EL DP MAR 2N AC 400V 50-60Hz]](https://manualsarea.com/img/product/thumbs/180/ce/23/ce232ceeda728532882a2a2f56bf2abc.webp) Miele PWM 906 [EL DP MAR 2N AC 400V 50-60Hz]
User Manual
Miele PWM 906 [EL DP MAR 2N AC 400V 50-60Hz]
User Manual
![Miele PLW 8617 [EL TH]](https://manualsarea.com/img/product/thumbs/180/e8/4a/e84a63b24dca64279b26bca714985678.webp) Miele PLW 8617 [EL TH]
User Manual
Miele PLW 8617 [EL TH]
User Manual
![Miele PDR 908 [EL MAR 3N AC 400V 50-60Hz]](https://manualsarea.com/img/product/thumbs/180/05/b7/05b705998b251f92b271e908423e1ecb.webp) Miele PDR 908 [EL MAR 3N AC 400V 50-60Hz]
Installation Manual
Miele PDR 908 [EL MAR 3N AC 400V 50-60Hz]
Installation Manual
![Miele PLW 8615 [EL CT]](https://manualsarea.com/img/product/thumbs/180/70/ff/70ff37b9174e78db8d00ddce8cf08ee3.webp) Miele PLW 8615 [EL CT]
Installation Manual
Miele PLW 8615 [EL CT]
Installation Manual
![Miele PLW 8616 [EL/S]](https://manualsarea.com/img/product/thumbs/180/37/f4/37f4255dee3c9942a13241f3ccd5fe93.webp) Miele PLW 8616 [EL/S]
Installation Manual
Miele PLW 8616 [EL/S]
Installation Manual
![Miele PWM 916 [EL DV DD SOM]](https://manualsarea.com/img/product/thumbs/180/21/65/21657a907bb735f3acf5a7bdbbc78c8a.webp) Miele PWM 916 [EL DV DD SOM]
Manual
Miele PWM 916 [EL DV DD SOM]
Manual
![Miele PFD 104 SCVi XXL [120V]](https://manualsarea.com/img/product/thumbs/180/0a/20/0a20c04430aaa9be6a985688f5bb5580.webp) Miele PFD 104 SCVi XXL [120V]
Installation Manual
Miele PFD 104 SCVi XXL [120V]
Installation Manual
![Miele PDR 507 HP [MAR]](https://manualsarea.com/img/product/thumbs/180/58/9e/589e9ba94b88174fa0cdb27b4bbaac5b.webp) Miele PDR 507 HP [MAR]
User Manual
Miele PDR 507 HP [MAR]
User Manual