Page 2 - Contents; IMPORTANT SAFETY INSTRUCTIONS
Contents 2 IMPORTANT SAFETY INSTRUCTIONS ............................................................ 5 Sustainability and environmental protection .................................................. 15 Overview ............................................................................................
Page 3 - Operation
Contents 3 Operation ............................................................................................................ 40 Safety notes for operation ................................................................................... 40Switching the cooktop on ................................
Page 5 - Appropriate use; This cooktop is intended for domestic use and use in other similar
IMPORTANT SAFETY INSTRUCTIONS 5 This cooktop complies with all relevant local and national safetyrequirements. Inappropriate use can, however, lead to personal in-jury and material damage. Read the operating and installation instructions carefully beforeusing the cooktop. They contain important info...
Page 6 - Safety with children
IMPORTANT SAFETY INSTRUCTIONS 6 Safety with children Do not leave children unattended: Children should not be alone or unsupervised in the area where the appliance is installed. Do not al-low them to sit or stand on the appliance. Be sure to supervise any children in the vicinity of the cooktop,...
Page 7 - Technical safety
IMPORTANT SAFETY INSTRUCTIONS 7 Technical safety Proper installation: Make sure that your appliance has been in- stalled correctly and that it has been grounded by a qualified techni-cian. Maintenance by the user: Never repair or replace any part of the appliance unless the instructions specific...
Page 9 - The appliance must be completely disconnected from the electric-
IMPORTANT SAFETY INSTRUCTIONS 9 The appliance must be completely disconnected from the electric- ity supply during installation, maintenance and repair work. Ensurethat power is not supplied to the appliance until after it has been in-stalled or until any maintenance or repair work has been carrie...
Page 10 - Correct use
IMPORTANT SAFETY INSTRUCTIONS 10 Correct use The cooktop gets hot when in use and remains hot for a while af- ter being turned off. There is a potential hazard until the residual heatindicator goes out. Never leave the appliance unattended at high heat settings – Boilover causes smoking and gre...
Page 14 - Cleaning and maintenance; Do not use a steam cleaner to clean the cooktop.
IMPORTANT SAFETY INSTRUCTIONS 14 Cleaning and maintenance Do not use a steam cleaner to clean the cooktop. The steam may reach electrical components and cause a short cir-cuit.
Page 15 - Sustainability and environmental protection; - Cook in covered pots and pans if; Disposal of your old appliance
Sustainability and environmental protection 15 Energy-saving tips - Cook in covered pots and pans if possible. This prevents heat escapingunnecessarily. - Cook with as little water as possible. - Once food has come to a boil or the pan is hot for frying, reduce the heatto a lower power level. - Use ...
Page 16 - Overview; Cooktop; Cooking zone with TwinBooster
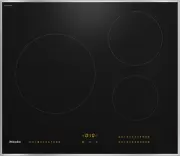
Overview 16 Cooktop KM 7720 FR a Cooking zone with TwinBooster b Cooking zone with TwinBooster c Cooking zone with TwinBooster d Controls and indicators
Page 19 - Controls and display
Overview 19 Controls and display b a c d e h k g i f j a Stop & Go sensor controlFor stopping/starting a cooking process in progress b Cooktop On/Off sensor control c Wipe protection sensor controlFor locking the sensor controls d Keeping warm sensor controlFor activating/deactivating the Keepin...
Page 20 - Cooking zone data; Cooking
Overview 20 Cooking zone data KM 7720 FR Cooking zone Ø in inches (cm) 1 Max. rating in watts for 208 V 2 Linked cooking zone 3 7"–11" (18–28 cm) NormalTwinBooster, level 1TwinBooster, level 2 2,4002,7503,350 - 5 1/2"–7 1/2" (14–19 cm) NormalTwinBooster, level 1TwinBooster, leve...
Page 24 - Total
Overview 24 KM 7740 FR Cooking zone Ø in inches (cm) 1 Rating in watts for 208 V 2 Linked cooking zone 3 4"–6 1/2" (10–16 cm) NormalTwinBooster, level 1TwinBooster, level 2 1,3001,5502,000 6 1/2"–9"16–23 cm (16–23 cm) NormalTwinBooster, level 1TwinBooster, level 2 2,1002,7503,...
Page 26 - Power management system; Total power
Overview 26 Power management system Total power The cooktop has a maximum total per-mitted power consumption which can-not be exceeded for safety reasons. The higher the total permitted powerconsumption of the cooktop, the morepower levels/functions can be used onall cooking zones at the same time. ...
Page 27 - Cooktop when switched off
Overview 27 Operation Cooktop when switched off When the cooktop is switched off, youcan only see the printed symbols for thesensor controls and the numerical dis-play. More sensor controls light upwhen the cooktop is switched on. Operation a Sensor controls and indicators This glass-ceramic cooktop...
Page 28 - Networking
Overview 28 Networking Your cooktop is equipped with an inte-grated WiFi module. The cooktop canbe connected to your home WiFi net-work or simply to your Miele ventilationhood. Miele@home After installing the Miele app on a mo-bile device, you can do the following: - call up information on the opera...
Page 29 - Functions; Use this function if there is a dan-
Overview 29 Functions Con@ctivity 3.0 Con@ctivity 3.0 is the direct communi-cation system between your cooktopand a Miele ventilation hood. Communi-cation is achieved by means of net-working. Con@ctivity 3.0 enables theventilation hood to operate automati-cally depending on the operating statusof yo...
Page 30 - sensor control is not
Overview 30 Safety lock The safety lock is activated while thecooktop is switched on. When thesafety lock is activated, the cooktopcan only be operated under certainconditions. Keeping warm This function enables food to be keptwarm after it has finished cooking. The maximum duration for keeping food...
Page 31 - Sensor controls are covered
Overview 31 Safety shut-off Sensor controls are covered Your cooktop will turn off automaticallyif one or several of the sensor controlsremain covered for longer than 10 sec-onds; for example, by finger contact,food boiling over, or an object. flashes briefly above the sensor control and a ton...
Page 32 - Overheating protection
Overview 32 Overheating protection In order to prevent the cooktop frombeing damaged by excessive tempera-tures, the overheating protection mech-anism intervenes in one of the followingways: Overheating protection measures - If the Booster function is switched on, it will stop. - The set power level...
Page 33 - Commissioning; Unpacking the cooktop; Wipe the cooktop dry.
Commissioning 33 Unpacking the cooktop Please stick the extra data plate forthe appliance supplied with this doc-umentation in the space provided inthe “Customer Service” section ofthis manual. Remove any protective foil and stick-ers. Cleaning the cooktop for thefirst time Before using it for...
Page 34 - Installing the Miele app
Commissioning 34 Miele@home Installing the Miele app The ability to use the Miele app de-pends on the availability of theMiele@home service in your country.For information about availability,please visit www.miele.com. The Miele app is available free ofcharge from the Apple App Store ® or from the G...
Page 35 - Connecting via the Miele app
Commissioning 35 Connecting via the Miele app - A home WiFi network is available. - The signal of your WiFi network is sufficiently strong in the placewhere your cooktop is installed. - There is no direct WiFi connection between the cooktop and a Mieleventilation hood (Con@ctivity 3.0). - The Miele ...
Page 36 - Connecting via WPS
Commissioning 36 Connecting via WPS - A home WiFi network is available. - The signal of your WiFi network is sufficiently strong in the placewhere your cooktop is installed. - There is no direct WiFi connection between the cooktop and a Mieleventilation hood (Con@ctivity 3.0). - You must have a WPS ...
Page 37 - Canceling the process
Commissioning 37 Canceling the process Touch any sensor control. Resetting settings Reset the settings if you are disposingof your cooktop, selling it, or putting aused cooktop into operation. This is theonly way to ensure that all personaldata has been removed and the previ-ous owner will no long...
Page 38 - Availability of the Wi-Fi connection
Commissioning 38 Establishing a direct connec-tion with the ventilation hood The cooktop requires max. 2 W in net-worked standby. Availability of the Wi-Fi connection The Wi-Fi connection shares a fre-quency range with other appliances (in-cluding microwave ovens and remotecontrol toys). This can ca...
Page 40 - Safety notes for operation
Operation 40 Safety notes for operation Fire hazard due to overheated food. Unattended food can overheat and ignite. Do not leave the cooktop unattended while it is being used. Risk of burning or scalding due to hot cooking zones. The cooking zones will be hot after use. Do not touch the cooking...
Page 41 - Switching the cooktop on; Switching off the cooktop; Power level; Setting the power level
Operation 41 Switching the cooktop on Touch the sensor control. Additional sensor controls will light up. If no further entry is made, the cook-top will turn itself off after a few sec-onds for safety reasons. Switching off a cooking zone/the cooktop Switching off the cooktop To switch off th...
Page 42 - Booster; Activating the Booster function
Operation 42 Booster Activating the Booster function When the Booster function is activated,the settings for the linked cooking zonemay be changed (see “Overview –Power management system”). The Booster function can be used on amaximum of 2 cooking zones at thesame time. The Booster function is activ...
Page 43 - Activating Auto heat-up
Operation 43 Auto heat-up The heat-up time depends on whichcontinued cooking level has been cho-sen: Continued cook- ing level* Heat-up time [min:sec] 1 approx. 00:15 1. approx. 00:15 2 approx. 00:15 2. approx. 00:15 3 approx. 00:25 3. approx. 00:25 4 approx. 00:50 4. approx. 00:50 5 approx. 2:00 5....
Page 44 - Timer; Setting timer durations
Operation 44 Timer Setting timer durations A duration of between 1 minute ( : ) and 9 hours 59 minutes ( : ) can be set. Durations of up to 59 minutes areshown in minutes (00:59) and durationsof more than 60 minutes are shown inhours and minutes. Durations are entered: - using the left or fron...
Page 46 - sensor control (kitchen
Operation 46 Using both timer functions at thesame time If you use both functions simultane-ously, the shortest time is always dis-played. The sensor control (kitchen timer) or the indicator light of the cook-ing zone with the shortest switch-offtime pulsates. If you want to show the times left...
Page 47 - System lock; Activating the system lock; Safety lock; Activating the safety lock
Operation 47 System lock Activating the system lock All sensor controls are locked. A setkitchen timer will continue to countdown. Touch the sensor control for 6 seconds. The seconds can be seen countingdown in the timer display. When thistime has elapsed, will appear in the timer display....
Page 48 - Keeping warm; Application; Wipe protection; Activating wipe protection
Operation 48 Keeping warm Activating/deactivating the Keepingwarm function Touch the sensor control for the cooking zone you wish to use. Keeping warm temperatures for vari-ous applications A keeping warm temperature of 185°F(85°C) is set as standard. You canchange the keeping warm temperature(...
Page 49 - Cooktop data; Displaying the software version
Operation 49 Cooktop data Displaying the model identifier/serialnumber There must not be any cookware onthe cooktop. Switch the cooktop on. Press the 0 sensor control on any nu-merical display. Press the 0 and 4 sensor controls onthe numerical display at the sametime for 6 seconds. Numbers wil...
Page 50 - Setting ranges
Setting ranges 50 The cooktop is programmed with 9 power levels at the factory. If you wish to fine-tune a setting, you can extend the power level range to 17 power levels (see “Cus-tomizing settings”). Setting range Extended set- ting (17 power lev- els) Melting butter, chocolate, etc.Dissolving ge...
Page 51 - Good to know; How induction cooktops work
Good to know 51 How induction cooktops work An induction coil is located under eachcooking zone. The coil creates a mag-netic field that reacts directly with thebase of the pan and heats it up. Thecooking zone itself is heated up indi-rectly by the heat given off by the pan. An induction cooking zon...
Page 52 - Cookware; Suitable cookware
Good to know 52 Cookware Suitable cookware - stainless steel with a magnetic base - enameled steel - cast iron The composition of the pan base canaffect the evenness of the cooking re-sults (e.g., when making pancakes). Thebase of the pan must be able to distrib-ute the heat evenly. Cookware with ab...
Page 53 - Cookware tips
Good to know 53 Cookware tips - Position the cookware as centrally as possible on the relevant cookingzone/cooking area. - To make optimum use of the cooking zones, choose cookware with a suit-able base diameter (see “Overview –Cooking zone data”). If the cookwareis too small it will not be recogniz...
Page 54 - Customizing settings; Accessing programming mode
Customizing settings 54 Accessing programming mode The sensor control is located ap- prox. 1/2" (1 cm) (index finger width) tothe left of the sensor control. The cooktop is switched off. Touch and hold the and sensor controls until the sensor control lights up and appears in t...
Page 58 - Cleaning and care; Safety notes on cleaning and care
Cleaning and care 58 Safety notes on cleaning and care Danger of burning due to hot surfaces. All parts of the cooktop may be hot after use. Turn off the cooktop. Allow the cooktop to cool down before cleaning it. All surfaces could be discolored or damaged if unsuitable cleaningagents are used or...
Page 59 - When to clean; - stain or rust removers
Cleaning and care 59 When to clean The entire cooktop should be cleanedafter each use. Removing light soiling Clean the entire ceramic surface ofthe cooktop with a damp, soft clothand a solution of water and a littlewashing-up liquid. Please follow thecleaning-agent manufacturer’s in-structions....
Page 60 - Frequently asked questions; Messages in the display
Frequently asked questions 60 Many malfunctions and faults that can occur in daily operation can be easily reme-died. You can save time and money in many cases, as you do not need to contactMiele Customer Service. Information to help you rectify faults yourself can befound at www.miele.com/service. ...
Page 61 - Problem
Frequently asked questions 61 Problem Possible cause and solution will flash alternately with , , or in the timer display. The fan is blocked or defective. Make sure it has not been blocked by an object. Remove the obstruction. If this fault message continues to appear in thedi...
Page 62 - Unexpected behavior
Frequently asked questions 62 Unexpected behavior Problem Possible cause and solution The symbol lights up or flashes alternatelywith the set power levelor in one of the cook- ing zone indicators. No cookware is present on the cooking zone.Unsuitable cookware is present on the cooking zone.The b...
Page 64 - Unsatisfactory results; General problems or technical faults
Frequently asked questions 64 Unsatisfactory results Problem Possible cause and solution Auto Heat-up is turnedon, but the food doesnot start cooking. Large amounts of food are being heated. Start cooking at the highest power level, then re-duce the power level manually. The pan is not conducting ...
Page 65 - Customer Service; Contact in the event of a fault
Customer Service 65 Information to help you rectify faults yourself and about Miele spare parts can befound at www.miele.com/service. Contact in the event of a fault In the event of a fault which you cannot remedy yourself, please contact yourMiele dealer or Miele Customer Service. You can book a Mi...
Page 66 - Optional accessories; Microfiber cloth
Optional accessories 66 Miele offers a range of useful acces-sories, as well as cleaning and condi-tioning products for your appliance. These products can be easily orderedfrom the Miele webshop. Cookware Miele offers a wide range of cookware.These have all been optimized for Mieleappliances in term...
Page 67 - Installation; Safety notes for installation; Risk of damage caused by incorrect installation.
Installation *INSTALLATION* 67 Safety notes for installation Risk of damage caused by incorrect installation. Incorrect installation can damage the cooktop. The cooktop must only be installed by a qualified specialist. Risk of electric shock from voltage. Incorrect connection to the power supply...
Page 68 - Damage caused by incorrect installation.
Installation *INSTALLATION* 68 Damage caused by incorrect installation. Using sealant under the cooktop could result in damage to thecooktop and the countertop if the cooktop ever needs to be re-moved for servicing. Do not use sealant between the cooktop and the countertop.The sealing strip under ...
Page 70 - Safety distances; Safety distance above the cooktop
Installation *INSTALLATION* 70 Safety distances Safety distance above the cooktop She safety distance specified by themanufacturer of the ventilation hoodmust be maintained between the cook-top and the ventilation hood above it. When two or more appliances whichhave different safety distances are in...
Page 71 - back
Installation *INSTALLATION* 71 Safety distance behind and to theside of the cooktop The minimum safety distances shownbelow must be maintained between theappliance and a tall cabinet or wall: - between the back of the counter- top cut-out and the rear edge of thecountertop:2" (50 mm) and - o...
Page 72 - Minimum safety distance underneath the cooktop; accommodate the power supply cord
Installation *INSTALLATION* 72 Minimum safety distance underneath the cooktop To ensure sufficient ventilation to the cooktop, a minimum safety distance must beleft between the underside of the cooktop and any oven, protective base, ordrawer. The minimum safety distancebetween the underside of the c...
Page 73 - Safety distance from the wall covering
Installation *INSTALLATION* 73 Safety distance from the wall covering If a wall covering is installed, a minimum safety distance must be maintained be-tween the countertop cut-out and the covering. High temperatures can alter ordamage these materials. ' ( & ) l * a Wall frame b Dimension x = thi...
Page 74 - Installation dimensions; Front
Installation *INSTALLATION* 74 Installation dimensions KM 7720 FR All dimensions are given in mm and inches. The superscript numbers after the cut-out di-mensions are the tolerances for the cut-out. a Front b Flexible metal hose with power cords,L = 4' (1,200 mm)
Page 77 - Reinstalling the cooktop; Seal any cut surfaces on
Installation *INSTALLATION* 77 Reinstalling the cooktop Create the countertop cut-out. Re-member to maintain the minimumsafety distances (see “Installation –Safety distances”). Seal any cut surfaces on wooden countertops with a special varnish, silicone rubber, or resin to prevent thewood from s...
Page 78 - Electrical connection; Damage through improper work.
Installation *INSTALLATION* 78 Electrical connection Damage through improper work. Installation, repair, and maintenancework performed by by unqualifiedpersons can cause considerabledanger to users.Miele cannot be held liable for anydamage arising as a result of suchwork.Installation, repair and m...
Page 79 - Connection
Installation *INSTALLATION* 79 Connection Ensure that the connection data onthe data plate (voltage, frequency,and fuse rating) match those of yourelectrical supply. The data plate is located underneaththe appliance. The appliance is approved and readyfor connection to a grounded connectorwith thr...
Page 80 - Declaration of conformity
Installation *INSTALLATION* 80 Declaration of conformity Supplier's Declaration of Conformity 47 CFR § 2.1077 Compliance Informa-tion Induction Cooktop Unique Identifier: Miele Model: KM7720; KM7730; KM7740 Responsible Party Miele, Inc.National Headquarters9 Independence WayPrinceton, NJ 08540Phone:...
Page 83 - National Headquarters; Canada; Headquarters and Miele Centre
9 Independence WayPrinceton, NJ 08540www.mieleusa.com U.S.A. Miele, Inc. National Headquarters Please have the model and serial numberof your appliance available whencontacting Customer Service. Canada ImporterMiele Limited Headquarters and Miele Centre Customer Support Phone: 888-99-MIELE (64353)[e...


 Miele APCL 043
User Manual
Miele APCL 043
User Manual
 Miele APWM 065
Installation Manual
Miele APWM 065
Installation Manual
 Miele APWM 070
Installation Manual
Miele APWM 070
Installation Manual
 Miele SC
Installation Manual
Miele SC
Installation Manual
 Miele PR
Installation Manual
Miele PR
Installation Manual
 Miele APCL 047
User Manual
Miele APCL 047
User Manual
 Miele PLW 8505
Installation Manual
Miele PLW 8505
Installation Manual
![Miele PT 7186 Vario [EL]](https://manualsarea.com/img/product/thumbs/180/69/3e/693e1219f5c0d53fde982888bd54a3ec.webp) Miele PT 7186 Vario [EL]
User Manual
Miele PT 7186 Vario [EL]
User Manual
 Miele CM/1
User Manual
Miele CM/1
User Manual
![Miele PLW 8617 [EL/S TH]](https://manualsarea.com/img/product/thumbs/180/fe/90/fe9010c5f8c3c4aada5d83b417c78507.webp) Miele PLW 8617 [EL/S TH]
Installation Manual
Miele PLW 8617 [EL/S TH]
Installation Manual
![Miele PWM 908 [EL DP MAR 3 AC 400-480V 50-60Hz]](https://manualsarea.com/img/product/thumbs/180/20/e5/20e5e929bcb336fc6b2f128d9c857a3d.webp) Miele PWM 908 [EL DP MAR 3 AC 400-480V 50-60Hz]
User Manual
Miele PWM 908 [EL DP MAR 3 AC 400-480V 50-60Hz]
User Manual
![Miele PWM 906 [EL DP MAR 3 AC 400-480V 50-60Hz]](https://manualsarea.com/img/product/thumbs/180/57/c8/57c81dd8d0abe05852b709a3fa9b80db.webp) Miele PWM 906 [EL DP MAR 3 AC 400-480V 50-60Hz]
Installation Manual
Miele PWM 906 [EL DP MAR 3 AC 400-480V 50-60Hz]
Installation Manual
![Miele PWM 906 [EL DP MAR 2N AC 400V 50-60Hz]](https://manualsarea.com/img/product/thumbs/180/ce/23/ce232ceeda728532882a2a2f56bf2abc.webp) Miele PWM 906 [EL DP MAR 2N AC 400V 50-60Hz]
User Manual
Miele PWM 906 [EL DP MAR 2N AC 400V 50-60Hz]
User Manual
![Miele PLW 8617 [EL TH]](https://manualsarea.com/img/product/thumbs/180/e8/4a/e84a63b24dca64279b26bca714985678.webp) Miele PLW 8617 [EL TH]
User Manual
Miele PLW 8617 [EL TH]
User Manual
![Miele PDR 908 [EL MAR 3N AC 400V 50-60Hz]](https://manualsarea.com/img/product/thumbs/180/05/b7/05b705998b251f92b271e908423e1ecb.webp) Miele PDR 908 [EL MAR 3N AC 400V 50-60Hz]
Installation Manual
Miele PDR 908 [EL MAR 3N AC 400V 50-60Hz]
Installation Manual
![Miele PLW 8615 [EL CT]](https://manualsarea.com/img/product/thumbs/180/70/ff/70ff37b9174e78db8d00ddce8cf08ee3.webp) Miele PLW 8615 [EL CT]
Installation Manual
Miele PLW 8615 [EL CT]
Installation Manual
![Miele PLW 8616 [EL/S]](https://manualsarea.com/img/product/thumbs/180/37/f4/37f4255dee3c9942a13241f3ccd5fe93.webp) Miele PLW 8616 [EL/S]
Installation Manual
Miele PLW 8616 [EL/S]
Installation Manual
![Miele PWM 916 [EL DV DD SOM]](https://manualsarea.com/img/product/thumbs/180/21/65/21657a907bb735f3acf5a7bdbbc78c8a.webp) Miele PWM 916 [EL DV DD SOM]
Manual
Miele PWM 916 [EL DV DD SOM]
Manual
![Miele PFD 104 SCVi XXL [120V]](https://manualsarea.com/img/product/thumbs/180/0a/20/0a20c04430aaa9be6a985688f5bb5580.webp) Miele PFD 104 SCVi XXL [120V]
Installation Manual
Miele PFD 104 SCVi XXL [120V]
Installation Manual
![Miele PDR 507 HP [MAR]](https://manualsarea.com/img/product/thumbs/180/58/9e/589e9ba94b88174fa0cdb27b4bbaac5b.webp) Miele PDR 507 HP [MAR]
User Manual
Miele PDR 507 HP [MAR]
User Manual