Page 3 - Contents; Language
Contents 3 PRECAUTIONS TO AVOID POSSIBLE EXPOSURE TO EXCESSIVEMICROWAVE ENERGY ............................................................................................... 2 IMPORTANT SAFETY INSTRUCTIONS ................................................................... 7 Overview .................
Page 4 - Main and submenus
Contents 4 Date .................................................................................................................................. 36 Lighting............................................................................................................................. 37 Start screen ...
Page 7 - IMPORTANT SAFETY INSTRUCTIONS; Appropriate use
IMPORTANT SAFETY INSTRUCTIONS When using the appliance, follow basic safety precautions, including thefollowing:Read all instructions before installation and use of the oven to preventaccidents and machine damage.WARNING - To reduce the risk of burns, electric shock, fire, injury to persons,or expos...
Page 8 - Safety with children
IMPORTANT SAFETY INSTRUCTIONS This oven can only be used by people with reduced physical, sensory, or mental capabilities or lack of experience and knowledge ifthey are supervised while using it.They may only use it unsupervised if they have been shown how todo so in a safe manner. They must be ab...
Page 9 - Door; Technical safety
IMPORTANT SAFETY INSTRUCTIONS If you tap the Door sensor button, the door will fully open automatically. In doing so, it can knock against small children oranimals, for example.When opening the door, make sure that there are no people orobjects in the area around the door. Technical safety This...
Page 11 - Correct use
IMPORTANT SAFETY INSTRUCTIONS The oven requires a sufficient supply of cool air for efficient operation. Make sure that the supply of cool air is not hindered in anyway (e.g., by installing heat insulation strips in the cabinet niche). Inaddition, the required supply of cool air must not be excess...
Page 14 - This is
IMPORTANT SAFETY INSTRUCTIONS The oven floor can become damaged by items being pushed around on it. When placing pots, pans, or dishware on the oven floor,do not push them around. Risk of injury caused by steam. Pouring a cold liquid onto a hot surface creates steam, which can cause severe scald...
Page 16 - Always; The following applies to stainless steel surfaces:
IMPORTANT SAFETY INSTRUCTIONS Plastic containers which are not heat-resistant melt and may ignite at high temperatures and can damage the oven.Use only plastic containers that are suitable for use in an oven whenusing operating modes that do not use microwave power. Follow themanufacturer ’s instr...
Page 17 - Cleaning and care; The following applies to matte glass surfaces:; Accessories
IMPORTANT SAFETY INSTRUCTIONS Magnets can cause scratches. Do not use the stainless steel surface as a magnetic notice board. Cleaning and care Risk of injury due to electric shock. The steam from a steam cleaning appliance could reach live electrical components and causea short circuit. Never u...
Page 18 - Overview; Oven
Overview Oven a Controls b Browning /Broiling element c Connection socket for the probe d 3 shelf levels for the glass tray and wire rack e Convection fan with heating element f Front frame with data plate g Door 18
Page 19 - Control panel; Remote
Control panel 19 a Recessed On/Off button For turning the oven on and off b Optical interface(for Miele Service only) c Remote sensor button For controlling the oven via yourmobile device d Minute + sensor button For starting the Quick Microwavefunction e Touch displayFor displaying information...
Page 20 - The
Control panel 20 On/Off button The On/Off button is recessed and reacts to touch.Use this button to turn the oven on andoff. Proximity sensor (MotionReact) The proximity sensor detects when youapproach the touch display, e.g., withyour hand or body.If you have activated the correspondingsettings,...
Page 21 - Sensor buttons; Sensor button Function
Control panel Sensor buttons The sensor buttons react to touch. Every tap of a sensor button is confirmed withan audible keypad tone. You can turn this keypad tone off by selecting the Volume | Keypad Tone | Off setting. If you want the sensor buttons to respond even when the oven is turned off,...
Page 22 - Touch display; header; center; OK
Control panel Touch display The sensitive surface of the touch display can be scratched by pointed or sharpobjects, e.g., pens.Only touch the display with your fingers.Make sure that water cannot get behind the touch display. The touch display is split into multiple areas. Operating Modes 12:00 Auto...
Page 23 - Symbols; The following symbols may appear on the display:; Symbol
Control panel Symbols The following symbols may appear on the display: Symbol Meaning This symbol indicates that there is additional information andadvice about using the appliance. Select OK to confirm the information. … This indicates that there are more menu options available, whichare not vi...
Page 24 - Using the appliance; orange; Selecting a menu option; Changing a setting in a list
Using the appliance 24 You operate the oven via the touchdisplay by tapping the menu option youwant.Each time you tap a possible option, therelevant characters (word and/orsymbol) will light up orange . Fields for confirming an operating stepare highlighted in green (e.g., OK ). Selecting a menu opt...
Page 26 - Features; Data plate; - Operating and installation instructions; Glass tray; use the glass tray with the; operating mode, even if
Features 26 A list of the models described in theseoperating and installation instructionscan be found on the back page. Data plate The data plate located on the frontframe of the oven is visible when thedoor is open.The data plate states the model number,the serial number, and connection data(volta...
Page 27 - Wire rack with non-tip safety notches; The wire rack is; not; suitable for use with; Danger of injury caused by hot; Using the wire rack
Features 27 Wire rack with non-tip safety notches The wire rack is not suitable for use with the Microwave operating mode. You can use the wire rack for all otheroperating modes which use or do notuse microwave power. Danger of injury caused by hot surfaces.The wire rack gets hot during cooki...
Page 29 - Accessories for cleaning and care; Safety features; System lock; PerfectClean treated surfaces; tray
Features 29 Accessories for cleaning and care - Opener The opener can be used to lever thedoor open during a power failure. Todo so, push the opener at an angleinto the gap on the outside edge ofthe door at the top between thecontrol panel and the door. Safety features - System lock (see “Settin...
Page 30 - Before first use; Availability of the Wi-Fi connection
Before first use 30 Miele@home Your oven is equipped with anintegrated WiFi module. To use this feature, you will need: - A WiFi network- The Miele app- A Miele user account. You can create a user account via the Miele app. The Miele app will guide you as youconnect your oven to your home WiFinetwor...
Page 31 - Basic settings
Before first use 31 Basic settings You must make the following settingsbefore starting up for the first time. Youcan change these settings again at alater time (see “Settings”). Risk of injury caused by hot surfaces.The oven gets hot during operation.For safety reasons, only use the ovenwhen it ha...
Page 33 - Settings; Settings overview; Menu option
Settings Settings overview Menu option Available settings Language ... | deutsch | english | ... Location Time Display On * | Off | Night dimming Clock type Analog * | Digital Clock format 24 h | 12 h (am/pm) * Set DateLighting On“On” for 15 seconds * Off Start screen Main menu * Operating mod...
Page 36 - Opening the “Settings” menu; Display; Date
Settings 36 Opening the “Settings” menu In the Settings menu, you can personalize your oven by adapting thefactory default settings to suit yourrequirements. From the main menu: Select Settings . Select the setting you want. You can check settings or change them. You cannot change sett...
Page 37 - Lighting; Light; Start screen; Back; Brightness
Settings 37 When the oven is turned off, the datewill only appear on the display if the Time | Clock type | Digital setting has been selected. Lighting - On The oven interior lighting is turned onduring the entire cooking process. - “On” for 15 seconds The oven interior lighting turns off15 secon...
Page 38 - Volume; Buzzer Tones; Units of Measurement; Weight; Quick Microwave
Settings 38 Volume Buzzer Tones If audible signals are turned on, anaudible signal will sound when the settemperature is reached and at the endof a set time. The volume of the audible signals isrepresented by a segment bar. - Maximum volume - Audible signals are switc...
Page 39 - Recommended temperatures; Recommended power levels
Settings 39 - Off The Booster function is turned off during the preheating phase of acooking program. Only the heatingelements for the selected operatingmode are used to preheat the ovencompartment. You can also use the pull-down menuto turn the Booster function on or off for a cooking program. Re...
Page 40 - Switch the light on; Switch the appliance on; Safety; System Lock; for at; Sensor Lock; The sensor lock is active. Touch
Settings 40 Proximity sensor (MotionReact) The proximity sensor detects when youapproach the touch display, e.g., withyour hand or body. If you want the proximity sensor torespond even when the oven is turnedoff, select the Display | QuickTouch | On setting. Switch the light on - during cooking p...
Page 41 - Furniture front recognition
Settings 41 - Off The sensor lock is not active. Allsensor buttons react to touch asnormal. Furniture front recognition - On Furniture front recognition isactivated. Using the proximity sensor,the oven automatically detectswhether the cabinet door is closed. If the cabinet door is closed, the oventu...
Page 42 - Activating MobileStart; SuperVision display
Settings 42 Remote Control If you have installed the Miele app onyour mobile device, have access to theMiele@home system, and haveactivated the remote control function( On ), you can use the MobileStart function to retrieve information on ovencooking programs that are in progress orto end a program ...
Page 43 - Activating /deactivating
Settings 43 RemoteUpdate The RemoteUpdate menu option is only displayed and can only be selected ifthe requirements for usingMiele@home have been met (see“Before using for the first time –Miele@home”). The RemoteUpdate function is used forupdating the software in your oven. If anupdate is available...
Page 44 - Demo Mode
Settings 44 Electrical version You can set the voltage variant. Thesetting must correspond to the voltageof your domestic electrical supply. Calibrate temperature You can change the temperature inincrements in all operating modes andautomatic programs so that it is higheror lower in the oven compart...
Page 45 - Using the Alarm function; Setting the alarm; Changing an alarm; Deleting an alarm
Alarm + Timer 45 Using the Timer sensor button, you can set a timer (e.g., for boiling eggs) or analarm for a specific time. Two alarms, two timers, or an alarmand a timer can be set simultaneously. Using the Alarm function The alarm can be used to specify a particular time for an audible signal...
Page 46 - Using the Timer function; Setting the timer; Changing the timer; Deleting the timer
Alarm + Timer 46 Using the Timer function The timer can be used to time other activities in the kitchen, e.g., boilingeggs.The timer can also be used at the sametime as a cooking program for which thestart and finish times have been set(e.g., as a reminder to stir the food oradd seasoning, etc.)....
Page 47 - Menu
Main and submenus As different countries have different preferences when it comes to preparing food,the temperatures in °F and °C may not match. The temperatures are defined asthey are specified in the table. Menu Recommended value Range Operating Modes Convection Bake Convection Roast 3...
Page 49 - Microwave operation; How it works; Advantages of the microwave oven; Suitable dishware
Microwave operation 49 How it works The oven contains a magnetron thatconverts electrical energy intoelectromagnetic waves (microwaves).These microwaves are distributedevenly throughout the ovencompartment and are also reflected bythe metal walls inside the oven. The microwaves penetrate the foodfro...
Page 51 - supplied
Microwave operation 51 Tip: Metal tins are less suitable for operating modes which use microwavepower because the metal reflects themicrowaves. The microwaves only reachthe cake from above, which extends thebaking duration. If you use metal tins,place the tin on the glass tray so that itcannot touch...
Page 52 - Unsuitable dishware; Testing dishware
Microwave operation 52 Unsuitable dishware Moisture can collect in the hollowspaces on dishware and lids withhollow handles or knobs. When themoisture evaporates, pressure canbuild up and the item can explode. Ifthe hollow recess is sufficientlyventilated, the item can be used.Do not use dishware wi...
Page 53 - Cover
Microwave operation 53 Cover Tip: Covers are available from retail outlets. - A cover prevents too much steam escaping, especially when cookingfoods which need longer to cook. - It speeds up the heating process of the food. - It prevents food from drying out.- It helps keep the oven cavity clean. ...
Page 54 - Operation; always; do not use
Operation 54 If you place food directly on the floorof the oven when using the Microwave operating mode, the oven can become damaged.When using the Microwave operating mode, place the glass trayon level 1 and always place containers such as cups and bakingtins on the glass tray. Turn the o...
Page 55 - Changing the microwave power level; Changing set durations; Deleting the set cooking durations
Operation 55 Changing the temperature and coretemperature Via Settings | Recommended temperatures , you can permanently adjust the recommended temperatureto suit your cooking preferences.The core temperature only appears if you are using the probe (see“Roasting – Probe”). Tap the temperature d...
Page 56 - Canceling a cooking program
Operation 56 Select Delete . Confirm with OK . If you delete Duration , the set durations for Ready at and Start at are also deleted.If you delete Ready at or Start at , the cooking program will start using thecooking duration set. Interrupting a cooking processin the Microwave operatingmode Y...
Page 57 - Booster
Operation 57 Booster The Booster function is used to quickly preheat the oven.This function is turned on as the factorydefault setting for the followingoperating modes ( Settings | Booster | On ): - Convection Bake - Convection Roast - Surround - Auto Roast - Combi Conv Bake -...
Page 58 - Crisp function; Turning Crisp function on; Changing the operating mode
Operation 58 Example: You have selected anoperating mode and the requiredsettings such as the temperature.You want to turn on the Preheat function for this cooking program. Drag down the pull-down menu. Depending on the color scheme, Preheat is highlighted in either black or white. Select Prehe...
Page 60 - Categories; Usage notes
Automatic Programs 60 With the wide range of automaticprograms, you can achieve excellentresults with ease. Categories The automatic programs are sorted into categories to provide a betteroverview. Simply select the appropriateautomatic program for the type of foodyou are cooking and follow thein...
Page 61 - Search
Automatic Programs 61 Search (Depending on language)Under Automatic Programs , you can search by the name of the categoriesand the automatic programs.This search is a full-text search and canalso be used to search for parts ofwords.From the main menu: Select Automatic Programs . The category l...
Page 62 - Special Modes; Popcorn
Special Modes 62 This section provides information on thefollowing applications: - Popcorn- Defrost- Dehydrate- Reheat- Warm-up Cookware- Proof- Slow Roasting- Keep warm- Cooking- Canning- Frozen food/ready meals Popcorn If you select the Popcorn program, the oven starts with a set microwave powerl...
Page 63 - Defrost; Risk of infection from bacteria.; Tips; - Place the food to be defrosted on the
Special Modes 63 Defrost Gentle defrosting of frozen food meansthat the vitamins and minerals aregenerally retained. Use one of the following operatingmodes and Special Modes: - Special Modes | Defrost Select a category and the weight forthe food. - Operating Modes | Microwave Set th...
Page 64 - Using the Defrost Special Mode
Special Modes 64 Using the Defrost Special Mode Use the “Defrost” mode to gentlydefrost frozen food. Only use dishware that is microwavesafe. Select Special Modes . Select Defrost . A list will appear. Select the desired food category. Enter the weight of the frozen food. You can start t...
Page 65 - Defrosting with the Microwave operating mode; Quantity
Special Modes Defrosting with the Microwave operating mode Food to be defrosted Quantity [min] 1 [min] Butter 1/2 lb (250 g) 1 8–10 5–10 Milk 4 1/4 c (1000 ml) 4 12–16 10–15 Sponge cake (3 slices) Approx. 0.6 lb (300 g) 2 4–6 5–10 Fruit cake (3 slices) Approx. 0.6 lb (300 g) 2 6–8 10–15 Butter...
Page 66 - Dehydrate; Removing the dried food
Special Modes 66 Dehydrate Dehydrating or drying is a traditionalmethod of preserving fruit, certainvegetables, and herbs.It is important to check that fruit andvegetables are fresh, ripe and unbruisedbefore they are dehydrated. Prepare the food for drying by cuttingit up, and peeling and coring i...
Page 67 - Reheat
Special Modes 67 Reheat It is essential that the information in“IMPORTANT SAFETYINSTRUCTIONS – Correct use” isobserved. Danger of injury caused by hot food.If food for babies and children isheated at too high a temperature,they can burn themselves.Only heat food for babies andchildren for 30–60 se...
Page 68 - Using the Reheat Special Mode
Special Modes 68 Using the Reheat Special Mode This program is designed for reheatingfood.The time required depends on thenature of the food, its initialtemperature, and the amount to becooked. For example, food takenstraight from the refrigerator takeslonger to reheat than food which hasbeen kept a...
Page 69 - Reheating with the Microwave operating mode
Special Modes Reheating with the Microwave operating mode Drink/Food Quantity [min] 1 [min] Drinks (drinking temperature140-150°F (60–65°C)) 1 cup/1 glass (8 oz/200 ml) 7 00:50–1:10 – Baby bottle (milk) 2 Approx. 8 oz (200 ml) 4 00:50–1:00 3 1 Food for babies and children 3 1 jar (8 oz/200 g) ...
Page 70 - Proof; Keep warm
Special Modes 70 Warm-up Cookware Preheating the dishware means thatfood does not cool down as quickly. Use heat-resistant dishware. Place the wire rack on shelf level 1and place the dishware to be heatedon it. Depending on the size of thedishware, you can also place it on theoven floor. Select ...
Page 71 - method is ideal for
Special Modes 71 Slow Roasting The Slow Roasting method is ideal for cooking beef, pork, veal, or lamb whenyou want a tender result. Always observe USDA/CFIA foodsafety guidelines. First briefly sear the meat on all sides ata high temperature on the cooktop inorder to seal it.Then place the meat in...
Page 72 - Using the Surround operating mode
Special Modes 72 Using the Slow Roasting SpecialMode Observe the information under“Roasting – Precision Probe”. Select Special Modes . Select Slow Roasting . Follow the instructions on the display.Place the necessary accessories inthe oven compartment for thepreheating phase. Set the tem...
Page 73 - Cooking durations/core temperatures; Always observe USDA/CFIA food safety guidelines.; Meat
Special Modes Cooking durations/core temperatures Always observe USDA/CFIA food safety guidelines. Meat Cookingduration Core temperature Beef tenderloin, approx. 2.2 lbs(1 kg) - rare - medium - well done 60–80 min 75–85 min 110–130 min 113–119°F (45–48°C) 129–135°F (54–57°C) 145–151°F (63–66°C) Prim...
Page 74 - Cooking
Special Modes 74 Cooking It is essential that the information in“IMPORTANT SAFETYINSTRUCTIONS – Correct use” isobserved. Food with a thick skin or peel, suchas tomatoes, sausages, potatoes,and eggplant can burst when heatedor cooked.Pierce or score the skin of thesefoods several times to allow steam...
Page 75 - Cooking with the Microwave operating mode
Special Modes Cooking with the Microwave operating mode Soups/stewsVegetables [g] Level 6 [min] + Level 4 [min] 1 [min] Stew 1500 10 + 20 1 Soup 1500 11 + 24 1 Peas 500 5 + 10 2 Peas (frozen) 450 5 + 12 2 Carrots 500 5 + 10 2 Broccoli florets 500 6 + 8 2 Broccoli (frozen) 450 5 + 11 2 Caulif...
Page 76 - Canning; Risk of injury from increased; Preparing fruit and vegetables; with a screw cap; operating mode; Select the; operating mode and a
Special Modes 76 Canning Risk of infection from bacteria. The spores of the botulinumbacterium are not sufficiently killedby canning legumes and meat onlyonce. Toxins may form which canlead to serious poisoning. Thesespores are only destroyed by canningthe food again.After they have cooled down, a...
Page 77 - Canning fruit and vegetables
Special Modes 77 Canning fruit and vegetables Set the specified post-canningwarming temperature as soon asbubbles are visible in the jars, thenleave the jars in the warm oven for thetime specified. Canning vegetables As soon as bubbles are visible in thejars, set the specified canningtemperature...
Page 78 - Removing the jars after canning; Frozen food/ready meals; Preparing frozen food/ready meals
Special Modes 78 Removing the jars after canning Risk of injury caused by hot surfaces.The jars will be very hot after canning.Use oven mitts when removing thejars from the oven. Take the jars out of the oven. Cover the jars with a towel and leaveto set for approx. 24 hours in a draft-free are...
Page 79 - MyMiele; Adding entries; Deleting entries
MyMiele 79 Under MyMiele , you can save frequently used applications.It is particularly useful with theautomatic programs as you do not needto work through every menu level inorder to start a program. Tip: You can also set menu options that you have entered in MyMiele to appear on the start scre...
Page 80 - Favorites; Creating a Favorite
Favorites 80 You can create and save up to 20 ofyour own programs. - You can combine up to 10 cooking stages to accurately program yourfavorite or most frequently usedrecipes. In each cooking stage, youcan select settings such as theoperating mode, temperature, andcooking duration or core temperatur...
Page 81 - Starting Favorites; Changing cooking stages
Favorites 81 Starting Favorites Place the food in the oven cavity. Select Favorites . Select the program you want to use. Depending on the program settings, thefollowing menu options will appear onthe display: - Start now The program will start immediately.The oven heating will turn onimme...
Page 82 - Renaming Favorites; Deleting a Favorite
Favorites 82 Renaming Favorites Select Favorites . Touch the program you want tochange and keep your finger on it untilthe context menu appears. Select Rename . Change the program name using thekeyboard. You can add a line break for longerprogram names using the symbol. Once you hav...
Page 83 - Baking; Tips for baking; - Place cakes in rectangular bakeware; Notes on the operating modes; Follow the instructions on the display.
Baking 83 Handling and cooking food correctlyis essential for maintaining goodhealth.Cakes, pizzas, and French friesshould be cooked until golden, notdark brown. Always observe USDA/CFIA foodsafety guidelines. Tips for baking - Set a cooking duration. If used for baking, do not delay the start for t...
Page 84 - Using Intensive
Baking 84 Use this operating mode for cookingtraditional recipes. If using an olderrecipe or cookbook, set the oventemperature 20°F (10°C) lower thanthat recommended. This will not changethe cooking duration. Place cakes in baking tins on shelflevel 1. Place flat items (e.g., cookies, traycakes)...
Page 85 - Roasting; Tips for roasting
Roasting 85 Always observe USDA/CFIA foodsafety guidelines. Tips for roasting - Preheating the oven is only required when roasting beef sirloin and fillet.Preheating is generally not necessary. - Use a closed cooking container for roasting meat, such as a roasting dish.The meat will stay succulent. ...
Page 87 - Probe; - The metal tip of the probe must be
Roasting 87 Probe The food probe allows you to monitorthe cooking process simply and reliably. How it works The metal tip of the food probe must befully inserted into the center of the foodall the way to the handle. There is atemperature sensor in the metal tipwhich measures the core temperatureof t...
Page 88 - Using the probe; Place the food in the oven.; and
Roasting 88 Using the probe Fully insert the metal tip of the probeinto the center of the meat all the wayto the handle. If you are cooking several pieces ofmeat at the same time, insert the probeinto the largest piece of meat. Place the food in the oven. Insert the plug of the probe into thes...
Page 89 - Broiling; Tips for broiling
Broiling 89 Risk of injury caused by hot surfaces.If you broil with the door open, thehot air will escape from the ovenbefore it has been cooled by thecooling fan. The control elements willget hot.Broil with the oven door closed. Always observe USDA/CFIA foodsafety guidelines. Tips for broiling - ...
Page 90 - If the surface of a thicker cut of
Broiling 90 Selecting the cooking duration Broil thinner cuts of meat/slices offish for approx. 6–8 minutes per side.It is best to broil food of a similarthickness at the same time so thatthe cooking durations do not vary toomuch. Broil thicker pieces for about7–9 minutes per side. When bro...
Page 91 - Cleaning and care of the oven; Unsuitable cleaning agents
Cleaning and care of the oven 91 Danger of injury caused by hot surfaces.The oven gets hot during operation.You could burn yourself on the heaterelements, oven cavity, or accessories.Allow the heater elements, ovencavity, and accessories to cool beforemanual cleaning. Risk of injury due to elect...
Page 92 - Soiling caused by spilled fruit juices; Removing normal soiling
Cleaning and care of the oven 92 Only the glass tray is dishwasherproof. Tip: Soiling caused by spilled fruit juices and cake mixtures is best removedwhile the oven is still warm. Use cautionand make sure the oven is not too hot.To make it easier to clean the oven: Lower the browning /broiling ele...
Page 93 - Removing stubborn soiling; Using oven cleaners; Dry all surfaces with a soft cloth.
Cleaning and care of the oven 93 Removing stubborn soiling Spilt fruit and roasting juices maycause lasting discoloration or mattepatches on surfaces. Thisdiscoloration will not affect theproperties of the surface finish.Do not attempt to remove thesestains. Clean them following theinstructions give...
Page 95 - Frequently asked questions; Problem; You have selected the
Frequently asked questions Many malfunctions and faults that can occur in daily operation can be easilyremedied. You can save time and money in many cases, as you do not need tocontact Miele Customer Service.Information to help you rectify faults yourself can be found at www.miele.com/service.The fo...
Page 98 - and a fault code not; operating
Frequently asked questions Problem Possible cause and solution Maximum operating durationreached appears on the display. The oven has been operating for an unusually longtime. This has triggered the safety shut-off. Confirm with OK . The oven is now ready to use again. Fault and a fault code not ...
Page 99 - Select the temperature required for the recipe.; The browning is uneven.; You selected the wrong temperature or shelf level.
Frequently asked questions Problem Possible cause and solution The cake/cookies arenot baked properly. A different temperature than that given in the recipewas used. Select the temperature required for the recipe. The ingredient quantities are different from thosegiven in the recipe. Check if yo...
Page 101 - Customer Service; Contact in the event of a fault
Customer Service 101 Information to help you rectify faultsyourself and about Miele spare partscan be found at www.miele.com/service. Contact in the event of a fault In the event of a fault which you cannotremedy yourself, please contact yourMiele dealer or Miele Customer Service. You can book a Mie...
Page 102 - Caring for the environment; Disposal of the packing material
Caring for the environment 102 Disposal of the packing material The cardboard box and packingmaterials protect the appliance duringshipping. They have been designed tobe biodegradable and recyclable.Ensure that any plastic wrappings, bags,etc. are disposed of safely and kept outof the reach of child...
Page 103 - Installation; Installation dimensions; Installation in a tall or base cabinet; Oven with glass front
Installation *INSTALLATION* Installation dimensions Installation in a tall or base cabinet Miele Ovens can be installed flush or proud. Discuss your requirements with yourarchitect, kitchen designer, and installer.More installation drawings are available on the Miele website. * Oven with glass front...
Page 104 - Side view
Page 105 - Connections and ventilation; Electrical connection
Installation *INSTALLATION* Connections and ventilation A Cutout 4" x 28 3/8" (100 mm x 720 mm) in the base of the kitchen cabinetfor power cord and ventilation The outlet for the electrical connection should be accessible, e.g., in anadjacent kitchen cabinet. If the electrical connection ...
Page 106 - Securing the oven in the housing unit; Do; use a cordless screwdriver.
Installation *INSTALLATION* 106 Installing and removing theoven For safety reasons, only use the ovenwhen it has been fully installed. Do not open the door when the ovenis on the floor. This could damage thedoor.Do not open the door until the ovenhas been installed inside the housingunit. Securing t...
Page 107 - Remove the mounting aid.; Taking the oven out of the housing unit; Risk of injury caused by dropping; front; at the top of the side
Installation *INSTALLATION* 107 Remove the mounting aid. Screw the knurled nut onto the boltby hand to fix the oven in the cabinetniche. The door may be damaged if theknurled nuts protrude from the frontframe.Make sure that the knurled nuts areflush with the front frame afterinstallation. Re...
Page 108 - Risk of injury due to electric
Installation *INSTALLATION* 108 Electrical connection Risk of injury due to electric shock.During installation, maintenance, andrepair work, the oven must becompletely disconnected from thepower supply:Disconnect the oven from the powersupply by tripping the breakers, orunplugging the power cord f...
Page 109 - or
Installation *INSTALLATION* 109 Electrical connection The oven is equipped with a power cordapprox. 6 ft (1.8 m) long with a 4-pinNEMA 14-30P plug for connection to apower supply with: - 2NAC 208 V, 30 A, 60 Hz or - 2NAC 240 V, 30 A, 60 Hz Temporary or permanent operation onan autonomous power suppl...
Page 110 - Declaration of conformity; Responsible Party; This; IC Compliance Statement:; This device complies with; Radio Module; FCC ID; Compliance Statement
Declaration of conformity 110 Supplier's Declaration ofConformity 47 CFR § 2.1077Compliance Information Microwave FunctionUnique Identifier: Miele Model: H 7870 BMX Responsible Party Miele, Inc.National Headquarters9 Independence WayPrinceton, NJ 08540Phone: 800-843-7232Fax: 609-419-4298www.mieleusa...
Page 111 - Copyrights and licenses; in the device/appliance for the open source
Copyrights and licenses Miele uses their own and third party software which is not subject to any so-calledopen source license for the operation and control of the device/appliance. Thissoftware/these software components are protected by copyright. The copyrightpowers of Miele and third parties have...
Page 112 - Copyrights and licenses for the communication module
Copyrights and licenses for the communication module 112 For the purpose of operating andcontrolling the communication module,Miele uses proprietary or third-partysoftware that is not covered by opensource licensing terms. This software/these software components areprotected by copyright. The copyri...
Page 115 - National Headquarters; Canada; Headquarters and Miele Centre; International Headquarters
9 Independence WayPrinceton, NJ 08540www.mieleusa.com U.S.A. Miele, Inc. National Headquarters Please have the model and serial numberof your appliance available whencontacting Customer Service. Canada ImporterMiele Limited Headquarters and Miele Centre Customer Support Phone: 888-99-MIELE (64353)[e...
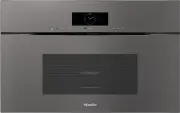


 Miele APCL 043
User Manual
Miele APCL 043
User Manual
 Miele APWM 065
Installation Manual
Miele APWM 065
Installation Manual
 Miele APWM 070
Installation Manual
Miele APWM 070
Installation Manual
 Miele SC
Installation Manual
Miele SC
Installation Manual
 Miele PR
Installation Manual
Miele PR
Installation Manual
 Miele APCL 047
User Manual
Miele APCL 047
User Manual
 Miele PLW 8505
Installation Manual
Miele PLW 8505
Installation Manual
![Miele PT 7186 Vario [EL]](https://manualsarea.com/img/product/thumbs/180/69/3e/693e1219f5c0d53fde982888bd54a3ec.webp) Miele PT 7186 Vario [EL]
User Manual
Miele PT 7186 Vario [EL]
User Manual
 Miele CM/1
User Manual
Miele CM/1
User Manual
![Miele PLW 8617 [EL/S TH]](https://manualsarea.com/img/product/thumbs/180/fe/90/fe9010c5f8c3c4aada5d83b417c78507.webp) Miele PLW 8617 [EL/S TH]
Installation Manual
Miele PLW 8617 [EL/S TH]
Installation Manual
![Miele PWM 908 [EL DP MAR 3 AC 400-480V 50-60Hz]](https://manualsarea.com/img/product/thumbs/180/20/e5/20e5e929bcb336fc6b2f128d9c857a3d.webp) Miele PWM 908 [EL DP MAR 3 AC 400-480V 50-60Hz]
User Manual
Miele PWM 908 [EL DP MAR 3 AC 400-480V 50-60Hz]
User Manual
![Miele PWM 906 [EL DP MAR 3 AC 400-480V 50-60Hz]](https://manualsarea.com/img/product/thumbs/180/57/c8/57c81dd8d0abe05852b709a3fa9b80db.webp) Miele PWM 906 [EL DP MAR 3 AC 400-480V 50-60Hz]
Installation Manual
Miele PWM 906 [EL DP MAR 3 AC 400-480V 50-60Hz]
Installation Manual
![Miele PWM 906 [EL DP MAR 2N AC 400V 50-60Hz]](https://manualsarea.com/img/product/thumbs/180/ce/23/ce232ceeda728532882a2a2f56bf2abc.webp) Miele PWM 906 [EL DP MAR 2N AC 400V 50-60Hz]
User Manual
Miele PWM 906 [EL DP MAR 2N AC 400V 50-60Hz]
User Manual
![Miele PLW 8617 [EL TH]](https://manualsarea.com/img/product/thumbs/180/e8/4a/e84a63b24dca64279b26bca714985678.webp) Miele PLW 8617 [EL TH]
User Manual
Miele PLW 8617 [EL TH]
User Manual
![Miele PDR 908 [EL MAR 3N AC 400V 50-60Hz]](https://manualsarea.com/img/product/thumbs/180/05/b7/05b705998b251f92b271e908423e1ecb.webp) Miele PDR 908 [EL MAR 3N AC 400V 50-60Hz]
Installation Manual
Miele PDR 908 [EL MAR 3N AC 400V 50-60Hz]
Installation Manual
![Miele PLW 8615 [EL CT]](https://manualsarea.com/img/product/thumbs/180/70/ff/70ff37b9174e78db8d00ddce8cf08ee3.webp) Miele PLW 8615 [EL CT]
Installation Manual
Miele PLW 8615 [EL CT]
Installation Manual
![Miele PLW 8616 [EL/S]](https://manualsarea.com/img/product/thumbs/180/37/f4/37f4255dee3c9942a13241f3ccd5fe93.webp) Miele PLW 8616 [EL/S]
Installation Manual
Miele PLW 8616 [EL/S]
Installation Manual
![Miele PWM 916 [EL DV DD SOM]](https://manualsarea.com/img/product/thumbs/180/21/65/21657a907bb735f3acf5a7bdbbc78c8a.webp) Miele PWM 916 [EL DV DD SOM]
Manual
Miele PWM 916 [EL DV DD SOM]
Manual
![Miele PFD 104 SCVi XXL [120V]](https://manualsarea.com/img/product/thumbs/180/0a/20/0a20c04430aaa9be6a985688f5bb5580.webp) Miele PFD 104 SCVi XXL [120V]
Installation Manual
Miele PFD 104 SCVi XXL [120V]
Installation Manual
![Miele PDR 507 HP [MAR]](https://manualsarea.com/img/product/thumbs/180/58/9e/589e9ba94b88174fa0cdb27b4bbaac5b.webp) Miele PDR 507 HP [MAR]
User Manual
Miele PDR 507 HP [MAR]
User Manual