Page 2 - Contents; Using the minute minder
Contents 2 Warning and Safety instructions ............................................................................... 5 Caring for the environment ......................................................................................... 12 Oven overview ............................................
Page 3 - Baking
Contents 3 Switching on and off automatically.............................................................................. 28 Setting a cooking duration....................................................................................... 28 At the end of the cooking duration:........................
Page 4 - Problem solving guide
Contents 4 Removing the side runners with FlexiClip runners .................................................... 50 Lowering the top heat/grill element ............................................................................. 50 Removing the back panel ..............................................
Page 5 - Warning and Safety instructions; Appropriate use
Warning and Safety instructions 5 This oven complies with all current local and national safetyrequirements. However, inappropriate use can lead to personalinjury and damage to property.Read the operating and installation instructions carefully beforeusing the oven. They contain important informatio...
Page 6 - Safety with children
Warning and Safety instructions 6 Safety with children Activate the system lock to ensure that children cannot switch the oven on by mistake. Children under 8 years of age must be kept away from the oven unless they are constantly supervised. Children aged 8 and older may only use the oven wit...
Page 8 - If the connection cable is damaged, it must be replaced with a; Correct use; Risk of injury caused by hot surfaces. The oven gets hot during
Warning and Safety instructions 8 If the oven is delivered without a power connection cable, a special cable must be installed by a Miele authorised service technician (see“Installation”, “Electrical connection”). If the connection cable is damaged, it must be replaced with a special connection ...
Page 10 - The following applies to stainless steel surfaces:; Cleaning and care
Warning and Safety instructions 10 Risk of injury caused by steam. Pouring a cold liquid onto a hot surface creates steam, which can cause severe scalding. The suddentemperature change can also cause damage to hot enamelledsurfaces. Never pour cold liquids directly onto hot enamelledsurfaces. It...
Page 11 - The side runners can be removed (see “Cleaning and care” –; Accessories; Only use original Miele accessories. If other parts are used,
Warning and Safety instructions 11 The side runners can be removed (see “Cleaning and care” – “Removing the side runners with FlexiClip runners”). Refit the siderunners correctly. The catalytic enamelled back panel can be removed for cleaning purposes (see “Cleaning and care – Removing the back ...
Page 12 - Caring for the environment; Disposing of your old appliance
Caring for the environment 12 Disposing of the packagingmaterial The packaging material is used forhandling and protects the appliancefrom transport damage. The packagingmaterial used is selected from materialswhich are environmentally friendly fordisposal and can generally be recycled.Recycling the...
Page 13 - Oven overview
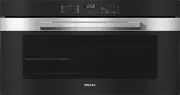
Oven overview 13 a Control elements b Top heat/grill element c Air inlets for the fan with ring heating element behind it d Catalytic enamelled back panel e Side runners with 3 shelf levels f Front frame with data plate g Door
Page 14 - Oven controls; Sensor control
Oven controls 14 a Function selectorFor selecting oven functions b Clock/timerFor displaying the time of day andsettings c Sensor control For modifying times and settings d OK sensor control For selecting functions and savingsettings e Sensor control For modifying times and settings f Tempera...
Page 15 - Function selector; OK
Oven controls 15 Function selector Use the function selector to select therequired function and switch on theoven lighting independently.It can be turned clockwise or anti-clockwise.In the 0 position it can be retracted by pressing it in. Functions Lighting Conventional heat Bottom heat Full...
Page 16 - Features; Data plate; - Operating and installation instructions; Side runners
Features 16 A list of the models described in theseoperating and installation instructionscan be found on the back page of thisbooklet. Data plate The data plate is located on the frontframe, visible when the door is open.The data plate states the model number,the serial number as well as connection...
Page 17 - FlexiClip runners HFC
Features 17 from being pulled out completely fromthe side runners when you only wish topull accessories out partially. Insert the accessories into the ovenwith the non-tip safety notchestowards the back. If you are using the universal tray withthe rack on top, insert the tray betweenthe rails of the...
Page 18 - Fitting and removing FlexiClip runners; Danger of injury caused by hot; do not; Push the FlexiClip runner in all the way.; Grilling and roasting insert HGBB 92
Features 18 Fitting and removing FlexiClip runners Danger of injury caused by hot surfaces.The oven gets hot during operation.You could burn yourself on theheating elements, oven compartmentor accessories.Allow the heating elements, ovencompartment and the accessories tocool before fitting or remo...
Page 19 - The
Features 19 Round baking trays The solid round baking tray HBF 27-1 is suitable for cooking pizzas, flat cakesmade with yeast or creamed mixtures,sweet and savoury tarts, bakeddesserts, flat bread, and can also beused for frozen cakes and pizzas.The perforated round baking and AirFry tin HBFP 27-1 c...
Page 20 - Safety features; System lock; for the oven; Cooling fan; PerfectClean treated surfaces; perforated
Features 20 Safety features - System lock for the oven (see “Clock/timer – Changingsettings”) - Cooling fan The cooling fan will come onautomatically when a cookingprogramme is started. It ensures thatthe hot oven air is mixed with coolambient air and thus cooled before itis expelled via the gap...
Page 21 - Before using for the first time
Before using for the first time 21 Before using for the first time The oven must not be operated until it has been correctly installed inits housing unit. Press and release the function andtemperature selectors if they areretracted. The time of day can only be changedwhen the function selector i...
Page 23 - Energy saving tips; Cooking programmes; Residual heat utilisation
Energy saving tips 23 Cooking programmes - Remove all accessories from the oven compartment that are not required forcooking. - In general, if a range of temperatures is given in a recipe or chart, it is bestto select the lower temperature and tocheck the food after the shortestduration. - Preheat t...
Page 24 - Using the oven; Simple operation
Using the oven 24 Simple operation Place the food in the oven. Select the required oven function withthe function selector. The oven lighting and the fan will switchon. Use the temperature selector to setthe temperature. The oven heating is switched on and thetemperature indicator light ligh...
Page 25 - display; sensor; Display; Symbols on the display; Sensor controls; Use
Clock/timer 25 The clock/timer offers the followingfunctions: - Time of day display- Minute minder- Switching cooking processes on and off automatically - Changing various settings The clock/timer is operated via the display and the , OK and sensor controls . The functions available are ind...
Page 26 - Setting the time; Time display
Clock/timer 26 Setting the time The time of day is set in segments: - For the time of day and cooking durations, first the hours, then theminutes. - For a minute minder duration, first the minutes, then the seconds. Confirm with OK . The respective functions appeardepending on the position of the...
Page 27 - To set the minute minder
Clock/timer 27 Using the minute minder The minute minder can be used to timeother activities in the kitchen, e.g.boiling eggs.The minute minder can also be used atthe same time as a cooking programmein which the start and finish times havebeen set, e.g. as a reminder to stir a dishor add seasonin...
Page 29 - At the end of the cooking duration:
Clock/timer 29 will appear and the hour numeric block will start to flash. If you press once, two dashes will appear and then when you press againthe maximum possible value willappear in the hour numeric block . Use or to set the hours. Confirm with OK ....
Page 32 - Changing the time of day; Changing settings
Clock/timer 32 Changing the time of day The time of day can only be changedwhen the function selector is at 0 . Turn the function selector to 0 . Press and at the same time. The hours will flash. Use or to set the hours. Confirm with OK . The hours are saved and the minuteswill fl...
Page 34 - Tips on baking; - Position rectangular tins with the; Using baking parchment; Notes on the cooking charts; Selecting the
Baking 34 Handling food carefully will helpprotect your health.Cakes, pizzas and french fries shouldbe cooked until golden, not darkbrown. Tips on baking - Set a cooking duration. If used for baking, do not delay the start for toolong. Cake mixture or dough will dryout, and the raising agents will l...
Page 35 - Notes on the functions; shelf: place the food in shelf level 1.
Baking 35 Selecting the cooking duration Unless otherwise stated, the cookingdurations given in the cooking charts arefor an oven compartment which has notbeen pre-heated. With a pre-heatedoven compartment, shorten times byaround 10 minutes. As a general rule, check the food afterthe shortest d...
Page 36 - Roasting; Tips for roasting
Roasting 36 Tips for roasting - You can use all crockery made from temperature-resistant materials, e.g.roasting dishes, roasting pans with lid,ovenproof glass dishes, roasting bags,dishes made from earthenware orcast iron, the universal tray, rack and/or anti-splash insert (if available) ontop of t...
Page 38 - Grilling; Tips for grilling
Grilling 38 Risk of injury caused by hot surfaces.If you grill with the door open, hot airwill escape from the oven instead ofbeing cooled by the cooling fan. Thecontrol elements will get hot.Grill with the oven door closed. Tips for grilling - Pre-heating is necessary when grilling. Pre-heat the ...
Page 39 - To
Grilling 39 Selecting the cooking duration Grill thinner cuts of meat/slices of fishfor approx. 6–8 minutes per side.It is best to grill food of a similarthickness at the same time so thatthe cooking durations do not vary toomuch. As a general rule, check whether thefood is cooked after the s...
Page 40 - Further applications; Defrost; Select; and a temperature; Tips; - Remove the packaging and place the
Further applications 40 This section provides information on thefollowing applications: - Defrost- Low temperature cooking- Drying- Frozen food/ready meals- Heating crockery Defrost Gentle defrosting of frozen goodsmeans that the vitamins and mineralsare generally retained. Select Fan plus and...
Page 41 - Low temperature cooking; Using Conventional heat; Select the; function and a temperature
Further applications 41 Low temperature cooking Low temperature cooking is ideal forcooking delicate cuts of beef, pork, vealor lamb when a tender result is desired. First sear the meat all over at a hightemperature on the hob in order to sealit.Then place the meat in the pre-heatedoven compartment ...
Page 42 - Drying; Removing the dried food
Further applications 42 Drying Dehydrating or drying is a traditionalmethod of preserving fruit, certainvegetables and herbs.It is important that fruit and vegetablesare ripe and not bruised before they aredried. Peel and core the food for drying, ifnecessary, and cut it up. Depending on how big...
Page 43 - Frozen food/Ready meals; Tips for cakes, pizza and baguettes; Heat crockery
Further applications 43 Frozen food/Ready meals Tips for cakes, pizza and baguettes - Bake cakes, pizza and baguettes on baking paper on the rack.Do not use the baking tray or theuniversal tray for frozen foods with alarge surface area. The tray couldbecome warped and difficult, or evenimpossible, t...
Page 44 - Unsuitable cleaning agents
Cleaning and care 44 Danger of injury caused by hot surfaces.The oven gets hot during operation.You could burn yourself on theheating elements, oven compartmentor accessories.Allow the heating elements, ovencompartment and the accessories tocool before manual cleaning. Risk of injury due to elec...
Page 45 - Soiling caused by spilt fruit juices; Removing normal soiling
Cleaning and care 45 Tip: Soiling caused by spilt fruit juices and cake mixtures is best removedwhile the oven compartment is stillwarm.To make it easier to clean the oven: Remove the door. Take out the side runners withFlexiClip runners (if fitted). Remove the catalytic enamelled backpanel. ...
Page 46 - Using oven cleaners; Dry all surfaces with a soft cloth.
Cleaning and care 46 Using oven cleaners Very stubborn soiling on PerfectCleansurfaces can be cleaned using theMiele oven cleaner, which must onlybe applied to cold surfaces. If the oven spray gets into gaps andopenings, a strong odour is generatedduring subsequent cookingprogrammes.Do not spray t...
Page 47 - Rinse the back panel thoroughly.; Removing oil and grease; function and
Cleaning and care 47 Cleaning the catalyticenamelled back panel Catalytic enamel is self-cleaning, whichmeans that oil and fat are burnt offautomatically when very hightemperatures are reached inside theoven. You do not require any additionalcleaning agents. The higher thetemperature, the more effec...
Page 48 - Door removal
Cleaning and care 48 Door removal The door weighs approx. 11 kg. The oven door is connected to the doorhinges by retainers.Before removing the door from theretainers, the locking clamps on bothdoor hinges have to be released. Open the door fully. Release the locking clamps by turningthem as far ...
Page 49 - Fitting the door
Cleaning and care 49 Fitting the door Hold the door securely on both sidesand carefully fit it back into the hingeretainers.Make sure that you fit the doorstraight. Open the door fully. If the locking clamps are not locked,the door could become loose,resulting in damage.Always ensure that the lo...
Page 50 - Reassemble
Cleaning and care 50 Removing the side runners withFlexiClip runners The side runners can be removedtogether with the FlexiClip runners (ifinserted).If you wish to remove the FlexiCliprunners separately beforehand, pleasefollow the instructions in “Features” –“Fitting and removing FlexiClip runners”...
Page 51 - Removing the back panel
Cleaning and care 51 Carefully lower the top heat/grillelement. You can now access the ceiling of theoven. Clean the ceiling of the oven with hotwater and washing-up liquid, appliedwith a clean sponge cloth or a clean,damp microfibre cloth. After cleaning, raise the top heat/grillelement gentl...
Page 52 - Problem
Problem solving guide 52 Many malfunctions and faults that can occur in daily operation can be easilyremedied. You can save time and money in many cases, as you do not need to callthe Miele Customer Service Department.Information to help you rectify faults yourself can be found at www.miele.com/serv...
Page 54 - Service; Contact in the event of a fault
Service 54 Information to help you rectify faultsyourself and about Miele spare partscan be found at www.miele.com/service. Contact in the event of a fault In the event of any faults which youcannot remedy yourself, please contactyour Miele dealer or the MieleCustomer Service Department. You can boo...
Page 55 - Installation; Installation dimensions; Dimensions are given in mm.; Installation in a tall or base unit
Installation *INSTALLATION* 55 Installation dimensions Dimensions are given in mm. Installation in a tall or base unit When building the oven into a base unit underneath a hob, please also observethe installation instructions for the hob as well as the building-in depth requiredfor the hob.The HAL 9...
Page 56 - Tall unit side view; The HAL 90 trim is available as an optional accessory.
Installation *INSTALLATION* 56 Tall unit side view Base unit side view The HAL 90 trim is available as an optional accessory. Fix the HAL trim into the niche under the worktop.
Page 57 - Connections and ventilation; Front view
Installation *INSTALLATION* 57 Connections and ventilation a Front view b Mains connection cable, length = 2000 mm c No connections permitted in this area d Ventilation cut-out, min. 150 cm ²
Page 58 - Installing the oven; Remove the carrying handles.
Installation *INSTALLATION* 58 Installing the oven For safety reasons, the oven may onlybe used when it has been fullyinstalled. The oven requires a sufficient supplyof cool air for efficient operation. Therequired supply of cool air must notbe excessively heated by other heatsources (e.g. solid fue...
Page 59 - Electrical connection; Connection to a switched socket; or if the; Connection data; is given on the data
Installation *INSTALLATION* 59 Electrical connection Danger of injury! Installation, repairs and othermaintenance work by unqualifiedpersons could be dangerous. Mielecannot be held liable forunauthorised work. The appliance may only beconnected to the mains electricitysupply by a qualified electri...
Page 60 - Oven
Installation *INSTALLATION* 60 Oven This oven is supplied with an approx.2 m long 3-core cable for connection toa single-phase supply.Maximum connected load: see dataplate. When replacing the cable suppliedwith another cable or changing theconnection, only cable type H 05 VV-F with a suitable cross-...
Page 61 - Cooking charts; Batter
Cooking charts 61 Batter Cakes/biscuits [°C] [min] Muffins (1 tray) 150–160 2 25–35 Muffins (2 trays) 150–160 1+3 30–40 3 Small cakes* (1 tray) 150 1 25–35 160 2 2 15–25 Small cakes* (2 trays) 140 2 1+3 30–40 Madeira cake (wire rack, loaf tin, 30 cm) 1 150–160 2 65–75 150–160 2...
Page 62 - Shortcrust pastry
Cooking charts 62 Shortcrust pastry Cakes/biscuits (accessories) [°C] [min] Biscuits (1 tray) 140–150 1 20–30 150–160 2 25–35 Biscuits (2 trays) 140–150 1+3 20–30 3 Drop cookies* (1 tray) 140 1 30–40 160 2 2 20–30 Drop cookies* (2 trays) 140 1+3 35–45 3 Flan base (wire rack, flan...
Page 63 - Yeast dough
Cooking charts 63 Yeast dough Cakes/biscuits (accessories) [°C] [min] Bundt cake (wire rack, Bundt cake tin, 24 cm) 1 150–160 1 45–55 160–170 1 50–60 Stollen (1 tray) 150–160 1 50–60 160–170 1 45–55 Streusel cake with/without fruit (1 tray) 160–170 2 50–60 170–180 2 40–50 Fres...
Page 64 - Quark dough; Sponge mixture
Cooking charts 64 Quark dough Cakes/biscuits (accessories) [°C] [min] Fresh fruit cake (1 tray) 160–170 2 40–50 170–180 2 40–50 Apple turnovers/raisin whirls (1 tray) 160–170 2 25–35 Apple turnovers/raisin whirls (2 trays) 150–160 1+3 25–35 1 Function, Temperature, Shelf lev...
Page 66 - Savoury dishes; Food; Grilled vegetables (wire rack on universal tray)
Cooking charts 66 Savoury dishes Food (accessories) [°C] [min] Savoury flan (1 tray) 220–230 1 1 25–35 Onion tart (1 tray) 180–190 1 2 25–35 Pizza, yeast dough (1 tray) 170–180 2 30–40 210–220 1 2 30–40 Pizza, quark dough (1 tray) 170–180 2 30–40 190–200 1 2 25–35 Frozen pizza, p...
Page 67 - Beef; level 3 and universal tray on shelf level 1)
Cooking charts 67 Beef Food (accessories) [°C] [min] 9 [°C] Braised beef, approx. 1 kg (oven dish withlid) 2 150–160 3 1 120–130 6 – 2 170–180 3 1 120–130 6 – 170–180 1 160–180 7 – Fillet of beef, approx. 1 kg (universal tray) 2 180–190 3 1 25–60 45–75 Fillet of beef (rare), approx...
Page 68 - Veal
Cooking charts 68 Veal Food (accessories) [°C] [min] 6 [°C] Braised veal, approx. 1.5 kg (oven dishwith lid) 2 160–170 1 120–130 5 – 2 170–180 1 120–130 5 – Fillet of veal, approx. 1 kg (universal tray) 2 160–170 3 1 30–60 45–75 Fillet of veal (pink), approx. 1 kg 1 2 80–85 4 1 50–...
Page 69 - Pork; Bacon
Cooking charts 69 Pork Food (accessories) [°C] [min] 9 [°C] Pork joint/pork neck roast, approx. 1 kg(oven dish with lid) 160–170 1 130–140 5 80–90 180–190 1 140–150 5 80–90 Pork joint/pork neck roast, approx. 1 kg(oven dish with lid) 180–190 1 140–150 6 80–90 190–200 1 130–150 6 80...
Page 72 - Notes for test institutes; Test food
Notes for test institutes 72 Test food according to EN 60350-1 Test food (accessories) [°C] [min] Small cakes (1 universal tray 1 ) 150 1 25–35 160 4 2 15–25 Small cakes (2 universal trays 1 ) 140 4 1+3 30–40 Drop cookies (1 universal tray 1 ) 140 1 30–40 160 4 2 20–30 Drop cookies...
Page 73 - Energy efficiency class according to EN 60350-1; - Testing is undertaken using the; Data sheet for household ovens
Notes for test institutes 73 Energy efficiency class according to EN 60350-1 The energy efficiency rating is determined in accordance with EN 60350-1. Energy efficiency rating: APlease observe the following when conducting testing: - Testing is undertaken using the Eco Fan heat function. - Only...
Page 75 - United Kingdom
United Kingdom Miele Co. Ltd., Fairacres, Marcham Road, Abingdon, Oxon, OX14 1TWTel: 0330 160 6600, Internet: www.miele.co.uk, E-mail: [email protected] Australia Miele Australia Pty. Ltd.ACN 005 635 398ABN 96 005 635 398Level 4, 141 Camberwell RoadHawthorn East, VIC 3123Tel: 1300 464 353E-mail: [em...


 Miele APCL 043
User Manual
Miele APCL 043
User Manual
 Miele APWM 065
Installation Manual
Miele APWM 065
Installation Manual
 Miele APWM 070
Installation Manual
Miele APWM 070
Installation Manual
 Miele SC
Installation Manual
Miele SC
Installation Manual
 Miele PR
Installation Manual
Miele PR
Installation Manual
 Miele APCL 047
User Manual
Miele APCL 047
User Manual
 Miele PLW 8505
Installation Manual
Miele PLW 8505
Installation Manual
![Miele PT 7186 Vario [EL]](https://manualsarea.com/img/product/thumbs/180/69/3e/693e1219f5c0d53fde982888bd54a3ec.webp) Miele PT 7186 Vario [EL]
User Manual
Miele PT 7186 Vario [EL]
User Manual
 Miele CM/1
User Manual
Miele CM/1
User Manual
![Miele PLW 8617 [EL/S TH]](https://manualsarea.com/img/product/thumbs/180/fe/90/fe9010c5f8c3c4aada5d83b417c78507.webp) Miele PLW 8617 [EL/S TH]
Installation Manual
Miele PLW 8617 [EL/S TH]
Installation Manual
![Miele PWM 908 [EL DP MAR 3 AC 400-480V 50-60Hz]](https://manualsarea.com/img/product/thumbs/180/20/e5/20e5e929bcb336fc6b2f128d9c857a3d.webp) Miele PWM 908 [EL DP MAR 3 AC 400-480V 50-60Hz]
User Manual
Miele PWM 908 [EL DP MAR 3 AC 400-480V 50-60Hz]
User Manual
![Miele PWM 906 [EL DP MAR 3 AC 400-480V 50-60Hz]](https://manualsarea.com/img/product/thumbs/180/57/c8/57c81dd8d0abe05852b709a3fa9b80db.webp) Miele PWM 906 [EL DP MAR 3 AC 400-480V 50-60Hz]
Installation Manual
Miele PWM 906 [EL DP MAR 3 AC 400-480V 50-60Hz]
Installation Manual
![Miele PWM 906 [EL DP MAR 2N AC 400V 50-60Hz]](https://manualsarea.com/img/product/thumbs/180/ce/23/ce232ceeda728532882a2a2f56bf2abc.webp) Miele PWM 906 [EL DP MAR 2N AC 400V 50-60Hz]
User Manual
Miele PWM 906 [EL DP MAR 2N AC 400V 50-60Hz]
User Manual
![Miele PLW 8617 [EL TH]](https://manualsarea.com/img/product/thumbs/180/e8/4a/e84a63b24dca64279b26bca714985678.webp) Miele PLW 8617 [EL TH]
User Manual
Miele PLW 8617 [EL TH]
User Manual
![Miele PDR 908 [EL MAR 3N AC 400V 50-60Hz]](https://manualsarea.com/img/product/thumbs/180/05/b7/05b705998b251f92b271e908423e1ecb.webp) Miele PDR 908 [EL MAR 3N AC 400V 50-60Hz]
Installation Manual
Miele PDR 908 [EL MAR 3N AC 400V 50-60Hz]
Installation Manual
![Miele PLW 8615 [EL CT]](https://manualsarea.com/img/product/thumbs/180/70/ff/70ff37b9174e78db8d00ddce8cf08ee3.webp) Miele PLW 8615 [EL CT]
Installation Manual
Miele PLW 8615 [EL CT]
Installation Manual
![Miele PLW 8616 [EL/S]](https://manualsarea.com/img/product/thumbs/180/37/f4/37f4255dee3c9942a13241f3ccd5fe93.webp) Miele PLW 8616 [EL/S]
Installation Manual
Miele PLW 8616 [EL/S]
Installation Manual
![Miele PWM 916 [EL DV DD SOM]](https://manualsarea.com/img/product/thumbs/180/21/65/21657a907bb735f3acf5a7bdbbc78c8a.webp) Miele PWM 916 [EL DV DD SOM]
Manual
Miele PWM 916 [EL DV DD SOM]
Manual
![Miele PFD 104 SCVi XXL [120V]](https://manualsarea.com/img/product/thumbs/180/0a/20/0a20c04430aaa9be6a985688f5bb5580.webp) Miele PFD 104 SCVi XXL [120V]
Installation Manual
Miele PFD 104 SCVi XXL [120V]
Installation Manual
![Miele PDR 507 HP [MAR]](https://manualsarea.com/img/product/thumbs/180/58/9e/589e9ba94b88174fa0cdb27b4bbaac5b.webp) Miele PDR 507 HP [MAR]
User Manual
Miele PDR 507 HP [MAR]
User Manual