Page 2 - Contents; Language
Contents 2 Warning and safety instructions ................................................................................ 5 Notes on the operating instructions ......................................................................... 13 Notes on the layout.............................................
Page 3 - System lock
Contents 3 System lock ................................................................................................................ 33 Deactivating the system lock .................................................................................. 33 Information ...................................
Page 5 - Warning and safety instructions; Appropriate use
Warning and safety instructions 5 This dishwasher conforms to current safety requirements.Inappropriate use can, however, lead to personal injury andmaterial damage.Please observe the installation sheet and read the operatinginstructions carefully before setting up the dishwasher and using itfor the...
Page 6 - Technical safety
Warning and safety instructions 6 Children aged 8 and older may only use the dishwasher without supervision if they have been shown how to use it in a safe manner.Children must be able to understand and recognise the possibledangers caused by incorrect operation. Children must not be allowed to ...
Page 7 - Temporary or permanent operation on an autonomous power
Warning and safety instructions 7 Temporary or permanent operation on an autonomous power supply system or a power supply system that is not synchronisedwith the mains power supply (e.g. island networks, back-up systems)is possible. A prerequisite for operation is that the power supplysystem compl...
Page 9 - Correct installation
Warning and safety instructions 9 The water-connection pressure needs to be between 50 and 1,000 kPa. A damaged dishwasher could be dangerous. If the dishwasher gets damaged, switch it off at the mains immediately and call your Mieledealer or Miele Service. While the appliance is under warrant...
Page 10 - Correct use
Warning and safety instructions 10 In order to ensure stability, built-under and integrated dishwashers must only be installed under a continuous worktop that is secured toadjacent cabinetry. A sink in the adjacent cabinet of the dishwasher must be carefully sealed. Regularly check for leaks to ...
Page 11 - Accessories and spare parts
Warning and safety instructions 11 Do not use any commercial or industrial detergents. These may cause material damage, and there is a risk of a severe explosivechemical reaction (such as an explosive oxyhydrogen gas reaction). Do not fill the rinse aid reservoir with powder or liquid detergent....
Page 12 - If you wish to transport the dishwasher, empty it and securely
Warning and safety instructions 12 If you wish to transport the dishwasher, empty it and securely fasten all loose parts such as baskets, hoses and mains connectioncables.
Page 13 - Notes on the operating instructions; Notes on the layout; Warnings; Information which is important; Notes; Select the desired setting and press; Display
Notes on the operating instructions 13 These operating instructions apply toseveral different dishwasher models ofdifferent heights. The different dishwasher models will benamed as follows: normal = dishwasher measuring80.5 cm high (built-in appliance) or84.5 cm high (freestanding appliance) XXL = d...
Page 14 - Scope
Scope 14 The appliance is supplied with: - Dishwasher- Operating instructions for operating the dishwasher - Installation sheet for installing the dishwasher - Other installation accessories for installing the dishwasher (seeinstallation sheet) - Funnel for filling the dishwasher salt- Additional pr...
Page 15 - Guide to the appliance; Appliance overview
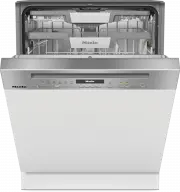
Guide to the appliance 15 Appliance overview a Door locking pins b Top spray arm c 3D MultiFlex cutlery tray d Upper basket (depending on model) e Middle spray arm f Aeration valve g Bottom spray arm h Filter combination i Salt reservoir j Data plate k Rinse aid reservoir l Detergent compartment Low...
Page 16 - Lower basket; FlexCare Glass & Bottle
Guide to the appliance 16 Lower basket a FlexCare Glass & Bottle b MultiClip c XL-Assist d Hinged spikes e Cutlery basket (depending on themodel)
Page 17 - Control field
Guide to the appliance 17 Control field a Programme selection ECO = ECO Auto = Auto 45–60 °C 45 °C = ComfortWash 45 °C 60 °C = PowerWash 60 °C 75 °C = Intensive 75 °C = Further programmes/settings b DisplayFor further information, see “Guideto the appliance” in the “Displayfunctions” s...
Page 18 - Display functions; OK
Guide to the appliance 18 Display functions The display is used to select or set thefollowing: - The programme- The timer- The Settings The display can show the following: - The programme stage- The estimated time left for the programme to run - The energy and water consumption (EcoFeedback) - Any...
Page 19 - Caring for the environment; Disposing of your old appliance
Caring for the environment 19 Disposing of the packagingmaterial The packaging material is used forhandling and protects the appliancefrom transport damage. The packagingmaterial used is selected from materialswhich are environmentally friendly fordisposal and can generally be recycled.Recycling the...
Page 20 - Before using for the first time; Opening the door; Risk of scalding due to hot water.
Before using for the first time 20 Every dishwasher is tested at thefactory. There will be residual water inthe appliance from this test. It is notan indication that the dishwasher hasbeen used previously. Opening the door In some programmes the doorautomatically opens slightly to assistthe drying p...
Page 21 - Closing the door; Push the baskets right in.; Activating the safety lock
Before using for the first time 21 Closing the door Push the baskets right in. Raise the door upwards until thecatch engages. At the end of the programme, if theAutoOpen function switched is on,the door locking pin must be fullyretracted before the door is closed.Otherwise, the door locking pin ...
Page 22 - Basic settings; Switching on the dishwasher; Setting the water hardness level
Before using for the first time 22 Basic settings Switching on the dishwasher Switch the dishwasher on with the button. The welcome screen will appear whenthe dishwasher is switched on. For further information about thedisplay functionality, see “Guide to theappliance – Display functions”. Sett...
Page 23 - Dishwasher salt; not; Damage to the water softener
Before using for the first time 23 Dishwasher salt In order to achieve good cleaningresults, the dishwasher needs tooperate with soft water. Hard waterresults in the build-up of calciumdeposits on crockery and on the washcabinet walls. Mains water with a water hardness levelhigher than 0.9 mmol/l (5...
Page 24 - Filling the salt reservoir; Risk of corrosion due to saline; programme without load items in
Before using for the first time 24 Filling the salt reservoir Before filling the salt reservoir for thefirst time, you must fill it withapprox. 1.5 l of water to enable the saltto dissolve.Once the dishwasher has beencommissioned, there is alwayssufficient water in the salt reservoir. Remove the l...
Page 25 - Refilling salt; When the refill reminder; Confirm with
Before using for the first time 25 Refilling salt When the refill reminder Refill salt appears in the display, wait until theend of the programme and then refillthe salt reservoir. Confirm with OK . The salt refill indicator will go out. Risk of corrosion due to saline solution.Saline solu...
Page 26 - Rinse aid; Washing-up liquid or detergent
Before using for the first time 26 Rinse aid Rinse aid is necessary to ensure thatwater does not cling and leave marks oncrockery during the drying phase, andhelps crockery dry faster after it hasbeen washed. Rinse aid is poured into the containerand the amount set is dispensedautomatically. Washi...
Page 27 - Adding rinse aid
Before using for the first time 27 Adding rinse aid Press the yellow button on the lid of the rinse aid reservoir. The lid will spring open. Fill with rinse aid until the filling levelindicator (arrow) changes to a darkcolour while the door is horizontallyopen. The rinse aid reservoir holdsap...
Page 28 - Settings; Opening the settings menu; Changing settings; Closing the settings menu
Settings 28 You can alter the dishwasher ’s controlsto suit changing requirements byadjusting the settings.The settings can be altered at anytime. Opening the settings menu Switch the dishwasher on with the button if it is switched off. Use the programme selectionbutton to select the Furth...
Page 29 - The flag after the word; Water hardness; - You should programme the
Settings 29 Language The display can be set to appear in oneof several different languages.You can change the language used inthe display and also the country via the Language sub-menu. The flag after the word Language serves as a guide if a language that youdo not understand has been set.I...
Page 30 - ECO; Display brightness
Settings 30 Rinse aid You can adjust the rinse aid dosage forbest results. The rinse aid dosage can be set from 0to 6 ml. 3 ml is the factory default setting.The rinse aid dosage can turn out to behigher than the set value due to theautomatic adjustment of theprogramme.If spots appear on crockery an...
Page 31 - AutoOpen; Risk of injury due to door opening; nd interim rinse; Hygiene cycle
Settings 31 AutoOpen In some programmes the doorautomatically opens slightly to assistthe drying process.This function can be deactivated if youwish. However, this negatively affectsthe drying process in most cases. Risk of injury due to door opening automatically.The door may open automatically a...
Page 32 - Heat accumulator; Water connection
Settings 32 Heat accumulator This dishwasher is equipped with a heataccumulator (see “Caring for theenvironment – Heat accumulator ”). Empty manually You can manually empty the heataccumulator, e.g. for a longer period ofabsence, or before moving thedishwasher to a new location. Please ensure that...
Page 33 - Deactivating the system lock; Information
Settings 33 System lock The system lock prevents yourdishwasher being used without yourknowledge.If an attempt is made to switch thedishwasher on when the system lock isactivated, the symbol will appear in the display.The lock must be deactivated before thedishwasher can be used.The appliance w...
Page 34 - Economical dishwashing
Caring for the environment 34 Economical dishwashing This dishwasher is exceptionallyeconomical in its use of water andelectricity. You can make the most of yourappliance by following these tips: - Washing in a dishwasher generally uses less water and energy thanwashing by hand. - There is no need t...
Page 35 - Estimated consumption
Caring for the environment 35 EcoFeedback consumptionindicator The Consumption indicator function isused for calling up information about theenergy and water consumption of yourdishwasher (see “Settings –Consumption indicator ”).The following information can be shownon the display: - An estimate of ...
Page 36 - water connection (see “Settings –
Caring for the environment 36 Heat accumulator This dishwasher is equipped with a heataccumulator, in which fresh water forthe programme is pre-heated andstored in order to save energy. The heataccumulator is refilled with fresh watertowards the end of each programme.The water is held here ready for...
Page 37 - Loading the dishwasher; General information
Loading the dishwasher 37 General information Remove coarse food residues fromcrockery.There is no need to pre-rinse itemsunder running water. Damage can be caused by ash, sand, wax, lubricating grease or paint.These substances will contaminatethe dishwasher and can then nolonger be removed.Do not...
Page 38 - Items not suitable for dishwashers:
Loading the dishwasher 38 Items not suitable for dishwashers: - Wooden cutlery and crockery or items with wooden parts: these maydiscolour and fade. The glue used inthese items is not dishwasher-proofand wooden handles may come looseafter being washed in a dishwasher. - Craft items, antiques, valuab...
Page 39 - Upper basket; Loading the upper basket; Damage due to leaking water.; Loading the FlexCare cup rack; Lower the FlexCare cup rack to do so.
Loading the dishwasher 39 Upper basket See the “Loading the dishwasher ”chapter, “Loading examples” sectionfor examples of how to load crockeryand cutlery. Loading the upper basket Damage due to leaking water. If you run the dishwasher without theupper basket, water can leak out ofthe dishwasher.O...
Page 40 - Adjusting the FlexCare cup rack
Loading the dishwasher 40 Adjusting the FlexCare cup rack You can set the height and depth of thecup rack at two different levels. so thatit can accommodate larger cups and sothat taller crockery can be placedunderneath it. Pull the cup rack upwards and click itinto the desired position (see arrow...
Page 41 - Lowering the spikes; Press the yellow lever downwards
Loading the dishwasher 41 Lowering the spikes On both front right-hand rows of spikes,you can lower every other spike to makeit easier to arrange larger crockery, e.g.cereal bowls. 1 2 Press the yellow lever downwards , and then lower the dark grey spikes . Place the bowls vertically in the ...
Page 42 - Adjusting the upper basket; Pull out the upper basket.; Raise the upper basket:
Loading the dishwasher 42 Adjusting the upper basket In order to gain more space for tallerpieces of crockery in the lower basket orupper basket, the upper basket can beadjusted on 3 levels with 2 cm betweeneach level.The upper basket can also be set at anangle so that water can run off freelyfrom r...
Page 43 - Loading the lower basket; When tilted, plates up to 35 cm in
Loading the dishwasher 43 Lower basket See the “Loading the dishwasher ”chapter, “Loading examples” sectionfor examples of how to load crockeryand cutlery. Loading the lower basket Place larger and heavier items such asplates, serving platters, saucepans,bowls etc., in the lower basket. Glasses, c...
Page 45 - Loading the FlexCare Glass & Bottle; Lean the containers into the holders.
Loading the dishwasher 45 Loading the FlexCare Glass & Bottle The glass and bottle holders can beused to keep tall, narrow and hollowcontainers, e.g. beer glasses, bottles,vases, secure during a programme. The inserts in the glass and bottleholders can be raised to make moreroom for tall glass...
Page 46 - MultiClip; Secure light items to the MultiClips.; Loading the XL-Assist; Slightly lift the XL-Assist
Loading the dishwasher 46 MultiClip The MultiClips enable you to fasten lightload items such as those made fromplastic. Secure light items to the MultiClips. Make sure that crockery does notobstruct the middle spray arm. XL-Assist The XL-Assist is used to secure largeload items, e.g. pots and pans...
Page 47 - Cutlery tray/cutlery basket; Loading the 3D MultiFlex tray
Loading the dishwasher 47 Cutlery tray/cutlery basket (depending on model) See the “Loading the dishwasher ”chapter, “Loading examples” sectionfor examples of how to load crockeryand cutlery. Load the cutlery into the 3D MultiFlextray or into the cutlery basket(depending on the model). Loading the...
Page 48 - Arrange them evenly along the insert.
Loading the dishwasher 48 Loading the cutlery basket (if present) The cutlery basket can be placedanywhere on the front rows of spikes inthe left or right corner of the lowerbasket. To avoid the risk of injury, knives andforks should be placed with thehandles upwards in the cutlerybasket. Place ...
Page 49 - Loading examples; Dishwashers with cutlery tray
Loading the dishwasher 49 Loading examples Dishwashers with cutlery tray Upper basket Lower basket
Page 50 - Cutlery tray
Loading the dishwasher 50 Cutlery tray Heavily soiled crockery
Page 51 - Dishwashers with cutlery basket
Loading the dishwasher 51 Dishwashers with cutlery basket Upper basket Lower basket
Page 52 - Cutlery basket
Loading the dishwasher 52 Cutlery basket Heavily soiled crockery
Page 53 - Detergent; Active ingredients; Risk of damage due to unsuitable
Detergent 53 Active ingredients Risk of damage due to unsuitable detergents.Detergents that are not suitable fordomestic dishwashers can causedamage to the dishwasher or to theload items.Only use detergents formulated fordomestic dishwashers. Modern detergents contain variousactive ingredients, th...
Page 54 - Risk of chemical burns from; Dispensing detergent; QuickPowerWash
Detergent 54 Risk of chemical burns from detergent.Dishwasher detergents can causeburning on the skin and in the eyes,nose, mouth and throat.Avoid contact with detergents. Do not inhale powder detergents. Donot swallow dishwasher detergents.Seek medical attention immediatelyif detergent has been s...
Page 55 - Adding detergent; Press the yellow button
Detergent 55 Adding detergent Press the yellow button on the lid of the detergent compartment. The lid will spring open. The lid will also open at the end of aprogramme sequence. Add the detergent to the detergentcompartment. Push the lid shut until you hear it clickinto place. The detergent...
Page 56 - Operation; Start; Selecting a programme; “Programme
Operation 56 Switching on the dishwasher Open the stopcock, if it is closed. Make sure the spray arms can rotatefreely. Close the door. Press the button. The programme selected will brieflyappear in the display and the indicatorlight for the programme selected willcome on. Next, the estim...
Page 57 - Display programme duration
Operation 57 Display programme duration The estimated duration of the selectedprogramme appears on the displaybefore the programme begins. Duringthe programme, the time left until theend of the programme is displayed.Symbols appear to indicate which stagethe programme is at: Pre-wash/Soak Main w...
Page 58 - End of the programme; Energy management
Operation 58 End of the programme The programme has ended when thedisplay shows the message Finished . In some programmes, if the “AutoOpen”function is activated, the door willautomatically open slightly (see“Settings – AutoOpen”). This improvesthe drying process.If the Consumption programmable ...
Page 59 - Unloading the dishwasher
Operation 59 Unloading the dishwasher Dishes tend to break and chip moreeasily when they are hot. Allow thedishes to cool until they are comfortableenough to handle before unloadingthem.If you open the door fully after switchingoff, the dishes will cool much faster. First unload the lower basket, ...
Page 60 - Options; Timer; Activating the timer
Options 60 Timer You can set the start time of aprogramme. The programme start timecan be delayed for between 30 minutesand 24 hours. With start time delays between30 minutes and 3 hours, the delay canbe set in 30 minute stages. It is set inhours for periods longer than this. With manual detergen...
Page 61 - Displaying the operating hours
Options 61 After you have activated the timer, allthe displays will switch off after a fewminutes to save energy.Press the button to switch the display back on again for a fewminutes. The time up until the programme startswill show counting down in the displayin hours for durations above 10 hours...
Page 62 - Guide for selecting a programme; Crockery
Guide for selecting a programme 62 1 Food such as potatoes, pasta, rice or stews can leave starchy deposits. Deposits containing protein can be left by food such as fried meat or fish. Mixed crockery including temperature-sensitive glasses and plastics Pots, pans, everyday crockery and cutlery Light...
Page 64 - Programme overview; Programme
Programme overview 64 Programme Programme sequence Pre-wash Main wash Interim rinse Final rinse Drying / AutoOpen °C °C ECO 1 - 43 42 / Auto 45–60 °C Variable programme sequence, sensor-controlled adjustment according to load size and level of soiling As required 45–60 55–70 / ComfortWas...
Page 66 - Further programmes; ExtraQuiet 50 °C; programme to clean it. The; Rinse out salt; immediately start the; PowerWash
Programme overview 66 Further programmes ComfortWash+ 55 °C Programme for cleaning a mixed load ofcrockery with normal household foodresidues. ExtraQuiet 50 °C Very quiet programme with longerrunning time. This programme issuitable for mixed crockery with normalhousehold food residues that have d...
Page 67 - Extras; Selecting extras; BottleClean
Extras 67 Selecting extras You can use extras to adjust theprogrammes.To do this, you can select or deselectthe extras before starting the selectedprogramme. Press the Extras button. Select the extra you want and confirmwith OK . Extras that cannot be combined withthe selected programme or e...
Page 68 - Selecting Quick
Extras 68 Selecting Quick You can reduce the programme runningtime using the Quick extra. The time by which the programmerunning time is shortened variesaccording to the selected programme.In order to achieve optimum washresults, the temperature, and thereforethe energy consumption, will slightly...
Page 69 - Cleaning and care; Cleaning the wash cabinet; Intensive 75 °C; Cleaning the control field; only; Cleaning the appliance front
Cleaning and care 69 Check the condition of yourdishwasher regularly (approx. every4–6 months). In this way, faults andproblems can be avoided. Damage due to unsuitable cleaning agents.All surfaces are susceptible toscratching. Contact with unsuitablecleaning agents can alter or discolourthe exter...
Page 70 - ammonia, acids or chlorides
Cleaning and care 70 Clean the appliance front with a softsponge cloth and a solution of warmwater and washing-up liquid. Aftercleaning, wipe the surfaces dry usinga soft cloth. A clean, damp microfibre clothwithout dishwasher detergent canalso be used. To avoid damaging the externalsurfaces, do n...
Page 71 - Cleaning the spray arms
Cleaning and care 71 Cleaning the spray arms Particles of food can get stuck in thespray arm nozzles and bearings. Thespray arms should therefore beinspected regularly (approx. every 2–4 months). Never run a wash programmewithout using the spray arms. Damage due to soiling entering the circulation...
Page 72 - Removing the top spray arm; Push the upper spray arm upwards; Removing the middle spray arm; above) and remove the spray arm; Removing the lower spray arm; Remove the lower basket.
Cleaning and care 72 Removing the top spray arm 2 1 Push the upper spray arm upwards to engage the inner ratchet. Thenunscrew the spray arm by rotating thescrew thread anti-clockwise (view from below). Removing the middle spray arm 2 1 Rotate the screw thread of the middlespray arm clockwi...
Page 74 - Inserting the lower spray arm; Damage due to soiling entering
Cleaning and care 74 Inserting the lower spray arm Refit the lower spray arm and ensurethat the filter combination lies flat inthe base of the wash cabinet. Rotate the screw thread of the lowerspray arm clockwise (view fromabove) until the arrow in the viewingwindow points to the lock symbol ...
Page 75 - Cleaning the filters
Cleaning and care 75 Checking the filters in the washcabinet The filter combination in the base of thewash cabinet retains coarse soiling fromthe suds solution. This prevents soilinggetting into the circulation system andre-entering the wash cabinet throughthe spray arms. Damage due to soiling ent...
Page 77 - Cleaning the water inlet filter; Never
Cleaning and care 77 Cleaning the water inlet filter A filter is incorporated in the screwthread to protect the water inlet valve. Ifthe filter is soiled, insufficient waterflows into the wash cabinet. Risk of electric shock from mains voltage.The plastic housing of the waterconnection contains an...
Page 78 - Cleaning the drain pump
Cleaning and care 78 Cleaning the drain pump If water remains in the wash cabinetafter the end of the programme, thewater has not been pumped away. Thedrain pump may be blocked by foreignobjects. These foreign objects are easyto remove. Disconnect the dishwasher from themains. To do this, turn off...
Page 79 - Risk of injury from glass splinters.
Cleaning and care 79 The drain pump (see arrow) isunderneath the cover. Risk of injury from glass splinters. It is especially difficult to see glasssplinters in the drain pump.Take care when cleaning the drainpump. Carefully remove all foreign objectsfrom the drain pump. Check the drainpump impe...
Page 80 - Problem solving guide; Technical problems; Problem; indicator; The dishwasher is not plugged in.; The; Then press the
Problem solving guide 80 Many malfunctions and faults that can occur in daily operation can be easilyremedied. You can save time and money in many cases, as you do not need to callthe Miele Customer Service Department.Information to help you rectify faults yourself can be found at www.miele.com/serv...
Page 81 - Fault messages; Door release
Problem solving guide 81 Fault messages Problem Cause and remedy One of the followingfaults appears in the dis-play: Before rectifying the problem: Switch the dishwasher off. Fault F There may be a technical fault. Switch the dishwasher back on after a few seconds. Restart the desired prog...
Page 82 - Water inlet fault; Water drainage fault; General problems with the dishwasher
Problem solving guide 82 Water inlet fault Problem Cause and remedy One of the followingmessages appears in thedisplay: Open stopcock The stopcock is closed. Open the stopcock fully. Water intake Before rectifying the problem: Switch the dishwasher off. The water inlet is restricted. O...
Page 83 - Noises
Problem solving guide 83 Problem Cause and remedy Detergent residue is leftin the detergent com-partment at the end of aprogramme. The detergent compartment was still damp whendetergent was added. Only add the detergent when the detergentcompartment is dry. The detergent compart-ment lid cannot be...
Page 84 - Wash items are insecure in the wash cabinet.
Problem solving guide 84 Problem Cause and remedy Rattling noise in thewash cabinet Wash items are insecure in the wash cabinet. Carefully open the door and rearrange the washitems so that they sit securely. There is a foreign object (e.g. glass shard) in the drainpump. Remove the foreign object...
Page 85 - Unsatisfactory washing result
Problem solving guide 85 Unsatisfactory washing result Problem Cause and remedy The crockery is notclean. The crockery was not loaded correctly. See notes under “Loading the dishwasher ” forexamples on how to load crockery and cutlery. The programme was not powerful enough. Select a more powerfu...
Page 87 - Add more dishwasher salt.; programme without load items in the
Problem solving guide 87 Problem Cause and remedy Add more dishwasher salt. Plastic items are discol-oured. Natural dyes, e.g. from carrots, tomatoes or ketchupmay be the cause. The amount of detergent used orits bleaching effect was not sufficient to deal withnatural dyes. Use more detergent (s...
Page 88 - Service; Contact in the event of a fault
Service 88 Information to help you rectify faultsyourself and about Miele spare partscan be found at www.miele.com/service. Contact in the event of a fault In the event of any faults which youcannot remedy yourself, please contactyour Miele dealer or the MieleCustomer Service Department. You can boo...
Page 89 - EPREL database; Warranty; “Comparison
Service 89 EPREL database From 1 March 2021, information onenergy labelling and ecodesignrequirements will be available in theEuropean Product Database (EPREL).You can find the product database atthe following link https://eprel.ec.europa.eu/. You will be asked toenter the model identifier.The model...
Page 90 - Optional accessories; Detergent tabs
Optional accessories 90 Dishwasher detergent, rinse aid andcleaning and care products are availablefor this dishwasher, as are optionalaccessories. All the products have been designed forMiele appliances.These and many other products can beordered from the Miele webshop, theMiele Customer Service De...
Page 91 - Appliance care; Dishwasher cleaner; Descaling agent
Optional accessories 91 Appliance care Miele cleaning and care productsprovide optimum care for your Mieledishwasher. Dishwasher cleaner - For use with the Maintenance programme without detergent dispensing - Cleans the dishwasher effectively and thoroughly - Removes grease, bacteria, and associate...
Page 92 - Installation; The Miele Waterproof system; Health risk due to wash water.
Installation *INSTALLATION* 92 The Miele Waterproof system Provided that your dishwasher has beeninstalled correctly, the Miele Waterproofsystem will protect you from waterdamage throughout its lifetime. Water inlet Health risk due to wash water. Water in the dishwasher is notdrinking water.Do not...
Page 93 - Risk of damage from leaking
Installation *INSTALLATION* 93 Risk of damage from leaking water.The connection point is subject tomains water pressure. Water leakingfrom it can cause damage.You should therefore open thestopcock slowly and check for leaks.Correct the position of the seal andscrew thread if appropriate. Checkthe ...
Page 94 - Water drainage; Venting the water drain; Open the dishwasher door fully.
Installation *INSTALLATION* 94 Water drainage The dishwasher ’s drainage system isfitted with a non-return valve, whichprevents dirty water from flowing backinto the appliance via the drain hose.The dishwasher is supplied withapprox. 1.5 m of flexible drain hose withan internal diameter of 22 mm.The...
Page 95 - Electrical connection; Risk of fire from overheating.
Installation *INSTALLATION* 95 Electrical connection The dishwasher is “connector-ready” asstandard for connection to an earthedsocket.The socket must be easily accessibleafter the dishwasher has been installed.If that is not possible, ensure that asuitable means of disconnection isprovided on the i...
Page 96 - Technical data; Dishwasher model
Technical data 96 Technical data Dishwasher model Normal XXL Height of freestandingappliance 84.5 cm(adjustable by+3.5 cm) - Height of built-in appliance 80.5 cm(adjustable by+6.5 cm) 84.5 cm(adjustable by+6.5 cm) Height of building-in niche Min. 80.5 cm(+6.5 cm) Min. 84.5 cm(+6.5 cm) Width 59.8 cm ...
Page 97 - Off mode
Technical data 97 Dishwasher model Normal XXL Off mode Maximum 0.50 W* Standby mode Maximum 0.50 W* Delay start Maximum 4.00 W* * see product data sheet for precise values
Page 99 - United Kingdom
United Kingdom Miele Co. Ltd., Fairacres, Marcham Road, Abingdon, Oxon, OX14 1TWTel: 0330 160 6600, Internet: www.miele.co.uk, E-mail: [email protected] Australia Miele Australia Pty. Ltd.ACN 005 635 398ABN 96 005 635 398Level 4, 141 Camberwell RoadHawthorn East, VIC 3123Tel: 1300 464 353E-mail: [em...


 Miele APCL 043
User Manual
Miele APCL 043
User Manual
 Miele APWM 065
Installation Manual
Miele APWM 065
Installation Manual
 Miele APWM 070
Installation Manual
Miele APWM 070
Installation Manual
 Miele SC
Installation Manual
Miele SC
Installation Manual
 Miele PR
Installation Manual
Miele PR
Installation Manual
 Miele APCL 047
User Manual
Miele APCL 047
User Manual
 Miele PLW 8505
Installation Manual
Miele PLW 8505
Installation Manual
![Miele PT 7186 Vario [EL]](https://manualsarea.com/img/product/thumbs/180/69/3e/693e1219f5c0d53fde982888bd54a3ec.webp) Miele PT 7186 Vario [EL]
User Manual
Miele PT 7186 Vario [EL]
User Manual
 Miele CM/1
User Manual
Miele CM/1
User Manual
![Miele PLW 8617 [EL/S TH]](https://manualsarea.com/img/product/thumbs/180/fe/90/fe9010c5f8c3c4aada5d83b417c78507.webp) Miele PLW 8617 [EL/S TH]
Installation Manual
Miele PLW 8617 [EL/S TH]
Installation Manual
![Miele PWM 908 [EL DP MAR 3 AC 400-480V 50-60Hz]](https://manualsarea.com/img/product/thumbs/180/20/e5/20e5e929bcb336fc6b2f128d9c857a3d.webp) Miele PWM 908 [EL DP MAR 3 AC 400-480V 50-60Hz]
User Manual
Miele PWM 908 [EL DP MAR 3 AC 400-480V 50-60Hz]
User Manual
![Miele PWM 906 [EL DP MAR 3 AC 400-480V 50-60Hz]](https://manualsarea.com/img/product/thumbs/180/57/c8/57c81dd8d0abe05852b709a3fa9b80db.webp) Miele PWM 906 [EL DP MAR 3 AC 400-480V 50-60Hz]
Installation Manual
Miele PWM 906 [EL DP MAR 3 AC 400-480V 50-60Hz]
Installation Manual
![Miele PWM 906 [EL DP MAR 2N AC 400V 50-60Hz]](https://manualsarea.com/img/product/thumbs/180/ce/23/ce232ceeda728532882a2a2f56bf2abc.webp) Miele PWM 906 [EL DP MAR 2N AC 400V 50-60Hz]
User Manual
Miele PWM 906 [EL DP MAR 2N AC 400V 50-60Hz]
User Manual
![Miele PLW 8617 [EL TH]](https://manualsarea.com/img/product/thumbs/180/e8/4a/e84a63b24dca64279b26bca714985678.webp) Miele PLW 8617 [EL TH]
User Manual
Miele PLW 8617 [EL TH]
User Manual
![Miele PDR 908 [EL MAR 3N AC 400V 50-60Hz]](https://manualsarea.com/img/product/thumbs/180/05/b7/05b705998b251f92b271e908423e1ecb.webp) Miele PDR 908 [EL MAR 3N AC 400V 50-60Hz]
Installation Manual
Miele PDR 908 [EL MAR 3N AC 400V 50-60Hz]
Installation Manual
![Miele PLW 8615 [EL CT]](https://manualsarea.com/img/product/thumbs/180/70/ff/70ff37b9174e78db8d00ddce8cf08ee3.webp) Miele PLW 8615 [EL CT]
Installation Manual
Miele PLW 8615 [EL CT]
Installation Manual
![Miele PLW 8616 [EL/S]](https://manualsarea.com/img/product/thumbs/180/37/f4/37f4255dee3c9942a13241f3ccd5fe93.webp) Miele PLW 8616 [EL/S]
Installation Manual
Miele PLW 8616 [EL/S]
Installation Manual
![Miele PWM 916 [EL DV DD SOM]](https://manualsarea.com/img/product/thumbs/180/21/65/21657a907bb735f3acf5a7bdbbc78c8a.webp) Miele PWM 916 [EL DV DD SOM]
Manual
Miele PWM 916 [EL DV DD SOM]
Manual
![Miele PFD 104 SCVi XXL [120V]](https://manualsarea.com/img/product/thumbs/180/0a/20/0a20c04430aaa9be6a985688f5bb5580.webp) Miele PFD 104 SCVi XXL [120V]
Installation Manual
Miele PFD 104 SCVi XXL [120V]
Installation Manual
![Miele PDR 507 HP [MAR]](https://manualsarea.com/img/product/thumbs/180/58/9e/589e9ba94b88174fa0cdb27b4bbaac5b.webp) Miele PDR 507 HP [MAR]
User Manual
Miele PDR 507 HP [MAR]
User Manual