Page 2 - Contents; IMPORTANT SAFETY INSTRUCTIONS
Contents 2 IMPORTANT SAFETY INSTRUCTIONS ............................................................ 4 Caring for the environment .............................................................................. 13 Guide to the ventilation hood ............................................................
Page 3 - Cleaning and care
Contents 3 Cleaning and care ............................................................................................. 36 Stainless steel housing ........................................................................................ 36Grease filters ...............................................
Page 4 - Appropriate use
IMPORTANT SAFETY INSTRUCTIONS 4 READ AND SAVE THESE INSTRUCTIONS This appliance complies with current safety requirements.Improper use of the appliance can lead to personal injury andmaterial damage. Read all instructions before installing or using the appliance for thefirst time. Only use the appli...
Page 5 - Safety with children
IMPORTANT SAFETY INSTRUCTIONS 5 Safety with children Children must be kept away from the ventilation hood unless they are constantly supervised. Children must not be allowed to clean or service the hood. Please supervise children in the vicinity of the hood and do not let them play with it. ...
Page 7 - Correct use
IMPORTANT SAFETY INSTRUCTIONS 7 Only open the housing as described in the enclosed “Installation diagram” and in the “Cleaning and care” section of this manual.Under no circumstances should any other parts of the housing beopened.Tampering with electrical connections or components andmechanical pa...
Page 8 - – 1) You have a class ABC extinguisher, and you know how to operate it.
IMPORTANT SAFETY INSTRUCTIONS 8 Open flames are a fire hazard. The use of an open flame under the ventilation hood is not permitted.To avoid the danger of fire, do not flambé or grill over an open flame.When switched on, the ventilation hood could draw flames into thefilter. Fat deposits could ign...
Page 9 - Always turn the ventilation hood on whenever a burner is in use to
IMPORTANT SAFETY INSTRUCTIONS 9 Always turn the ventilation hood on whenever a burner is in use to prevent damage from condensation. Overheated oil and fat can ignite, causing fire damage to the ventilation hood.Do not leave cookware, pans, and deep-fat fryers unattended whencooking with oil or ...
Page 10 - Proper installation
IMPORTANT SAFETY INSTRUCTIONS 10 Proper installation WARNING: TO REDUCE THE RISK OF FIRE, ELECTRIC SHOCK, OR INJURY TO PERSONS, OBSERVE THE FOLLOWING: - a) Installation work and electrical wiring must be done by qualified person(s) in accordance with all applicable codes and standards,including fi...
Page 11 - Cleaning and maintenance
IMPORTANT SAFETY INSTRUCTIONS 11 The information provided in “Installation” must be observed when installing the ventilation hood. Components can have sharp edges which may cause injury. Wear gloves to protect your hands. When installing the exhaust duct, only use pipes or tubes made of non-fl...
Page 12 - Miele will guarantee to supply functional parts for a minimum of; FCC Declaration of Conformity; These devices comply with FCC Rules Part 15. This equipment; FCC Radiation Exposure Statement; This equipment complies with FCC radiation exposure limits set; Industry Canada Statement; This digital apparatus does not exceed the Class B limits for
IMPORTANT SAFETY INSTRUCTIONS 12 Miele will guarantee to supply functional parts for a minimum of 10 years and up to 15 years following the discontinuation of yourventilation unit. FCC Declaration of Conformity These devices comply with FCC Rules Part 15. This equipment has been tested and found...
Page 13 - Caring for the environment; Disposal of your old appliance
Caring for the environment 13 Disposal of the packingmaterial The cardboard box and packingmaterials protect the appliance duringshipping. They have been designed tobe biodegradable and recyclable. Ensure that any plastic wrappings,bags, etc. are disposed of safely andkept out of the reach of childr...
Page 14 - Guide to the ventilation hood
Page 16 - Description of functions; Extraction mode
Description of functions 16 The following functions are available onyour ventilation hood, depending on themodel: Extraction mode The air is drawn in and cleaned by thegrease filters and directed outside. Recirculation mode Recirculation mode hoods require arecirculation kit and OdorFree CharcoalFil...
Page 17 - Before using for the first time; Setting up Miele@home
Before using for the first time 17 Selecting extraction mode orrecirculation mode The ventilation hood can be operatedwith either extraction mode orrecirculation mode. The power of theblower is adapted to suit the selectedmode of operation. The ventilationhood is set up at the factory forrecirculati...
Page 18 - Miele App
Before using for the first time 18 Miele App The Miele App is available to downloadfree of charge from the Apple AppStore ® or from the Google Play Store™. Connecting via the app The Miele app can be used to connectto your network. Install the Miele app on your mobiledevice. To log in you will nee...
Page 19 - Connecting via WPS
Before using for the first time 19 Switch the ventilation hood off. Press and hold the control. Press the lighting control at the same time. 2 will light up constantly, 3 will flash on and off. The ventilation hood will be ready forconnection in the next 2 minutes. Follow the instructio...
Page 21 - Setting up Con@ctivity
Before using for the first time 21 Touch the control. 2 will light up constantly, 3 will flash on and off. After a few seconds, 2 and 3 will flash on and off. The connection has nowbeen disconnected. Exit disconnection mode on theventilation hood by pressing thedelayed shutdown control . Th...
Page 23 - Reattempting the connection
Before using for the first time 23 Start the WiFi connection on thecooktop. For more details, see thecooktop operating instructions. When successfully connected, 2 and 3 will light up constantly. Quit connection mode on theventilation hood by pressing thedelayed shutdown control . Con@ctivity...
Page 24 - Activating the wireless connection
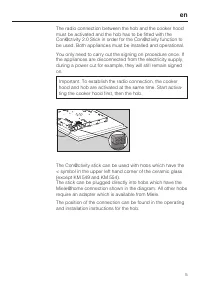
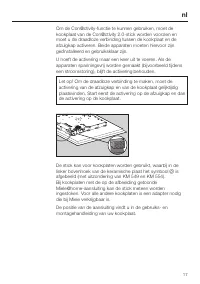
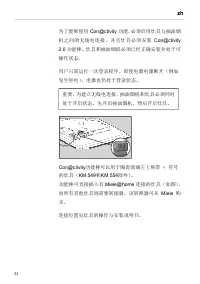
Before using for the first time 24 Installing the Con@ctivity 2.0 stick See the relevant installationinstructions provided with theCon@ctivity 2.0 stick. Activating the wireless connection The ventilation hood and the cooktopmust be installed and operational. The wireless connection must beactivat...
Page 25 - Activating the cooktop
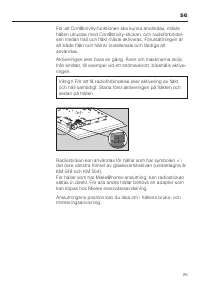
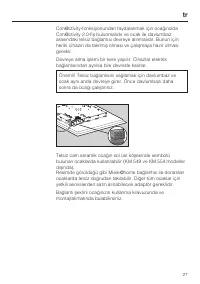
Before using for the first time 25 To activate Con@ctivity 2.0, press the control. 2 will light up constantly, 3 will flash on and off. After a few seconds, 2 and 3 will light up constantly, B will flash on and off. The search for a wireless connectionwill start. Activating the cooktop While t...
Page 26 - Activation failed
Before using for the first time 26 Activation failed If a wireless connection cannot beestablished despite activation of theCon@ctivity function on the ventilationhood and cooktop, the function mustfirst be deactivated and thenreactivated on both appliances. Deactivating the wireless connection Th...
Page 27 - Reaction time
Operation (Automatic mode) 27 When Con@ctivity is active, theventilation hood always operates inautomatic mode (see “Before using forthe first time – Setting upCon@ctivity”). If you wish to operate the ventilationhood manually; see “Operation(Manual mode) – Cooking withoutCon@ctivity”. Cooking with ...
Page 31 - Power management; - The overhead lighting will switch off
Operation (Manual mode) 31 Turning the overhead lightingon/off The overhead lighting can be turned onand off separately from the blower. To do this, press the lightingcontrol . The symbol will light up when the overhead lighting is turned on. Power management The ventilation hood is equipped...
Page 32 - Turning power management on/off
Operation (Manual mode) 32 Turning power management on/off You can deactivate powermanagement.Keep in mind that this may increaseenergy consumption. Switch off the blower and the lighting. Press the delayed shutdowncontrol for approx. 10 seconds until the 1 indicator appears in the blower lev...
Page 33 - Filter saturation indicator
Operation (Automatic and Manual modes) 33 Filter saturation indicator The ventilation hood registers the lengthof time it has been operated. The filter saturation indicators showwhen the filters need to be cleaned orchanged by lighting up the grease filtersymbol or charcoal filter symbol . Addit...
Page 36 - Before proceeding with any; Stainless steel housing; General information; Grease filters; Risk of fire
Cleaning and care 36 Before proceeding with any maintenance or cleaning task, theventilation hood must bedisconnected from the power supply,see “IMPORTANT SAFETYINSTRUCTIONS”. Stainless steel housing General information Unsuitable cleaning agents candamage the surfaces and controlelements.Do not u...
Page 37 - Removing the grease filters
Cleaning and care 37 Removing the grease filters When handling the grease filter, be careful not to drop it.This can result in damage to the filterand the cooktop below.Make sure you hold the filter securelyat all times when handling it. To remove a grease filter, release thelocking clip. Then, ...
Page 38 - for approx. 6 seconds; OdorFree Charcoal Filter; Press the filters into the frame.
Cleaning and care 38 Press the filter saturationindicator for approx. 6 seconds until 1 is the only indicator flashing. Reinsert the grease filters. Wheninserting the grease filters, make surethat the locking clip is facingoutward. If a grease filter is inadvertently fittedupside down, ins...
Page 39 - before
Cleaning and care 39 When to change the OdorFreeCharcoal Filter Replace the charcoal filters when theyno longer absorb kitchen odorseffectively, and at least every 6 months. The filter saturation indicator remindsyou to regularly replace the charcoalfilters by illuminating the charcoal filtersymbol ...
Page 40 - Changing a light bulb; Turn off the blower and the lighting.
Cleaning and care 40 Changing a light bulb Only use the specified light bulbs.Other bulbs, for example halogenbulbs, may become damaged due tothe high generation of heat. The light bulbs should be replaced withthe following: Bulb type .............................. LED, GU10Power ......................
Page 41 - Installation; Before installation; Before installation, it is important; Installation materials; for securing the
Installation *INSTALLATION* 41 Before installation Before installation, it is important to read the information contained inthis chapter and in the “IMPORTANTSAFETY INSTRUCTIONS” chapter. The ventilation hood is intended forinstallation in wall cabinets, ventilationhousing units, vent flues or abo...
Page 42 - Appliance dimensions
Installation *INSTALLATION* 42 Appliance dimensions The drawing is not to scale
Page 43 - Distance between cooktop and ventilation hood (S)
Installation *INSTALLATION* 43 a The ducting can also be connected at the back. Distance between cooktop and ventilation hood (S) Provided a larger distance is not given by the manufacturer of the cooktop,follow the minimum safety distances between a cooktop and the bottom of thehood.Please also obs...
Page 44 - Installation recommendations; Ventilation stack
Installation *INSTALLATION* 44 Installation recommendations - To achieve optimum vapor extraction, the hood must be centered over thecooktop, not to the side. - The mounting area must be easily accessible. The ventilation hoodshould be easy to reach anddisassemble in case a service call isnecessary....
Page 45 - Condensate
Installation *INSTALLATION* 45 Non-return flap Use a non-return flap in the ventsystem. A non-return flap ensures that when theventilation hood is not in operation, theduct is closed to prevent unwantedexchange of room air and outside air. If the exhaust is ducted through anoutside wall, a Miele w...
Page 46 - Reducing Collar
Installation *INSTALLATION* 46 Reducing Collar (optional accessory) If you would like to reduce theenvironmental impact of your ventilationsystem by limiting the CFM output theReducing Collar can be installed. Itreduces the air flow to less than400 CFM. Check local building codesfor max. CFM require...
Page 47 - Electrical connection; Grounding Instructions
Installation *INSTALLATION* 47 Electrical connection WARNING: TO REDUCE THE RISKOF FIRE, ELECTRIC SHOCK, ORINJURY TO PERSONS, OBSERVETHE FOLLOWING:All electrical work should beperformed by a qualified electricianin strict accordance with nationalregulations (for USA: ANSI-NFPA 70)and local safety re...
Page 48 - Customer Service; Contact in the event of a fault
Customer Service 48 Information to help you rectify faultsyourself and about Miele spare partscan be found at www.miele.com/service. Contact in the event of a fault In the event of a fault which you cannotremedy yourself, please contact yourMiele dealer or Miele Customer Service. You can book a Miel...
Page 49 - Technical data; WiFi module; Optional accessories for recirculation mode
Technical data 49 Blower motor 350 W Overhead lighting DA 2588 2 x 3 W DA 2518 4 x 3 W Total connected load DA 2588 356 W DA 2518 362 W Supply voltage, frequency 120 V AC, 60 Hz Fuse 15 A Power cord length 2.5 ft (0.75 m) Weight DA 2588 26.6 lbs (12.1 kg) DA 2518 31.5 lbs (14.3 kg) WiFi module Frequ...
Page 51 - National Headquarters; Canada; Headquarters and Miele Centre
9 Independence WayPrinceton, NJ 08540www.mieleusa.com U.S.A. Miele, Inc. National Headquarters Please have the model and serial numberof your appliance available whencontacting Customer Service. Canada ImporterMiele Limited Headquarters and Miele Centre Customer Support Phone: 888-99-MIELE (64353)[e...