Page 2 - Caring for the environment; Saving energy; Disposing of your old appliance
Caring for the environment 2 Disposing of the packagingmaterial The packaging material is used forhandling and protects the appliancefrom transport damage. The packagingmaterial used is selected from materialswhich are environmentally friendly fordisposal and can generally be recycled.Recycling the ...
Page 3 - Contents; Making 2 portions
Contents 3 Caring for the environment ......................................................................................... 2 Saving energy .................................................................................................................. 2 Warning and Safety instructions ..........
Page 5 - System lock; Cleaning and care
Contents 5 Performance mode......................................................................................................... 42 Eco mode ................................................................................................................... 42 Barista mode ..........................
Page 6 - Accessories
Contents 6 Warranty .......................................................................................................................... 75 Accessories .................................................................................................................... 76 Installation ............
Page 7 - Warning and Safety instructions
Warning and Safety instructions 7 This coffee machine complies with all the stipulated safetyrequirements. Inappropriate use can, however, lead to personalinjury and material damage. Read the operating instructions carefully before using the coffeemachine. They contain important information on safet...
Page 8 - Correct application
Warning and Safety instructions 8 Correct application This coffee machine is intended for home use. This coffee machine is not intended for outdoor use. This coffee machine must not be used at altitudes above 2000 m. It must only be used as a domestic appliance to make espresso, cappuccino, ...
Page 9 - Technical safety
Warning and Safety instructions 9 Technical safety Installation work or repairs should only be carried out by a Miele authorised technician. Unauthorised or incorrect installation work orrepairs can pose considerable danger to users. A damaged coffee machine could be dangerous. Before building i...
Page 10 - Correct use
Warning and Safety instructions 10 Only use the coffee machine in rooms where the ambient temperature is between +16 °C and +38 °C. A minimum installation height of 850 mm must be observed. This coffee machine must not be installed behind a closed cabinet door because heat and moisture can bui...
Page 12 - Accessories and spare parts
Warning and Safety instructions 12 Accessories and spare parts Miele can only guarantee the safety of the machine when original Miele spare parts are used. Faulty components must only bereplaced by genuine Miele original spare parts. Only use original Miele accessories. If other parts are used, ...
Page 13 - Appliance description; Exterior view; Control panel
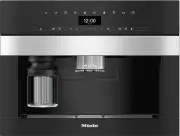
Appliance description 13 Exterior view 1 2 3 4 5 6 a On/Off button b Control panel c Door handle d Height-adjustable central spout with lighting e Drip tray cover f Milk flask
Page 14 - Interior view
Appliance description 14 Interior view a Bean container b Milk valve c Height-adjustable central spout with lighting d Grinder setting e Bean container f Fan outlet g Water container h Drip tray with lid i Brew unit j Waste container k Maintenance container l Drip tray
Page 15 - The milk container; cannot
Appliance description 15 The milk container a Lid b Milk suction tube c Sensor d Glass flask Central spout with cup rimsensor The central spout with cup rim sensorfeatures automatic spout adjustment.Thanks to this spout adjustmentfunction, the central spout moves downautomatically at the start of a ...
Page 16 - Controls and indicators; For making drinks; For creating and managing profiles; OK
Controls and indicators 16 6 a On/Off button For switching coffee machine on andoff b Drink buttons For making drinks c Display For showing information about thecurrent action or status d sensor – For making other drinks, e.g. Ristretto, Cappuccino italiano – For making a pot of tea or coffe...
Page 17 - Symbols in the display; Symbol; timer and setting for displaying; minute minder has been started (see “Tea –
Controls and indicators 17 Symbols in the display The following symbols may also appear in the display in addition to the text: Symbol Explanation This symbol indicates the “Settings” menu and the“Language” menu option. This symbol indicates that there is additional information andadvice about u...
Page 18 - Drink button symbols
Controls and indicators 18 Drink button symbols Espresso Coffee Long coffee Cappuccino Latte macchiato Caffè latte Hot milk Milk froth Tea water
Page 19 - Operation; Sensor controls; Miele; Navigation area; Miele; Entering a name
Operation 19 Sensor controls To operate the coffee machine, touchthe sensor controls with your finger. An audible signal is generated eachtime a sensor is touched. You canadjust the volume of the keypad tonesor switch the tones off (see “Adjustingsettings – Volume”). Drinks menu When the following a...
Page 20 - - To enter a character, highlight the one
Operation 20 Name A B C D E F Z - To enter a character, highlight the one you want and confirm your choicewith OK . - To delete a character, touch the sensor control. - To save the name, select the tick and confirm with OK .
Page 22 - Before using for the first time; Selecting the display language; Setting the date; Setting the time of day; Setting the water hardness level
Before using for the first time 22 Before using for the first time Connect the coffee machine to theelectricity supply. Install the coffee machine by buildingit in. Remove any notices from themachine. Remove the protective foil from thedrip tray cover. Clean the water container, the beanco...
Page 23 - Selecting the Performance mode; Confirm with
Before using for the first time 23 Selecting the Performance mode You can select the appropriatePerformance mode to suit your personalpreferences (see “Adjusting settings –Performance mode”). - Eco mode : this is an energy-saving mode. - Barista mode : this mode has been optimised for unadulterated ...
Page 24 - Filling the coffee bean container; Risk of damage to the grinder
Filling the coffee bean container 24 Coffee or espresso can be made fromwhole roasted coffee beans which arefreshly ground for each portion. Thisrequires the bean containers to be filledwith coffee beans. Risk of damage to the grinder due to incorrect operation.The coffee machine will be damagedif...
Page 25 - Filling the water container; Risk to health due to; every day; Risk of damage due to incorrect
Filling the water container 25 Risk to health due to contaminated water.Bacteria can develop in water whichhas been sitting in the watercontainer for too long and is a risk toyour health.Change the water in the watercontainer every day . Risk of damage due to incorrect operation.Unsuitable liqui...
Page 26 - Switching on and off; Touch the On/Off switch
Switching on and off 26 Switching the coffee machineon Touch the On/Off switch . The coffee machine heats up and rinsesthe pipework. Hot water will run out ofthe central spout.You can now make drinks. If the coffee machine is already atoperating temperature, rinsing will nottake place. Switchin...
Page 27 - Making drinks; Coffee
Making drinks 27 Danger of burning and scalding on the dispensing spouts.The liquids and steam dispensed arevery hot and can cause scalding.Keep well away from the areaunderneath the spouts when hotliquids and steam are beingdispensed.Do not touch hot components. Coffee Coffee drinks in detail You...
Page 28 - Rinse the milk pipework manually; Filling and inserting the milk container; Milk is; not; cooled in the milk
Making drinks 28 As soon as you select a drink containingmilk, the machine will start to heat up.The milk will be drawn up into thecentral spout where it is heated bysteam and also frothed for drinksrequiring milk froth.You can prepare hot milk and milk frothusing cow’s milk or alternative plant-bas...
Page 30 - Tea
Making drinks 30 Place a cup under each of thedispensing spouts in the centralspout. Touch the sensor control immediately before or after you startmaking a drink. The sensor control lights up. Dispensing starts and 2 portions of thedesired drink will be dispensed. Coffee pot You can make s...
Page 31 - Chai latte; Starting the TeaTimer manually
Making drinks 31 Dispensed temperature:approx. 97 °C, brewing time:approx. 3 minutes - Chai latte has its origins in traditional Ayurveda medicine as a black tea withtypically Indian spices and milk. Themilk mellows the spices and tops offthe flavour experience.Dispensed temperature:approx. 97 °C, b...
Page 32 - Teapot; Dispensing warm or hot water; Changing the portion size
Making drinks 32 Remove the tea filter or tea bag whenthe desired brewing time has elapsed. Teapot The Teapot function allows you to make a large quantity of tea (maximumof 1 litre). The type of tea selecteddetermines the preset temperature.The drinks menu is displayed. Tip: Make sure that the wat...
Page 34 - Degree of grinding; too coarse; Adjusting the degree of grinding; exactly 1
Degree of grinding 34 The degree of grinding determines thecontact time between the ground coffeeand the water, known as the extractiontime. Only when the ideal degree ofgrinding is selected can the machinedispense a perfect cup of coffee with afine, hazelnut brown crema. Identifying the ideal degre...
Page 35 - Parameters; Portion size; too low
Parameters 35 Displaying and changingparameters You can change the portion size for alldrinks.In addition, you can set the quantity ofcoffee, the brewing temperature andpre-brewing for each coffee drinkindividually. Touch the sensor control. Select a drink. Confirm with OK . The parameter...
Page 36 - Pre-brewing the ground coffee; We particularly recommend using
Parameters 36 A temperature increment ofapproximately 2 °C makes a noticeabledifference. Pre-brewing the ground coffee When the pre-brewing function isturned on, the ground coffee is firstmoistened with a little hot water. Theground coffee swells a little. Theremaining amount of water is thenpressed...
Page 37 - Profiles; Manual
Profiles 37 Profiles In addition to the Miele drinks menu(Miele profile), you can create individualprofiles to cater for different tastes andpreferences.Within the profile, you can adjust theportion sizes and parametersindividually for all drinks. The name of the current profile isshown in the top l...
Page 38 - After each use
Profiles 38 - After each use : The machine will revert to the Miele profile whenever adrink is dispensed. - When switched on : The Miele profile will be displayed whenever the coffeemachine is switched on, regardless ofwhich profile was selected before themachine was last switched off. Select the ...
Page 39 - MobileStart
MobileStart 39 With MobileStart you can, for example,start making a drink via the Miele app. You will only be able to useMobileStart if Miele@home has beenset up for your coffee machine. Danger of burning and scalding on the dispensing spouts.If liquids or steam are dispensedwhile the machine is u...
Page 40 - Language
Settings 40 You can use the “Settings” menu tocustomise the coffee machine to suityour requirements. Displaying and changingSettings The drinks menu is displayed. Touch the sensor control. Select Settings . Confirm with OK . Select the menu option that you wantto display or change. Co...
Page 41 - Switch off at; Automatic; Volume
Settings 41 machine from switching itself onunnecessarily, for example, whilst youare away on holiday.The programmed times will, however,remain in the memory and will bereactivated when the machine is nextswitched back on manually.If you have set the time to be displayedwhile the machine is switched...
Page 42 - Performance mode; Eco mode; Water hardness
Settings 42 Performance mode You can select the appropriateperformance mode for how you useyour machine. Eco mode is set by default. Eco mode Eco mode is an energy-saving mode.The system does not heat up untilsomeone starts making a drink. Barista mode This performance mode has beenoptimised for una...
Page 44 - The; menu option appears; RemoteUpdate; The update may take several minutes.
Settings 44 - Deactivate */ Activate *: The settings for the WiFi network are retained, butthe network is switched on or off. - Connection status *: Information about the WiFi connection isdisplayed. The symbols indicate thestrength of the connection. - Set up again *: The settings for the current W...
Page 45 - Software version; Factory defaults
Settings 45 Please note the following informationabout the RemoteUpdate function: - You will only receive a message when a RemoteUpdate is available. - Once a RemoteUpdate has been installed, it cannot be undone. - Do not switch the coffee machine off during the update. Otherwise, theupdate will be ...
Page 46 - Risk to health due to inadequate cleaning; Overview of cleaning intervals
Cleaning and care 46 Risk to health due to inadequate cleaning Heat and moisture inside the coffee machine can cause coffee residues tobecome mouldy and/or milk residues to go off and pose a risk to health.Carefully clean the coffee machine regularly. Overview of cleaning intervals Recommended fre...
Page 48 - Unsuitable cleaning agents
Cleaning and care 48 Unsuitable cleaning agents Contact with unsuitable cleaningagents can alter or discolour theexternal surfaces. All surfaces aresusceptible to scratching. Scratcheson glass can in some circumstanceslead to breakage.Remove all cleaning agent residuesimmediately. To protect the mac...
Page 49 - Open the appliance door.; Taking the drip tray apart; The orange clips are not removable.; Cleaning the contacts on the drip tray; Dry all parts thoroughly.
Cleaning and care 49 Open the appliance door. Remove the drip tray and wastecontainer from the appliance. Empty the waste container afterremoving it from the drip tray. The waste container may contain asmall amount of water from rinsing aswell as the leftover coffee grounds. Taking the drip tr...
Page 50 - Reassembling the drip tray; Cleaning the drip tray cover
Cleaning and care 50 Reassembling the drip tray Attach the drip tray lid as follows:slide the lid under the lug next to thecontacts and apply pressure to the liduntil the catches at the sides audiblyclick into place. Place the waste container on the lid. Push the drip tray and wastecontainer b...
Page 51 - To give the water container an extra; Cleaning the central spout; Removing the central spout
Cleaning and care 51 Clean the water container by handwith warm water and a little washing-up liquid. Rinse the water container with cleanwater to remove any remainingwashing-up liquid. Dry the outside of the watercontainer. Tip: To give the water container an extra thorough clean, clean it in...
Page 52 - Do; remove the milk pipework; Clean all parts thoroughly by hand.; Inserting the central spout; Fit the dispensing unit back together.
Cleaning and care 52 Do not remove the milk pipework connecting piece.If necessary, clean the connectingpiece with the cleaning brush. Grip the dispensing unit by the sidesand pull it down to remove it. Take the dispensing unit apart,separating it into 3 components: theY-piece, the spouts and th...
Page 53 - Cleaning the cup rim sensor
Cleaning and care 53 Slide the dispensing unit into thecoffee machine. Connect the milk pipework. Refit the stainless steel cover. Close the appliance door. Fit cover to central spout will appear in the display. Confirm with OK . Cleaning the cup rim sensor Clean the cup rim sensor at lea...
Page 54 - Reassemble the milk container.
Cleaning and care 54 Use a clean cloth to dry all parts,paying particular attention to thethreads on the lid and on the glass. Reassemble the milk container. Use a damp sponge cloth to clean themilk container holder on the coffeemachine. Cleaning the milk valve (daily) The milk valve seal can ...
Page 55 - Removing the milk valve
Cleaning and care 55 milk sprays out during dispensing, themilk valve may be blocked. Clean themilk valve more often if necessary. Removing the milk valve Only remove the milk valve when thecoffee machine is switched off. Do not switch on the coffee machine whilethe milk valve is removed. Switch t...
Page 57 - Inserting the milk valve; switch on the coffee machine
Cleaning and care 57 Inserting the milk valve Do not switch on the coffee machine while the milk valve is removed. Insert the stainless steel bolt fromabove. Insert the silicone seal into the milkvalve holder. Insert the holder and silicone sealuntil they audibly click into place. Connect to...
Page 58 - Cleaning the bean containers
Cleaning and care 58 Attach the central spout’s stainlesssteel cover. Close the appliance door. You can now switch the coffee machineback on. Cleaning the bean containers Risk of damage from incorrect use and cleaning.Immersing the bean containers inliquids can result in malfunctions. Ifthey a...
Page 60 - Cleaning the inside of the appliance; turn the handle backwards
Cleaning and care 60 Wipe any coffee residue from thefilters. One filter is located in thefunnel. The other filter can be found tothe left of the funnel. Dry the funnel to prevent groundcoffee sticking to it the next time acoffee is made. Cleaning the inside of the appliance Use your vacuum cl...
Page 61 - Cleaning the appliance front
Cleaning and care 61 Cleaning the interior, inside ofthe appliance door and drip tray Clean the interior and appliance front aspart of the normal cleaning process. Forinstance, if you remove the watercontainer, use this as an opportunity toclean the area under the water containerat the same time. Th...
Page 62 - Maintenance programmes
Cleaning and care 62 Maintenance programmes The coffee machine has maintenanceprogrammes for: - Rinsing the machine- Rinsing the milk pipework- Cleaning the milk pipework- Degreasing the brew unit- Descaling the machine Run the relevant maintenanceprogramme when the prompt to do soappears in the dis...
Page 63 - Degreasing the brew unit
Cleaning and care 63 Fill the water container with lukewarmwater up to the mark and stir the solution. Follow the instructions for thecleaning agent mixing ratio carefully.Fill the water container with thespecified amount of water.Otherwise, cleaning will beincomplete. Push the water containe...
Page 65 - Descaling the machine
Cleaning and care 65 The process of removing the brew unitcauses ground coffee to drop onto thedrip tray. Remove the drip tray and clean thelid. Clean the interior of the coffeemachine (see also “Cleaning and care– Removing the brew unit andcleaning it by hand”). Use a vacuumcleaner to remove dr...
Page 66 - must be carried out; Carrying out descaling
Cleaning and care 66 Descaling must be carried out . The process takes approx. 35 minutes. The coffee machine will give you plentyof warning when it needs to bedescaled. As of this point, the displaywill indicate how many more drinks canbe made before descaling becomesabsolutely essential. This numb...
Page 67 - When; appears in the
Cleaning and care 67 When Rinse out and insert the water container. Close the door appears in the display: Remove the water container and rinseit thoroughly with clean water. Ensurethat no descaling solution residue remains in the water container. Fill thewater container with tap water. The descal...
Page 68 - Problem solving guide; Messages in the display; Error messages must be confirmed with; Problem; There is an internal fault.
Problem solving guide 68 Many malfunctions and faults that can occur in daily operation can be easilyremedied. You can save time and money in many cases, as you do not need to callthe Miele Customer Service Department.Information to help you rectify faults yourself can be found at www.miele.com/serv...
Page 70 - Unusual performance of the coffee machine
Problem solving guide 70 Problem Cause and remedy F233 The cup rim sensor is not inserted or is incorrectlyinserted.If the central spout is moving upwards and the cup rimsensor is bumped, e.g. with a cup, the cup rim sensorloses its reference position. Confirm the message with OK . Refit the cu...
Page 71 - The plug is not inserted in the socket correctly.
Problem solving guide 71 Problem Cause and remedy The coffee machineturns off suddenly. The factory set switch-off time (20 minutes) or theswitch-off time you have programmed has beenreached. If required, you can select a new switch-off time(see “Settings – Timer ”). The plug is not inserted in th...
Page 72 - timer setting has
Problem solving guide 72 Problem Cause and remedy Coffee dispensing isrepeatedly interruptedand the message Fill the bean container appears in the display. This is not a fault.The brew unit has not detected the ground coffee.Certain types of coffee produce a small amount ofcoffee when they are groun...
Page 73 - Unsatisfactory results
Problem solving guide 73 Problem Cause and remedy The display is hard tosee or not able to beread. The display brightness has been set too low. Change this setting (see “Settings”). The display lights up butthe coffee machine doesnot heat up and nodrinks are made. The demo mode for demonstrating t...
Page 74 - If necessary, try using a different type of coffee.; once a; Check the temperature of the milk in the milk flask.
Problem solving guide 74 Problem Cause and remedy The coffee tastes weak.The coffee grounds inthe waste container aresludgy and grainy. Less coffee is being brewed because insufficientcoffee beans are getting into the grinder.Have you used a dark roast?This type of coffee bean is often more oily. Th...
Page 75 - After sales service and warranty; Contact in the event of a fault
After sales service and warranty 75 Information to help you rectify faultsyourself and about Miele spare partscan be found at www.miele.com/service. Contact in the event of a fault In the event of any faults which youcannot remedy yourself, please contactyour Miele dealer or the MieleCustomer Servic...
Page 77 - Installation; Electrical connection; Risk of fire from overheating.
Installation *INSTALLATION* 77 Electrical connection The coffee machine is supplied with amains cable and moulded plug ready forconnection to a suitable earthed socket.The socket must be easily accessibleafter the coffee machine has beeninstalled. If the socket is not easilyaccessible, ensure that a...
Page 78 - Building-in dimensions; Installation in a tall unit; Maintain a minimum installation height of 850 mm.
Installation *INSTALLATION* 78 Building-in dimensions Installation in a tall unit Maintain a minimum installation height of 850 mm. All dimensions are given in mm. The appliance can be combined with other Miele built-in appliances. If the coffeemachine is to be built in above another appliance, ther...
Page 79 - Installation and connections; All dimensions are given in mm.
Installation *INSTALLATION* 79 Installation and connections All dimensions are given in mm. a Mains connection cable b No electrical connection in this area
Page 80 - Building in the coffee machine; Danger of injury due to incorrect; Connecting the electricity supply; Remove the silicone plug; before
Installation *INSTALLATION* 80 Building in the coffee machine Danger of injury due to incorrect operation.An appliance that has not been builtin is not safe and can cause injuries.Only ever use the coffee machineonce it has been built-in. Danger of damage due to incorrect operation.If the ambien...
Page 81 - Door opening limiters; Removing the door opening limiters
Installation *INSTALLATION* 81 Pushing in and aligning the coffeemachine Take care not to trap or damage theelectrical connection when pushingthe appliance into the niche. Push the coffee machine all the wayinto the niche until you feel someresistance. Never align the coffee machine byadjusting th...
Page 83 - Technical data; Electricity consumption in standby:
Technical data 83 Electricity consumption in standby: < 0.6 W Electricity consumption in networkedstandby: < 0.9 W Frequency band of the WiFi module 2.4000 GHz – 2.4835 GHz Maximum transmitting power of theWiFi module < 100 mW
Page 84 - EU Conformity declaration
EU Conformity declaration 84 Miele hereby declares that this coffeemachine complies with Directive2014/53/EU. The complete text of the EU declarationof conformity is available from one ofthe following internet addresses: - Products, Download from www.miele.ie - For service, information, operating in...
Page 85 - UK Conformity declaration; manuals and enter the name of the product or the serial number
UK Conformity declaration 85 Miele hereby declares that this coffee machine complies with UK Radio EquipmentRegulations 2017, as amended. The complete text of the UK declaration of conformity is available from one of thefollowing internet addresses: - Products, Download from www.miele.co.uk- For ser...
Page 86 - This; Statement of Compliance; confirms this Miele product fully complies with the; Paul Wright
UK Conformity declaration 86 This Statement of Compliance confirms this Miele product fully complies with the Product Security and Telecommunications Infrastructure (Security Requirementsfor Relevant Connectable Products) Regulations 2023. 1) Household Appliance – 2) Manufactured by: Miele & Cie...
Page 87 - United Kingdom
United Kingdom Miele Co. Ltd., Fairacres, Marcham Road, Abingdon, Oxon, OX14 1TWTel: 0330 160 6600, Internet: www.miele.co.uk, E-mail: [email protected] Australia Miele Australia Pty. Ltd.ACN 005 635 398ABN 96 005 635 398Level 4, 141 Camberwell RoadHawthorn East, VIC 3123Tel: 1300 464 353E-mail: [em...


 Miele APCL 043
User Manual
Miele APCL 043
User Manual
 Miele APWM 065
Installation Manual
Miele APWM 065
Installation Manual
 Miele APWM 070
Installation Manual
Miele APWM 070
Installation Manual
 Miele SC
Installation Manual
Miele SC
Installation Manual
 Miele PR
Installation Manual
Miele PR
Installation Manual
 Miele APCL 047
User Manual
Miele APCL 047
User Manual
 Miele PLW 8505
Installation Manual
Miele PLW 8505
Installation Manual
![Miele PT 7186 Vario [EL]](https://manualsarea.com/img/product/thumbs/180/69/3e/693e1219f5c0d53fde982888bd54a3ec.webp) Miele PT 7186 Vario [EL]
User Manual
Miele PT 7186 Vario [EL]
User Manual
 Miele CM/1
User Manual
Miele CM/1
User Manual
![Miele PLW 8617 [EL/S TH]](https://manualsarea.com/img/product/thumbs/180/fe/90/fe9010c5f8c3c4aada5d83b417c78507.webp) Miele PLW 8617 [EL/S TH]
Installation Manual
Miele PLW 8617 [EL/S TH]
Installation Manual
![Miele PWM 908 [EL DP MAR 3 AC 400-480V 50-60Hz]](https://manualsarea.com/img/product/thumbs/180/20/e5/20e5e929bcb336fc6b2f128d9c857a3d.webp) Miele PWM 908 [EL DP MAR 3 AC 400-480V 50-60Hz]
User Manual
Miele PWM 908 [EL DP MAR 3 AC 400-480V 50-60Hz]
User Manual
![Miele PWM 906 [EL DP MAR 3 AC 400-480V 50-60Hz]](https://manualsarea.com/img/product/thumbs/180/57/c8/57c81dd8d0abe05852b709a3fa9b80db.webp) Miele PWM 906 [EL DP MAR 3 AC 400-480V 50-60Hz]
Installation Manual
Miele PWM 906 [EL DP MAR 3 AC 400-480V 50-60Hz]
Installation Manual
![Miele PWM 906 [EL DP MAR 2N AC 400V 50-60Hz]](https://manualsarea.com/img/product/thumbs/180/ce/23/ce232ceeda728532882a2a2f56bf2abc.webp) Miele PWM 906 [EL DP MAR 2N AC 400V 50-60Hz]
User Manual
Miele PWM 906 [EL DP MAR 2N AC 400V 50-60Hz]
User Manual
![Miele PLW 8617 [EL TH]](https://manualsarea.com/img/product/thumbs/180/e8/4a/e84a63b24dca64279b26bca714985678.webp) Miele PLW 8617 [EL TH]
User Manual
Miele PLW 8617 [EL TH]
User Manual
![Miele PDR 908 [EL MAR 3N AC 400V 50-60Hz]](https://manualsarea.com/img/product/thumbs/180/05/b7/05b705998b251f92b271e908423e1ecb.webp) Miele PDR 908 [EL MAR 3N AC 400V 50-60Hz]
Installation Manual
Miele PDR 908 [EL MAR 3N AC 400V 50-60Hz]
Installation Manual
![Miele PLW 8615 [EL CT]](https://manualsarea.com/img/product/thumbs/180/70/ff/70ff37b9174e78db8d00ddce8cf08ee3.webp) Miele PLW 8615 [EL CT]
Installation Manual
Miele PLW 8615 [EL CT]
Installation Manual
![Miele PLW 8616 [EL/S]](https://manualsarea.com/img/product/thumbs/180/37/f4/37f4255dee3c9942a13241f3ccd5fe93.webp) Miele PLW 8616 [EL/S]
Installation Manual
Miele PLW 8616 [EL/S]
Installation Manual
![Miele PWM 916 [EL DV DD SOM]](https://manualsarea.com/img/product/thumbs/180/21/65/21657a907bb735f3acf5a7bdbbc78c8a.webp) Miele PWM 916 [EL DV DD SOM]
Manual
Miele PWM 916 [EL DV DD SOM]
Manual
![Miele PFD 104 SCVi XXL [120V]](https://manualsarea.com/img/product/thumbs/180/0a/20/0a20c04430aaa9be6a985688f5bb5580.webp) Miele PFD 104 SCVi XXL [120V]
Installation Manual
Miele PFD 104 SCVi XXL [120V]
Installation Manual
![Miele PDR 507 HP [MAR]](https://manualsarea.com/img/product/thumbs/180/58/9e/589e9ba94b88174fa0cdb27b4bbaac5b.webp) Miele PDR 507 HP [MAR]
User Manual
Miele PDR 507 HP [MAR]
User Manual