Page 2 - Caring for the environment
Caring for the environment 2 Disposing of the packagingmaterial The packaging material is used forhandling and protects the appliancefrom transport damage. The packagingmaterial used is selected from materialswhich are environmentally friendly fordisposal and can generally be recycled. Recycling the...
Page 3 - Contents
Contents 3 Caring for the environment .............................................................................. 2 Warning and Safety instructions ..................................................................... 6 Guide to the appliance .........................................................
Page 4 - Steamer
Contents 4 Active ironing board ............................................................................................ 37 Suction function ............................................................................................. 37Inflation function ...........................................
Page 5 - Problem solving guide
Contents 5 Care products...................................................................................................... 65 Descaling tablets for the steam ironing system ............................................. 65 Problem solving guide .......................................................
Page 6 - Warning and Safety instructions; Correct application
Warning and Safety instructions 6 This steam ironing system complies with current safety require- ments. Inappropriate use can, however, lead to personal injury anddamage to property. To avoid the risk of accidents and damage to the steam ironingsystem, please read these instructions carefully bef...
Page 7 - Safety with children
Warning and Safety instructions 7 Safety with children Children under the age of eight must be kept away from the steam ironing system unless they are supervised. Children older than eight may only use the steam ironing system unsupervised if they have been shown how to use it in a safe way,and ...
Page 8 - Technical safety
Warning and Safety instructions 8 Technical safety Before setting up the steam ironing system, inspect it visually for any external damage. Never use a damaged steam ironing system. Adamaged steam ironing system can be dangerous! Check the iron of the steam ironing system for damage. Do not use ...
Page 9 - The electrical safety of this steam ironing system can only be
Warning and Safety instructions 9 The electrical safety of this steam ironing system can only be guaranteed when correctly earthed. It is essential that this standardsafety requirement is met. If in any doubt, please have the wiringsystem of the building tested by a qualified electrician. Miele ca...
Page 12 - Do not
Warning and Safety instructions 12 Do not use solely demineralised water (e.g. distilled, battery wa- ter) to fill the water container. This could cause the steam ironingsystem to malfunction. Always place the iron with its soleplate horizontally on the resting surface of the steam ironing syste...
Page 13 - Using accessories
Warning and Safety instructions 13 Do not use the residual water drawer to store accessories or sim- ilar items. The residual water drawer should be used only to collectresidual water. Do not insert any objects into the apertures on the steam ironing system. If an aperture is blocked, do not use...
Page 14 - Guide to the appliance
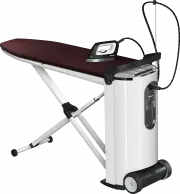
Guide to the appliance 14 a Ironing board b Iron with steam hose c Steam hose holder d Handle e Water container f Tower g Residual water drawer h Top storage compartmentFor the iron i Ironing board X-frame j Iron resting surface k Mains connection cable l Bottom storage compartmentFor the mains conn...
Page 15 - Tower; Iron resting area
Guide to the appliance 15 Tower a Rotary dial for height adjustmentand folding the appliance away b Iron resting area c Steam connection Tower (top view) with open storage com-partment (top) d Steam hose holders e Control field f Iron with steam hose
Page 16 - Control panel on tower; OK
Guide to the appliance 16 Control panel on tower h On/Off button Switches the steam ironing systemon or off. i DisplayDisplays messages and instructionsfor the user. j Arrow button Lights up if additional options areoffered or if the display text exceedsthe specified length of a line. Scrollsd...
Page 17 - Transporting; Danger of injury and damage to
Transporting 17 Danger of injury and damage to the appliance due to released ironingboard.The ironing board lock may becomedislodged if the steam ironing systemis transported or lifted while it is as-sembled.Only ever transport the steam ironingsystem while it is folded up. The steam ironing syste...
Page 18 - Assembly
Assembly *INSTALLATION* 18 Take the steam ironing system to itsinstallation site. Use one hand to pull the releasemechanism upwards. This releases the locking mechanism ofthe ironing board and the X-frame foldsdown. Hold onto the release mechanismand guide the ironing board into a po-sition of...
Page 19 - Adjusting the height; rotary control in this position.
Assembly *INSTALLATION* 19 The steam ironing system is now as-sembled. This is its lowest working pos-ition of approx. 83 cm high. Adjusting the height The steam ironing system can be adjus-ted to suit your personal preference.The maximum working height is around102 cm. When adjusting the height, en...
Page 20 - Adjust your working position to ap-
Assembly *INSTALLATION* 20 At the same time, pull the handle up-wards with the other hand or pressthe handle down. Do not push down on the ironingboard while adjusting the height.Always use the handle on the towerto adjust the height. When you have reached your desiredworking height, release the...
Page 21 - Connection
Connection *INSTALLATION* 21 Insert the mains plug into thesocket. The steam ironing system is designedfor connection to a properly installedearthed socket forAC 220-240 V, 50-60 Hz. Open the (lower) storage compart-ment by swinging the lid downwards. Remove the power cable from the(bottom) comp...
Page 22 - Close the storage compartment lid.; Connecting the steam hose; Lift the lid of the steam connection.
Connection *INSTALLATION* 22 Removing the iron and thesteam hose holder Open the lid of the top storage com-partment on the tower. Take out the iron. Close the storage compartment lid. Plug the steam hose holder suppliedinto one of the sockets provided. Tip: Use the socket on the side on whi...
Page 23 - Danger of the iron tipping over if
Connection *INSTALLATION* 23 Guide the steam hose on the rubberring into the steam hose holder. Ensure the steam hose fits tightlyand is not twisted. To avoid damaging or discolouringthe ironing board cover, always placethe iron on the resting surface beforeyou start ironing and when you take ab...
Page 24 - Before using for the first time; Determining water hardness; Using the test strips; Hardness range on the test strip; It is useful to know your water
Before using for the first time 24 Before using the steam ironing sys-tem for the first time, remove allpackaging (e.g. the protective filmfrom the tower). Determining water hardness In order for the steam ironing system tofunction properly and to display a mes-sage prompting you to descale it at ...
Page 25 - Switch on the steam ironing system; Language selection
Before using for the first time 25 Before using for the first time The following steps must be carriedout before using the appliance for thefirst time: Switch on the steam ironing system Press the button on the control panel on the tower. Willkommen The Welcome screen appears for a fewsecond...
Page 26 - Setting the water hardness
Before using for the first time 26 Setting the water hardness Set waterhardness... Before the water hardness can be set,the display message Set water hard- ness... must be acknowledged by press- ing the OK button. The steam ironing system gives youthe option to set the water hardness toone of ...
Page 28 - Switching on
Switching on 28 Switching on the steam ironingsystem Press the button on the control field of the tower to switch on thesteam ironing system. The button lights up and the wel- come screen appears for severalseconds in the display. If the iron was not connected to thesteam connection before s...
Page 29 - Filling the water container; Removing the water container
Switching on 29 Filling the water container If the water container is empty or notinstalled in the tower, the message Fill water cont. will appear in the dis- play. Removing the water container Hold the water container by itshandle. Pull the handle downwards. The water container is released ...
Page 30 - Steam operation; Water quality
Switching on 30 Steam operation Ready for use After inserting the water container, waituntil the steam ironing system is readyto use steam. This is indicated by the Ready for use message in the display. If the water container is refilled duringthe ironing process, the steam gener-ator may have...
Page 33 - CoolDown function
Switching on 33 CoolDown function Iron switched off The heating of the iron switches offautomatically if the iron is not moved forlonger than 3 minutes. The message Iron switched off appears in the display to indicate that the heating hasswitched off. After a certain time, steamis no longer av...
Page 34 - Ironing; Iron; Steam ironing system B 4312:
Ironing 34 Iron Depending on the model, your steamironing system has one of the followingirons: Steam ironing system B 4312: a Steam button b Slider for constant steam provision c Suction function button d Inflation function button Steam ironing systemB 4826 / B 4847: a Steam button b Slide...
Page 35 - Ironing with steam; Using short bursts of steam
Ironing 35 Ironing with steam The steam ironing system is ready foruse when Ready for use appears in the display. The burst of steam is con-trolled by the button on the iron. When the button is pressed, the fan on the underside of the ironing boardstarts automatically. When the button i...
Page 36 - Ironing without steam; The soleplate gets very hot dur-
Ironing 36 Ironing without steam Remove the water container from thesteam ironing system if you want toiron without steam. The steam generator will not heat upand saves you energy. Ironing with the non-stick sole-plate A non-stick soleplate has been in-cluded with the accessories which cansimply b...
Page 37 - Removing the non-stick soleplate; Active ironing board; Suction function
Ironing 37 Removing the non-stick soleplate Hold the iron by the handle. Risk of burning or scalding due to hot iron and non-stick soleplate.The non-stick soleplate is still veryhot after ironing.Avoid direct contact.Only touch the tab of the non-sticksoleplate. Pull back the tab at the back o...
Page 38 - Memory function
Ironing 38 Memory function The memory function saves the fan dir-ection and the power setting used lastwith your steam ironing system. Whenyou use the appliance the next time,you do not need to set it again. Heated ironing surface When the iron is connected and thesteam ironing system is switched on...
Page 39 - The steamer; Connecting the Steamer; Risk of burning or scalding due
Steamer 39 The B 4847 steam ironing system isequipped with a steamer in addition tothe iron. The steamer is available asan optional accessory for the B 4312and B 4826 steam ironing systems. The steamer makes ironing hanging garments easier, e.g. dresses and jack-ets. It comes with a removable brus...
Page 40 - is shown in the
Steamer 40 Attaching the Steamer to the steamconnection Pull back the slider located on theside of the steam hose plug. Insert the steam hose plug into thesteam connection on the tower. Release the slider when it has lockedinto place in the steam connection. The Steamer is now attached to thes...
Page 41 - Using the steamer
Steamer 41 Using the steamer Danger of burning due to hot steam!Never direct the steam or the steamjets at people, animals or electricalappliances of any kind.Never point the steam at clothingwhile the clothes are being worn! Theclothing will intensify burning of theskin. The emission of steam is ...
Page 42 - Brush attachment; Connecting the brush attachment
Steamer 42 Brush attachment The steamer is equipped with a brushattachment which can be clipped on.The brush attachment helps to raise thefibres. You can hold the steamer directlyonto the fabric while the brush at-tachment is in place.Always try it first on an inconspicu-ous part of the fabric. Conn...
Page 43 - Switching off the steam ironing system; The light in the; Bottom storage compartment
Switching off the steam ironing system 43 To switch off the steam ironing sys-tem, press the button. The light in the button goes out. The steam ironing system is nowswitched off. The last selected fan set-tings are saved and are available for thenext time you switch on the appliance. Pl...
Page 44 - Dismantling; Hold the rotary control in the
Dismantling 44 Setting the ironing board to itslowest working height To dismantle the steam ironing sys-tem, the ironing board must first beset to its lowest working height. Makesure you do not trap the mains con-nection cable in the mechanism. En-sure the residual water drawer is com-pletely emptie...
Page 45 - Folding the ironing board; The ironing board is now unlocked.
Dismantling 45 Folding the ironing board Turn one of the two rotary controls asfar as it will go towards the posi- tion. The ironing board is now unlocked. Release the rotary control. The rotary control will spring back intothe centre position. Guide the ironing board downwardsor allow it to...
Page 46 - Disconnecting the steam hose.; Hold the slider back.; Storing the iron; Storing the steamer
Dismantling 46 Disconnecting the steam hose. Do not pull on the steam hose!Hold the plug at the end of the steamhose. The plug may still be warm im-mediately after using the system. Pull back the slider located on theside of the steam hose plug. Hold the slider back. Withdraw the plug from the...
Page 47 - Emptying the water container
Dismantling 47 Emptying the water container Empty the water container if thesteam ironing system is not going tobe used for a long period of time. Remove the water container (see“Filling the water container”). Make sure the water container iscompletely emptied. Storing the steam ironing sys-tem ...
Page 48 - Cleaning and care; Automatic rinsing; will appear in the display on the
Cleaning and care 48 Automatic rinsing The automatic rinse function clearsthe steam generator of mineral depos-its from the evaporated water. After approx. 3 litres of water have beenpassed through the system, the rinseprocess will start automatically the nexttime the steam ironing system isswitched...
Page 49 - Descaling
Cleaning and care 49 The residual water drawer is dish-washer-safe or can be washed byhand using warm water and a littlewashing-up liquid. Make sure the metal discs (contacts)at the top of the residual waterdrawer are clean and dry. Thesemetal discs send a signal to thesteam ironing system when the ...
Page 50 - Descaling warning; will appear in the dis-
Cleaning and care 50 Descaling warning Descale soon will appear in the dis- play the next time you switch the steamironing system on if there are only about2 hours of ironing available before thesystem needs descaling. You can start the descaling processwhilst the system is cold via the Set-ting...
Page 51 - Starting the descaling process early
Cleaning and care 51 Starting the descaling process early Ready for use When the steam ironing system isswitched on, press the button on the control panel. The settings menu will be displayed.Use the arrow buttons to select indi-vidual settings. Language Use the or arrow buttons to se...
Page 52 - Fill water container to mark; will appear in; Level mark on the water container; The screw cap is now closed.
Cleaning and care 52 Fill water container to mark Hold the water container by itshandle. Pull the handle downwards. The water container is released from theretainer. Pull the water container upwards andout. When removing the water container,you may notice some water drippingwhile the water ...
Page 53 - Press the; will
Cleaning and care 53 Add descaler Press the OK button to display the next step. The message Fit water container will now appear in the display. Fit water container Put the water container back into thetower. After about 10 minutes (the time it takesfor the descaling tablet to dissolve)...
Page 54 - Empty drawer; Fit drawer
Cleaning and care 54 Empty drawer This message may be displayed afterinserting the water container with thedescaling tablet. If you do not see thismessage, you can skip the followingsteps and continue as soon as yousee Pre-rinse in the display. Set the steam ironing system to itshighest wo...
Page 55 - Rinse water container and fill to; will appear
Cleaning and care 55 Rinse water container and fill to the mark Remove the water container from thetower. As long as the water container is not in-serted into the tower, the display willshow the following message Fit water container . Open the screw cap. Rinse the water container thorou...
Page 57 - Rinsing the soleplate; will be shown
Cleaning and care 57 Rinsing the soleplate The iron must not be warm from pre-vious use.Let the iron cool down for at least60 minutes before rinsing the sole-plate. Make sure that the non-stick sole-plate has been removed from theiron. If the non-stick soleplate is still on theiron, remove it now ...
Page 58 - steam; Cleaning the housing; Before cleaning the housing,
Cleaning and care 58 The indicator light on the temperatureselector will light up yellow whilst theiron is heating up. Tip: During the heat-up phase, you can set down the iron on the designatedsurface on the steam ironing system. As soon as the indicator light goes out,the rinsing process is complet...
Page 59 - To avoid damaging the surface,
Cleaning and care 59 To avoid damaging the surface, do not use the following for cleaning: - abrasive cleaning agents, (e.g. powder cleaners, cream cleaners,chrome polish, eraser blocks). - hard, abrasive brushes or sponges, (e.g. pot scourers), or sponges whichhave been previously used and stillc...
Page 60 - Cleaning the water filter; Disconnect the power supply
Cleaning and care 60 Wash and dry the ironing board coveraccording to the care label or replacethe cover if it is damaged. Never use the steam ironing systemwithout the ironing board cover inplace! Put the dry or new cover onto theironing board from the tower end firstand draw it down towards th...
Page 61 - Removing the water filter cover
Cleaning and care 61 Removing the water filter cover Use a cross-head screwdriver to re-move the screw of the water filtercover. Pull the water filter cover upwards. The water filter must be taken out ofthe right hand socket for cleaning.There is a hook and a round tool at thesides of the water ...
Page 62 - Pull out water filter
Cleaning and care 62 Pull out water filter Push the round tool on the water filtercover onto the water filter fromabove. The round tool will click into the waterfilter. Pull the water filter out of the socket. Cleaning the water filter Detach the water filter from the roundtool. Clean the wa...
Page 63 - Inserting the water filter
Cleaning and care 63 Inserting the water filter Position the water filter with the smallseal facing downwards. Press the water filter fully into theright-hand socket. Then replace the seal in the right-hand socket. The side with the ridgemust face downwards. Then replace the water filter cov...
Page 64 - Optional accessories; Accessories; Ironing board cover
Optional accessories 64 Miele appliances are designed toachieve the best possible results and toprovide uncompromising satisfactionfor as long as possible. To achieve this,all factors must interact perfectly withone another. Therefore Miele offers acomprehensive range of accessoriesthat harmonise wi...
Page 65 - Care products
Optional accessories 65 Care products The Miele care product range has beendeveloped specially to clean your appli-ance thoroughly and gently. Descaling tablets for the steam iron-ing system Miele descaling tablets guarantee thebest cleaning result when descalingyour Miele steam ironing system. One ...
Page 66 - or
Problem solving guide 66 Most faults can be resolved by yourself. Time and money will be saved because aservice call will not be needed. The following guide may help you to find thereason for a fault, and to correct it. Please note: Repair work to electrical appliances should only be carried out b...
Page 67 - Troubleshooting; Problem
Problem solving guide 67 Troubleshooting Problem Cause and remedy The steam ironing sys-tem cannot be switchedon. The steam ironing system does not have any power. Check that – the plug is inserted into the wall socket and that the socket is switched on. – the fuse in your fuse panel has not tripp...
Page 73 - Display messages; Message
Problem solving guide 73 Display messages Message Cause and remedy Drain valve closing When the steam ironing system was switched on,the steam generator drain was open. The drain isclosed automatically during this message. Drain valve fault Switch off/on The descaling or rinsing processes have...
Page 77 - Service; - your Miele retailer; Warranty
Service 77 Service In the case of a fault that you cannotrectify yourself, contact - your Miele retailer or - Miele Service. The customer service telephone num-ber can be found at the end of theseoperating instructions. Please notethat telephone calls may be monitoredand recorded for training purpos...
Page 78 - Electrical connection UK
Electrical connection UK *INSTALLATION* 78 Before you connect the steam iron-ing system, you must check the con-nection data (voltage and frequency)on the data plate and compare it withthe data applicable to your localpower supply.Compliance with this data is mandat-ory, otherwise there is a risk of...
Page 79 - Technical data
Technical data 79 Dimensions, folded (H x W x D) 1280 × 470 × 370 mm Assembled dimensions (H x W x D) 970 × 470 × 1480 mm Weight B 4312 and B 4826 Weight B 4847 29 kg 30 kg Supply voltage See data plate Power rating See data plate Fuse rating ≥ 10 A A Steam pressure B 4312 Steam pressure for B 4826 ...
Page 83 - United Kingdom
United Kingdom Miele Co. Ltd., Fairacres, Marcham Road, Abingdon, Oxon, OX14 1TWTel: 0330 160 6600, Internet: www.miele.co.uk, E-mail: [email protected] Australia Miele Australia Pty. Ltd.ACN 005 635 398ABN 96 005 635 398Level 4, 141 Camberwell RoadHawthorn East, VIC 3123Tel: 1300 464 353Internet: w...
Page 84 - FashionMaster


 Miele APCL 043
User Manual
Miele APCL 043
User Manual
 Miele APWM 065
Installation Manual
Miele APWM 065
Installation Manual
 Miele APWM 070
Installation Manual
Miele APWM 070
Installation Manual
 Miele SC
Installation Manual
Miele SC
Installation Manual
 Miele PR
Installation Manual
Miele PR
Installation Manual
 Miele APCL 047
User Manual
Miele APCL 047
User Manual
 Miele PLW 8505
Installation Manual
Miele PLW 8505
Installation Manual
![Miele PT 7186 Vario [EL]](https://manualsarea.com/img/product/thumbs/180/69/3e/693e1219f5c0d53fde982888bd54a3ec.webp) Miele PT 7186 Vario [EL]
User Manual
Miele PT 7186 Vario [EL]
User Manual
 Miele CM/1
User Manual
Miele CM/1
User Manual
![Miele PLW 8617 [EL/S TH]](https://manualsarea.com/img/product/thumbs/180/fe/90/fe9010c5f8c3c4aada5d83b417c78507.webp) Miele PLW 8617 [EL/S TH]
Installation Manual
Miele PLW 8617 [EL/S TH]
Installation Manual
![Miele PWM 908 [EL DP MAR 3 AC 400-480V 50-60Hz]](https://manualsarea.com/img/product/thumbs/180/20/e5/20e5e929bcb336fc6b2f128d9c857a3d.webp) Miele PWM 908 [EL DP MAR 3 AC 400-480V 50-60Hz]
User Manual
Miele PWM 908 [EL DP MAR 3 AC 400-480V 50-60Hz]
User Manual
![Miele PWM 906 [EL DP MAR 3 AC 400-480V 50-60Hz]](https://manualsarea.com/img/product/thumbs/180/57/c8/57c81dd8d0abe05852b709a3fa9b80db.webp) Miele PWM 906 [EL DP MAR 3 AC 400-480V 50-60Hz]
Installation Manual
Miele PWM 906 [EL DP MAR 3 AC 400-480V 50-60Hz]
Installation Manual
![Miele PWM 906 [EL DP MAR 2N AC 400V 50-60Hz]](https://manualsarea.com/img/product/thumbs/180/ce/23/ce232ceeda728532882a2a2f56bf2abc.webp) Miele PWM 906 [EL DP MAR 2N AC 400V 50-60Hz]
User Manual
Miele PWM 906 [EL DP MAR 2N AC 400V 50-60Hz]
User Manual
![Miele PLW 8617 [EL TH]](https://manualsarea.com/img/product/thumbs/180/e8/4a/e84a63b24dca64279b26bca714985678.webp) Miele PLW 8617 [EL TH]
User Manual
Miele PLW 8617 [EL TH]
User Manual
![Miele PDR 908 [EL MAR 3N AC 400V 50-60Hz]](https://manualsarea.com/img/product/thumbs/180/05/b7/05b705998b251f92b271e908423e1ecb.webp) Miele PDR 908 [EL MAR 3N AC 400V 50-60Hz]
Installation Manual
Miele PDR 908 [EL MAR 3N AC 400V 50-60Hz]
Installation Manual
![Miele PLW 8615 [EL CT]](https://manualsarea.com/img/product/thumbs/180/70/ff/70ff37b9174e78db8d00ddce8cf08ee3.webp) Miele PLW 8615 [EL CT]
Installation Manual
Miele PLW 8615 [EL CT]
Installation Manual
![Miele PLW 8616 [EL/S]](https://manualsarea.com/img/product/thumbs/180/37/f4/37f4255dee3c9942a13241f3ccd5fe93.webp) Miele PLW 8616 [EL/S]
Installation Manual
Miele PLW 8616 [EL/S]
Installation Manual
![Miele PWM 916 [EL DV DD SOM]](https://manualsarea.com/img/product/thumbs/180/21/65/21657a907bb735f3acf5a7bdbbc78c8a.webp) Miele PWM 916 [EL DV DD SOM]
Manual
Miele PWM 916 [EL DV DD SOM]
Manual
![Miele PFD 104 SCVi XXL [120V]](https://manualsarea.com/img/product/thumbs/180/0a/20/0a20c04430aaa9be6a985688f5bb5580.webp) Miele PFD 104 SCVi XXL [120V]
Installation Manual
Miele PFD 104 SCVi XXL [120V]
Installation Manual
![Miele PDR 507 HP [MAR]](https://manualsarea.com/img/product/thumbs/180/58/9e/589e9ba94b88174fa0cdb27b4bbaac5b.webp) Miele PDR 507 HP [MAR]
User Manual
Miele PDR 507 HP [MAR]
User Manual