Makita XAG12Z1 - Manuals

User Manual Makita XAG12Z1


Summary
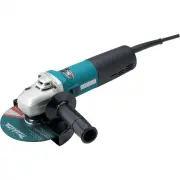
2 ENGLISH ENGLISH (Original instructions) SPECIFICATIONS Model: XAG12 XAG13 Wheel diameter 180mm (7″) 230mm (9″) Max. wheel thickness 6.5mm (1/4″) Spindle thread 5/8″ Rated speed (n) 7,800/min 6,000/min Overall length 499mm (19-5/8″) Rated voltage D.C.36 V Standard battery cartridge BL1815N, BL1820B...
3 ENGLISH 6. Dress properly. Do not wear loose clothing or jewellery. Keep your hair, clothing, and gloves away from moving parts. Loose clothes, jewel - lery or long hair can be caught in moving parts. 7. If devices are provided for the connection of dust extraction and collection facilities, ensur...
5 ENGLISH 3. When wheel is binding or when interrupting a cut for any reason, switch off the power tool and hold the power tool motionless until the wheel comes to a complete stop. Never attempt to remove the cut-off wheel from the cut while the wheel is in motion otherwise kickback may occur. Inves...
Makita Angle Grinders Manuals
-
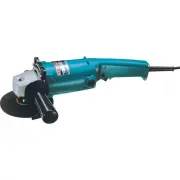 Makita 9005B
User Manual
Makita 9005B
User Manual
-
Makita 9005B
Manual
-
 Makita 9557NB
User Manual
Makita 9557NB
User Manual
-
Makita 9557NB
Manual
-
 Makita 9557NB2
User Manual
Makita 9557NB2
User Manual
-
 Makita 9557NB-A-96403
User Manual
Makita 9557NB-A-96403
User Manual
-
 Makita 9557NB-B-69696
User Manual
Makita 9557NB-B-69696
User Manual
-
 Makita 9557PB
User Manual
Makita 9557PB
User Manual
-
Makita 9557PB
Manual
-
 Makita 9557PBX1
User Manual
Makita 9557PBX1
User Manual
-
 Makita 9564CV
User Manual
Makita 9564CV
User Manual
-
Makita 9564CV
Manual
-
 Makita 9564P
User Manual
Makita 9564P
User Manual
-
 Makita 9564PC
User Manual
Makita 9564PC
User Manual
-
Makita 9564PC
Manual
-
 Makita 9565CV
User Manual
Makita 9565CV
User Manual
-
Makita 9565CV
Manual
-
 Makita 9565PCV
User Manual
Makita 9565PCV
User Manual
-
 Makita 9566CV
User Manual
Makita 9566CV
User Manual
-
Makita 9566CV
Manual