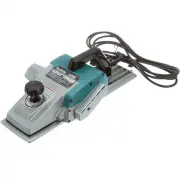
Makita KP0810 - Manuals
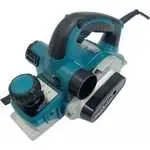
Manual Makita KP0810


Summary
2 ENGLISH SPECIFICATIONS Model KP0810 Planing width 82 mm (3-1/4") Planing depth 4 mm (5/32") Shiplapping depth 25 mm (1") No load speed (RPM) 16,000/min. Overall length 290 mm (11-3/8") Net weight 3.2 kg (7.1 lbs) • Due to our continuing programme of research and development, the sp...
3 rate for which it was designed. 17. Do not use the power tool if the switch does not turn it on and off. Any power tool that cannot be controlled with the switch is dangerous and must be repaired. 18. Disconnect the plug from the power source and/or the battery pack from the power tool before maki...
4 ・ no load speed ・ Class II Construction ・ revolutions or reciprocation per minute FUNCTIONAL DESCRIPTION CAUTION: • Always be sure that the tool is switched off and unplugged before adjusting or checking function on the tool. Adjusting depth of cut 1 2 007639 Depth of cut may be adjusted by simply...
Makita Electric Planers Manuals
-
 Makita 1002BA
User Manual
Makita 1002BA
User Manual
-
Makita 1002BA
Manual
-
 Makita 1806B
User Manual
Makita 1806B
User Manual
-
Makita 1806B
Manual
-
 Makita 1911B
User Manual
Makita 1911B
User Manual
-
Makita 1911B
Manual
-
 Makita 2012NB
User Manual
Makita 2012NB
User Manual
-
Makita 2012NB
Manual
-
 Makita DKP180Z
User Manual
Makita DKP180Z
User Manual
-
 Makita GA9060RX3
User Manual
Makita GA9060RX3
User Manual
-
 Makita KP0800
User Manual
Makita KP0800
User Manual
-
Makita KP0800
Manual
-
 Makita KP0800K
User Manual
Makita KP0800K
User Manual
-
Makita KP0800K
Manual
-
 Makita KP0800X1
User Manual
Makita KP0800X1
User Manual
-
 Makita KP0810C
User Manual
Makita KP0810C
User Manual
-
Makita KP0810C
Manual
-
 Makita KP0810CK
User Manual
Makita KP0810CK
User Manual
-
 Makita KP312
User Manual
Makita KP312
User Manual
-
Makita KP312
Manual