Page 2 - SPECIFICATIONS; SAFETY WARNINGS; General power tool safety warnings; Save all warnings and instruc-
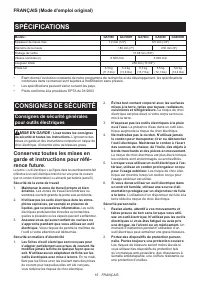
2 ENGLISH ENGLISH (Original instructions) SPECIFICATIONS Model: GA7060 GA7060R GA7064 GA9060 GA9060R Max. wheel thickness 7.2mm (1/4″) 6.5mm (1/4″) Wheel diameter 180mm (7″) 230mm (9″) Spindle thread 15.88mm (5/8″) Rated speed (n) 8,500/min 6,600/min Overall length 450mm (17-3/4″) Net weight 5.3kg (...
Page 3 - Grinder safety warnings
3 ENGLISH Power tool use and care 1. Do not force the power tool. Use the correct power tool for your application. The correct power tool will do the job better and safer at the rate for which it was designed. 2. Do not use the power tool if the switch does not turn it on and off. Any power tool tha...
Page 5 - SAVE THESE INSTRUCTIONS.; Symbols
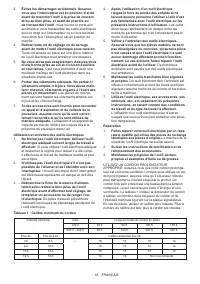
5 ENGLISH 4. Do not restart the cutting operation in the workpiece. Let the wheel reach full speed and carefully re-enter the cut. The wheel may bind, walk up or kickback if the power tool is restarted in the workpiece. 5. Support panels or any oversized workpiece to minimize the risk of wheel pinch...
Page 6 - FUNCTIONAL; Shaft lock; For tool with the lock-off switch; Indication lamp
6 ENGLISH FUNCTIONAL DESCRIPTION CAUTION: Always be sure that the tool is switched off and unplugged before adjusting or checking function on the tool. CAUTION: Return the switch trigger to the "OFF" position in case of accidental unplugging, blackout, or the power is cut unintentionally. Ot...
Page 7 - Unintentional restart proof; ASSEMBLY; Installing or removing wheel guard (For; For tool with locking screw type
7 ENGLISH The indication lamp lights up green when the tool is plugged. If the indication lamp does not light up, the mains cord or the controller may be defective. The indication lamp is lit but the tool does not start even if the tool is switched on, the carbon brushes may be worn out, or the cont...
Page 8 - Installing or removing depressed; Installing or removing flex wheel
8 ENGLISH Pull the lever in direction of the arrow. Then tighten the wheel guard with fastening the screw. Be sure to tighten the screw securely. The setting angle of the wheel guard can be adjusted with the lever. 1 2 ► 1. Screw 2. Lever To remove wheel guard, follow the installation proce- dure in...
Page 9 - Installing or removing abrasive disc; Installing or removing loop handle; OPERATION; Grinding and sanding operation
9 ENGLISH Installing or removing abrasive disc Optional accessory 1 2 3 ► 1. Sanding lock nut 2. Abrasive disc 3. Rubber pad 1. Mount the rubber pad onto the spindle. 2. Fit the disc on the rubber pad and screw the sand- ing lock nut onto the spindle. 3. Hold the spindle with the shaft lock, and sec...
Page 10 - Operation with wire cup brush; Operation with wire wheel brush; diamond wheel
10 ENGLISH Operation with wire cup brush Optional accessory CAUTION: Check operation of brush by run - ning tool with no load, insuring that no one is in front of or in line with brush. CAUTION: Do not use brush that is damaged, or which is out of balance. Use of damaged brush could increase potenti...
Page 11 - Operation with cup-type diamond
11 ENGLISH Mount the inner flange onto the spindle. Fit the wheel / disc on the inner flange and screw the lock nut onto the spindle. 1 2 3 4 ► 1. Lock nut 2. Abrasive cut-off wheel / diamond wheel 3. Inner flange 4. Wheel guard for abrasive cut-off wheel / diamond wheel For United States and Canada...
Page 12 - MAINTENANCE; Air vent cleaning
12 ENGLISH 3. Mount dust collecting wheel guard with the pro- trusions on the dust collecting wheel guard aligned with the notches on the bearing box. Turn in the guard to desired angle and tighten attaching screw to secure. To plane corners, remove front-edge cover by sliding in the directions of t...
Page 13 - OPTIONAL ACCESSORIES
13 ENGLISH OPTIONAL ACCESSORIES CAUTION: These accessories or attachments are recommended for use with your Makita tool spec- ified in this manual. The use of any other accessories or attachments might present a risk of injury to persons. Only use accessory or attachment for its stated purpose. If y...
Page 14 - MAKITA LIMITED WARRANTY
14 MAKITA LIMITED WARRANTY Please refer to the annexed warranty sheet for the most current warranty terms applicable to this product. If annexed warranty sheet is not available, refer to the warranty details set forth at below website for your respective country. United States of America: www.makita...
Page 15 - SPÉCIFICATIONS; CONSIGNES DE SÉCURITÉ; Consignes de sécurité générales; Conservez toutes les mises en
15 FRANÇAIS FRANÇAIS (Mode d’emploi original) SPÉCIFICATIONS Modèle : GA7060 GA7060R GA7064 GA9060 GA9060R Épaisseur de meule max. 7,2 mm (1/4″) 6,5 mm (1/4″) Diamètre de la meule 180 mm (7″) 230 mm (9″) Filetage de l’arbre 15,88 mm (5/8″) Vitesse nominale (n) 8 500 /min 6 600 /min Longueur totale 4...
Page 19 - CONSERVEZ CE MODE; Symboles
19 FRANÇAIS Consignes de sécurité spécifiques au brossage métallique : 1. Soyez conscient du fait que des poils de fils métalliques sont éjectés par le brosse pendant l’utilisation ordinaire. Ne malmenez pas les fils métalliques en appliquant une charge exces- sive à la brosse. Les poils de fils mét...
Page 20 - Blocage de l’arbre
20 FRANÇAIS DESCRIPTION DU FONCTIONNEMENT ATTENTION : Assurez-vous toujours que l’outil est hors tension et débranché avant de l’ajuster ou de vérifier son fonctionnement. ATTENTION : Ramenez la gâchette sur la positon d’arrêt en cas de débranchement acci - dentel, de panne d’électricité ou de coupu...
Page 21 - ASSEMBLAGE; brosse métallique circulaire / meule
21 FRANÇAIS Voyant Uniquement pour le modèle GA7060R / GA9060R 1 ► 1. Voyant Le voyant s’allume en vert lorsque l’outil est branché. Si le voyant ne s’allume pas, il se peut que le cordon d’alimentation ou le contrôleur soit défectueux. Si le voyant est allumé mais que l’outil ne démarre pas même s’...
Page 23 - Pose ou retrait de la meule flexible; Pose ou retrait du disque abrasif; Pose ou retrait de la poignée annulaire; UTILISATION
23 FRANÇAIS Pose ou retrait de la meule flexible Accessoire en option MISE EN GARDE : Utilisez toujours le pro- tecteur fourni quand la meule flexible est montée sur l’outil. La meule peut voler en éclats en cours d’utilisation et le protecteur réduit alors les risques de blessure. 1 4 2 3 ► 1. Cont...
Page 24 - Travaux avec une brosse métallique
24 FRANÇAIS ATTENTION : Ne mettez jamais l’outil en marche alors qu’il se trouve en contact avec la pièce à travailler, pour éviter de vous blesser. ATTENTION : Portez toujours des lunettes de sécurité ou un écran facial pendant l’utilisation. ATTENTION : Après l’utilisation, mettez tou- jours l’out...
Page 25 - Utilisation avec une meule diamant
25 FRANÇAIS Débranchez l’outil et placez-le la tête en bas pour per- mettre un accès facile à l’arbre. Retirez tous les accessoires de l’arbre. Enfilez la brosse métallique circulaire sur l’arbre et serrez avec les clés. AVIS : Évitez d’appliquer trop de pression, car cela fait plier les fils lors d...
Page 26 - ENTRETIEN; Nettoyage des orifices d’aération
26 FRANÇAIS 2. Desserrez la vis de fixation sur le protecteur de meule col - lecteur de poussière jusqu’à ce que la fente de fixation s’ouvre. 1 ► 1. Vis de fixation 3. Montez le protecteur de meule collecteur de poussière en alignant ses parties saillantes sur les entailles du boîtier d’engrenage. ...
Page 27 - ACCESSOIRES EN OPTION
27 FRANÇAIS ACCESSOIRES EN OPTION ATTENTION : Ces accessoires ou pièces complémentaires sont recommandés pour l’utilisation avec l’outil Makita spécifié dans ce manuel. L’utilisation de tout autre accessoire ou pièce complémentaire peut comporter un risque de blessure. N’utilisez les accessoires ou ...
Page 28 - GARANTIE LIMITÉE MAKITA
28 FRANÇAIS GARANTIE LIMITÉE MAKITA Pour les conditions de garantie en vigueur qui s’ap- pliquent à ce produit, veuillez vous reporter à la feuille de garantie en annexe. Si la feuille de garantie en annexe n’est pas disponible, reportez-vous aux détails de la garantie présentés sur le site Web de v...
Page 29 - ESPECIFICACIONES; ADVERTENCIAS DE; Advertencias generales de; Conserve todas las advertencias
29 ESPAÑOL ESPAÑOL (Instrucciones originales) ESPECIFICACIONES Modelo: GA7060 GA7060R GA7064 GA9060 GA9060R Especificaciones eléctricas en México 127 V 15 A 50/60 Hz Grosor máx. de la rueda o disco abrasivo 7,2 mm (1/4″) 6,5 mm (1/4″) Diámetro de la rueda o disco abrasivo 180 mm (7″) 230 mm (9″) Ros...
Page 33 - GUARDE ESTAS; Símbolos
33 ESPAÑOL Advertencias de seguridad específicas para las operaciones de lijado: 1. No utilice papel de lijado para disco de tamaño excesivo. Siga las recomendaciones de los fabri - cantes cuando seleccione el papel de lijado. Un papel de lijado de mayor tamaño que se extienda más allá de la almohad...
Page 34 - Bloqueo del eje
34 ESPAÑOL DESCRIPCIÓN DEL FUNCIONAMIENTO PRECAUCIÓN: Asegúrese siempre de que la herramienta esté apagada y desconectada antes de ajustar o comprobar cualquier función en la herramienta. PRECAUCIÓN: Regrese el gatillo interruptor a la posición de apagado en caso de una desco- nexión accidental, un ...
Page 35 - MONTAJE; Instalación de la empuñadura lateral
35 ESPAÑOL Lámpara de indicación Solamente para el modelo GA7060R / GA9060R 1 ► 1. Lámpara de indicación La lámpara de indicación se ilumina en verde cuando la herramienta está enchufada. Si la lámpara de indicación no se ilumina, puede que el cable de alimentación o el controlador esté defectuoso. ...
Page 37 - Instalación o extracción de un disco; Instalación y desinstalación del; OPERACIÓN
37 ESPAÑOL Instalación o extracción de una rueda flexible Accesorio opcional ADVERTENCIA: Utilice siempre el protector suministrado cuando la rueda flexible esté ins - talada en la herramienta. La rueda puede desinte- grarse durante el uso y el protector ayuda a reducir las posibilidades de una lesi...
Page 38 - Operación con rueda de cepillo de alambre
38 ESPAÑOL PRECAUCIÓN: Nunca encienda la herra- mienta cuando ésta esté en contacto con la pieza de trabajo, esto podría ocasionar lesiones al operador. PRECAUCIÓN: Use siempre gafas de seguri- dad o careta durante la operación. PRECAUCIÓN: Después de la operación, apague siempre la herramienta y es...
Page 39 - Operación con una rueda de
39 ESPAÑOL Desconecte la herramienta y póngala al revés para permitir un acceso fácil al eje. Quite cualquier accesorio que haya en el eje. Enrosque la rueda de cepillo de alambre en el eje y apriete con las llaves. AVISO: Cuando utilice la rueda de cepillo de alambre, evite aplicar mucha presión qu...
Page 40 - MANTENIMIENTO; Limpieza del orificio de ventilación
40 ESPAÑOL 2. Afloje el tornillo de acoplamiento del protector recolector de polvo de la rueda hasta que se abra la ranura de acoplamiento. 1 ► 1. Tornillo de acoplamiento 3. Coloque el protector recolector de polvo de la rueda con las protuberancias alineadas con las muescas en la caja de cojinetes...
Page 41 - ACCESORIOS OPCIONALES
41 ESPAÑOL ACCESORIOS OPCIONALES PRECAUCIÓN: Estos accesorios o aditamentos están recomendados para utilizarse con su herra- mienta Makita especificada en este manual. El empleo de cualquier otro accesorio o aditamento puede conlle- var el riesgo de lesiones personales. Utilice los accesorios o adit...
Page 42 - GARANTÍA LIMITADA DE MAKITA; Ésta Garantía no aplica para México
42 ESPAÑOL GARANTÍA LIMITADA DE MAKITA Ésta Garantía no aplica para México Consulte la hoja de la garantía anexa para ver los términos más vigentes de la garantía aplicable a este producto. En caso de no disponer de esta hoja de garantía anexa, consulte los detalles sobre la garantía descritos en el...
Page 44 - Makita Corporation
Some dust created by power sanding, sawing, grinding, drilling, and other construction activities contains chemicals known to the State of California to cause cancer, birth defects or other reproductive harm. Some examples of these chemicals are: • lead from lead-based paints, • crystalline silica f...