Page 2 - SPECIFICATIONS; GENERAL SAFETY RULES
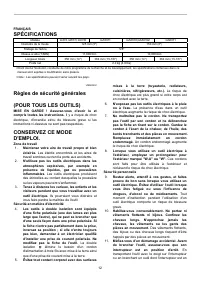
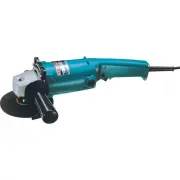
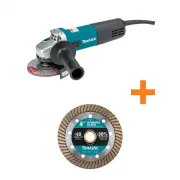
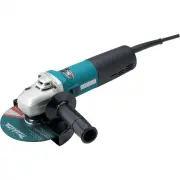
2 ENGLISH SPECIFICATIONS Model GA5010, GA5010Y, GA5010Z GA5011 GA6010,GA6010Z GA6011 Wheel diameter 125 mm (5") 150 mm (6") Spindle thread 5/8" No load speed (RPM) 11,000/min 10,000/min Overall length 356 mm (14") 384 mm (15-1/8") 356 mm (14") 384 mm (15-1/8") Net weight ...
Page 3 - SPECIFIC SAFETY RULES
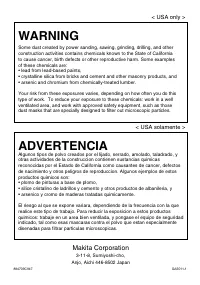
3 16. Do not force tool. Use the correct tool for your application. The correct tool will do the job better and safer at the rate for which it is designed. 17. Do not use tool if switch does not turn it on or off. Any tool that cannot be controlled with the switch is dangerous and must be repaired. ...
Page 4 - SAVE THESE INSTRUCTIONS.; Shaft lock; For tool with type A switch trigger
4 flange (especially the installing surface) or the lock nut. Damage to these parts could result in wheel breakage. 9. NEVER use tool with wood cutting blades or other sawblades. Such blades when used on a grinder frequently kick and cause loss of control leading to personal injury. 10. Hold the too...
Page 5 - ASSEMBLY
5 For tool without lock button and lock-off button To start the tool, simply pull the switch trigger. Release the switch trigger to stop. For tool with lock button To start the tool, simply pull the switch trigger. Release the switch trigger to stop. For continuous operation, pull the switch trigger...
Page 6 - Installing or removing wheel guard; For tool with locking screw type wheel guard
6 1 2 3 008048 Installing or removing wheel guard CAUTION: • When using a depressed center grinding wheel/Multi-disc, wire wheel brush or cut-off wheel, the wheel guard must be fitted on the tool so that the closed side of the guard always points toward the operator. For tool with locking screw type...
Page 7 - OPERATION; Grinding and sanding operation
7 To tighten the lock nut, press the shaft lock firmly so that the spindle cannot revolve, then use the lock nut wrench and securely tighten clockwise. 1 2 007996 To remove the wheel, follow the installation procedure in reverse. Installing or removing abrasive disc (optional accessory) NOTE: • Use ...
Page 8 - MAINTENANCE
8 1 2 008002 Unplug tool and place it upside down allowing easy access to spindle. Remove any accessories on spindle. Mount urethane washer then thread wire cup brush onto spindle and tighten with supplied wrench. When using brush, avoid applying too much pressure which causes over bending of wires,...
Page 9 - Replacing carbon brushes; ACCESSORIES
9 1 2 008001 Replacing carbon brushes 1 001145 Remove and check the carbon brushes regularly. Replace when they wear down to the limit mark. Keep the carbon brushes clean and free to slip in the holders. Both carbon brushes should be replaced at the same time. Use only identical carbon brushes. Use ...
Page 11 - MAKITA LIMITED ONE YEAR WARRANTY
11 MAKITA LIMITED ONE YEAR WARRANTY Warranty Policy Every Makita tool is thoroughly inspected and tested before leaving the factory. It is warranted to be free of defects from workmanship and materials for the period of ONE YEAR from the date of original purchase. Should any trouble develop during t...
Page 12 - FRANÇAIS; SPÉCIFICATIONS; Zone de travail
12 FRANÇAIS SPÉCIFICATIONS Modèle GA5010, GA5010Y, GA5010Z GA5011 GA6010,GA6010Z GA6011 Diamètre de la meule 125 mm (5") 150 mm (6") Filetage de l'arbre 5/8" Vitesse à vide (T/MIN) 11,000/min 10,000/min Longueur totale 356 mm (14") 384 mm (15-1/8") 356 mm (14") 384 mm (15-1/8...
Page 15 - Symboles; Interrupteur
15 AVERTISSEMENT: Une MAUVAISE UTILISATION de l'outil ou l'ignorance des consignes de sécurité du présent manuel d'instructions peuvent entraîner une grave blessure. USD291-2 Symboles Les symboles utilisés pour l'outil sont indiqués ci-dessous. ・ volts ・ ampères ・ courant alternatif ou continu ・ vit...
Page 16 - ASSEMBLAGE; Installation de la poignée latérale (poignée); Pour outil avec carter de meule à vis de blocage
16 Pour outil avec commutateur de verrouillage et de sécurité Un doigt de verrouillage est fourni pour prévenir la pression accidentelle sur la gâchette. Pour faire démarrer l'outil, enfoncez le doigt de verrouillage (B) puis appuyez sur la gâchette (A). Pour l'arrêter, relâchez la gâchette. Pour un...
Page 17 - Pour outil avec carter de meule à levier de serrage
17 Pour retirer le carter de meule, suivez la procédure de l'installation de l'autre côté. Pour outil avec carter de meule à levier de serrage 1 2 34 008343 1 008344 Après avoir desserré la vis, desserrez le levier sur le carter de meule. Montez le carter de meule en alignant la partie saillante de ...
Page 18 - UTILISATION; Opérations de meulage et de ponçage
18 empêcher l'arbre de tourner, puis utilisez la clé à contre-écrou en serrant fermement dans le sens des aiguilles d'une montre. Pour retirer le disque, suivez la procédure d'installation de l'autre côté. UTILISATION AVERTISSEMENT: • l n'est jamais nécessaire de forcer l'outil. Le poids de l'outil ...
Page 19 - ENTRETIEN; Remplacement des charbons
19 augmente les risques de blessure au contact des fils cassés. • Avec les brosses métalliques circulaires, utilisez TOUJOURS le carter, en vous assurant que le diamètre de la brosse n'est pas trop grand pour le carter. La brosse peut se casser en cours d'utilisation et le carter réduit alors les ri...
Page 20 - ACCESSOIRES
20 1 2 008000 Pour maintenir la SÉCURITÉ et la FIABILITÉ du produit, les réparations, tout autre travail d'entretien ou de réglage doivent être effectués dans un centre de service Makita agréé ou un centre de service de l'usine Makita, exclusivement avec des pièces de rechange Makita. ACCESSOIRES AT...
Page 22 - GARANTIE LIMITÉE D’UN AN MAKITA
22 GARANTIE LIMITÉE D’UN AN MAKITA Politique de garantie Chaque outil Makita est inspecté rigoureusement et testé avant sa sortie d’usine. Nous garantissons qu’il sera exempt de défaut de fabrication et de vice de matériau pour une période d’UN AN à partir de la date de son achat initial. Si un prob...
Page 23 - ESPAÑOL; ESPECIFICACIONES; Área de trabajo
23 ESPAÑOL ESPECIFICACIONES Modelo GA5010, GA5010Y, GA5010Z GA5011 GA6010,GA6010Z GA6011 Especificaciones eléctricas en México 120 V 10,5 A 50/60 Hz Diámetro de disco 125 mm (5") 150 mm (6") Rosca del eje 125 mm (5/8") Revoluciones por minuto (r.p.m.) 11 000 r/min 10 000 r/min Longitud t...
Page 25 - Sostenga la herramienta con firmeza.
25 Tabla 1. Calibre mínimo para el cable Voltios Longitud total del cable en metros 120 V~ 7,6 m (25 ft) 15,2 m (50 ft) 30,4 m (100 ft) 45,7 m (150 ft) Más de No más de Calibre del cable (AWG) 0 A 6 A 18 16 16 14 18 16 14 12 6 A 10 A 10 A 12 A 16 16 14 12 12 A 16 A 14 12 No se recomienda Amperaje no...
Page 26 - Símbolos; Bloqueo del eje; Para herramienta con gatillo interruptor tipo A
26 después de operar la herramienta, puesto que puede estar extremadamente caliente y quemarle la piel. 19. Póngase SIEMPRE indumentaria apropiada incluyendo camisas de manga larga, guantes de cuero y delantales de taller para proteger la piel contra el contacto con virutas calientes. 20. La utiliza...
Page 27 - MONTAJE; Instalación de la empuñadura lateral (mango)
27 Para herramienta con gatillo interruptor tipo B 1 2 A B 008415 Para herramienta con bloqueo del interruptor Para poner en marcha la herramienta, presione simplemente el gatillo interruptor (A). Suéltelo para pararla. Para una operación continua, presione en gatillo interruptor (A) y luego empuje ...
Page 29 - OPERACIÓN; Operación de amolado y lijado
29 Sólo para EE.UU. / Canadá 1 23 008053 Monte la brida interior en el eje. Encaje el disco encima de la brida interior y rosque la contratuerca en el eje. Para apretar la tuerca, presione el bloqueo del eje firmemente para que el eje no pueda girar, después apriete firmemente hacia la derecha utili...
Page 31 - MANTENIMIENTO; Reemplazamiento de las escobillas de carbón; ACCESORIOS
31 herramienta eléctrica en la pieza de trabajo, el disco podrá estancarse, saltar o retroceder bruscamente. • Durante las operaciones de corte, no cambie nunca el ángulo del disco. La aplicación de presión lateral en el disco de corte (al igual que en el amolado) hará que el disco se agriete y se r...
Page 33 - GARANTÍA LIMITADA MAKITA DE UN AÑO
33 GARANTÍA LIMITADA MAKITA DE UN AÑO LA SIGUIENTE GARANTÍA NO APLICA PARA MÉXICO Política de garantía Cada herramienta Makita es inspeccionada y probada exhaustivamente antes de salir de fábrica. Se garantiza que va a estar libre de defectos de mano de obra y materiales por el periodo de UN AÑO a p...
Page 36 - Makita Corporation
36 Some dust created by power sanding, sawing, grinding, drilling, and otherconstruction activities contains chemicals known to the State of Californiato cause cancer, birth defects or other reproductive harm. Some examplesof these chemicals are:• lead from lead-based paints,• crystalline silica fro...