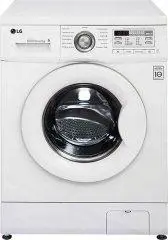
Page 4 - TABLE OF CONTENTS
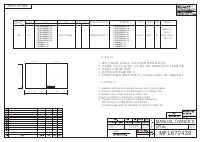
TABLE OF CONTENTS This manual may contain images or content different from the model you purchased.This manual is subject to revision by the manufacturer. SAFETY INSTRUCTIONS ........................................................ 4 IMPORTANT SAFETY INSTRUCTIONS .......................................
Page 5 - SAFETY INSTRUCTIONS; The following safety guidelines are intended to prevent; Children in the Household; This appliance is not intended for use by persons (including
4 SAFETY INSTRUCTIONS EN The following safety guidelines are intended to prevent unforeseen risks or damage from unsafe or incorrect operation of the appliance. The guidelines are separated into ‘WARNING’ and ‘CAUTION’ as described below. This symbol is displayed to indicate matters and operations t...
Page 6 - Installation
5 EN Installation • Never attempt to operate the appliance if it is damaged, malfunctioning, partially disassembled, or has missing or broken parts, including a damaged cord or plug. • This appliance should only be installed and transported by two or more people holding the appliance securely. • Do ...
Page 8 - Operation
7 EN Operation • Do not use a sharp object like drill or pin to penetrate, modify or disassemble the unit. • Do not repair or replace any part of the appliance. All repairs and servicing must be performed by qualified service personnel unless specifically recommended in this Owner’s Manual. Use only...
Page 11 - INSTALLATION; Parts
10 INSTALLATION EN Parts 7 8 6 5 4 3 2 1 Door Drum Control Panel Drawer 1 2 3 4 Water Supply Hose Power Plug Water Drain Hose Leveling Feet 5 6 7 8
Page 12 - Accessories; NOTE; Specifications; Wash capacity
11 EN Accessories Water supply hose (for cold water) Connecting supply hose Water drain hose Water supply hose connector Water drain hose connector Anti-slip sheets (2 EA) Detergent measuring cup Brackets (front) (2 EA) Brackets (back) (2 EA) Spanner * Screws Type A (37 EA) Type B (5 EA) Type C (11 ...
Page 13 - Location; Positioning; WARNING; Electrical Connection
12 EN Installation Place Requirements Location 125 cm 5 cm 5 cm 60 cm 10 cm 114 cm 135 cm 123 cm 2 cm *125 cm 0.5 cm *125 cm: minimum space for installation Level floor : Allowable slope under the entire appliance is 1°. Power outlet : Must be within 1.5 meters of either side of the location of the ...
Page 14 - Stacking Mini Washer
13 EN Stacking Mini Washer Brackets (front) Brackets (back) Brackets (front) Brackets (back) • The error message appears on the display, if the stacking holder is not attached to the bottom of the Main Washer. 1 Tilt and hold Main Washer. 2 Assemble the front brackets and stacking holder at the bott...
Page 16 - Connecting the Supply Hose; Checking the Rubber Seal on the; Connecting Hose to Water Tap
15 EN Connecting the Supply Hose • Water supply pressure must be between 0.1 MPa and 0.8 MPa (100 ~ 800kPa). • Do not overtighten the water supply hose. • If the water supply pressure is more than 0.8 MPa, a decompression device should be installed. • Periodically check the condition of the hose eve...
Page 18 - Installing the Drain Hose; Using the Drain Hose Connector; CAUTION
17 EN Installing the Drain Hose • The drain hose should not be placed higher than 100 cm above the floor. Water in the appliance may not drain or may drain slowly. 1 Insert the band clamp onto the drain hose elbow. Pliers may be required to open the clamp so it can be fitted to the rubber end of the...
Page 19 - Leveling the Appliance
18 EN Leveling the Appliance If the floor is uneven, turn the adjustable feet as required (Do not insert pieces of wood etc. under the feet). Make sure that all four feet are stable and resting on the floor and then check that the appliance is perfectly level (Use a spirit level). • Once the applian...
Page 20 - OPERATION; Using the Appliance
19 OPERATION EN Using the Appliance 1 Sort laundry and load items. • Sort laundry by fabric type, soil level, colour and load size as needed. Open the door and load items into the washing machine. 2 Add cleaning products. • Add the proper amount of detergent with the detergent measuring cup to the w...
Page 21 - Sorting Laundry
20 EN Sorting Laundry 1 Look for the care label on your clothes. • This will tell you about the fabric content of your garment and how it should be washed. • Symbols on the care labels. Wash temperature Normal machine wash Permanent press Delicate Hand wash Do not wash 2 Sorting laundry. • To get th...
Page 22 - Closing the Door and Drawer
21 EN Closing the Door and Drawer 1 Gently push down on the Mini Washer’s Lid until it clicks. 2 Push the drawer in until it has completely closed. CAUTION • Do not let your hands get stuck between the door and the washing machine, as this can cause injury. • Forcing the drawer or the Lid to open ca...
Page 23 - Adding Cleaning Products; Detergent Dosage
22 EN Adding Cleaning Products Detergent Dosage • Detergent should be used according to the instruction of the detergent manufacturer and selected according to type, colour, soiling of the fabric and washing temperature. • If too much detergent is used, too many suds can occur and this will result i...
Page 24 - Adding Softeners; Adding Fabric Softener
23 EN Adding Softeners Adding Fabric Softener CASE 1. When the machine chimes: 1 Press Start/Pause to pause the cycle. • It can be paused by pressing the Start/ Pause button of the Mini Washer or by using the remote control. 2 Slide open the drawer, open the door, and add the liquid fabric softener....
Page 25 - Control Panel
24 EN Control Panel 1 2 4 5 3 Power Button • Press the Power button to turn the washing machine on, or off if washing hasn't commenced. Display • The display shows the cycle status and estimated time remaining. • : Drawer lock indicator • : Wi-Fi connect indicator • : Remote start indicator Programm...
Page 26 - Programme Table; Washing Programme
25 EN Programme Table Washing Programme Programme Description Note Maximum Load Light Soil Use this programme to wash lightly soiled normal items, except delicate fabrics such as wool or silk. • Pressing the Start/Pause button without selecting a programme will cause the Normal programme to begin im...
Page 27 - Option Programme; Spin Only; Locking the Control Panel
26 EN Option Programme Spin Only Use this option to spin a hand washed load that may not have been washed in the machine. Extra Rinse Use this option to increase the number of rinsing programmes. 1 Press the Power button. 2 Select a washing programme. 3 Press the Extra Rinse button to set the amount...
Page 28 - SMART FUNCTIONS; Using SmartThinQ; Installing SmartThinQ
27 SMART FUNCTIONS EN Using SmartThinQ Application Installing SmartThinQ Search for the LG SmartThinQ application from the Google Play Store or Apple App Store on a smart phone. Follow instructions to download and install the application. Wi-Fi Function • For appliances with the or logo Washer Cycle...
Page 29 - Using Washer Cycle; Remote Start; Download Cycle; Smart DiagnosisTM Using a Smart
28 EN Using Washer Cycle Remote Start Use a smart phone to control your appliance remotely. You can also monitor your cycle operation so you know how much time is left in the cycle. To Use Remote Start: 1 Press the Power button. 2 Put the laundry in drum. 3 Press and hold Remote Start button for 3 s...
Page 30 - Using Smart DiagnosisTM; Smart DiagnosisTM Through the
29 EN Using Smart Diagnosis™ Smart Diagnosis™ Through the Customer Information Centre Use this function if you need an accurate diagnosis by an LG Electronics customer information centre when the appliance malfunctions or fails. Use this function only to contact the service representative, not durin...
Page 31 - MAINTENANCE; Cleaning the Washing; Care After Wash
30 MAINTENANCE EN WARNING • Unplug the washing machine before cleaning to avoid the risk of electric shock. Failure to follow this warning may result in serious injury, fire, electric shock, or death. • Never use harsh chemicals, abrasive cleaners, or solvents to clean the washing machine. They may ...
Page 32 - Cleaning the Drum; Cleaning the Water Inlet Filter
31 EN Cleaning the Drum Use the Tub Clean option to keep the drum clean. 1 Press the Power button. 2 Dilute 200 ml liquid chlorine bleach in 1 ℓ of water and pour the mixture in the drum. 3 Press the Tub Clean button to set time required. 4 Press the Start/Pause button. CAUTION • Do not leave the ma...
Page 33 - Cleaning the Lint Filter; Caution on Freezing During; How to Keep the Product from
32 EN Cleaning the Lint Filter The Lint filter is an important part for an efficient washing performance result, so it needs special care from you. It is recommended that the filter be cleaned regularly. 1 Squeeze the side tabs and lift out the filter. 2 Open the cap and remove any lint before washi...
Page 34 - How to Handle Freezing; Step 1. When the Door is Frozen; Step 3. When the Drain Pump is Frozen
33 EN How to Handle Freezing Step 1. When the Door is Frozen • Thaw out the door using a hot water cloth. Step 2. When the Water Supply Hose is Frozen • icon may blink on the display when water supply problems occur, take the following measures. − Take out water supply hose and connect to the tap an...
Page 35 - TROUBLESHOOTING; Diagnosing Problems
34 TROUBLESHOOTING EN The appliance is equipped with an automatic error-monitoring system to detect and diagnose problems at an early stage. If the appliance does not function properly or does not function at all, check the following before you call for service: Diagnosing Problems Symptoms Reason S...
Page 39 - Error Messages
38 EN Error Messages Symptoms Reason Solution Drawer is not closed properly. • Close the drawer and press Start/Pause button to start the cycle. • If the drawer is closed and the drawer lock error message is displayed, call for service. Door is not closed properly. • Open the drawer and make sure th...
Page 41 - Memo