Page 2 - Copyright © 2017 LG Electronics Inc. All rights reserved; OWNER’S MANUAL; WASHING; installation for future reference.
www.lg.com Copyright © 2017 LG Electronics Inc. All rights reserved OWNER’S MANUAL WASHING MACHINE Before beginning installation, read these instructions carefully. This will simplify installation and ensure that the product is installed correctly and safely. Leave these instructions near the produc...
Page 3 - TABLE OF CONTENTS
TABLE OF CONTENTS This manual is produced for a group of products and may contain images or content different from the model you purchased.This manual is subject to revision by the manufacturer. SAFETY INSTRUCTIONS ......................................03 Important Safety Instructions .................
Page 4 - SAFETY INSTRUCTIONS; ensure that they do not play with the appliance.; WARNING; solvents or substances. Do not clean the product or expose it to
03 SAFETY INSTRUCTIONS The following safety guidelines are intended to prevent unforeseen risks or damage from unsafe or incorrect operation of the product.The guidelines are separated into ‘WARNING’ and ‘CAUTION’ as described below. This symbol is displayed to indicate matters and operations that c...
Page 5 - Important Safety Instructions; Installation; outlet, have a proper outlet installed by a qualified electrician.
04 Important Safety Instructions To reduce the risk of fire, electric shock, or injury to persons when using your product, basic safety precautions should be followed, including the following: Installation • Never attempt to operate this appliance if it is damaged, malfunctioning, partially disassem...
Page 6 - Operation
05 Operation • Do not attempt to separate any panels or disassemble the appliance. Do not apply any sharp objects to the control panel in order to operate the appliance. • Do not repair or replace any part of the appliance. All repairs and servicing must be performed by qualified service personnel u...
Page 7 - Maintenance; plug firmly and pull straight out from the socket outlet.; Technical Safety for Using the Dryer; prevent heat from escaping and so create a fire hazard.
06 Maintenance • Securely plug the power plug in the socket outlet after completely removing any moisture and dust. • Disconnect the power cord before cleaning the appliance. Turning the unit off into stand by mode from the front panel will not isolate the mains supply from the appliance. • Never un...
Page 8 - Disposal; appliance to prevent misuse.
07 Disposal • Before discarding an old appliance, unplug it. Cut off the cable directly behind the appliance to prevent misuse. • Dispose of all packaging materials (such as plastic bags and styrofoam) away from children. The packaging material can cause suffocatoion. • Remove the door before dispos...
Page 9 - INSTALLATION; Parts; Accessories
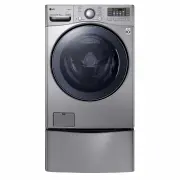
08 INSTALLATION Parts Transit bolts Power plug Drawer Control panel Drum Door Drain hose Drain plug Drain pump filter Cover cap (Location may vary depending on products) Adjustable feet Accessories Cold supply hose (1EA) (Option: Hot (1EA)) Spanner Elbow bracket (for securing drain hose) Anti–slip s...
Page 10 - Specifications; Wash Capacity
09 Specifications Model WDC1215HSVE Wash Capacity 15 kg (Wash) / 8 kg (Dry) Power Supply 220 - 240 V~, 50 Hz Size 700 mm (W) x 770 mm (D) x 990 mm (H) Product Weight 100 kg Permissible Water pressure 0.1 - 0.8 MPa (1.0 - 8.0 kgf / cm²) • Appearance and specifications may change without notice to imp...
Page 11 - Installation Place Requirements; Location; Positioning; Electrical Connection
10 Installation Place Requirements Location 10 cm 2 cm 2 cm Level Floor : Allowable slope under the entire appliance is 1°. Power Outlet : Must be within 1.5 meters of either side of the location of the appliance. • Do not overload the outlet with more than one appliance. Additional Clearance : For ...
Page 12 - NOTE
11 Unpacking and Removing Transit Bolts 1 Lift the appliance off the foam base. • After removing the carton and shipping material, lift the appliance off the foam base. Make sure the tub support comes off with the base and is not stuck to the bottom of the appliance. • If you must lay the appliance ...
Page 13 - Wooden Floors (Suspended
12 Using Anti-Slip Sheets (Optional) If you install the appliance on a slippery surface, it may move because of excessive vibration. Incorrect leveling may cause malfunction through noise and vibration. If this occurs, install the anti-slip sheets under the leveling feet and adjust the level. 1 Clea...
Page 14 - Leveling the Appliance; Connecting Supply Hose; Checking the Rubber Seal on the Supply
13 Leveling the Appliance If the floor is uneven, turn the adjustable feet as required (Do not insert pieces of wood etc. under the feet). Make sure that all four feet are stable and resting on the floor and then check that the appliance is perfectly level (Use a spirit level). • Once the appliance ...
Page 15 - Connecting Hose to Water Tap
14 Connecting Hose to Water Tap Connecting Screw-Type Hose to Tap with Thread Screw the hose connector onto the water supply tap. Connecting Screw-Type Hose to Tap Without Thread 1 Loose the four fixing screws. Upper connector Rubber seal Fixing screw 2 Remove the guide plate if the tap is too large...
Page 16 - Connecting Hose to Appliance
15 3 Push the adapter onto the end of the tap so that the rubber seal forms a watertight connection. Tighten the four fixing screws and the adapter ring plate . 4 Pull the connector latch plate down, push the supply hose onto the adapter, and release the connector latch plate. Make sure the adapter ...
Page 17 - Installing the Drain Hose
16 Installing the Drain Hose • The drain hose should not be placed higher than 100 cm above the floor. Water in the appliance may not drain or may drain slowly. • Securing the drain hose correctly will protect the floor from damage due to water leakage. • If the drain hose is too long, do not force ...
Page 18 - OPERATION; Using the Washing Machine
17 OPERATION Using the Washing Machine Before the first wash, select a washing programme, allow the washing machine to wash without clothing. This will remove residue and water from the drum that may have been left during manufacturing. 1 Sort laundry and load items. • Sort laundry by fabric type, s...
Page 19 - Sorting Laundry; CAUTION
18 Sorting Laundry 1 Look for a care label on your clothes. • This will tell you about the fabric content of your garment and how it should be washed. • Symbols on the care labels. Wash temperature Normal machine wash Permanent press Delicate Hand wash Do not wash 2 Sorting laundry. • To get the bes...
Page 20 - Adding Cleaning Products; Detergent Dosage; Adding Detergent and Fabric Softener; Adding Detergent
19 Adding Cleaning Products Detergent Dosage • Detergent should be used according to the instruction of the detergent manufacturer and selected according to type, colour, soiling of the fabric and washing temperature. • If too much detergent is used, too many suds can occur and this will result in p...
Page 21 - Adding Fabric Softener; Using tablet
20 Adding Fabric Softener • Do not exceed the maximum fill line. Overfilling can cause early dispensing of the fabric softener, which may stain clothes. Close the dispenser drawer slowly. • Do not leave the fabric softener in the detergent drawer for more than 2 days (Fabric softener may harden). • ...
Page 22 - Control Panel
21 Control Panel Power button • Press the Power button to turn the washing machine on. • To cancel the Delay End function, the Power button should be pressed. Start/Pause button • This Start/Pause button is used to start the wash cycle or pause the wash cycle. • If a temporary stop of the wash cycle...
Page 23 - Programme Table; Washing Programme
22 Programme Table Washing Programme Programme Description Fabric Type Proper Temp. Maximum Load Weight Cotton Provides better performance by combining various drum motions. Coloured fast garments (shirts, nightdresses, pajamas, etc) and normally soiled cotton load (underwear). 40 °C (Cold to 60 °C)...
Page 25 - Drying Programme
24 Drying Programme Programme Description Fabric Type Turbo Dry Select this cycle to reduce the cycle time during the drying cycle. Cotton or linen fabrics such as cotton towels, t-shirts, and linen garments. Air Dry Select this cycle to reduce water and energy usage during the drying cycle. Time 30...
Page 26 - Extra Options
25 Extra Options Programme Delay End Steam Add Item Turbo Clean™ Turbo Dry Air Dry Time Dry Cotton ● ● ● ●** ● ● ● Allergy Care ● ●* ● ● ● ● ● Hygiene ● ● ● ● ● ● ● Refresh ● ●* Baby Care ● ●* ● ● ● ● ● Duvet ● ● ● Sports Wear ● ●** ● ● Wool ● ● Silent Wash ● ● ● ● ● Speed Wash ● ●** ● ●** ● ● ● Q.W...
Page 27 - Add Item; Option Programme; Delay End; Turbo CleanTM
26 Add Item Use this function to add loads or remove the foreign material. 1 Press the Add Item button. 2 Close the door after add loads or remove the foreign material (e.g. coin or pin etc.) 3 Press the Start/Pause button. • Results when choosing Add Item during cycles. - When the tub is spinning :...
Page 29 - Remote Start
28 Child Lock ( ) Select this function to lock the buttons on the control assembly to prevent tampering. Locking the control panel 1 Press and hold the Wash and Rinse button for 3 seconds. 2 A beep will sound, and ‘ ’ will appear on the display.When the child lock is set, all buttons are locked exce...
Page 30 - Download Cycle
29 Download Cycle The Download Cycle features of this appliance allow you to download new and special cycles that are not included in the appliance's basic cycles. Appliances that have been successfully registered can download a variety of specialty cycles specific to the appliance. Only one cycle c...
Page 31 - Dry; Drying Time Guide
30 Dry Use the Automatic cycles to dry most loads. Electronic sensors measure the temperature of the exhaust to increase or decrease drying temperatures for faster reaction time and tighter temperature control. • Cold water tap must be left on during drying cycles. • This washing machine’s automatic...
Page 32 - SMART FUNCTIONS; Using SmartThinQ Application; Things to check before using LG
31 SMART FUNCTIONS Using SmartThinQ Application Things to check before using LG SmartThinQ • For appliances with the or logo 1 Check the distance between the appliance and the wireless router (Wi-Fi network). • If the distance between the appliance and the wireless router is too far, the signal stre...
Page 33 - Installing SmartThinQ
32 Installing SmartThinQ Search for the LG SmartThinQ application from the Google Play Store or Apple App Store on a smart phone. Follow instructions to download and install the application. NOTE • If you choose the simple login to access the LG SmartThinQ application, you must go through the applia...
Page 34 - Smart DiagnosisTM Using a Smart Phone; Using Smart DiagnosisTM; Smart DiagnosisTM Through the
33 Smart Diagnosis™ Using a Smart Phone • For appliances with the or logo Use this function if you need an accurate diagnosis by an LG Electronics customer information centre when the appliance malfunctions or fails.Smart Diagnosis™ can not be activated unless the appliance is connected to power. If...
Page 35 - MAINTENANCE; Cleaning Your Washing Machine; Care After Wash; Cleaning the Exterior; Cleaning the Water Inlet Filter
34 MAINTENANCE WARNING • Unplug the washing machine before cleaning to avoid the risk of electric shock. Failure to follow this warning may result in serious injury, fire, electric shock, or death. • Never use harsh chemicals, abrasive cleaners, or solvents to clean the washing machine. They may dam...
Page 36 - Cleaning the Drain Pump Filter
35 Cleaning the Drain Pump Filter • The drain filter collects threads and small objects left in the laundry. Check regularly that the filter is clean to ensure smooth running of your washing machine. • Allow the water to cool down before cleaning the drain pump, carrying out emergency emptying, or o...
Page 38 - How to Keep the Product from Freezing; Check for Freezing
37 Caution on Freezing During Winter • When frozen, the product does not operate normally. Install the product where it will not freeze during winter. • Do not install the washer in any outdoor or sheltered outdoor location as this will contribute water freezing within the unit. How to Keep the Prod...
Page 39 - How to Handle Freezing
38 How to Handle Freezing • Make sure to empty the drum, pour warm water of 50–60 °C up to the rubber part inside the drum, close the door, and wait for 1–2 hours. 50‒60 °C CAUTION • When the drain hose is installed in a curved shape, the inner hose may freeze. • Open the cover cap and drain tube pl...
Page 40 - TROUBLESHOOTING; Diagnosing Problems
39 TROUBLESHOOTING The appliance is equipped with an automatic error-monitoring system to detect and diagnose problems at an early stage. If the appliance does not function properly or does not function at all, check the following before you call for service: Diagnosing Problems Symptoms Reason Solu...
Page 44 - Error Messages
43 Error Messages Symptoms Reason Solution Water supply pressure is not adequate in area. • Check another tap in the house. Water supply taps are not completely open. • Fully open tap. Water supply hose(s) are kinked. • Straighten hose(s). The filter of the supply hose(s) are clogged. • Check the fi...
Page 46 - Memo