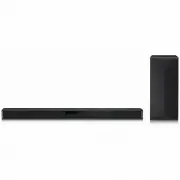
Page 2 - Safety Information; CAUTION
1 Getting Started Getting Started 2 Getting Star ted 1 Safety Information CAUTION RISK OF ELECTRIC SHOCK DO NOT OPEN CAUTION: TO REDUCE THE RISK OF ELECTRIC SHOCK DO NOT REMOVE COVER (OR BACK) NO USER-SERVICEABLE PARTS INSIDE REFER SERVICING TO QUALIFIED SERVICE PERSONNEL. This lightning flash with ...
Page 4 - Symbols
Getting Started 4 Getting Star ted 1 Symbols ~ Refers to alternating current (AC). 0 Refers to direct current (DC). Refers to class II equipment. 1 Refers to stand-by. ! Refers to “ON” (power). Refers to dangerous voltage.
Page 5 - Table of Contents; Getting Started; Troubleshooting
Table of Contents 5 1 2 3 4 5 Table of Contents 1 Getting Started 2 Safety Information 6 Unique features 6 Introduction 6 – Symbols used in this manual 7 Remote control 8 Front panel 8 Rear panel 9 About LED condition 11 Installing the sound bar 12 Mounting the main unit on a wall 2 Connecting 14 Wi...
Page 6 - Unique features; Auto power down; BLUETOOTH®; USB playback; Introduction; Symbols used in this manual; Note; Caution
Getting Started 6 Getting Star ted 1 Unique features Auto power down This unit supports to turn off by itself for saving energy consumption. Portable In Listen to music from your portable device. (MP3 player, Notebook, Smart phone, etc..) BLUETOOTH® Listen to music stored on your Bluetooth device. U...
Page 7 - Remote control; Replacement of battery
Getting Started 7 Getting Star ted 1 Remote control Replacement of battery Remove the battery cover on the rear of the remote control, and insert battery with and matched correctly. • • • • • • • • • • • • • • a • • • • • • • • • • • • • 1 (Standby) : Switches the unit ON or OFF F (Function) : Selec...
Page 8 - Front panel
Getting Started 8 Getting Star ted 1 Front panel Rear panel A o / p (Volume) : Adjusts volume level F (Function) : Selects the function. 1 (Standby) B (USB) : Connect to a USB device. C PORT.IN ( Portable) : Connect to a Portable device. D OPT. IN ( Optical ) : Connect to an Optical device. A Standb...
Page 9 - About LED condition; LED
Getting Started 9 Getting Star ted 1 About LED condition LED Condition Description OPTICAL LED turns on. OPTICAL function is selected. USB LED turns on. USB function is selected. USB LED blinks. Paused USB playback. Bluetooth LED turns on. Paired with Bluetooth device. Bluetooth LED blinks. Waiting ...
Page 10 - Useful functions for using the unit
Getting Started 10 Getting Star ted 1 Useful functions for using the unit Function Description To do Do this TV Remote On/Off (Page 20) It allows you to control the volume of this unit by your TV remote control even by other company’s product.Initial setting of this function was set to on. ON Press ...
Page 11 - Installing the sound bar
Getting Started 11 Getting Star ted 1 Installing the sound bar You can hear the sound by connecting the unit to the other device : TV, Blu-ray disc player, DVD player, etc.Place the unit in front of the TV and connect it to the device you want. (Page 14 - 17)You can place the wireless subwoofer anyw...
Page 12 - Mounting the main unit
Getting Started 12 Getting Star ted 1 Mounting the main unit on a wall You can mount the main unit on a wall. Because it is difficult to make a connection after installing this unit, you should connect the cables before installation. > Caution Preparation materials Unit Wall bracket install guide...
Page 14 - Wireless subwoofer; LED indicator of wireless subwoofer; Setting up the wireless subwoofer for; Manually pairing wireless subwoofer
2 Connecting Connecting 14 Connecting 2 Wireless subwoofer connection LED indicator of wireless subwoofer LED Color Status Green (Blink) The connection is trying. Green The connection is completed. Red The wireless subwoofer is in standby mode or the connection failed. Off (No display) The power cor...
Page 15 - How to affix the ferrite; Affix the ferrite core for power
Connecting 15 Connecting 2 y It takes a few seconds (and may take longer) for the main unit and the subwoofer to communicate with each other and make sounds. y The closer the main unit and the subwoofer, the better sound quality. It is recommended to install the main unit and the subwoofer as close ...
Page 16 - Connecting to your TV; Using an OPTICAL cable; Optional equipment
Connecting 16 Connecting 2 Connecting to your TV Using an OPTICAL cable 1. Connect the OPT. IN jack on the back of the unit to OPTICAL OUT jack on the TV using an OPTICAL cable. Optical cable 2. Select the input source to Optical by pressing OPTICAL on the remote control or F repeatedly. You can see...
Page 17 - Listening to music from your portable; USB connection
Connecting 17 Connecting 2 PORT. IN connection 3.5 mm stereo cable Listening to music from your portable player The unit can be used to play the music from many types of portable players or external devices.1. Connect the portable player to the PORT. IN connector of the unit by using 3.5 mm stereo c...
Page 18 - USB device requirement
Connecting 18 Connecting 2 USB device requirement y Devices which require additional program installation connected to a computer, are not supported. y Do not extract the USB device while in operation. y For a large capacity USB, it may take longer than a few minutes to be searched. y To prevent dat...
Page 20 - Basic operations; USB operation; Other operations; Turn off the sound temporarily; Using your TV remote control
3 Operating Operating 20 Oper ating 3 Basic operations USB operation 1. Connect the USB device to the USB port.2. Select the input source to USB by pressing F repeatedly. You can see USB LED turns on. Then USB function is selected. To Do this Playback Press N on the remote control. Pause During play...
Page 21 - Auto display Dimmer
Operating 21 Oper ating 3 Auto display Dimmer Function LED will be darkened automatically if there is no key input for 15 seconds. When you press any button, the Function LED will be brighten. Auto power down This unit will turn itself off to save electric consumption if the main unit is not connect...
Page 22 - Auto function change; When optical signal comes in; When 3.5 mm stereo cable is
Operating 22 Oper ating 3 Auto function change This unit recognizes input signals such as Optical, Bluetooth and Portable and then changes suitable function automatically. When optical signal comes in When you turn on the external device connected to this unit by an optical cable, this unit change t...
Page 23 - Using BLUETOOTH®; About Bluetooth; Listening to music stored on the; Pairing your unit and Bluetooth device
Operating 23 Oper ating 3 Using BLUETOOTH® technology About Bluetooth Bluetooth i s wireless communication technology for short range connection. The sound may be interrupted when the connection interfered by the other electronic wave or you connect the Bluetooth in the other rooms. Connecting indiv...
Page 24 - BLUETOOTH connection lock
Operating 24 Oper ating 3 y When using Bluetooth technology, you have to make a connection between the unit and the Bluetooth device as close as possible and keep the distance. However it may not work well in the cases below : - There is an obstacle between the unit and the Bluetooth device. - There...
Page 25 - Sound adjustment; Setting the surround mode; Adjust the woofer level settings
Troubleshooting 25 Troubleshoo ting 4 Sound adjustment Setting the surround mode This system has two pre-set surround sound fields. You can select a desired sound mode by using each sound mode button. Sound effect Description STANDARD You can enjoy optimized sound. BASS BLAST Reinforces the bass and...
Page 26 - Troubleshooting; General
4 Troubleshooting Troubleshooting 26 Troubleshoo ting 4 Troubleshooting General PROBLEM CAUSE & CORRECTION The unit does not work properly. y Turn off the power of this unit and the connected external device (TV, Woofer, DVD-player, Amplifier, etc.) and turn them on again. y Disconnect the power...
Page 27 - NOTES to use wireless
Troubleshooting 27 Troubleshoo ting 4 PROBLEM CAUSE & CORRECTION When you feel the output sound of the unit is low. Check the details below and adjust the unit according to them. y Switch [ON] state of DRC function to [OFF] by using remote controller. y With the sound bar connected with TV, chan...
Page 28 - Trademarks and licenses
5 Appendix Appendix 28 Appendix 5 Trademarks and licenses All other trademarks are trademarks of their respective owners. Manufactured under license from Dolby Laboratories. Dolby, Dolby Audio, and the double-D symbol are trademarks of Dolby Laboratories. The Bluetooth® word mark and logos are regis...
Page 29 - Specifications
Appendix 29 Appendix 5 Specifications General Power requirements Refer to the main label. Power consumption Refer to the main label. Dimensions (W x H x D) Approx. 660.0 mm x 56.0 mm x 99.0 mm with foot (26.0 inch x 2.2 inch x 3.9 inch) Operating temperature 5 °C to 35 °C (41 °F to 95 °F) Operating ...
Page 30 - Maintenance; Handling the unit; When shipping the unit
Appendix 30 Appendix 5 Maintenance Handling the unit When shipping the unit Please save the original shipping carton and packing materials. If you need to ship the unit, for maximum protection, re-pack the unit as it was originally packed at the factory. Keeping the exterior surfaces clean y Do not ...