Page 2 - Safety Information; CAUTION
Getting Started 2 Getting Star ted 1 Safety Information CAUTION RISK OF ELECTRIC SHOCK DO NOT OPEN CAUTION: TO REDUCE THE RISK OF ELECTRIC SHOCK DO NOT REMOVE COVER (OR BACK) NO USER-SERVICEABLE PARTS INSIDE REFER SERVICING TO QUALIFIED SERVICE PERSONNEL. This lightning flash with arrowhead symbol w...
Page 3 - IMPORTANT SAFETY; Symbols
Getting Started 3 Getting Star ted 1 This device is equipped with a portable battery or accumulator. Safe way to remove the battery from the equipment: Remove the old battery or battery pack, follow the steps in reverse order than the assembly. To prevent contamination of the environment and bring o...
Page 5 - Table of Contents; Getting Started
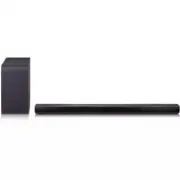
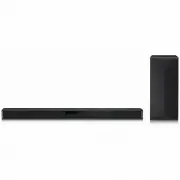
Table of Contents 5 1 2 3 4 5 Table of Contents 1 Getting Started 2 Safety Information 6 Unique features 6 Introduction6 – Symbols used in this manual 6 Accessories7 Remote control 8 Front panel 8 Rear panel 9 Installing the sound bar 10 Mounting the main unit on a wall 2 Connecting 12 Connecting th...
Page 6 - Unique features; Auto power down; Introduction; Symbols used in this manual; Note; Caution; Accessories
Getting Started 6 Getting Star ted 1 Unique features Auto power down This unit will turn off by itself for energy saving consumption. Portable In Listens to music from your portable device. (MP3, Notebook, etc) LG Sound Sync Controls volume level of this unit by the remote control of your LG TV that...
Page 7 - Remote control; Replacement of Battery
Getting Started 7 Getting Star ted 1 Remote control Replacement of Battery Remove the battery cover on the rear of the remote control, and insert battery with and matched correctly. • • • • • • • • • • • • • • a • • • • • • • • • • • • • 1 (Power) : Switches the unit ON or OFF. / Switches to the sta...
Page 8 - Front panel; Rear panel
Getting Started 8 Getting Star ted 1 A Remote sensor B Display window C The buttons are located on the rear. Front panel A o / p : (Volume) : Adjusts volume level F (Function) : Selects the function and input source. 1/! (Standby/On) B DC IN : AC adapter input C OPTICAL IN : Optical input D PORTABLE...
Page 9 - Installing the sound bar
Getting Started 9 Getting Star ted 1 Installing the sound bar You can hear the sound by connecting the unit to the other device : TV, Blu-ray disc player, DVD player, etc.Place the unit in front of the TV and connect it to the device you want. (Refer to pages 14 - 20.) y For best performance of wire...
Page 10 - Mounting the main unit
Getting Started 10 Getting Star ted 1 Mounting the main unit on a wall You can mount the main unit on a wall. Because it is difficult to make a connection after installing this unit, you should connect the cables before installation. > Caution Preparation materials Unit Wall bracket install guide...
Page 12 - Connecting the AC; LED indicator of wireless subwoofer; Setting up the wireless subwoofer for
Connecting 12 Connecting 2 Connecting the AC Adapter Connect the speaker to the power supply with the supplied AC adapter.1. Connect the supplied AC power cord to the AC adapter. 2. Connect the AC adapter cable to DC IN adapter input. 3. Plug the AC power cord into an AC outlet. Wireless subwoofer c...
Page 13 - Manually pairing wireless subwoofer
Connecting 13 Connecting 2 Manually pairing wireless subwoofer When your connection is not completed, you can check red LED or blinking green LED on the wireless subwoofer and the wireless subwoofer does not make sound. To solve the problem, follow the steps below. 1. Adjust volume level of the main...
Page 14 - Connecting to your TV; Using an OPTICAL cable; Using an HDMI cable
Connecting 14 Connecting 2 Connecting to your TV Please connect this unit and the TV using the optical digital cable or HDMI cable considering the capability of the TV. Using an OPTICAL cable 1. Connect the OPTICAL IN jack on the back of the unit to OPTICAL OUT jack on the TV using an OPTICAL cable....
Page 15 - HDMI cable Checklist; Enjoy rich sound broadcast of; Connection through HDMI Cable
Connecting 15 Connecting 2 HDMI cable Checklist Some HDMI cables do not support the ARC function, this can result in no sound output.When connecting this unit to the TV, if there is no sound, there might be a problem with the HDMI cable. Therefore connect this unit to the TV and check whether the Ty...
Page 16 - function; Additional information for HDMI
Connecting 16 Connecting 2 ARC (Audio Return Channel) function The ARC function enables an HDMI capable TV to send the audio stream to HDMI OUT of the unit.To use this function : - Your TV must support the HDMI-CEC and ARC function and the HDMI-CEC and ARC must be set to On. - The setting method of ...
Page 17 - Optional equipment; HDMI connection; For enjoying sound only
Connecting 17 Connecting 2 Optional equipment connection HDMI connection You can enjoy the sound and picture from HDMI connection on external device. For enjoying sound only You can enjoy the sound from the external device you connect. To the Blu-ray disc player, DVD player, etc. 1. Connect HDMI IN ...
Page 18 - Optical In connection; Portable In connection; Listening to music from your portable
Connecting 18 Connecting 2 Optical In connection Connect an optical output jack of external devices to the OPTICAL IN jack. To the optical output jack of external device 1. Connect the OPTICAL IN jack on the back of the unit to optical out jack of your TV (or digital device etc.) 2. Select the input...
Page 19 - USB connection; Compatible USB devices
Connecting 19 Connecting 2 USB connection Connect USB memory device to the USB port on the back of the unit. If HDMI cable is connected on the unit, inserting a USB device may be limited depending on a USB device shape. , Note For more information of playing files on a USB, refer to the page 21. Rem...
Page 20 - Playable file
Connecting 20 Connecting 2 Playable file Sampling Frequency MP3 : within 32 to 48 kHzWMA : within 32 to 48 kHzOGG : within 32 to 48 kHzFLAC : within 32 to 192 kHzWAV : within 32 to 48 kHz Bitrate MP3 : within 80 to 320 kbpsWMA : within 56 to 128 kbpsOGG : within 64 to 500 kbpsFLAC : within 500 to 50...
Page 21 - Basic operations; USB operation
Operating 21 Oper ating 3 Basic operations USB operation 1. Connect the USB device to the USB port.2. Select the input source to USB by pressing F button repeatedly To Do this Playback Press dM . Pause During playback, press dM . Skip to the next/ previous file During playback, press V on the remote...
Page 22 - Other operations; AV Sync; Turn off the sound temporarily
Operating 22 Oper ating 3 Other operations AV Sync When receiving audio signals from TV, sound and images may not be matched. In the case, this function can adjust the delay time.1. Press AV SYNC . 2. Use C/V to scroll up and down through the delay amount, which you can set at anything between 0 and...
Page 24 - Auto function change; When optical signal comes in; When LG TV signal comes in; LG Sound Sync
Operating 24 Oper ating 3 Auto function change This unit recognizes input signals such as Optical, Bluetooth ,LG TV and Portable and then changes suitable function automatically. When optical signal comes in When you turn on the external device connected to this unit by an optical cable, this unit c...
Page 25 - With wired connection
Operating 25 Oper ating 3 With wired connection 1. Connect your LG TV to the unit by using an optical cable. Optical cable 2. Set up the sound output of TV to listen to the sound through this unit : TV setting menu [ [Sound] [ [TV Sound output] [ [LG Sound Sync (Optical)] 3. Turn on the unit by pres...
Page 26 - Using BLUETOOTH; About BLUETOOTH; BLUETOOTH Profiles; Listening to music stored on the; Pairing your unit and BLUETOOTH
Operating 26 Oper ating 3 Using BLUETOOTH ® technology About BLUETOOTH Bluetooth i s wireless communication technology for short range connection. The sound may be interrupted when the connection has interference from other electronic waves or when you connect Bluetooth in the other rooms. Connectin...
Page 28 - Using BLUETOOTH App; Install “Music Flow Bluetooth”; Install “Music Flow Bluetooth” App; Activate BLUETOOTH with
Operating 28 Oper ating 3 Using BLUETOOTH App Only Android OS is available to use “Music Flow Bluetooth ” app with this unit. , Note About “Music Flow Bluetooth” App “Music Flow Bluetooth” app brings a suite of new features to this unit.To enjoy more features, you are recommended to download and ins...
Page 29 - Sound adjustment; Setting sound effect
Operating 29 Oper ating 3 y “Music Flow Bluetooth” app will be available in the software version as follow; - Android O/S : Ver 4.0.3 (or later) y If you use “Music Flow Bluetooth ” app for operation, there would be some differences between “Music Flow Bluetooth” app and the supplied remote control....
Page 30 - Adjust volume level; Bass; Night mode
Operating 30 Oper ating 3 Adjust volume level automatically This unit supports auto volume function that automatically adjusts the volume level.When the output sound is too loud or too low, press AUTO VOL on the remote control. So you can enjoy the sound with appropriate levels.To cancel this functi...
Page 31 - Troubleshooting
4 Troubleshooting Troubleshooting 31 Troubleshoo ting 4 Troubleshooting PROBLEM CAUSE & CORRECTION The unit does not work properly. y Turn off the power of this unit and the connected external device (TV, Woofer, DVD-player, Amplifier, etc.) and turn it on again. y Disconnect the power cord of t...
Page 32 - NOTES to use wireless
Troubleshooting 32 Troubleshoo ting 4 PROBLEM CAUSE & CORRECTION When you feel the output sound of the unit is low. Check the details below and adjust the unit according to them. y With the sound bar connected with TV, change the AUDIO DIGITAL OUT setting on TV Setup Menu from [PCM] to [AUTO] or...
Page 33 - Trademarks and licenses
5 Appendix Appendix 33 Appendix 5 Trademarks and licenses All other trademarks are trademarks of their respective owners. Manufactured under license from Dolby Laboratories. Dolby and the double-D symbol are trademarks of Dolby Laboratories. For DTS patents, see http://patents.dts.com. Manufactured ...
Page 34 - Specifications
Appendix 34 Appendix 5 Specifications General Power consumption Refer to the main label.Networked standby : 0.5 W(If all network ports are activated.) AC adapter y Model : DA-38A25 y Manufacturer : Asian Power Devices Inc. y Input : 100 - 240 V ~ 50 - 60 Hz 1.2 A y Output : 25 V 0 1.52 A Dimensions ...
Page 36 - Maintenance; Handling the unit; When shipping the unit
Appendix 36 Appendix 5 Maintenance Handling the unit When shipping the unit Please save the original shipping carton and packing materials. If you need to ship the unit, for maximum protection, re-pack the unit as it was originally packed at the factory. Keeping the exterior surfaces clean y Do not ...