Page 3 - Safety Information; CAUTION
Getting Started 3 Getting S tar ted 1 Safety Information CAUTION RISK OF ELECTRIC SHOCK DO NOT OPEN CAUTION: TO REDUCE THE RISK OF ELECTRIC SHOCK DO NOT REMOVE COVER (OR BACK) NO USER-SERVICEABLE PARTS INSIDE REFER SERVICING TO QUALIFIED SERVICE PERSONNEL. This lightning flash with arrowhead symbol ...
Page 5 - Important Notice for TV colour
Getting Started 5 Getting S tar ted 1 Important Notice for TV colour system The colour system of this player differs according to currently playing discs.For example, when the player plays the disc recorded in the NTSC colour system, the image is output as an NTSC signal.Only the multi system colour...
Page 6 - Table of Contents; Getting Started
Table of Contents 6 Table of Contents 1 Getting Started 3 Safety Information 8 Introduction8 – Playable discs and symbols used in this manual 8 – About the “ 7 ” symbol display 8 – Regional Code 9 – Compatibility Notes 9 – AVCHD (Advanced Video Codec High Definition) 9 – System Requirements 10 – Rec...
Page 7 - Troubleshooting
Table of Contents 7 1 2 3 4 5 6 39 – Modify a timer recording40 – Instant Timer Recording40 – Recording from Video/Audio Input41 General Playback 41 – Playing a disc 42 – Using the disc menu 42 – Resume playback 42 – Playing the recorded titles43 – Rename the recorded titles43 – Deleting a recorded ...
Page 8 - Introduction; Playable discs and symbols used in this manual; About the “
Getting Started 8 Getting S tar ted 1 Introduction Playable discs and symbols used in this manual Media/Term Logo Symbol Description DVD-ROM DVD-R DVD-RW DVD+R DVD+RW (12 cm, 8 cm) r y Discs such as movies that can be purchased or rented. y Video mode and finalized only y Supports the dual layer dis...
Page 9 - Note; Compatibility Notes; System Requirements
Getting Started 9 Getting S tar ted 1 y Depending on the conditions of the recording equipment or the CD-R/RW (or DVD±R/RW ) disc itself, some CD-R/RW (or DVD±R/RW ) discs cannot be played on the unit. y Do not attach any seal or label to either side (the labeled side or the recorded side) of a disc...
Page 10 - Recordable Discs; File compatibility; Overall; MOVIE
Getting Started 10 Getting S tar ted 1 Recordable Discs DVD-R/ DVD+R(DL): - Format is available (only 1 time), with UDF type - Record is available over and over (Multi-session is supported) - You may need to finalize a disc to play it with different unit. Once a disc is finalized, you can‘t record a...
Page 11 - MUSIC; PHOTO
Getting Started 11 Getting S tar ted 1 y Not all the WMA and AAC Audio formats are compatible with this unit. y MPEG2 Audio Codec are not supported on this unit. y DTS is only available when this unit is connected to the equipment supporting DTS. Sampling frequency: within 32 - 48 kHz ( WMA), within...
Page 12 - Remote control; Battery Installation
Getting Started 12 Getting S tar ted 1 Remote control Battery Installation Remove the battery cover on the rear of the Remote Control, and insert a R03 (size AAA) battery with 4 and 5 matched correctly. • • • • • • a • • • • • • 1 (POWER): Switches the player ON or OFF. INPUT: Changes the input for ...
Page 13 - Main Unit
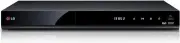
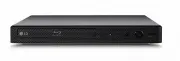
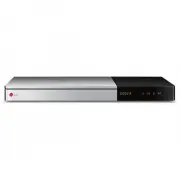
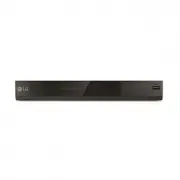
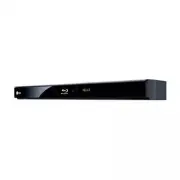
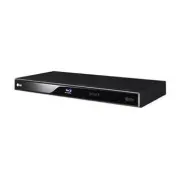
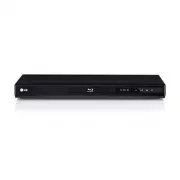
Getting Started 13 Getting S tar ted 1 Main Unit a Disc Tray b Display window c Remote Sensor d R (Open/Close) e T (Play/Pause) f I (Stop) g 1 /I (Power) h USB Port a ANTENNA IN b HDMI OUT (TO TV) c OPTICAL (DIGITAL AUDIO OUT) d VIDEO IN/2CH AUDIO IN (Left/Right) Connect the audio/video output of an...
Page 14 - Connections to Your; Antenna connection to your
Connecting 14 C onnecting 2 Connections to Your TV Make one of the following connections, depending on the capabilities of your existing equipment. y Antenna connection (page 14) y HDMI connection (page 15) y Video/Audio (Left/Right) Connection (page 16) y Depending on your TV and other equipment yo...
Page 15 - HDMI Connection; Additional Information for HDMI
Connecting 15 C onnecting 2 HDMI Connection If you have a HDMI TV or monitor, you can connect it to this unit using a HDMI cable ( Type A, High Speed HDMI™ Cable). Connect the HDMI jack on the unit to the HDMI jack on a HDMI compatible TV or monitor. TV Rear of this unit TV HDMI Cable Set the TV’s s...
Page 16 - Connection; Resolution Setting
Connecting 16 C onnecting 2 Video/Audio (Left/Right) Connection Connect the VIDEO OUT jack on the unit to the video in jack on the TV using the video cable supplied. Connect the Left and Right AUDIO OUT jacks on the unit to the audio left/right in jacks on the TV using the supplied audio cables. TV ...
Page 17 - Connecting to an; About Digital Multi-channel sound; Connecting to an Amplifier via
Connecting 17 C onnecting 2 Connecting to an Amplifier Make one of the following connections, depending on the capabilities of your existing equipment. y HDMI Audio connection (page 17) y Digital Audio connection (page 18) y Connecting to an Amplifier via Digital Audio Output (page 18) y Connecting ...
Page 19 - Connection to Another; Connections to Recorder
Connecting 19 C onnecting 2 Connection to Another device Accessory Video/Audio/ Connections to Recorder Connect the input jacks ( VIDEO IN/2 CH AUDIO IN) on the unit to the video/audio out jacks on your accessory component, using video/audio cables. R L VIDEO OUT AUDIO OUT Rear of this unit Video/Au...
Page 20 - USB device connection; Playback content in the USB
Connecting 20 C onnecting 2 USB device connection This unit can play movie, music and photo files contained on a USB device. Playback content in the USB device 1. Insert a USB device into the USB port until it fits into place. or External HDD Front of the unit USB flash memory 2. Press HOME ( n ). 3...
Page 21 - Auto Set Up
System Setting 21 S ys tem Se tting 3 Auto Set Up You can reset the recorder to all its factory settings. Some options cannot be reset (Rating and Password). The [Auto Set up] menu appears on the screen after the factory settings. Step 1. Language Selection Use w/s/a/d to select a language for the o...
Page 22 - Home Menu Overview; Basic button operations; Settings; Adjust the Setup Settings
System Setting 22 S ys tem Se tting 3 Home Menu Overview To access numerous functions of the unit, press HOME ( n ) on the remote. Basic button operations HOME ( n ): Accesses or removes the Home Menu. w/s/a/d : Used to navigate on-screen displays. ENTER ( b ): Acknowledges menu selection. BACK ( 1 ...
Page 23 - Settings for Digital TV; Scanning programmes
System Setting 23 S ys tem Se tting 3 Settings for Digital TV To use DTV functions, this recorder needs some settings in advance. Scanning programmes automatically (Auto Tuning) All available digital TV or radio programmes are searched for and stored automatically based on the selected country.1. Pr...
Page 24 - Editing Programme List; Lock System; Setting the Block Programme
System Setting 24 S ys tem Se tting 3 Editing Programme List (Channel Edit) You can remove any digital TV or radio programs stored on this recorder using the [Channel Edit] menu.1. Display [Setting] menu. 2. Use w/s to select [DTV ], and press ENTER ( b ). 3. Use w/s/a/d to select [Channel Edit] and...
Page 25 - Setting the Parental Guidance; Setting the antenna power; Setting the Timeshift
System Setting 25 S ys tem Se tting 3 Setting the Parental Guidance 1. Display [Lock System] menu. 2. Use w/s to select [Parental Guidance] and press ENTER ( b ). 3. Use w/s to set the limitation level and press ENTER ( b ). Blocking Off You can view all programs.Refer to the table below for the rat...
Page 26 - Aspect Ratio; Resolution; HDMI Color Setting
System Setting 26 S ys tem Se tting 3 [PICTURE] Menu Aspect Ratio Select a TV aspect ratio option according to your TV type. [4:3 Letter Box] Select when a standard 4:3 TV is connected. Displays theatrical images with masking bars above and below the picture. [4:3 Pan Scan] Select when a standard 4:...
Page 27 - Digital Output
System Setting 27 S ys tem Se tting 3 [SOUND] Menu Each disc has a variety of audio output options. Set the unit’s Audio options according to the type of audio system you use. Digital Output Select the output sound format when a device equipped with a HDMI or Digital Audio input jack is connected to...
Page 29 - Parental Guidance; Time Setting
System Setting 29 S ys tem Se tting 3 Parental Guidance Viewing of some digital TV programmes can be limited according to the age limit you set. (See “Setting the Parental Guidance on page 25.) DVD Rating Blocks playback of rated DVD based on their content. (Not all discs are rated.) [1 (Kids) - 8 (...
Page 30 - DivX® VOD; Auto Off
System Setting 30 S ys tem Se tting 3 4. Use s/w to select [Offset] option then press ENTER ( b ). 5. Press a/d to select a value then press ENTER ( b ) (NSW/ACT, VIC, QLD, SA, WA,TAS or NT ). y There are cases where the TV station does not send, or sends wrong date and/or time information and the r...
Page 31 - Disc Format; Finalize; Caution; System Information
System Setting 31 S ys tem Se tting 3 [DISC] Menu Disc Format If you want to copy a disc, use only the disc which is formatted on this unit.If you load a completely blank disc, the recorder will initialize the disc.Also, you can reformat the DVD-RW/DVD+RW from the Setting menu as below.1. Display [S...
Page 32 - Using the Digital TV; Viewing the Digital TV; Changing Digital TV
4 Operating Operating 32 Oper ating 4 Using the Digital TV functions You can watch and record the digital TV programmes or playback the recorded TV programmes you want to watch using this unit. Viewing the Digital TV Viewing the Digital TV broadcasting on the TV screen. y DTV antenna connection is r...
Page 34 - Changing Aspect Ratio; Changing Recording device; Programme Guide (Digital
Operating 34 Oper ating 4 Changing Aspect Ratio You can change the TV aspect ratio setting while playback.1. While watching DTV, press Q.MENU. 2. Use a/d to select the [Aspect Ratio] option. 2. Use s/w to select aspect ratio, and press ENTER ( b ). While playing the recording title, You can select t...
Page 35 - To change date; Using the timeshift function
Operating 35 Oper ating 4 To change date When the Program Guide with 8 days is displayed, you can also change the date of the Program Guide by pressing the green ( G ) coloured button, you can set the time +24H. On the contrary, by pressing the red ( R ) coloured button, you can set the time -24H. A...
Page 36 - Using the teletext (Viewing; Recording TV; Dual Programme Recording
Operating 36 Oper ating 4 Using the teletext (Viewing Teletext) Many Digital TV programmes broadcast information via their text service, and this recorder has access to dedicated text programmes transmitted by the broadcasters. 1. Press TEXT while watching TV. 2. Use coloured ( R/G/Y / B ) button to...
Page 37 - Stop Recording
Operating 37 Oper ating 4 Stop Recording You can stop recording instantly in Live TV.1. Press Z (STOP) then stop dialogue is displayed. 2. Use a/d to select [Yes] and press ENTER ( b ) to stop recording. To stop recording, you must move to the programme being recorded before pressing Z (STOP). , Not...
Page 38 - Timer Recording (Programme; Instant Timer Recording with
Operating 38 Oper ating 4 Timer Recording (Programme Guide) You can also set the timer based on the information provided by the programme guide.1. While watching TV, press GUIDE. 2. Press red ( R ) or green ( G ) coloured button to select date field. 3. Use a/d to select the programme list, and sele...
Page 39 - Deleting a timer recording
Operating 39 Oper ating 4 4. Use a/d to select [Record] and press ENTER ( b ). If you select [Advanced Schedule] and press ENTER ( b ) to follow the steps 3-5 from “Timer Recording (Manual)” on page 37 to complete the editing. 5. Select [Yes] and press ENTER ( b ). 6. Use a/d to select [Yes] and pre...
Page 40 - Instant Timer Recording; Recording from Video/Audio
Operating 40 Oper ating 4 Instant Timer Recording You can set the recording time instantly to stop the recording automatically.1. Use CH ( W/S ) to select a programme you want to record. 2. Press REC. ( X ) to start recording. Press ENTER ( b ) to display the progress of recording. If you want to ch...
Page 41 - General Playback; Playing a disc; To stop playback
Operating 41 Oper ating 4 General Playback Playing a disc DVD AVCHD ACD 1. Press B (OPEN/CLOSE), and place a disc on the disc tray. 2. Press B (OPEN/CLOSE) to close the disc tray. For most Audio CD, DVD, AVCHD and DVD-ROM discs, playback starts automatically. 3. Press HOME ( n ). 4. Select [Movie], ...
Page 42 - Using the disc menu; To display the disc menu; Resume playback; Playing the recorded titles
Operating 42 Oper ating 4 Using the disc menu DVD AVCHD To display the disc menu The menu screen may be displayed first after loading a disc which contains a menu. If you want to display the disc menu during playback, press DISC MENU.Use a/d/s/w buttons to navigate through menu items. Resume playbac...
Page 43 - Sorting the recorded titles; Rename the recorded titles; Deleting a recorded titles
Operating 43 Oper ating 4 Sorting the recorded titles REC 1. While watching TV, press REC.LIST to display the [Recorded TV ] or use a/d/s/w to select [Recorded TV ] on the HOME menu and press ENTER ( b ). 2. Press yellow ( Y ) coloured button repeatedly to sorted by recorded time in recent order or ...
Page 44 - Playing movie file and; Playing a file on
Operating 44 Oper ating 4 Playing movie file and VR discs You can play DVD-RW discs that are recorded in Video Recording ( VR) format and movie files contained on a disc/HDD/USB device.1. Press HOME ( n ). 2. Select [Movie] using a/d , and press ENTER ( b ). 3. Select [ VR] using a/d , and press ENT...
Page 45 - To control movie playback; Basic operations for video and
Operating 45 Oper ating 4 To control movie playback You can control playback and set options while watching videos.During playback, press INFO/MENU ( m ) . a Progress bar - Selects the desired point and plays. b Playback control - Refer to the basic operation for video. c Option - Sets options for t...
Page 46 - Basic operations for photo
Operating 46 Oper ating 4 To resume playback (Movie files) The unit records the point where you stopped during playback. When you play the file again on the list, the option will be appeared on the file. To resume the playback, Select [YES] and press ENTER ( b ). To scan forward or backward (Movie f...
Page 47 - Listening to music while slide show; Options while watching a video
Operating 47 Oper ating 4 Listening to music while slide show You can display photo files while listening to audio files.1. While viewing a photo in full screen, press INFO/ MENU ( m ) to display the option menu. 2. Select an [Option] using a/d/s/w , and press ENTER ( b ) 3. Select [BGM] option, and...
Page 48 - Advanced Playback; Repeat Playback; Viewing content information; Last Scene Memory
Operating 48 Oper ating 4 Advanced Playback Repeat Playback DVD AVCHD ACD MUSIC During playback, press REPEAT ( h ) repeatedly to select a desired repeat mode. DVDs Off – Returns to normal playback. Chapter – The current chapter will be played back repeatedly. Title – The current title will be playe...
Page 49 - Displaying content information; Playing from selected time; Hearing different audio
Operating 49 Oper ating 4 On-Screen display You can display and adjust various information and settings concerning the content. Displaying content information on-screen DVD AVCHD 1. During playback, press INFO/MENU ( m ) to show various playback information. a Title – current title number/total numb...
Page 50 - Selecting a subtitle language; Watching from a different; Using the Recording
Operating 50 Oper ating 4 Selecting a subtitle language DVD AVCHD 1. During playback, press INFO/MENU ( m ) to display the On-Screen display. 2. Use s/w to select the [Subtitle] option. 3. Use a/d to select the desired subtitle language. 4. Press BACK ( 1 ) to exit the On-Screen display. y Some disc...
Page 52 - Troubleshooting; General; Symptom; Symptom
5 Troubleshooting Troubleshooting 52 Trouble shoo ting 5 Troubleshooting General Symptom Cause & Solution The Power does not turn on. y Plug the power cord into the wall outlet securely. The unit does not start playback. y Insert a playable disc. (Check the disc type, color system, and regional ...
Page 53 - Playback; Recording
Troubleshooting 53 Trouble shoo ting 5 Playback Symptom Cause & Solution Cannot play a disc recorded using this unit on other unit. y Finalize the disc. (see page 31) y Check the disc compatibility of the player. y Place the disc on the disc tray correctly inside the guide. y Discs recorded with...
Page 54 - HDMI; Customer Support
Troubleshooting 54 Trouble shoo ting 5 HDMI Symptom Cause & Solution The connected HDMI device does not display any picture. y Try disconnecting then reconnecting the HDMI cable. y Try switching the power of the HDMI device off then back on. y The video input of the connected device is set corre...
Page 55 - Controlling a TV with; Setting up the remote to
6 Appendix Appendix 55 Appendix 6 Controlling a TV with the Supplied Remote Control You can control your TV using the buttons below. By pressing You can 1 ( TV POWER) Turn the TV on or off. INPUT Switch the TV’s input source between the TV and other input sources. VOL +/– Adjust the volume of the TV...
Page 56 - Area Code List
Appendix 56 Appendix 6 Area Code List Choose an area code from this list. Area Code Area Code Area Code Area Code Afghanistan AF Argentina AR Australia AU Austria AT Belgium BE Bhutan BT Bolivia BO Brazil BR Cambodia KH Canada CA Chile CL China CN Colombia CO Congo CG Costa Rica CR Croatia HR Czech ...
Page 57 - Language code List
Appendix 57 Appendix 6 Language code List Use this list to input your desired language for the following initial settings: [Disc Audio], [Disc Subtitle] and [Disc Menu]. Language Code Language Code Language Code Language Code Afar 6565 Afrikaans 6570 Albanian 8381 Ameharic 6577 Arabic 6582 Armenian ...
Page 58 - Trademarks and
Appendix 58 Appendix 6 Trademarks and Licenses Manufactured under license from Dolby Laboratories. Dolby and the double-D symbol are trademarks of Dolby Laboratories. The terms HDMI and HDMI High-Definition Multimedia Interface, and the HDMI logo are trademarks of HDMI Licensing LLC in the United St...
Page 59 - Specifications
Appendix 59 Appendix 6 Specifications General Power requirements AC 200-240 V, 50/60 Hz Power consumption 50 W Dimensions ( W x H x D) Approx. 430 x 55.5 x 270 mm without foot Net Weight (Approx.) 3.46 kg Operating temperature 5 °C to 35 °C Operating humidity 5 % to 90 % Television system DVB-T Stan...
Page 60 - Maintenance; Notes on Discs
Appendix 60 Appendix 6 Maintenance Notes on Discs Handling Discs Do not touch the playback side of the disc. Hold the disc by the edges so that fingerprints do not get on the surface. Never stick paper or tape on the disc. Storing Discs After playing, store the disc in its case. Do not expose the di...
Page 61 - About the internal
Appendix 61 Appendix 6 About the internal hard disk drive The internal hard disk drive (HDD) is a fragile piece of equipment. Please use the unit following the guidelines below to protect against possible HDD failure. y Do not move the unit while it is on. y Install and use a unit on a stable, level...


 LG BP250
User Manual
LG BP250
User Manual
 LG BP740
User Manual
LG BP740
User Manual
 LG DP132
User Manual
LG DP132
User Manual
 LG BD300
User Manual
LG BD300
User Manual
 LG BD370
User Manual
LG BD370
User Manual
 LG BD390
User Manual
LG BD390
User Manual
 LG BD530
User Manual
LG BD530
User Manual
 LG BD550
User Manual
LG BD550
User Manual
 LG BD570
User Manual
LG BD570
User Manual
 LG BD590
User Manual
LG BD590
User Manual
 LG BD630
User Manual
LG BD630
User Manual
 LG BD640
User Manual
LG BD640
User Manual