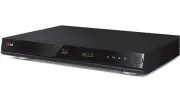
LG RC199H - Manuals
LG RC199H Player – User Manual, Manual in PDF format online.
Manuals:
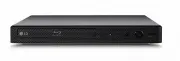
User Manual LG RC199H
Manual LG RC199H
Summary
2 This lightning flash with arrowhead symbolwithin an equilateral triangle is intended toalert the user to the presence of uninsulat-ed dangerous voltage within the product’senclosure that may be of sufficient magni-tude to constitute a risk of electric shock topersons. The exclamation point within ...
3 FCC WARNING: This equipment may generate or use radio frequency energy. Changes or modifica-tions to this equipment may cause harmful interfer-ence unless the modifications are expresslyapproved in the instruction manual. The user couldlose the authority to operate this equipment if anunauthorized...
4 1. Read these instructions. - All these safety and operating instructions should be read before theproduct is operated. 2. Keep these instructions. - The safety, operating and use instructions should be retained for futurereference. 3. Heed all warnings. - All warnings on the product and in the op...
5 INTRODUCTION About the Symbol Display . . . . . . . . . . . . .6 Symbol Used in this Manual . . . . . . . . . . . . . .6Notes on Discs . . . . . . . . . . . . . . . . . . . . . . . .6Moisture Condensation . . . . . . . . . . . . . . . . . .6Recordable and Playable Discs . . . . . . . . . . .7Recom...
6 To ensure proper use of this product, please read this owner’s manual carefully and retain for future reference. About the Symbol Display “ ” may appear on your TV display during operation and indicates that the function is not permitted by thisunit or specific media. Symbol Used in this Manual No...
HOOKUP AND SETTINGS PLA YBACK RECORDING EDITTING REFERENCE 7 Recordable and Playable Discs DVD-RW (DVD - ReWritable) DVD-RW discs can be formatted for VR mode recording or Video mode recording. These Discs can be recorded on repeatedly. Recordings can be erased, then you can record again on thesame ...
8 Playable Discs DVD (8 cm / 12 cm disc) Discs such as movies that can be purchased or rented Video CD (VCD) (8 cm / 12 cm disc) VIDEO CDs or CD-Rs/CD-RWs in VIDEO CD/Super VIDEO CD format Audio CD (8 cm / 12 cm disc) Music CDs or CD-Rs/CD-RWs in music CD format that can be purchased CD-R/CD-RW (8 c...
9 Restrictions on video recording • You cannot record copy-protected video using this recorder. Copy-protected video includes DVD-Videodiscs and some satellite broadcasts. If copy-protected material is encountered during a recording, recordingwill pause or stop automatically and an error message wil...
10 U s e a b l e M e m o r y C a r d s U s e a b l e M e m o r y C a r d s • Compact Flash Card (CF) • Micro Drive (MD), ST1 MD • Secure Digital Card (SD), Mini SD • Multi Media Card (MMC), MMC Plus, RS MMC,MMC Mobile • xD-Picture Card (xD) • Memory Stick (MS), MS Duo, MS Pro, MS ProDuo • Compatible...
11 a Disc Tray (DVD deck) Insert a disc here. b Z DVD Opens or closes the disc tray. c Cassette Compartment (VCR deck) Insert a video cassette here. d Z VCR Ejects the tape in the VCR deck. e 1 1 POWER Switches the Recorder ON and OFF. f MEMORY CARD Slot 1 Insert a memory card (CF, MD or ST1 MD) g M...
12 a POWER ( 1 ) Turns Recorder ON and OFF. EJECT, OPEN/CLOSE ( Z ) - Opens and closes the disc tray. - Ejects the tape in the VCR deck. DVD Select the Recorder’s function mode toDVD. VCR Select the Recorder’s function mode toVCR. INPUT Changes the input to use for recording(Tuner, AV1, AV2, or DV I...
13 a ANT. IN Connect the antenna to this terminal. b S-VIDEO OUT Connect to a S-Video Input on TV. c COMPONENT/PROGRESSIVE SCAN VIDEOOUT (Y Pb Pr) Connect to a TV with Y Pb Pr inputs. d AUDIO OUT (Left/Right) Connect to a TV or other equipment with audioinputs. e AV IN 1 (VIDEO IN /AUDIO IN (Left/Ri...
14 Depending on your TV and other equipmentthere are various ways you can connect therecorder. Please refer to the manuals of yourTV, VCR, Stereo System or other devices asnecessary for additional connection informa-tion. Notes: • Make sure the Recorder is connected directly to the TVand tune the TV...
15 C o n n e c t i o n s t o y o u r T V C o n n e c t i o n s t o y o u r T V Make one of the following connections, depending onthe capabilities of your TV. RF coaxial connection Connect the RF OUT jack on the Recorder to theantenna in jack on the TV using the supplied 75-ohmCoaxial Cable (R). How...
16 HDMI connection If you have a HDMI TV or monitor, you can connect itto this recorder using a HDMI cable. 1. Connect the HDMI OUT jack on the recorder to the HDMI jack on a HDMI compatible TV or moni-tor (H). 2. Set the TV’s source to HDMI (refer to TV’s Owner’s manual). Notes: • If your TV is NOT...
17 C o n n e c t i o n t o a n C o n n e c t i o n t o a n A m p l i f i e r A m p l i f i e r Connecting to an amplifier equipped with twochannel analog stereo or Dolby Pro Logic II/ProLogic Connect the Left and Right AUDIO OUT (orDVD/VCR AUDIO OUT) jacks on the Recorder to the audio left and right...
19 I n i t i a l S e t u p W I n i t i a l S e t u p W i z a r d i z a r d When POWER is pressed for the first time to turn theunit on, the Initial Setup Wizard function sets theLanguage, Channels and Clock. 1. Use v / V to select a language for the Setup menu and information display and then pressE...
21 G e n e r a l S e t t i n g s G e n e r a l S e t t i n g s Tuning Band Select 1. Select the [Tuning Band] option then press B . 2. Use v / V to select the tuning band (TV or CATV) option then press ENTER. TV: If you are using a standard antenna to receive channels. CATV: If you are using basic c...
22 Manual If your local TV station does not send date andtime information, or sends incorrect information,you can set the clock manually. 1. Select the [Clock Set] > [Manual] option. 2. Press ENTER. 3. Enter the necessary information for year, date and time. b / B (left/right): Moves the cursor t...
23 Sampling Freq. (Frequency) If your receiver or amplifier is NOT capable of han-dling 96 kHz signals, select 48 kHz. When this choiceis made, this unit automatically converts any 96 kHzsignals to 48 kHz so your system can decode them. If your receiver or amplifier is capable of handling 96kHz sign...
24 R e c o r d i n g S e t t i n g s R e c o r d i n g S e t t i n g s Disc Record Mode You can set the picture quality for recording; XP (Excellent quality), SP (Standard quality), LP (Lowquality), EP (Extend quality). 1. Select the [Disc Record Mode] option then press B . 2. Use v / V to select a ...
26 G e n e r a l E x p l a n a t i o n o f G e n e r a l E x p l a n a t i o n o f O n - S c r e e n D i s p l a y O n - S c r e e n D i s p l a y Some DVDs require specific operation or allow onlylimited operation during playback. When this occurs, is displayed, action prohibited or not available. ...
27 P l a y i n g a T P l a y i n g a T a p e a p e 1. Press VCR to control the VCR deck. 2. Insert a pre-recorded video cassette. • If the unit is powered off, it will power on automatically when the tape is loaded. • If the Timer indicator lights on the front paneldisplay window, press POWER once. ...
28 VCR Playback Features Buttons Operations EJECT ( Z ) Ejects the tape in the VCR deck. PAUSE/STEP ( X ) Pause playback. Press repeatedly to step forward one frame at a time. • After 5 minutes in STILL mode the Recorder stops to protectthe tape and video heads. FORWARD ( M ) Scan forward.In Stop mo...
29 DVD or Video CD Playback Features Buttons Operations OPEN / CLOSE ( Z ) Opens or closes the disc tray. PAUSE/STEP ( X ) Pause playback. Press repeatedly to play Frame-by-Frame. You can also use b / B to step backward and forward while in Pause mode. • This function is forward only for Video CD. B...
30 DVD or Video CD Playback Features (Continued) Buttons Operations PLAY MODE Select a desired play mode while playback. [A-] : Repeats a sequence between A (Start point) and B (End point) during playback. Press ENTER at yourchosen end point then the repeat sequence begins. [CHAPTER] : Repeats the c...
31 S p e c i a l P l a y b a c k O p t i o n s S p e c i a l P l a y b a c k O p t i o n s If a menu screen is displayed In some cases, the disc menu might appear instead. Use the b B v V buttons to select the title/chapter you want to view, then press ENTER to start. PressTITLE or DISC MENU/LIST to...
32 P l a y i n g a D i v X M o v i e F i l e P l a y i n g a D i v X M o v i e F i l e The Recorder can play Divx files. Before playing DivXfiles, read “About DivX movie files” on right. 1. Press HOME and the Home menu appears. 2. Select [Movie] > [DISC] and press ENTER.3. Use v / V to select a f...
33 P l a y i n g a n P l a y i n g a n A u d i o C D o r A u d i o C D o r M P 3 / W M A M P 3 / W M A f i l e s f i l e s The Recorder can play Audio CDs and MP3/WMAfiles. Before playing MP3/WMA files, read [MP3/WMAaudio file requirement] on right. 1. Press HOME and the Home menu appears. 2. Select...
34 V V i e w i n g a J P E G f i l e s i e w i n g a J P E G f i l e s This unit can play JPEG files. Before playing JPEGrecordings, read “Photo file requirement” on page 35. 1. Press HOME and the Home menu appears. 2. Select [Photo] > [DISC] or [MEMORY CARD] and press ENTER. 3. Use v V b B to se...
35 View Slide Shows 1. Select [Slide Show] option on the Photo menu. 2. Press ENTER. 3. Use b / B / v / V to set the options. [Object] option: • [Selected] Views slide show only selected files. • [All] Views slide show all files. [Speed] option: Sets the Slide Show speed to [Normal], [Slow], or [Fas...
36 A b o u t D V D r e c o r d i n g A b o u t D V D r e c o r d i n g Notes: • This Recorder cannot record CD-R or CD-RWdiscs. • Fingerprints and small scratches on a disc canaffect playback and/or recording performance.Please take proper care of your discs. • The company does not hold any responsi...
INTRODUCTION HOOKUP AND SETTINGS PLA YBACK EDITTING REFERENCE 37 B a s i c R e c o r d i n g f r o m a T V B a s i c R e c o r d i n g f r o m a T V Follow the instructions below to record a TV program.Recording starts immediately and continues until thedisc or tape is full or you stop the recording...
38 T T i m e r R e c o r d i n g i m e r R e c o r d i n g The Timer Recording function allows you to record upto 16 programs within a period of one month. 1. Press HOME and the Home menu appears.2. Select [TV] > [Timer Record] and press ENTER. 3. Select [NEW] and press ENTER. The Timer Record me...
INTRODUCTION HOOKUP AND SETTINGS PLA YBACK EDITTING REFERENCE 39 Timer Recording Troubleshooting Even though the timer is set, the recorder will notrecord when: • There is no disc (or tape) loaded. • A non-recordable disc (or tape) is loaded. • Disc Protect is set to [ON] in the Disc menu(see page 2...
INTRODUCTION HOOKUP AND SETTINGS PLA YBACK EDITTING REFERENCE 41 R e c o r d i n g f r o m E x t e r n a l R e c o r d i n g f r o m E x t e r n a l C o m p o n e n t s C o m p o n e n t s You can record from an external component, such asa camcorder or VCR, connected to any of theRecorder’s externa...
42 R e c o r d i n g f r o m D V I n p u t R e c o r d i n g f r o m D V I n p u t Before DV dubbing You can connect a DV-equipped camcorder to thisrecorder using a single DV cable for input and outputof audio, video, data and control signals. This recorder is only compatible with DV-format(DVC-SD, ...
INTRODUCTION HOOKUP AND SETTINGS PLA YBACK RECORDING REFERENCE 43 T T i t l e L i s t a n d C h a p t e r L i s t i t l e L i s t a n d C h a p t e r L i s t M e n u O v e r v i e w M e n u O v e r v i e w Using the Title List menu you can edit video content.The editing features available in the Tit...
44 V R M o d e : O r i g i n a l a n d V R M o d e : O r i g i n a l a n d P l a y l i s t E d i t i n g P l a y l i s t E d i t i n g Titles, Chapters and Parts Titles in the disc’s original content contain one ormore chapters. When you insert a disc’s title into thePlaylist, all the chapters withi...
INTRODUCTION HOOKUP AND SETTINGS PLA YBACK RECORDING REFERENCE 45 M a k i n g a N e w P l a y l i s t M a k i n g a N e w P l a y l i s t Use this function to add an Original title or chapter tothe Playlist. When you do this, the whole title is putinto the Playlist (you can delete bits you don’t nee...
INTRODUCTION HOOKUP AND SETTINGS PLA YBACK RECORDING REFERENCE 47 N a m i n g a T N a m i n g a T i t l e i t l e You can name Original and Playlist titles independ-ently. 1. Choose the title you want to name on the Title List menu, then press ENTER.The menu options appears on the left side of theme...
48 Moving a Playlist Chapter Moving a Playlist Chapter Use this function to re-arrange the playing order ofPlaylist chapters on the Chapter List-Playlist menu. Note: This function is not available if there is only onechapter. 1. Select a chapter on the Chapter List-Playlist menu. 2. Press ENTER. The...
50 O v e r w r i t i n g R e c o r d i n g O v e r w r i t i n g R e c o r d i n g To overwrite a new video recording on a previouslyrecorded title, follow these steps. This feature is notavailable for DVD+Rs, that always record at the endof the Disc. 1. Select input source you want to record (TV ch...
INTRODUCTION HOOKUP AND SETTINGS PLA YBACK RECORDING EDITTING 51 C o n t r o l l i n g C o n t r o l l i n g Y Y o u r T V w i t h t h e o u r T V w i t h t h e S u p p l i e d U n i v e r s a l R e m o t e S u p p l i e d U n i v e r s a l R e m o t e C o n t r o l C o n t r o l You can control the...
52 Area Code Afghanistan AF Argentina AR Australia AU Austria AT Belgium BE Bhutan BT Bolivia BO Brazil BR Cambodia KH Canada CA Chile CL China CN Colombia CO Congo CG Costa Rica CR Croatia HR Czech Republic CZ Denmark DK Ecuador EC Egypt EG El Salvador SV Area Code Ethiopia ET Fiji FJ Finland FI Fr...
INTRODUCTION HOOKUP AND SETTINGS PLA YBACK RECORDING EDITTING 53 T T r o u b l e s h o o t i n g r o u b l e s h o o t i n g Symptom No power. Abnormal or no picture. No sound. The playback picture ispoor. Picture from externalinput is distorted. Some channels areskipped over whenusing CH( v / V ). ...
INTRODUCTION HOOKUP AND SETTINGS PLA YBACK RECORDING EDITTING 55 Symptom Picture or sound ofbroadcasting channel isweak or missing. Can’t play disc recordedon this Recorder onanother DVD player. Cannot record or didnot record successfully. Stereo Audio Recordand/or Playback notpresent. Cause Antenna...
56 General Power requirements AC 120 V, 60 Hz Power consumption 27 W Dimensions (approx.) 430 X 78.5 X 310 mm (16.9 x 3.1 x 12.2 inches) (w x h x d) Mass (approx.) 5.2 kg (11.44 lbs) Operating temperature 5˚C to 35˚C (41˚F to 95˚F) Operating humidity 5 % to 90 % Signal system NTSC Recording Recordin...
This LG Electronics product, will be repaired or replaced, at LG’s option, if it proves to be defective in material orworkmanship, under normal use, during the warranty period (“Warranty Period”) listed below, effective from the date(“Date of Purchase”) of original consumer purchase of the product. ...
LG Players Manuals
-
LG BP250
User Manual
-
LG BP740
User Manual
-
LG BR629T
User Manual
-
LG DC379
User Manual
-
LG DK373
User Manual
-
LG DK377
User Manual
-
LG DK379
User Manual
-
LG DK478
User Manual
-
LG DK487
User Manual
-
LG DP132
User Manual
-
LG DP132
Manual
-
LG DS375
User Manual
-
LG DV374
User Manual
-
LG DV375
User Manual
-
LG DV378
User Manual
-
LG DV3781
User Manual
-
LG DV379
User Manual
-
LG DVX642H
Manual
-
LG DVX692H
Manual
-
LG HR836T
User Manual