Page 2 - ENGLISH; LICENSES; This DivX Certified
2 ENGLISH LICENSES Supported licenses may differ by model. For more information about licenses, visit www.lg.com. Manufactured under license from Dolby Laboratories. Dolby, Dolby Vision, Dolby Audio, and the double-D symbol are trademarks of Dolby Laboratories. This DivX Certified ® device has passe...
Page 3 - SAFETY PRECAUTIONS; Indoor Installation; WARNING
3 ENGLISH SAFETY PRECAUTIONS Please take note of the safety instructions to prevent any potential accident or misuse of the projector. • Safety precautions are given in two forms, i.e., WARNING and CAUTION as detailed below. WARNING Failure to follow the instructions may cause serious injury and eve...
Page 4 - CAUTION
4 ENGLISH • Do not install the product in a place with no ventilation (e.g., on a bookshelf or in a closet) or on a carpet or cushion. - This may result in fire due to the increase in internal temperature. • Do not place the product close to sources of steam, oil or oil mist, such as humidifiers and...
Page 7 - cord and result in a fire or; When in Use
7 ENGLISH • Never disassemble the power supply devices (AC adapter/power cord, etc.). - This may damage the power cord and result in a fire or electric shock. • Connect the AC adapter and the power cord firmly. - Not doing so may result in a product failure or fire. • Do not place heavy objects or p...
Page 8 - Sparks may cause fire or burns.
8 ENGLISH • Do not look directly into the lens when the projector is in use. - The bright light may damage your eyes. • When the lamp is on or has just been turned off, avoid touching the air vent or lamp, because these will be very hot. • If there is a gas leak in the room with the projector, do no...
Page 11 - This can result in fire, electric; Others
11 ENGLISH • Do not wipe the optical system (lens, mirror) right after the product has been turned off or while the product is being operated. When cleaning each part of the product, remove the power cord and wipe gently with a soft cloth. Do not spray with water or wipe with a wet cloth. Do not use...
Page 12 - This may result in fire or electric
12 ENGLISH • Do not touch the lens; doing so can result in burns or damage to lens. Lens and unit may be HOT during and immediately after use. Use caution when handling unit, allowing for proper cool down. • Only use a grounded electrical outlet. (Except for devices which are not grounded.) • Do not...
Page 13 - resulting in fire or burns.; ANTENNA
13 ENGLISH • Store batteries away from metallic objects, such as keys and paper clips. - Excess current may cause a rapid increase in temperature, resulting in fire or burns. • Do not store the batteries near any heat source, such as a heater. - This may result in fire or damage to the product. • Do...
Page 14 - For USA; Outdoor Antenna Grounding
14 ENGLISH For USA NOTE TO CABLE/TV INSTALLER This reminder is provided to call the CATV system installer’s attention to Article 820 - 40 of the National Electric Code (U.S.A.). The code provides guidelines for proper grounding and, in particular, specifies that the cable ground shall be connected t...
Page 15 - CONTENTS
15 ENGLISH CONTENTS LICENSES 2 SAFETY PRECAUTIONS 3 PREPARATION 17 Accessories 17Optional Extras 18 Parts and Components 19 - Main Unit 19 - Side 20 - Back 21 Using the Joystick Button 22 - Basic functions 22 - Adjusting the menu 23 Projector Status Indicators 23 Installation 24 - Installation Preca...
Page 16 - MY MEDIA
16 ENGLISH MY MEDIA 50 Before Using 50 - Connecting a USB Device 50 - Removing a USB Device 50 To Use My Media 52 - Watching the Videos 56 - Viewing the Photos 62 - Listening to Music 66 - Viewing Files 70 3D FUNCTION 74 While Watching 3D 74 Requirements for Watching 3D Images 78 - Using the DLP-LIN...
Page 17 - PREPARATION; Accessories
17 ENGLISH PREPARATION The pictures may differ slightly from the actual product. Accessories Accessories included with the projector are show below. Accessories are subject to change without prior notice. New accessories may be added or old ones removed. Remote Control Two AAA Batteries Owner's Manu...
Page 18 - Optional Extras
18 ENGLISH Optional Extras To purchase optional accessories, visit an electronics store or online shopping site or contact the retail store where you purchased the product. Optional accessories are subject to change without prior notice. Projection Screen HDMI Cable RF Cable Video Cable Audio Cable ...
Page 19 - Parts and Components; Main Unit
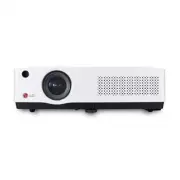
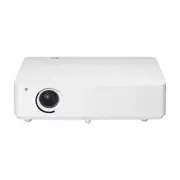
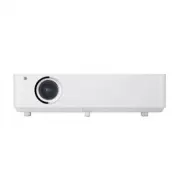
19 ENGLISH Parts and Components This projector is manufactured using high-precision technology. You may, however, see tiny black dots and/or bright colored dots (red, blue, or green) that continuously appear on the projector screen. This is a normal result of the manufacturing process and does not i...
Page 20 - Description
20 ENGLISH Side 6 4 2 3 1 7 5 No. Description 1 (Headphone Port) 2 COMPONENT IN Port 3 AV IN Port 4 OPTICAL DIGITAL AUDIO OUT Port 5 (USB port) 6 RGB IN Port 7 Port
Page 22 - Using the Joystick Button; Basic functions; your finger on the joystick button, press it
22 ENGLISH Using the Joystick Button You can operate the projector by pressing the button or moving the joystick left, right, up, or down. Basic functions Power On When the projector is turned off, place your finger on the joystick button, press it once, and release it. Power Off When the projector ...
Page 23 - Projector Status Indicators; LED Power Indicator
23 ENGLISH Adjusting the menu When the projector is turned on, press the joystick button one time.You can adjust the menu items ( , , , ) moving the joystick button left, right, up, or down. Move to the desired menu item, and then press the joystick button once to select it. Turns the power off. Cha...
Page 24 - Installation; Installation Precautions; This may result in fire.
24 ENGLISH Installation Installation Precautions • Place the projector in a well- ventilated environment. - To prevent internal overheating, install the projector in a well- ventilated place. Do not place anything near the projector. That may block its air vents. If the air vents are blocked, the in...
Page 25 - correct the distortion, use the Edge Adj function.
25 ENGLISH Projection Distance per Screen Size 1 Place the projector on a sturdy, level surface, together with the PC or audio/ video source. 2 Place the projector an appropriate distance away from the screen. The distance between the projector and the screen determines the actual size of the image....
Page 26 - The Kensington Security System is an optional accessory.
26 ENGLISH Kensington Security System • This projector has a Kensington Security Standard connector as an anti-theft mechanism. Connect a Kensington Security System cable as shown below. • For more information on installation and use of the Kensington Security System, refer to the user’s guide provi...
Page 27 - REMOTE CONTROL; Open the lid at the back of the remote control
27 ENGLISH REMOTE CONTROL Open the lid at the back of the remote control and insert the batteries as described in the instructions. Use new batteries and do not mix regular or rechargeable batteries. (1.5 V AAA) • Do not mix new batteries with old ones. (POWER) Turns the projector on or off. Accesse...
Page 30 - USING THE PROJECTOR; Connecting the Antenna or Cable; Ω, sold separately) when connecting to the
30 ENGLISH USING THE PROJECTOR Connecting the Antenna or Cable To watch TV using an indoor/outdoor antenna, connect a wall terminal and the antenna port of the projector using an RF cable (75 Ω). You can watch terrestrial or cable (analog, digital) TV. (The RF cable is sold separately.) • Make sure ...
Page 31 - Watching Projector; Turning on the Projector; Mode Setting; Store Demo
31 ENGLISH Watching Projector Turning on the Projector The menu screen display in this owner’s manual is an example to help users understand how to operate the product and may look different from the actual screen. 1 Connect the power cord correctly. 2 After waiting for a moment, press the (POWER) b...
Page 32 - In the; Select an input signal by using the
32 ENGLISH 5 In the Time Zone screen, select Time Zone region and Daylight Saving option. Step 3. Time Zone Time Zone Eastern Daylight Saving Auto Confirm Previous 6 Select an input signal by using the button on the remote control. Input List TV AV SCREEN SHARE USB Component RGB-PC ꔂ Move ꔉ OK Exit ...
Page 33 - Button
33 ENGLISH Focus of the Screen Image When an image appears on the screen, check if it is in focus and fits the screen properly. Focus Ring • To adjust the focus of the image, rotate the focus ring. • Make sure the product does not move when adjusting the focus. Watching With the Projector 1 When in ...
Page 34 - To Set Channel; Memorizing the Available Channels; Using the Auto Tuning function
34 ENGLISH To Set Channel Image shown may differ from your projector. Memorizing the Available Channels Using the Auto Tuning function Saves a channel which is currently broadcasting. Be sure to activate Auto Tuning when you move to a new home or change the position of your projector. When you activ...
Page 35 - Memorizing or Deleting Channels Manually
35 ENGLISH Memorizing or Deleting Channels Manually 1 Press the button. 2 Press the , , or button to select CHANNEL and press the button. 3 Press the or button to select Manual Tuning and press the button. 4 Scroll through the channel types, and then add or delete channels. 5 When you are finished, ...
Page 36 - CHANNEL; When you are finished, press the
36 ENGLISH Editing Your Channel List 1 Press the button. 2 Press the , , or button to select CHANNEL and press the button. 3 Press the or button to select Channel Edit and press the button. 4 Edit channels using the following buttons. Channel Edit Antenna Page 1/1 3-1 5-1 7-1 DTV TV Cable DTV Cable ...
Page 37 - Favorite Channel Setup; Set as Favorite; Group A
37 ENGLISH Favorite Channel Setup 1 Press the button. 2 Press the , , or button to select CHANNEL and press the button. 3 Press the or button to select Channel Edit and press the button. 4 Move to your desired channel. 5 Press the button to access the Set as Favorite . 6 Press the or buttons to scro...
Page 38 - Additional Options; Adjusting Aspect Ratio; Menu
38 ENGLISH Additional Options Adjusting Aspect Ratio • Resize an image to view at its optimal size by pressing while you are using the projector. • Available picture size may differ depending on the input signal. • You can also use the or button. Menu Description 16:9 Resizes images to the 16:9 rati...
Page 40 - To select an external input
40 ENGLISH Changing Input Device To select an external input Selects external input. • Press the button on the remote control to display the input selection screen. - Connected inputs are displayed first. However, TV / AV / SCREEN SHARE input is always activated. • Select an input signal using the r...
Page 41 - Selecting an Input Label; Close
41 ENGLISH Selecting an Input Label Displays which devices are connected to which input ports. Input Label AV ◀ ▶ Component ◀ ▶ RGB-PC ◀ ▶ HDMI1 ◀ ▶ HDMI2 ◀ ▶ Close 1 Press the button on the remote control to display the input selection screen. 2 Press the red button. 3 Use the or button to scroll t...
Page 42 - Using the Blank Function
42 ENGLISH Blank Function Using the Blank Function This function may be effective when you need to draw attention during a meeting or training. 1 Press the button, and the screen is covered by the background color. You can change the background color by referring to Selecting a Blank Image. 2 Press ...
Page 43 - Using the Quick Menu
43 ENGLISH Using the Quick Menu You can customize frequently used menus. 1 Press the button. 2 Press the or button to select a menu and press . Menu Description Aspect Ratio Resizes the picture. Caption View subtitles when the TV station provides subtitled programing. Program subtitles work only on ...
Page 44 - ENTERTAINMENT; Using SCREEN SHARE; SCREEN SHARE
44 ENGLISH ENTERTAINMENT Using SCREEN SHARE 1 Set the external input of the projector to SCREEN SHARE . 2 Enable related SCREEN SHARE function on the device you wish to connect. 3 Connect the Projector from the search list on the device you wish to connect. (When you connect the projector to your la...
Page 45 - Setting up bluetooth on the projector
45 ENGLISH Setting up bluetooth on the projector This option is used to output sound from the projector through Bluetooth audio devices. • The devices that can be connected are as follows: LG BTS1, LG HBS-700 , LG HBS-730 , LG HBS-800 (Models available for purchase may vary by region.) • Products fr...
Page 48 - List of registered devices; Connecting
48 ENGLISH Connecting, disconnecting, or deleting bluetooth devices in the list of registered devices In • AUDIO • Sound Out • Bluetooth • List of registered devices , Bluetooth devices are shown in the order that they were connected, and the same devices can be reconnected simply by selecting them ...
Page 49 - Deleting; Adjusting AV Sync. Adjust
49 ENGLISH Deleting Select Delete Marked or Delete All to delete any registered devices. • Delete Marked : Press the red button in List of registered devices to delete the selected device. • Delete All : Select Delete All in List of registered devices to delete all of the registered devices. Adjusti...
Page 50 - Before Using; Connecting a USB Device; USB Device
50 ENGLISH MY MEDIA Before Using Connecting a USB Device Connect a USB device (external HDD, USB memory) to the USB port of projector to enjoy the content files stored in the USB device with your projector. You cannot write or delete data in the USB device. Connect a USB flash drive as shown below. ...
Page 51 - Tips for Using a USB Device
51 ENGLISH Tips for Using a USB Device • If the USB storage device has a built-in auto recognition program or uses its own driver, it may not work. • Some USB storage devices may not work or may work incorrectly. • If you use a USB extension cable, the USB device may not be recognized or may not wor...
Page 52 - To Use My Media; Press the
52 ENGLISH To Use My Media 1 Press the button on the remote control. 2 Select MY MEDIA . Select desired file from the list. Watch the chosen file. Sets play related settings by checking option during disk playback. My Media supporting file • Maximum data transfer rate: 20 Mbps (Mega bit per second) ...
Page 53 - Profiles
53 ENGLISH Video Supported Codec Maximum: 1920 x 1080 @ 30p (only Motion JPEG 640 x 480 @ 30p) Extension Codec .asf, .wmv Video VC-1 Advanced Profile, VC-1 Simple and Main Profiles Audio WMA Standard, WMA 9 Professional .divx, .avi Video DivX3.11, DivX4, DivX5, DivX6, XVID, H.264/AVC Audio MPEG-1 La...
Page 55 - Progressive
55 ENGLISH Available photo file File type Item Info 2D (jpeg, jpg, jpe), 3D (jps) Support File type SOF0: Baseline, SOF1: Extend Sequential, SOF2: Progressive Picture Size Minimum: 64 x 64Maximum: Normal Type: 15360 (W) x 8640 (H)Progressive Type: 1920 (W) x 1440 (H) 3D (mpo) Support File type MPO P...
Page 56 - Movie List
56 ENGLISH Watching the Videos In the Movie List , you can watch movies stored on the connected USB device. Controls playback and sets options while viewing videos. Tips for Playing Video Files • Some subtitles created by users may not work properly. • The video and subtitle files should be placed i...
Page 57 - Browsing Movie List
57 ENGLISH Browsing Movie List Play a video file stored in the connected device. 1 Connect a USB storage device. 2 Press the button. 3 Use the or button to select Movie List and press the button. 4 Use the , , or button to select the file you want and press the button. USB STORAGE DEVICE Page 1/1 Pa...
Page 58 - Setting
58 ENGLISH 5 Control playback by using the following buttons. 나가기 Q.MENU Option Hide Exit Setting Description Shows the current playing position. Use or buttons to move forward or backward.Stops playing and returns to Movie List.Returns to normal playback.Pauses the media player.If no button is pres...
Page 59 - Options for Movie List
59 ENGLISH Options for Movie List 1 Press the button. 2 Use the or button to move to a desired option and press the button. 3 Use the , , or button to set up each item. Set Video Play. Setting Description Picture Size Selects the size of a playback screen. • Full : Files are played in full screen mo...
Page 60 - Set 3D Video; Registration code
60 ENGLISH Set 3D Video You can set 3D video or 2D video. 3D setting You can set 3D settings. (Refer to OPTION 1 Settings on page 100.) Registering the DivX code Checks DivX Reg. Code for replaying DivX protected videos. Register at http://vod. divx.com. Use Reg. Code to rent or purchase movies at w...
Page 61 - To deregister the DivX code; Select
61 ENGLISH To deregister the DivX code Use the DivX deregistration code to deactivate the DivX DRM function. 1 In the Settings menu, move to OPTION 1 and press DivX(R) VOD . 2 Use the or button to go to Deregistration and press the button. Registration Deregistration Close No No Yes Yes Your device ...
Page 62 - You can view photos stored on a connected device.
62 ENGLISH Viewing the Photos You can view photos stored on a connected device. Supported Photo Files PHOTO (*.JPEG)Baseline: 64-pixel (width) x 64-pixel (height) - 15360-pixel (width) x 8640-pixel (height)Progressive: 64-pixel (width) x 64-pixel (height) - 1920-pixel (width) x 1440-pixel (height) •...
Page 63 - Browsing Photo List
63 ENGLISH Browsing Photo List 1 Connect a USB storage device. 2 Press the button. 3 Use the or button to select Photo List and press the button. 4 Use the , , or button to select the file you want and press the button. USB STORAGE DEVICE Page 1/1 Page 1/1 Drive1 Drive5 Drive3 Drive4 Drive2 CH Page ...
Page 65 - Options for Photo List
65 ENGLISH Options for Photo List 1 Press the button. 2 Use the or button to move to a desired option and press the button. 3 Use , , or button to set up each item. Set Photo View. Setting Description Slide Speed Selects a slideshow speed. BGM Selects a music folder for the background music. • You c...
Page 66 - You can play audio files stored on the connected device.
66 ENGLISH Listening to Music You can play audio files stored on the connected device. Supported Music Files *.MP3Bit rate range 32 Kbps to 320 Kbps • Sampling rate MPEG1 Layer3: 32 kHz, 44.1 kHz, 48 kHz • Sampling rate MPEG2 Layer3: 16 kHz, 22.05 kHz, 24 kHz
Page 67 - Browsing Music List
67 ENGLISH Browsing Music List 1 Connect a USB storage device. 2 Press the button. 3 Use the or button to select Music List and press the button. 4 Use the , , or button to select the file you want and press the button. USB STORAGE DEVICE Page 1/1 Page 1/1 Drive1 Drive5 Drive3 Drive4 Drive2 CH Page ...
Page 69 - Options for Music List
69 ENGLISH Options for Music List 1 Press the button. 2 Use the or button to move to a desired option and press the button. 3 Use , , or button to set up each item. Set Audio Play. Setting Description Repeat Selects repeat play. Random Selects random play. Set Audio. You can change audio settings.(R...
Page 70 - You can see document files stored on a connected device.
70 ENGLISH Viewing Files You can see document files stored on a connected device. Supported File Formats XLS, XLSX, DOC, DOCX, PPT, PPTX, TXT, PDF, HWP Microsoft Office 97/2000/2002/2003/2007 version Adobe PDF 1.0/1.1/1.2/1.3/1.4 versionHangul: 97/2000/2002/2005/2007 version • File Viewer realigns a...
Page 71 - Browsing File List
71 ENGLISH Browsing File List 1 Connect a USB storage device. 2 Press the button. 3 Use the or button to select File List and press the button. 4 Use the , , or button to select the file you want and press the button. USB STORAGE DEVICE Page 1/1 Page 1/1 Drive1 Drive5 Drive3 Drive4 Drive2 CH Page Ch...
Page 73 - Options for File List
73 ENGLISH Options for File List 1 Press the button. 2 Use , , or button to set up each item. Set FileViewer Option Setting Description Single Page Loading On Loads and displays pages one by one. The initial loading time is short but a content heavy page may be displayed slowly. Off Loads all pages ...
Page 74 - D FUNCTION; While Watching 3D
74 ENGLISH 3D FUNCTION 3D technology uses different video frames for each eye to add depth to the video. While Watching 3D WARNING • If you view 3D video or images too closely for a long period of time, your eyesight may become worse. • If you watch the projector or game screen for a long time with ...
Page 75 - Warning about photosensitivity seizures
75 ENGLISH • Warning about photosensitivity seizures - Some users may experience a seizure or other abnormal symptoms when they are exposed to a flashing light or particular patterns from a video game. If anyone in your family has a history of epilepsy or has ever experienced any kind of seizure, pl...
Page 77 - Please check the following when using 3D glasses.
77 ENGLISH Please check the following when using 3D glasses. • Do not use 3D glasses as ordinary glasses, sunglasses or protective goggles. - If you do so, this may cause injury. • Do not store 3D glasses in very hot or very cold conditions. If you do, this may cause them to become distorted. Do not...
Page 78 - Requirements for Watching 3D Images; * Watching 3D videos should be done in dark room environments only.
78 ENGLISH Requirements for Watching 3D Images * Optimum viewing angle: Top/Bottom/Left/Right 9° Recommended viewing distance: 3 m to 5 m Recommended screen size: 101 cm * Watching 3D videos should be done in dark room environments only. • The pairing with the DLP-LINK glasses is affected by the int...
Page 79 - To view 3D images
79 ENGLISH Using the DLP-LINK (DLP-Ready) Type Glasses 1 While watching 3D images from the projector, press buttons on the glasses. 2 When you press the button, the glasses flicker while synchronizing with the 3D images. (The flickering is a unique operation method of DLP-LINK type glasses. It may b...
Page 81 - CUSTOMIZING SETTINGS; SETTINGS
81 ENGLISH CUSTOMIZING SETTINGS SETTINGS 1 Press the button. 2 Use the , , or button to select the desired item and press the button. 3 Use the , , or button to set up the desired item and press the button. 4 Press the button when completed. Menu Description PICTURE Adjusts the image quality for opt...
Page 82 - PICTURE Settings; Item
82 ENGLISH PICTURE Settings 1 Press the button. 2 Use the , , or button to select PICTURE and press the button. 3 Use the , , or button to set up the desired item and press the button. - To return to the previous menu, press the button. 4 Press the button when completed. • ꕊ Energy Saving : Minimum ...
Page 85 - Advanced Control
85 ENGLISH Advanced Control Item Description Dynamic Contrast Adjusts contrast and color to the optimal level according to the screen’s brightness. Dynamic Color Adjusts colors for more natural-looking colors. Color Gamut Selects the range of colors that can be expressed. • Standard : Displays the o...
Page 86 - Expert Control
86 ENGLISH Expert Control Item Description Dynamic Contrast Adjusts contrast and color to the optimal level according to the screen’s brightness. Color Gamut Selects the range of colors that can be expressed. • Standard : Displays the original colors of an input signal regardless of the display feat...
Page 88 - AUDIO Settings
88 ENGLISH AUDIO Settings 1 Press the button. 2 Use the , , or button to select AUDIO and press the button. 3 Use the , , or button to set up the desired item and press the button. - To return to the previous menu, press the button. 4 Press the button when completed. • Sound Mode : Standard • Sound ...
Page 92 - CHANNEL Settings
92 ENGLISH CHANNEL Settings 1 Press the button. 2 Use the , , or button to select CHANNEL and press the button. 3 Use the , , or button to set up the desired item and press the button. - To return to the previous menu, press the button. 4 Press the button when completed. • Auto Tuning • Manual Tunin...
Page 93 - TIME Settings
93 ENGLISH TIME Settings 1 Press the button. 2 Use the , , or button to select TIME and press the button. 3 Use the , , or button to set up the desired item and press the button. - To return to the previous menu, press the button. 4 Press the button when completed. • Clock • Off Time : Off • On Time...
Page 95 - WIRELESS Settings
95 ENGLISH WIRELESS Settings 1 Press the button. 2 Use the , , or button to select WIRELESS and press the button. 3 Use the , , or button to set up the desired item and press the button. - To return to the previous menu, press the button. 4 Press the button when completed. • SCREEN SHARE : [PJTR][LG...
Page 96 - LOCK Settings
96 ENGLISH LOCK Settings 1 Press the button. 2 Use the , , or button to select LOCK and press the button. - To enter the LOCK menu, enter the preset 4-digit password. The initial password is set as 0000 . 3 Use the , , or button to set up the desired item and press the button. - To return to the pre...
Page 100 - OPTION 1 Settings
100 ENGLISH OPTION 1 Settings 1 Press the button. 2 Use the , , or button to select OPTION 1 and press the button. 3 Use the , , or button to set up the desired item and press the button. - To return to the previous menu, press the button. 4 Press the button when completed. • Language • Caption : Of...
Page 103 - OPTION 2 Settings
103 ENGLISH OPTION 2 Settings 1 Press the button. 2 Use the , , or button to select OPTION 2 and press the button. 3 Use the , , or button to set up the desired item and press the button. - To return to the previous menu, press the button. 4 Press the button when completed. • Edge Adj • Auto Keyston...
Page 105 - CONNECTING DEVICES; You can connect various external devices to the projector.
105 ENGLISH CONNECTING DEVICES You can connect various external devices to the projector. Computer/Notebook Digital Device Headphone USB Mobile Phone DVD/ Video LG Audio Device Games Console HDMI - Page 106 Composite (AV) -Page 107 Component -Page 107 RGB - Page 111 USB Device -Page 50 Headphone - P...
Page 106 - Connecting to HD; HDMI Connection; HDMI to DVI Connection; HDMI
106 ENGLISH Connecting to HD Receiver, DVD, VCR Player, or External Devices Connect an HD receiver, DVD, VCR player, or external devices to the projector and select an appropriate input mode. HDMI Connection With an HDMI cable, you can enjoy high quality picture and sound.Using a HDMI cable, connect...
Page 107 - AV IN; Component connection; COMPONENT IN
107 ENGLISH Composite (AV) connection Connect the output ports of an external device and the AV IN ports of the projector using an AV cable. Press the button on the remote control to select AV . Check whether cables of the same color are connected properly. VIDEO OUT Accessories Red Red Red White Wh...
Page 109 - Connecting a PC
109 ENGLISH Connecting a PC The projector supports Plug and Play. Your PC will automatically detect the projector and requires no driver installation. HDMI Connection Using an HDMI cable, connect the port of the projector to the HDMI output port of your PC. Both video and audio are output at the sam...
Page 112 - Connecting a Laptop
112 ENGLISH Connecting a Laptop You can connect the projector to a laptop to use various functions. HDMI Connection Using an HDMI cable, connect the port of the projector to the HDMI output port of your laptop. Both video and audio are output at the same time. You can also use the . Press the button...
Page 113 - Connecting Headphones; OPTICAL DIGITAL
113 ENGLISH Connecting Headphones You can listen to the audio through a headphone. Not provided Connecting a Digital Amp Using an optical cable, connect the digital audio input port of a digital amp to the OPTICAL DIGITAL AUDIO OUT port of the projector. The output of an amp with a digital converter...
Page 114 - OPTICAL
114 ENGLISH • Refer to the user manual of the audio device to connect. • When connecting this product to other devices, make sure to turn off and unplug all the devices. • The audio output of this product has wide-ranging audio bandwidth, so the receiver volume must be adjusted properly. Speakers ca...
Page 115 - Using the Mirroring Function of a Mobile Phone; MHL Connection
115 ENGLISH Using the Mirroring Function of a Mobile Phone MHL Connection The Mobile High-definition Link (MHL) is an interface that can connect a mobile phone to the projector and play video and audio from the mobile phone through the projector.This only applies to products with a HDMI input that s...
Page 116 - MAINTENANCE; Clean your Projector to keep it in optimal condition.; Cleaning; Cleaning the Lens; agent onto a swab or soft cloth to lightly rub the lens.; Cleaning the Projector Case; To clean the projector case, first unplug the power cord.
116 ENGLISH MAINTENANCE Clean your Projector to keep it in optimal condition. Cleaning Cleaning the Lens If there is any dust or staining on the lens surface, you must clean the lens.Use an air spray or a cleaning cloth to clean the lens.To remove dust or stains, use an air spray or apply a small am...
Page 117 - SPECIFICATIONS
117 ENGLISH SPECIFICATIONS MODEL PF1000UA (PF1000UA-NA) Resolution (Pixel) 1920 (Horizontal) × 1080 (Vertical) Aspect ratio 16:9 (Horizontal:Vertical) Panel size 11.938 mm Projection distance (Screen size) 414 mm to 686 mm (1524 mm to 2540 mm) Ratio of upward projection 125 % Working range of the re...
Page 119 - Supported HDMI-DTV Mode
119 ENGLISH Supported HDMI-DTV Mode Resolution Horizontal Frequency (kHz) Vertical Frequency (Hz) 480p 31.47 60 31.47 59.94 31.5 60 720p 45 60 44.96 59.94 1080i 33.75 60 33.72 59.94 1080p 67.500 60 67.432 59.939 27 24 26.97 23.976 33.75 30 33.71 29.97 • To provide the best picture quality, a 1920 x ...
Page 120 - the screen or a message such as
120 ENGLISH Supported RGB-PC/HDMI-PC Mode Resolution Horizontal Frequency (kHz) Vertical Frequency (Hz) 640 x 350 31.468 70.09 720 x 400 31.469 70.08 640 x 480 31.469 59.94 800 x 600 37.879 60.31 1024 x 768 48.363 60.00 1152 x 864 54.348 60.053 1360 x 768 47.712 60.015 1280 x 1024 63.981 60.020 1920...
Page 121 - Open Source Software Notice Information
121 ENGLISH Open Source Software Notice Information To obtain the source code under GPL, LGPL, MPL, and other open source licenses, that is contained in this product, please visit http://opensource.lge.com.In addition to the source code, all referred license terms, warranty disclaimers and copyright...
Page 122 - SYMBOLS; Refers to class II equipment.
122 ENGLISH SYMBOLS Refers to alternating current (AC). Refers to direct current (DC). Refers to class II equipment. Refers to stand-by. Refers to “ON” (power). Refers to dangerous voltage.


 LG HU715QW
User Manual
LG HU715QW
User Manual
 LG PW800G
User Manual
LG PW800G
User Manual
 LG AF115
User Manual
LG AF115
User Manual
 LG AN215
User Manual
LG AN215
User Manual
 LG AU810PB
User Manual
LG AU810PB
User Manual
 LG BD430
User Manual
LG BD430
User Manual
 LG BD450
User Manual
LG BD450
User Manual
 LG BD460
User Manual
LG BD460
User Manual
 LG BF40QS
User Manual
LG BF40QS
User Manual
 LG BF50NST
User Manual
LG BF50NST
User Manual
 LG BF50RG
User Manual
LG BF50RG
User Manual
 LG BF60PST
User Manual
LG BF60PST
User Manual
 LG BG630
User Manual
LG BG630
User Manual
 LG BG650
User Manual
LG BG650
User Manual
 LG BU50NST
User Manual
LG BU50NST
User Manual
 LG BU50RG
User Manual
LG BU50RG
User Manual
 LG BU53PST
User Manual
LG BU53PST
User Manual
 LG BU53RG
User Manual
LG BU53RG
User Manual