LG LRG3093SB - Manuals
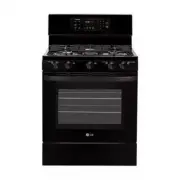
User Manual LG LRG3093SB
Manual LG LRG3093SB
Summary
I N T R O D U C T I O N 2 THANK YOU! Congratulations on your purchase and welcome to the LG family. Your new LG Gas Range combines precision cooking features with simple operation and stylish design. By following the operating and care instructions in this manual, your range will provide you with ma...
I M P O R T A N T S A F E T Y I N F O R M A T I O N 3 ENGLISH READ ALL INSTRUCTIONS BEFORE USE WARNING • ALL RANGES CAN TIP • INJURY TO PERSONS COULD RESULT • INSTALL ANTI-TIP DEVICESPACKED WITH RANGE • SEE INSTALLATION ANTI-TIP DEVICE II II M M M M P P P P O O O O R R R R T T T T A A A A N N N N T ...
4 I M P O R T A N T S A F E T Y I N F O R M A T I O N READ ALL INSTRUCTIONS BEFORE USE IMPORTANT SAFETY NOTICE Enforcement Act requires the Governor of Californiato publish a list of substances known to the state tocause birth defects or other reproductive harm, andrequires businesses to warn custom...
• Make sure your range is properly adjusted by aqualified service technician or installer for the type ofgas (natural or LP) that is to be used. Your rangecan be converted for use with either type of gas.See the installation instructions. • After using your range for a long time, high floortemperatu...
6 I M P O R T A N T S A F E T Y I N F O R M A T I O N READ ALL INSTRUCTIONS BEFORE USE SURFACE BURNERS • NEVER leave the surface burners unattended at high flame settings. Boilovers cause smoking andgreasy spillovers that may catch on fire. • Always turn knob to the “LITE” position when igniting the...
I M P O R T A N T S A F E T Y I N F O R M A T I O N 7 ENGLISH READ ALL INSTRUCTIONS BEFORE USE SELF-CLEANING OVEN • Make sure to wipe off excess spillage before self-cleaning operation. • DO NOT use oven cleaners. No commercial oven cleaner or oven liner protective coating of any kindshould be used ...
8 I M P O R T A N T S A F E T Y I N F O R M A T I O N READ ALL INSTRUCTIONS BEFORE USE OVEN When opening the door of a hot oven, stand away from the range. The hot air and steam thatescape can cause burns to hands, face and eyes. READ AND FOLLOW THIS SAFETY INFORMATION CAREFULLY. SAVE THESE INSTRUCT...
O P E R A T I N G I N S T R U C T I O N S 9 ENGLISH PARTS AND FEATURES Oval burner Medium burner Large burner Knobs (5 ea) Broiler pan & Grid Gasket Anti-tip bracket Model and serial number plate Storage door Oven door Oven vent Grates Small burner Extra large burner Automatic ovenlight switch S...
10 O P E R A T I N G I N S T R U C T I O N S USING THE GAS SURFACE BURNERS Throughout this manual, features and appearance may vary from your model. • Make sure all grates on the range are properlyplaced before using any burner. • Be sure the burners and grates are cooled downbefore you place your h...
O P E R A T I N G I N S T R U C T I O N S 11 ENGLISH USING THE GAS SURFACE BURNERS HOW TO SELECT FLAME SIZE NEVER let the flames extend up the sides of thecookware for safe handling of cookware. Watch the flame, not the knob, as you reduce heat.When fast heating is desired, the flame size on a gasbu...
O P E R A T I N G I N S T R U C T I O N S 13 ENGLISH As your oven heats up, the temperature increase ofthe air in the oven may cause water droplets to formon the door glass. These droplets are harmless andwill evaporate as the oven continues to heat up. ALUMINUM FOIL NEVER cover the oven bottom with...
14 O P E R A T I N G I N S T R U C T I O N S USING THE OVEN To avoid possible burns, place the racks in the desired position before you turn the oven on. PREHEATING AND PAN PLACEMENT Preheat the oven if the recipe calls for it. To preheat,set the oven at the correct temperature. Preheating isnecessa...
O P E R A T I N G I N S T R U C T I O N S 15 ENGLISH Serve the food immediately, and place the pan outside the oven to cool during themeal for easiestcleaning. Use LO Broil to cook foods such as poultryor thick cuts of meatthoroughly withoutover-browning them. NOTE : • Some smoke may occur during br...
16 O P E R A T I N G I N S T R U C T I O N S A B C D E F G Your oven has 7 rack positions. USING THE OVEN BROILING GUIDE Broiling times will be affected by the size, weight, thickness,starting temperature and your preference of doneness. This guide is based on meats at refrigerated temperatures. Foo...
O P E R A T I N G I N S T R U C T I O N S 17 ENGLISH USING THE CLOCK AND TIMER HOW TO SET THE CLOCK The clock should be set to the correct time of day forthe automatic oven timing functions to work properly.The time of day cannot be changed during cooking orself-clean mode. Press the “CLOCK” pad onc...
18 O P E R A T I N G I N S T R U C T I O N S USING THE TIMED BAKING FEATURES NOTE: DO NOT leave foods that spoil easily – such as milk, eggs, fish, stuffings, poultry and pork – more than 1hour before or after cooking. Room temperaturepromotes the growth of harmful bacteria. Be sure thatthe oven lig...
20 O P E R A T I N G I N S T R U C T I O N S SETTING THE PROOF FEATURE To avoid lowering the oven temperature andlengthening proofing time,do not open the oven doorunnecessarily. Check bread products early to avoidover-proofing. NOTES: • DO NOT use the proofing mode for warming food or keeping food ...
21 ENGLISH O P E R A T I N G I N S T R U C T I O N S SPECIAL FEATURES OF YOUR OVEN CONTROL Your new control has additional features that you maychoose to use. The following pages describe thesefeatures and how you may activate them. The special feature modes can only be activatedwhile the display is...
22 O P E R A T I N G I N S T R U C T I O N S HOW TO SET PREHEATING ALARM LIGHTON/OFF The interior oven light automatically turn on when theoven door is opened. When oven reaches set-temperature after preheat,the oven notifies preheat-end by flashing oven lampuntil the door is opened. You can activat...
23 ENGLISH O P E R A T I N G I N S T R U C T I O N S Press the “SELF CLEAN” pad once for a 3 hour cycle, twice for a 2 hour cycleor three times for a 4 hour cycle. A 3-hour self-clean is recommended foruse when cleaning small, containedspills. A SELF CLEAN time of 4 hoursis recommended for heavily s...
24 O P E R A T I N G I N S T R U C T I O N S USING THE SELF-CLEANING OVEN The oven shuts off automatically when the clean cycleis complete. • When the DOOR LOCKED light is off, the door will unlock automatically. • The words DOOR LOCKED will flash and the oven control will signal if you set the clea...
25 ENGLISH C A R E A N D C L E A N I N G O F T H E R A N G E CARE AND CLEANING Make sure electrical power is off and all surfacesare cool before cleaning any part of the range. If your range is pulled away from the wallfor cleaning, servicing or any reason,ensure that the anti-tip device is re-engag...
26 C A R E A N D C L E A N I N G O F T H E R A N G E BURNER CAPS AND HEADS BURNER CAPS Lift off when cool. Wash burner caps in hot, soapywater and rinse with clean water. To remove burnedon food particles, you may scour with a plasticscouring pad. AFTER CLEANING Before replacing the burner caps and ...
27 ENGLISH C A R E A N D C L E A N I N G O F T H E R A N G E BURNER GRATES Your range has three professional-style grates. For maximum stability, these grates should only beused in their proper position; Two side grates can beinterchanged left to right and front to back. Centergrate can be also inte...
28 C A R E A N D C L E A N I N G O F T H E R A N G E STAINLESS STEEL SURFACES DO NOT use a steel wool pad; it will scratch thesurface. To clean the stainless steel surface, use warm sudsywater or a stainless steel cleaner or polish. Alwayswipe the surface in the direction of the grain. Followthe cle...
29 ENGLISH C A R E A N D C L E A N I N G O F T H E R A N G E OVEN DOOR TO REMOVE THE DOORStep. 1 Open the door fully. Step. 2 Pull the hinge locks downtoward the door frame tothe unlocked position. Step. 3 Firmly grasp both sides of the door at the top. Step. 4 Close door to the door removalposition...
30 C A R E A N D C L E A N I N G O F T H E R A N G E After broiling, remove thebroiler pan from the oven.Remove the grid from thepan. Carefully pour outgrease from the pan into aproper container. Wash andrinse the broiler pan and gridin hot water with a soap-filledor plastic scouring pad.If food has...
31 ENGLISH C A R E A N D C L E A N I N G O F T H E R A N G E OVEN RACKS Your oven is equipped with nickel oven racks, removethem from the oven before beginning the self-cleancycle. To clean the oven racks, use an abrasive cleanser.After cleaning, rinse the racks with clean water anddry with a clean ...
32 C A R E A N D C L E A N I N G O F T H E R A N G E To Remove Storage Drawer: CAUTION - Turn power OFF before removing the storage drawer. Pull the drawer out until it stops. Lift the front of the drawer until the stops clear theguides. Remove the drawer. To Replace the Storage Drawer: Place the dr...
33 ENGLISH T R O U B L E S H O O T I N G BEFORE CALLING FOR SERVICE Before you call for service, review this list. It may save you time and expense. This list includes commonoccurrences that are not the result of a defect in workmanship or materials. Problem Possible Causes Solutions Top burners do ...
37 ENGLISH LG GAS RANGE LIMITED WARRANTY – USA LG Electronics Inc. will repair or replace your product, at LG’s option, if it proves to be defective in material orworkmanship under normal use, during the warranty period set forth below, effective from the date of original consumerpurchase of the pro...
LG Ranges Manuals
- LG LSDS6338F User Manual
-
LG LSES6338F
User Manual
-
LG LSES6338N
User Manual
-
LG LSGS6338F
User Manual
-
LG LSGS6338N
User Manual
-
LG LSIS6338F
User Manual
-
LG LTEL7337D
User Manual
-
LG LCRF0222
User Manual
-
LG LCRF0222S
User Manual
-
LG LDE3015SB
User Manual
-
LG LDE3015SB
Installation Manual
-
LG LDE3015SB
Manual
-
LG LDE3015ST
User Manual
-
LG LDE3015ST
Installation Manual
-
LG LDE3015ST
Manual
-
LG LDE3015SW
User Manual
-
LG LDE3015SW
Installation Manual
-
LG LDE3015SW
Manual
-
LG LDE3017SB
User Manual
-
LG LDE3017SB
Manual