LG LRE3012SB - Manuals
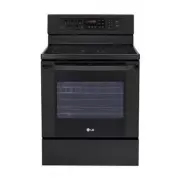
LG LRE3012SB Range – User Manual, Installation Manual in PDF format online.
Manuals:
User Manual LG LRE3012SB


Summary
- 2 - TABLE OF CONTENTS SAFETY ..................................................................3-8 - Important safety instructions .............................3-7 SURFACE CONTROLS COOKING ........................8-11 - “PF” “HS” message .........................................8- Locations of the...
ENGLISH - 3 - SAFETY I I M M P P O O R R T T A A N N T T S S A A F F E E T T Y Y I I N N S S T T R R U U C C T T I I O O N N S S Read and follow all instructions before using your oven to prevent the risk of fire, electric shock, personal injury, or damage when using the range. This guide do not cov...
- 4 - SAFETY I I M M P P O O R R T T A A N N T T S S A A F F E E T T Y Y I I N N S S T T R R U U C C T T I I O O N N S S O V E N • DO NOT TOUCH HEATING ELEMENTS OR INTERIOR SURFACES OF OVEN. Heating elementsmay be hot even though they are dark in color. Interiorsurfaces of an oven become hot enough ...
Installation Manual LG LRE3012SB


LG Ranges Manuals
-
 LG LSES6338F
User Manual
LG LSES6338F
User Manual
-
LG LSES6338N
User Manual
-
 LG LSGS6338F
User Manual
LG LSGS6338F
User Manual
-
 LG LSGS6338N
User Manual
LG LSGS6338N
User Manual
-
 LG LSIS6338F
User Manual
LG LSIS6338F
User Manual
-
 LG LTEL7337D
User Manual
LG LTEL7337D
User Manual
-
 LG LCRF0222
User Manual
LG LCRF0222
User Manual
-
LG LCRF0222S
User Manual
-
 LG LDE3015SB
User Manual
LG LDE3015SB
User Manual
-
LG LDE3015SB
Installation Manual
-
LG LDE3015SB
Manual
-
 LG LDE3015ST
User Manual
LG LDE3015ST
User Manual
-
LG LDE3015ST
Installation Manual
-
LG LDE3015ST
Manual
-
 LG LDE3015SW
User Manual
LG LDE3015SW
User Manual
-
LG LDE3015SW
Installation Manual
-
LG LDE3015SW
Manual
-
 LG LDE3017SB
User Manual
LG LDE3017SB
User Manual
-
LG LDE3017SB
Manual