Page 2 - CAUTION
2 This lightning flash with arrowhead symbol withinan equilateral triangle is intended to alert theuser to the presence of uninsulated dangerousvoltage within the product’s enclosure that maybe of sufficient magnitude to constitute a risk ofelectric shock to persons. The exclamation point within an ...
Page 3 - Dubbing; IMPORTANT SAFETY INSTRUCTIONS
Dubbing 3 1. Read these instructions. - All these safety and operating instructions should be read before the product is operated. 2. Keep these instructions. - The safety, operating and use instructions should be retained for future reference. 3. Heed all warnings. - All warnings on the product and...
Page 6 - Handling Discs; Introduction; Moisture Condensation
6 To ensure proper use of this product, please read thisowner’s manual carefully and retain for future refer-ence. Symbol Used in this Manual Indicates hazards likely to cause harm tothe unit itself or other material damage. Note: Indicates special notes and operating fea-tures. Tip: Indicates tips ...
Page 7 - Recordable and Playable Discs; Recommended recordable DVD discs
7 Recordable and Playable Discs DVD-RW (DVD - ReWritable) DVD-RW discs can be formatted for VR mode recording or Video mode recording. These Discs can be recorded on repeatedly. Recordings can be erased, then you can record again on thesame Disc. [VR mode] Recordings can be extensively edited Playab...
Page 8 - Playable Discs; Region code of the recorder and DVDs; ALL
8 Playable Discs DVD (8 cm / 12 cm disc) Discs such as movies that can be purchased or rented Video CD (VCD) (8 cm / 12 cm disc) VIDEO CDs or CD-Rs/CD-RWs in VIDEO CD/Super VIDEO CD format Audio CD (8 cm / 12 cm disc) Music CDs or CD-Rs/CD-RWs in music CD format that can be purchased CD-R/CD-RW (8 c...
Page 10 - Regarding Write Protect; U s i n g M e m o r y C a r d; About the Remote Control; Operation Range
10 C a r d u s e a b l e o n t h i s u n i t C a r d u s e a b l e o n t h i s u n i t • Compact Flash Card (CF) • Micro Drive (MD) • Secure Digital Card (SD) • Multi Media Card (MMC) • SmartMedia Card (SMC) • xD-Picture Card (xD) • Memory Stick (MS) • Memory Stick Pro (MS-Pro) • Compatible with: FA...
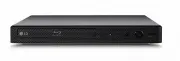
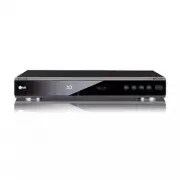
Page 12 - Front Panel; b c d
12 a (POWER) Switches the Recorder ON and OFF. b N ( PLAY ) To play back a disc or tape. c x (STOP) Stops playback. d z (REC) Starts recording. Press repeatedly to set the recording time. e CH ( V / v ) Scans up or down through memorized chan-nels. f Disc Tray Insert a disc here. g Z OPEN/CLOSE Open...
Page 13 - CH; Remote Control
13 Introduction 0-9 numerical buttons: Selects numbered options in a menu. b / B / v / V (left/right/up/down): Selects menu options. A-B: Repeats sequence between two points (A and B) AUDIO: Selects an audio lan- guage (DVD). INPUT: Changes the input to use for recording (Tuner, AV1-2, orDV IN). CHP...
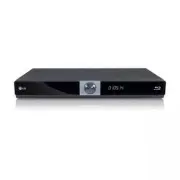
Page 14 - Rear Panel; Hookup and Settings
14 a ANT.IN Connect the antenna to this terminal. b AUDIO OUT (Left/Right) Connect to a TV with audio inputs. c VIDEO OUT Connect to a TV with video inputs. d COMPONENT VIDEO OUT/PROGRESSIVESCAN (Y Pb Pr) Connect to a TV with Y Pb Pr inputs. e Cooling fan f AC Power Cord Plug into the power source. ...
Page 15 - C o n n e c t i o n s t o y o u r T V; RF coaxial connection; Video connection; Hookup and
15 C o n n e c t i n g a n C o n n e c t i n g a n A n t e n n a A n t e n n a o r C a b l e T V o r C a b l e T V a a Antenna : Disconnect the antenna from the rear of the TV andidentify the antenna cable. If it is a round 75 ohmcoaxial cable connect it directly to the jack markedANT.IN on your Rec...
Page 16 - Audio connection; C o n n e c t i o n t o a n; Digital Multi-channel sound
16 Component Video / Progressive Scan connection If your television is a high-definition or “digital ready”television, you may take advantage of the Recorder’sprogressive scan output for the highest video resolu-tion possible. Connect the COMPONENT VIDEO OUT/P/SCANjacks on the Recorder to the corres...
Page 17 - Connecting a Digital Camcorder; DV Digital Camcorder
17 Connecting to the INPUT 1 or INPUT 2Jacks Connect the input jacks (INPUT1, INPUT2) on therecorder to the audio/video out jacks on your acces-sory component, using audio/video cables. Note: If you use the S-VIDEO IN jack on the front panel,the VIDEO IN jack on the front panel is not available. Con...
Page 18 - General Operation; Tuning Band Select; Auto Channel Set
18 I n i t i a l S e t t i n g s I n i t i a l S e t t i n g s In this menu system, there are several ways to cus-tomize the settings provided. Most menus consist ofthree levels to set up the options, but some requiregreater depth for the variety of settings. General Operation 1. Press SETUP and the...
Page 19 - To Add or Erase Channels from Memory; Clock Set; Auto; Manual
19 To Add or Erase Channels from Memory This feature allows you to add or erase channelsfrom memory manually. 1. Select the [Ch. Edit] option. 2. Press B to move to the third level. [Edit] icon is highlighted. 3. Press ENTER and the Channel Edit menu appears. 4. Use v / V or number buttons to select...
Page 20 - PBC
20 TV Aspect Selects the aspect ratio of the connected TV (4:3standard or wide). [4:3] Select this when connecting to a 4:3 screenTV. When you select [4:3], set [Display Mode]below. [16:9] Select this when connecting to a wide-screenTV or TV with a wide mode function. Display Mode Selects how to dis...
Page 21 - Power Save Mode; Factory Set; L a n g u a g e S e t t i n g s; Display Menu
21 Power Save Mode Set Power Save Mode to [ON] to place yourRecorder into an economic power save mode. Factory Set You can reset the Recorder to its original factory settings. Some options cannot be reset (Rating,Password and Area Code) 1. Select the [Factory Set] option.2. Press B to select [Set] t...
Page 22 - Sampling Frequency
22 A u d i o S e t t i n g s A u d i o S e t t i n g s Each DVD disc has a variety of audio output options.Set the recorder’s Audio Output according to the typeof audio system you use. Dolby Digital / DTS / MPEG [Bitstream]: Select “Bitstream” if you connect therecorder’s DIGITAL AUDIO OUT jack to a...
Page 23 - Country Code
23 Lock (Parental Control) Settings Rating Some movies contain scenes that may not be suit-able for children to view. Many of these discs containparental control information that applies to the com-plete disc or to certain scenes on the disc. Moviesand scenes are rated from 1 to 8, depending on thea...
Page 24 - DivX Registration Code; R e c o r d i n g S e t t i n g s; Record Mode Set
24 DivX Registration Code We provide you the DivX ® VOD (Video On Demand registration code that allows you to rent and purchasevideos using the DivX ® VOD service. For more information, visit www.divx.com/vod. 1. Select [DivX(R) VOD] option then press B . 2. Press ENTER while [Enter] is selected and...
Page 25 - Disc Settings; Initialize; Finalize
25 Disc Settings Initialize If you load a completely blank disc, the [Initialize]menu will appear. Select [Ok] then press ENTER.The Recorder will initialize the disc. DVD-R: The Recorder initializes the disc for Video mode. The recording mode will always be Videomode. DVD-RW: The Recorder initialize...
Page 26 - Disc Label; Disc Protect
26 Disc Label Use the Disc Label feature to enter a name for thedisc. This name appears when you load the disc andwhen you display disc information on-screen. The disc label can be up to 32 characters long. For discs formatted on a different recorder, you willsee only a limited character set. 1. Sel...
Page 27 - Displaying Information While Watching TV; Changing TV Audio Channel; Displaying Disc Information on-screen
27 G e n e r a l E x p l a n a t i o n o f G e n e r a l E x p l a n a t i o n o f O n - S c r e e n D i s p l a y O n - S c r e e n D i s p l a y Some DVDs require specific operation or allow onlylimited operation during playback. When this occurs, is displayed, action prohibited or not available. ...
Page 28 - Playback Setup; Moving to another TITLE; Search; DVD; VCD; Playback
28 P l a y i n g a D V D o r V P l a y i n g a D V D o r V i d e o C D i d e o C D Playback Setup 1. Press OPEN/CLOSE ( Z ) to open the disc tray. Load your chosen disc in the tray, with the play-back side down. 2. Press OPEN/CLOSE ( Z ) to close the tray. Playback starts automatically. If playback ...
Page 29 - To enter a Marker
29 Slow Motion 1. Press SCAN ( m or M ) during pause mode. 2. Use the SCAN ( m or M ) to select the required speed.DVD; 4 steps (forward and backward)DivX; 4 steps (forward only)Video CD; 3 steps (forward only) 3. To exit Slow Motion mode, press PLAY ( N ). Repeat Press REPEAT to select a desired re...
Page 31 - Program selection for sub picture; Sub picture position change
31 PIP (Picture in Picture) This function enables you to view the stored stationsin sub picture during playback. On and off Press PIP to switch on the sub picture, press thisbutton again to switch it off. Input mode selection for sub picture Press INPUT to select the input mode for the subpicture. E...
Page 32 - Notice for displaying the DivX subtitle
32 P l a y i n g a D i v X M o v i e F i l e P l a y i n g a D i v X M o v i e F i l e The Recorder can play Divx files on CD-R/RW orDVD±R/RW discs. Before playing DivX files, read“About DivX movie files” on the right colum. 1. Use v / V to select a folder, and press ENTER. A list of files in the fo...
Page 33 - Audio CD; Additional options for memory card; Pause; ACD
33 P l a y i n g a n P l a y i n g a n A u d i o C D o r M P 3 A u d i o C D o r M P 3 / W M A / W M A f i l e s f i l e s The Recorder can play Audio CDs and MP3/WMAfiles on CD-ROM, CD-R/RW, DVD+R/RW, DVD-R/RW discs or Memory Card.Before playing MP3/WMA files, read [Notes onMP3/WMA Recordings] on p...
Page 34 - Repeat Programmed Tracks; Erasing the Complete Program List; Notes on MP3/WMA Recordings
34 Program Playback with Program Playback with Audio Audio CD and MP3/WMA CD and MP3/WMA files files The program function enables you to store yourfavourite tracks from any disc in the player memory. Program can contain 99 tracks (Audio CD) or 256tracks (MP3/WMA). 1. Insert a disc. Audio CD and MP3/...
Page 35 - Viewing a JPEG Disc; Slide Show; Still Picture
35 Viewing a JPEG Disc Using this Recorder you can view JPEG files on theCD-R/RW or DVD±R/RW. Before playing JPEG files,read [About JPEG image files] on page 36.Also, you can view JPEG files in the memory card.(To use memory card, see page 10.) 1. Insert a disc and close the tray. The JPEG menu appe...
Page 37 - Recording
37 About DVD recording Notes: • This Recorder cannot record CD-R or CD-RWdiscs. • Fingerprints and small scratches on a disc canaffect playback and/or recording performance.Please take proper care of your discs. • The company does not hold any responsibility tocompensate the contents which should ha...
Page 38 - I n s t a n t T; Checking the Recording Time
38 B a s i c R e c o r d i n g f r o m a T V B a s i c R e c o r d i n g f r o m a T V Follow the instructions below to record a TV program.Recording starts immediately and continues until thedisc is full or you stop the recording. Note: You must load a recordable disc for DVD recording. 1. Switch o...
Page 39 - Checking Timer Recording Details
39 T T i m e r R e c o r d i n g i m e r R e c o r d i n g The Timer Recording function allows you to record upto 8 programs within a period of one month. Note: If you use a completely blank disc for timer recording,you must format the disc before starting timer record-ing. (Refer to [Initialize] on...
Page 40 - Timer Recording Troubleshooting; You cannot enter a timer program when:; R e c o r d i n g f r o m E x t e r n a l
40 Timer Recording Troubleshooting Even though the timer is set, the recorder will notrecord when: • There is no disc loaded. • A non-recordable disc is loaded. • [Disc Protect] is set to [ON] in the Disc menu(see page 26). • There are already 99 titles (DVD-RW, DVD-R)or 49 titles (DVD+RW, DVD+R(DL)...
Page 41 - Before DV dubbing
41 R e c o r d i n g f r o m D V I n p u t R e c o r d i n g f r o m D V I n p u t Before DV dubbing You can connect a DV-equipped camcorder to thisrecorder using a single DV cable for input and outputof audio, video, data and control signals. This recorder is only compatible with DV-format(DVC-SD, ...
Page 42 - Editing
42 Title List and Chapter List MenuOverview Using the Title List menu you can edit video content.The editing features available in the Title List menudepend on whether you are editing video on DVD,and whether you’re editing Original content, or aPlaylist. There are two ways to edit VR mode DVD-RW di...
Page 43 - Titles, Chapters and Parts; About word ‘Original’ and ‘Playlist’; Adding Chapter Markers; Editting
43 V R M o d e : O r i g i n a l a n d V R M o d e : O r i g i n a l a n d P l a y l i s t E d i t i n g P l a y l i s t E d i t i n g Titles, Chapters and Parts Titles in the disc’s original content contain one ormore chapters. When you insert a disc’s title into thePlaylist, all the chapters withi...
Page 46 - Space; M o v i n g a P l a y l i s t C h a p t e
46 N a m i n g a T N a m i n g a T i t l e i t l e You can name Original and Playlist titles independ-ently. 1. Choose the title you want to name on the Title List menu, then press ENTER.The menu options appears on the left side of themenu. 2. Use v / V / B to select [Title Name] option then press E...
Page 48 - P r o t e c t a T
48 H i d e a C h a p t e r H i d e a C h a p t e r You can skip playing chapters without deleting fromthe disc. 1. Use v V b B to choose a chapter you want to hide on the [Chapter List] menu, then pressENTER.Options appear on the left side of the screen. 2. Select [Hide] option. Example: Chapter Lis...
Page 49 - To finalize a disc, refer to
49 O v e r w r i t i n g R e c o r d i n g O v e r w r i t i n g R e c o r d i n g To overwrite a new video recording on a previouslyrecorded title, follow these steps. This feature is notavailable for DVD+Rs, that always record at the endof the Disc. 1. Select input source you want to record (TV ch...
Page 50 - By pressing; Controlling other TVs with the remote; Code numbers of controllable TVs; Reference
50 C o n t r o l l i n g C o n t r o l l i n g Y Y o u r T V w i t h t h e o u r T V w i t h t h e S u p p l i e d R e m o t e C o n t r o l S u p p l i e d R e m o t e C o n t r o l You can control the sound level, input source, andpower switch of your LG TV with the supplied remote.You can control...
Page 51 - Language Codes
51 Reference Area Code Afghanistan AF Argentina AR Australia AU Austria AT Belgium BE Bhutan BT Bolivia BO Brazil BR Cambodia KH Canada CA Chile CL China CN Colombia CO Congo CG Costa Rica CR Croatia HR Czech Republic CZ Denmark DK Ecuador EC Egypt EG El Salvador SV Area Code Ethiopia ET Fiji FJ Fin...
Page 52 - r o u b l e s h o o t i n g
52 Symptom No power. No picture. No sound. The playback picture ispoor. The recorder does notstart playback. The picture from theexternal input is distort-ed Some channels areskipped over whenusing v / V . The picture or sound ofbroadcasting channel isweak or missing. Camcorder image isnot shown. Ca...
Page 53 - Symptom; Reset the Recorder
53 Reference Symptom Cannot play a discrecorded using thisrecorder on anotherplayer. Cannot record or didnot record successfully. Timer recording is notpossible. Stereo Audio Recordand/or Playback is notpresent. The Remote Controldoes not work properly. Cause The disc was recorded in Video mode. Som...
Page 54 - Video recording format; DVD Specifications; S p e c i f i c a t i o n s
54 General Power requirements AC 120V, 60 Hz Power consumption 27W Dimensions (approx.) 430 X 49 X 300 mm (16.9 x 1.9 x 11.8 inches) (w x h x d) Mass (approx.) 3.5 kg (7.7 lbs) Operating temperature 5˚C to 35˚C (41˚F to 95˚F) Operating humidity 5 % to 90 % Signal system NTSC Recording Recording form...
Page 56 - THIS LIMITED WARRANTY DOES NOT APPLY TO:; Limited Warranty - USA
This LG Electronics product, will be repaired or replaced, at LG’s option, if it proves to be defective in material orworkmanship, under normal use, during the warranty period (“Warranty Period”) listed below, effective from the date(“Date of Purchase”) of original consumer purchase of the product. ...


 LG BP250
User Manual
LG BP250
User Manual
 LG BP740
User Manual
LG BP740
User Manual
 LG DP132
User Manual
LG DP132
User Manual
 LG RH735T
User Manual
LG RH735T
User Manual
 LG BD300
User Manual
LG BD300
User Manual
 LG BD370
User Manual
LG BD370
User Manual
 LG BD390
User Manual
LG BD390
User Manual
 LG BD530
User Manual
LG BD530
User Manual
 LG BD550
User Manual
LG BD550
User Manual
 LG BD570
User Manual
LG BD570
User Manual
 LG BD590
User Manual
LG BD590
User Manual
 LG BD630
User Manual
LG BD630
User Manual