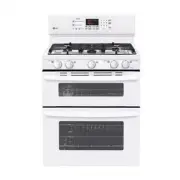
Page 2 - OWNER’S MANUAL; GAS DOUBLE OVEN; Please read this guide thoroughly before operating; ENGLISH
www.lg.com OWNER’S MANUAL GAS DOUBLE OVEN RANGE LDG3016STLDG3015STLDG3015SBLDG3015SW Please read this guide thoroughly before operating and keep it handy for reference at all times. ENGLISH ESP AÑOL MFL33029607
Page 3 - TABLE OF CONTENTS
2 TABLE OF CONTENTS 3 PRODUCT FEATURES 4 IMPORTANT SAFETY INSTRUCTIONS 10 BEFORE USE 10 Accessories11 Components 12 HOW TO USE 12 Gas Surface Burners 12 - Before Use 13 - Gas Burners 13 - Using the Gas Surface Burners 14 - Top-of-Range Cookware 15 - Using the Griddle (Model LDG3016ST only) 16 How to...
Page 5 - WHAT TO DO IF YOU SMELL GAS; try to light any appliance.; WARNING; IMPORTANT SAFETY INSTRUCTIONS
4 IMPORTANT SAFETy INSTRUCTIONS Always comply with the following precautions to avoid dangerous situations and to ensure the peak performance of your product. WARNING Indicates a hazardous situation which, if not avoided, could result in death or serious injury. CAUTION Indicates a hazardous situati...
Page 6 - IMPORTANT SAFETY NOTICE; CAUTION
5 IMPORTANT SAFETy INSTRUCTIONS ENGLISH IMPORTANT SAFETY NOTICE Enforcement Act requires the Governor of California to publish a list of substances known to the state to cause birth defects or other reproductive harm, and requires businesses to warn customers of potential exposure to such substances...
Page 8 - SURFACE BURNERS
7 IMPORTANT SAFETy INSTRUCTIONS ENGLISH SURFACE BURNERS WARNING y Even if the top burner flame goes out, gas is still flowing to the burner until the knob is turned to the “OFF” position. If you smell gas, immediately open a window and ventilate the area for five minutes prior to using the burner. D...
Page 9 - COOK MEAT AND POULTRY THOROUGHLY; OVEN
8 IMPORTANT SAFETy INSTRUCTIONS COOK MEAT AND POULTRY THOROUGHLY To protect against foodborne illnesses, cook meat and poultry thoroughly—meat to at least an INTERNAL temperature of 160°F and poultry to at least an INTERNAL temperature of 180°F. SELF CLEANING OVEN Make sure to wipe off excess spilla...
Page 10 - READ ALL INSTRUCTIONS BEFORE USING THE APPLIANCE.; SAVE THESE INSTRUCTIONS
9 IMPORTANT SAFETy INSTRUCTIONS ENGLISH y If you should have a grease fire in the broiler pan, press the “UPPER CLEAR/OFF” or “LOWER CLEAR/OFF” key, and keep the oven door closed to contain fire until it burns out. y For safety and better cooking performance, always bake and broil with the oven door...
Page 11 - NOTE; BEFORE USE; Accessories
10 BEFORE USE NOTE y Contact LG Customer Service if any accessories are missing. y For your safety and for extended product life, only use authorized components. y The manufacturer is not responsible for product malfunction or accidents caused by the use of separately purchased, unauthorized compone...
Page 12 - Components
11 BEFORE USE ENGLISH Components Make sure to understand the names and function of each part.* Throughout this manual, the features and appearance may vary depending on your model. NOTE y The model and serial tag is located behind the control panel. Anti-tip bracket Grates Small burner Extra large b...
Page 13 - HOW TO USE; Gas Surface Burners; Before use; Make sure that all burners are properly placed.
12 HOW TO USE HOW TO USE Gas Surface Burners Before use Read all instructions before using. Make sure that all burners are properly placed. Make sure that all grates are properly placed before using the burner. CAUTION DO NOT operate the burner for an extended period of time without cookware on the ...
Page 14 - Gas burners; Medium and Large Burner; Extra large burner; Using the gas surface burners; Selecting the Flame Size
13 HOW TO USE ENGLISH Gas burners Your gas range cooktop has five sealed gas burners.These can be assembled and separated. Follow the guide below. 1 2 3 4 1 2 3 4 1 2 3 4 1 4 2 3 Medium and Large Burner The medium and large burners are the primary burners for most cooking. These general purpose burn...
Page 15 - In Case of Power Failure:
14 HOW TO USE Use a flat-bottomed wok. Do not place stove-top grills on the burner. If using a wok, it is recommended that you use a 14-inch or smaller flat-bottomed wok. Make sure that the wok bottom sits flat on the grate. CAUTION DO NOT use a wok support ring. Placing the ring over the burner or ...
Page 16 - Using the Griddle
15 HOW TO USE ENGLISH CAUTION DO NOT remove the griddle plate until the cooktop grates, surfaces and griddle plate are completely cooled. CAUTION The griddle plate on the cooktop may become very hot when using the cooktop, oven or broiler systems. Always use oven mitts when placing or removing thegr...
Page 17 - How to Use the Oven; Choose the upper or lower oven for proper cooking.
16 HOW TO USE How to Use the Oven Before use Read all instructions before using. Make sure the electrical power cord and the gas valve are properly connected. Check it for safety. Check the correct use of the range depending on the type of food you will cook. Make sure you know how to use the oven (...
Page 18 - Do not cover rack or bottom with aluminum foil.; In case of power failure, do not use the oven.
17 HOW TO USE ENGLISH Do not block, touch or place items around the oven vent during cooking. Your oven is vented through ducts at the center above the burner grate. Do not block the oven vent when cooking to allow for proper air flow. Do not touch vent openings or nearby surfaces during the use of ...
Page 19 - Using the Control Panel
18 HOW TO USE Using the Control Panel Upper Oven: Name Description 1 BAKE Traditional bake function. Refer to “BAKE” in the How To Use section. 2 BROIL Traditional broil function. Refer to “BROIL” in the How To Use section. 3 WARM Warms food in the oven.Refer to “WARM” in the How To Use section. 4 P...
Page 21 - Operating Instructions
20 HOW TO USE Operating Instructions The value of setting can be changed by pressing “SETTING” key. The items are different from each model. Refer to “Setting item chart” SETTING ITEM CHART How to set convection auto conver- sion function for the lower oven (LDG3016ST) When using convection bake and...
Page 22 - How to select Fahrenheit or Celsius; How to Set the Clock Time:
21 HOW TO USE ENGLISH How to select Fahrenheit or Celsius The oven temperature settings can either be set to Fahrenheit or Celsius. The oven defaults to Fahrenheit unless changed by the user. 1 Press the X key until “ i ” will display. 2 Press the number 1 key to select Fahrenheit or Celsius. 3 Pres...
Page 23 - How to Use the Timer; How to Use the Oven Lockout Feature
22 HOW TO USE How to Use the Timer The upper or lower TIMER ON/OFF serves as an extra timer in the kitchen that will sound when the set time has run out. It does not start or stop cooking. The upper or lower TIMER ON/OFF feature can be used dur-ing any of the other oven control functions. The upper ...
Page 24 - Removing and Replacing the Oven Racks; To Remove Racks; To Replace Racks
23 HOW TO USE ENGLISH Removing and Replacing the Oven Racks Remove Replace To Remove Racks 1 While wearing oven mitts, grasp the oven rack. 2 Pull the rack straight out until it stops. 3 Lift up the front of the rack. 4 Pull out the rack. *You can also adjust the racks position before using the oven...
Page 26 - Preheating and Pan Placement; Baking chart
25 HOW TO USE ENGLISH Preheating and Pan Placement y To preheat, set the oven at the required recipe tempera-ture. Wait until the oven reaches its set temperature before placing the food in the oven. Preheating is neces-sary for satisfactory results when baking cakes, cookies, pastry and breads. y F...
Page 28 - BROILING CHART
27 HOW TO USE ENGLISH Food Quantity and/or Thickness Upper oven Comments Shelf Position First side (Min- utes) Second side (Min- utes) Ground beef Well done 1 Ib. (4 patties)1/2 to 3/4” thick A 5-7 3-5 Space evenly. Up to 8 patties may be broiled at once. Beef Steaks RareMediumWell Done 1” thick1 to...
Page 29 - TIMED COOK; DELAYED TIMED COOK
28 HOW TO USE TIMED COOK (Upper & Lower Oven) The TIMED COOK feature allows you to set the oven to cook for a specific length of time. This feature can only be used while baking. To set TIMED COOK (example: to BAKE at 300°F for 30 minutes): 1 Press the upper or lower A key. q o will appear in th...
Page 30 - How to use convection for the lower; CONVECTION BAKE FOR THE
29 HOW TO USE ENGLISH How to use convection for the lower oven (LDG3016ST) Convection system uses a fan to circulate the oven’s heat evenly within the oven.This improved heat distribution allows for even cooking and excellent results. CONVECTION BAKE FOR THE LOWER OVEN (LDG3016ST) Convection baking ...
Page 31 - Convection baking chart
30 HOW TO USE 3 Cookware for convection cooking Check to see if your cookware leaves room for air circula- tion in the oven before using your convection oven. If you are baking with several pans, leave space between them. Also, be sure the pans do not touch each other or the walls of the oven. 1) Pa...
Page 32 - CONVECTION ROAST FOR THE
31 HOW TO USE ENGLISH CONVECTION ROAST FOR THE LOWER OVEN (LDG3016ST) CONVECTION ROAST feature is designed to give optimumroasting performance. CONVECTION ROAST featurecombines cooking with the convection fan to roast meatsand poultry. The heated air circulates around the food from allsides, sealing...
Page 33 - Special Features; To set the oven for frozen pizza:; To set the WARM function:
32 HOW TO USE Special Features PIZZA (Upper Oven) T his function will automatically preheat the upper oven tem- perature to cook either regular or rising crust frozen pizza. Simply choose the type of crust (P1 for regular crust and P2 for rising crust) and set the desired cook time. To set the oven ...
Page 34 - To set the PROOF function:
33 HOW TO USE ENGLISH FAVORITE (LDG3016ST Lower Oven) This feature may store and recall up to 3 different settings.The favorite setting feature may be used with COOK TIMEfeature. This feature will not work with any other functionincluding START TIME feature. 1 To set FAVORITE 1) Place the food in th...
Page 35 - To set the SABBATH mode:
34 HOW TO USE To set the SABBATH mode: 1 Press the A key. 2 Using the number keys, enter the desired temperature. 3 Press the q key. 4 Press and hold the X key for three seconds. To change the temperature while in SABBATH mode (no tones sound & no display change): 1 Press the upper or lower oven...
Page 36 - CARE AND CLEANING; Gas Surface Burner; Removing and Replacing the Gas Surface Burner; After Cleaning the Burner Heads/Caps
35 CARE AND CLEANING ENGLISH CARE AND CLEANING Gas Surface Burner Removing and Replacing the Gas Surface Burner Grates and burner caps/heads can be removed for care and cleaning. General burner Burner cap is properly set. Burner cap is NOT properly set. Burner Heads/Caps For even and unhampered flam...
Page 37 - Burner Grates; Cleaning the Burner Grates
36 CARE AND CLEANING Burner Grates The range consists of three separate professional-style grates. For maximum stability, these grates should only be used when in their proper position. The two side grates can be interchanged from left to right and front to back. The center grate can be interchanged...
Page 38 - Cooktop Surface; Stainless Steel Surfaces; Oven air vents; Control Panel
37 CARE AND CLEANING ENGLISH Cooktop Surface To avoid burns, do not clean the cooktop surface until it has cooled. Foods with high acid or sugar content could cause a dull spot if allowed to set. Wash and rinse when the surface has cooled. For other spills such as oil/grease spattering, etc., wash w...
Page 39 - Oven Door; Removing and replacing the doors; Removing the Upper Oven Door
38 CARE AND CLEANING Oven Door Do not hand clean the oven door gasket Hand clean the door Do not hand clean the oven door gasket Hand clean the door y Use soapy water to thoroughly clean the oven door. Rinse well. DO NOT immerse the door in water. y You may use a glass cleaner on the outside glass o...
Page 40 - Replacing the Upper Oven Door; Removing the Lower Oven Door
39 CARE AND CLEANING ENGLISH Replacing the Upper Oven Door 1 Be sure that the hinges are lined up at a 30 degree position. 2 Slide the door back into the hinges until you hear a solid click and the release buttons have engaged. approximately 30° 3 Fully open the door. Push the hinge locks down onto ...
Page 41 - Replacing the Lower Oven Door; Inside of the Oven
40 CARE AND CLEANING Replacing the Lower Oven Door 1 Firmly grasp both sides of the door at the top and close the door to the removal position (approximately five degrees). 2 Seat the indentation of the hinge arm into the bottom edge of the hinge slot. Hinge arm Bottom edge of slot Indentation 3 Ope...
Page 42 - Before Starting SELF CLEAN; After Self Clean; To Set Self Clean
41 CARE AND CLEANING ENGLISH Before Starting SELF CLEAN Do not hand clean the oven door gasket Hand clean the door y Remove the oven racks, broiler pan, broiler grid, all cookware, aluminum foil or any other material from the oven. y The kitchen should be well ventilated to minimize the odors from c...
Page 43 - Changing the Oven Light; To replace the oven light; Broiler Pan and Grid; Oven racks
42 CARE AND CLEANING Changing the Oven Light The oven light is a standard 40-watt appliance bulb. It will turn on when the oven door is open. When the oven door is closed, press the M or Q key to turn the light on or off. To replace the oven light 1 Unplug the range or disconnect power. 2 Turn the g...
Page 44 - BEFORE REQUESTING SERVICE
43 BEFORE REQUESTING SERVICE ENGLISH BEFORE REQUESTING SERVICE Symptoms and Questions Possible Cause/Solution Top burners do not light or do not burn evenly. y Make sure that the electrical plug is inserted into a live, properly grounded outlet. y Remove the burners and clean them. Check the electro...
Page 46 - WARRANTY
45 WARRANTy ENGLISH To Prove Warranty Coverage Retain your Sales Receipt to prove date of purchase. A copy of your Sales Receipt must be submitted at the time warranty service is provided. To Obtain the Nearest Authorized Service Center or Sales Dealer, or to Obtain Product, Customer, or Service Ass...
Page 47 - MEMO
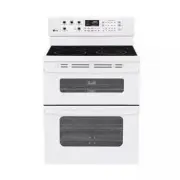
Page 48 - MANUAL DE PROPIETARIO; ESTUFA DE GAS CON; Lea detenidamente estas instrucciones antes utilizar y; ESP
MANUAL DE PROPIETARIO ESTUFA DE GAS CON HORNO DOBLE LDG3016STLDG3015STLDG3015SBLDG3015SW Lea detenidamente estas instrucciones antes utilizar y guárdelas como referencia para el futuro. ESP AÑOL www.lg.com P/No.: MFL33029607
Page 49 - CARACTERÍSTICAS DEL PRODUCTO; INDICE DE CONTENIDOS
2 IndIce de contenIdos 3 CARACTERÍSTICAS DEL PRODUCTO 4 INSTRUCCIONES DE SEGURIDAD IMPORTANTES 10 ANTES DE USAR 10 Accesorios11 Componentes 12 CÓMO USAR 12 Hornallas a gas de la superficie 12 - Antes de usar 13 - Hornillas a gas 13 - Uso de las hornillas a gas de la superficie 14 - Utensilios ubicad...
Page 50 - DIVERsOs TAMAÑOs DE HORNILLAs A GAs
3 cARAcTERísTIcAs DEL PRODUcTO ESP AÑOL DIVERsOs TAMAÑOs DE HORNILLAs A GAs Elija la hornilla que mejor se adapte al tamaño de su batería de cocina.Es posible utilizar varias hornillas a la vez para cocinar distintas cosas al mismo tiempo. EsTUFA A GAs sEGURA, cONVENIENTE Proporciona seguridad y con...
Page 51 - QUÉ HACER SI HUELE GAS; intente encender ningún aparato.; DISPOSITIVO ANTI-VUELCO; ADVERTENcIA; INSTRUCCIONES DE SEGURIDAD IMPORTANTES; TODAS LAS ESTUFAS PUEDEN VOLCARSE
4 INsTRUccIONEs DE sEGURIDAD IMPORTANTEs Cumpla siempre con lo indicado en las siguientes señales de avisos de seguridad para evitar situaciones peligrosas y para asegu- rarse de obtener el máximo rendimiento de su producto. ADVERTENcIA Indica una situación peligrosa que puede resultar en lesiones g...
Page 52 - AVISO IMPORTANTE DE SEGURIDAD; PREcAUcIÓN
5 INsTRUccIONEs DE sEGURIDAD IMPORTANTEs ESP AÑOL AVISO IMPORTANTE DE SEGURIDAD La Ley de Cumplimiento dispone que el Gobernador de California debe publicar una lista de sustancias conocidas por el Estado que pueden ocasionar defectos de nacimiento u otros daños reproductivos; asimismo, requiere que...
Page 54 - HORNILLAS DE LA SUPERFICIE
7 INsTRUccIONEs DE sEGURIDAD IMPORTANTEs ESP AÑOL HORNILLAS DE LA SUPERFICIE ADVERTENcIA y Aunque la llama de la hornilla se apague, el gas continúa saliendo hasta que la perilla se gire a la posición "OFF" (APAGADO). Si huele gas, abra una ventana de inmediato y ventile el lugar por cinco m...
Page 55 - COCINE COMPLETAMENTE LA CARNE Y EL POLLO; HORNO
8 INsTRUccIONEs DE sEGURIDAD IMPORTANTEs COCINE COMPLETAMENTE LA CARNE Y EL POLLO Para prevenir cualquier enfermedad transmitida por los alimentos, cocine completamente la carne y el pollo. La carne debe coci-narse a una temperatura INTERNA DE 160°F (71°C) como mínimo, y el pollo debe cocinarse a un...
Page 56 - LEA TODAS LAS INSTRUCCIONES ANTES DE UTILIZAR EL APARATO.; CONSERVE ESTAS INSTRUCCIONES
9 INsTRUccIONEs DE sEGURIDAD IMPORTANTEs ESP AÑOL y En caso de que haya fuego en la asadera provocado por grasas, presione la tecla "UPPER CLEAR/OFF" o "LOWER CLEAR/OFF", y mantenga la puerta del horno cerrada para contener el fuego hasta que éste se apague. y Por razones de segurida...
Page 57 - NOTA; ANTES DE USAR; Accesorios
10 ANTEs DE UsAR NOTA y Comuníquese con el Centro de Atención al Cliente de LG en caso de que falte algún accesorio. y Por su seguridad y para lograr una óptima durabilidad del producto, utilice únicamente componentes autorizados. y El fabricante no será responsable por el mal funcionamiento del pro...
Page 58 - Componentes
11 ANTEs DE UsAR ESP AÑOL Componentes Asegúrese de entender los nombres y función de cada pieza.* A lo largo de este manual, las características y apariencia del producto pueden variar dependiendo de su modelo. soporte Anti- vuelco Parrillas Hornilla pequeña Hornilla extra grande Pestillo para autol...
Page 59 - CÓMO USAR; Hornillas a gas de la superficie; Antes de usar; su mano, agarradera, repasador u otro material sobre las mismas.
12 cÓMO UsAR CÓMO USAR Hornillas a gas de la superficie Antes de usar Lea todas las instrucciones antes de usar el producto. Asegúrese de que todas las hornillas estén correctamente colocadas. Asegúrese de que las hornillas y parrillas se hayan enfriado antes de apoyar su mano, agarradera, repasador...
Page 60 - Hornillas a Gas; Uso de las hornillas a gas de la super-; Cómo seleccionar el tamaño de llama
13 cÓMO UsAR ESP AÑOL Hornillas a Gas La cocina de su estufa tiene cinco hornillas selladas a gas.Estas pueden ser ensambladas y separadas. Siga la guía a continuación. 1 2 3 4 1 2 3 4 1 2 3 4 Hornilla mediana y grande Las hornillas medianas y grandes son las hornillas prin-cipalmente utilizadas par...
Page 61 - En caso de falla en la energía eléc-
14 cÓMO UsAR En caso de falla en la energía eléc- trica: En caso de que haya una falla en la energía eléctrica, puede encender las hornillas superiores con un fósforo. Las hornillas superiores que se encuentren en uso al producirse una falla en la energía eléctrica continuarán funcionando con normal...
Page 62 - Uso de la Parrilla
15 cÓMO UsAR ESP AÑOL PREcAUcIÓN NO retire la plancha de la parrilla hasta que las rejillas, su- perficies de la estufa y la propia parrilla se hayan enfriado por completo. PREcAUcIÓN La plancha de la parrilla puede calentarse mucho alusar la estufa, el horno o los sistemas de asado.Use siempre guan...
Page 63 - Cómo usar el Horno
16 cÓMO UsAR Cómo usar el Horno Antes de usar Lea todas las instrucciones antes de usar. Asegúrese de que el cable de alimentación eléctrica y la válvula de gas estén correctamente conectados. Verifíquelo por cuestiones de seguridad. Verifique cómo utilizar de manera correcta la estufa, dependiendo ...
Page 64 - No cubra ningún estante o base con papel aluminio.; En caso de falla en la energía eléctrica, no utilice el horno.
17 cÓMO UsAR ESP AÑOL No obstruya, toque o coloque objetos alrededor del conducto de venti-lación del horno cuando el mismo esté encendido. Su horno es ventilado a través de conductos ubicados en el centro, encima de la parrilla de la hornilla. No obstruya la ventilación del horno cuando éste se enc...
Page 65 - Cómo usar el panel de control
18 cÓMO UsAR Cómo usar el panel de control Horno superior: Nombre Descripción 1 BAKE Función tradicional de hornear. Consulte “HORNEAR” en la sección "Cómo usar". 2 BROIL Función tradicional de asar. Consulte “ASAR” en la sección "Cómo usar". 3 WARM Calienta la comida en el horno.Con...
Page 68 - Cómo seleccionar Grados Fahrenheit; Ajustes predeterminados mínimos y máximos:
21 cÓMO UsAR ESP AÑOL Cómo seleccionar Grados Fahrenheit o Celsius: Las temperatura del horno puede configurarse en grados Fahrenheit o Celsius. El ajuste predeterminado de fábrica es en grados Fahrenheit. Éste puede ser cambiado por el usu-ario. 1 Presione la tecla X hasta que aparezc “ i ” en la p...
Page 69 - Cómo usar el temporizador:; Cómo utilizar la característica de blo-
22 cÓMO UsAR Cómo usar el temporizador: El TIMER ON/OFF (TEMPORIZADOR ENCENDIDO/ APAGA- DO) superior o inferior sirve como un temporizador extra de la cocina que sonará cuando el tiempo establecido se haya completado. No comienza ni detiene la cocción. La característica TIMER ON/OFF superior o infer...
Page 70 - Cómo extraer y volver a colocar los estantes del horno; Para extraer los estantes del horno:; Para volver a colocar los estantes del
23 cÓMO UsAR ESP AÑOL Cómo extraer y volver a colocar los estantes del horno Extraiga coloque Para extraer los estantes del horno: 1 Con sus guantes para hornear, agarre el estante del horno. 2 Tire el estante hacia afuera hasta que haga tope. 3 Levante la parte frontal del estante. 4 Tire el estant...
Page 71 - HORNEAR
24 cÓMO UsAR HORNEAR (Horno Superior e Inferior) La función de HORNEADO se utiliza para preparar platillos tales como pasteles, panes, guisados y comidas asadas. Se puede programar el horno para que hornee a cualquier tem-peratura, desde 170°F (77°C) a 550°F (288°C). La temperatura predeterminada es...
Page 72 - Precalentamiento y ubicación de; Tabla para hornear
25 cÓMO UsAR ESP AÑOL Precalentamiento y ubicación de las bandejas y Para precalentar, ajuste la temperatura del horno a la indicada en la receta. Espere hasta que el horno alcance la temperatura ingresada antes de poner la comida en el horno. El precalentamiento es necesario para obtener resultados...
Page 74 - TABLA PARA LA FUNCIÓN DE ASAR
27 cÓMO UsAR ESP AÑOL This chart is only for reference. Adjust cook time according to your preference. Comida Cantidad y/o espesor Horno superior Comentarios Posición del estante Primer lado (minutos) Segundo lado (minutos) Carne molida Bien cocida 1 Iibra (4 hamburguesas)1/2 a 3/4” de espesor A 5-7...
Page 75 - COCCIÓN CON TEMPORIZADOR
28 cÓMO UsAR ESP AÑOL COCCIÓN CON TEMPORIZADOR (Horno superior e inferior) La función de COCCIÓN CON TEMPORIZADOR le permite programar el horno para cocinar durante un período de tiempo específico. Esta función solo puede utilizarse mientras se hornea. Para configurar la COCCIÓN CON TEMPORIZADOR (ej...
Page 76 - Como usar la convección del horno; CONVECCIÓN HORNEADO
29 cÓMO UsAR ESP AÑOL ESP AÑOL Como usar la convección del horno inferior (LDG3016ST) El sistema de convección utiliza un ventilador para hacer circular el calor del horno.Esto resulta en una mejora en la distribución del calor permi-tiendo un cocinado parejo y por lo tanto excelentes resulta-dos. C...
Page 77 - Tabla de horneado por convección
30 cÓMO UsAR 3 Utensilios de cocina para el cocinado por convección. Antes de usar el horno por convección, verifique sus utensi- lios de cocina dejen espacio para que el aire circule dentro del horno. Si va a hornear con varios utensilios de cocina deje espacio entre estos. También, asegúrese de qu...
Page 78 - CONVECCIÓN ASADO PARA EL
31 cÓMO UsAR ESP AÑOL CONVECCIÓN ASADO PARA EL HORNO INFERIOR (LDG3016ST) El modo de convección asado esta diseñado para otorgar un óptimo desempeño al asar. La función CONVECCIÓN ASADO combina el cocinado con el ventilador de convección para asar carnes. El aire precalentado circula alrededor de la...
Page 79 - Características especiales
32 cÓMO UsAR Características especiales PIZZA (Horno superior) Esta función fijara automáticamente la temperatura del horno superior para cocinar pizza congelada tanto de masa regular como de masa gruesa. Simplemente escoja el tipo de masa (P1 para masa regular y P2 para masa gruesa) e introduzca el...
Page 80 - FAVORITOS (LDG3016ST Horno
33 cÓMO UsAR ESP AÑOL LEVAR (Para el horno inferior) Esta característica mantiene el horno caliente para que los productos con levadura leven antes de hornearlos. Para programar la función LEVAR: 1 Utilice la bandeja B o C para levar. 2 Presione la tecla J . 3 Presione la tecla q . 4 Cuando el levad...
Page 81 - Para configurar el modo SABBAT:; SABBAT (Horno superior e
34 cÓMO UsAR Para configurar el modo SABBAT: 1 Presione la tecla A . 2 Utilizando las teclas numéricas, ingrese la temperatura deseada. 3 Presione la tecla q . 4 Presione y mantenga presionada la tecla X durante tres segundos. V isualización en pantalla (ejemplo): Para cambiar la temperatura mientra...
Page 82 - Cómo limpiar los cabezales/tapas de; CUIDADO Y LIMPIEZA; Hornilla a gas de la superficie
35 cUIDADO Y LIMPIEZA ESP AÑOL Cómo limpiar los cabezales/tapas de las hornillas Para lograr una llama pareja y completa, las hendiduras de los cabezales de las hornillas deben estar siempre limpias. Los cabezales de las hornillas y la tapa de la hornalla pueden levantarse. • Lave las tapas de las h...
Page 83 - Parrillas de las hornillas; Cómo limpiar las parrillas de las
36 cUIDADO Y LIMPIEZA Parrillas de las hornillas La estufa contiene tres parrillas separadas de estilo profesional. Para logar su máxima estabilidad, estas parrillas solo deben ser utilizadas cuando estén en la posición correcta. Las dos parrillas laterales pueden intercambiarse de izquierda a derec...
Page 84 - Superficie de la estufa; Superficies de acero inoxidable; Conductos de ventilación del horno; Panel de control
37 cUIDADO Y LIMPIEZA ESP AÑOL Superficie de la estufa Para evitar quemaduras, no limpie la superficie de la estufa hasta que se haya enfriado. Los alimentos con alto contenido ácido o los alimentos con alto contenido de azúcar pueden manchar la superficie si se dejan reposar en ésta. Lave y enjuagu...
Page 85 - Puerta del horno; Cómo extraer y volver a colocar las; Cómo extraer la puerta del horno
38 cUIDADO Y LIMPIEZA Puerta del horno No limpie a mano la junta de la puerta del horno Limpie a mano la puerta No limpie a mano la junta de la puerta del horno Limpie a mano la puerta y Utilice agua y jabón para limpiar la puerta del horno en profundidad. Enjuague bien. NO sumerja la puerta en agua...
Page 86 - Cómo volver a colocar la puerta del
39 cUIDADO Y LIMPIEZA ESP AÑOL Cómo volver a colocar la puerta del horno superior 1 Asegúrese de que las bisagras estén alineadas a una posición de 30 grados. 2 Deslice la puerta hacia las bisagras hasta que escuche un sonido de encastre y que los botones de liberación se hayan ajustado. 3 Abra la p...
Page 87 - AUTO LIMPIEZA
40 cUIDADO Y LIMPIEZA Cómo volver a colocar la puerta del horno inferior. 1 Tome firmemente ambos lados de la puerta por la parte superior y cierre la puerta hasta la posición correcta para extraerla (aproximadamente a cinco grados). 2 Coloque la hendidura del brazo de la bisagra en el borde inferio...
Page 88 - Antes de comenzar la AUTO; Luego de la Auto limpieza; Para programar la auto limpieza
41 cUIDADO Y LIMPIEZA ESP AÑOL Antes de comenzar la AUTO LIMPIEZA No limpie a mano la junta de la puerta del horno Limpie a mano la puerta y Quite las bandejas del horno, asadera, rejilla para asar, elementos de cocina, papel de aluminio y cualquier otro material del horno. y La cocina deberá estar ...
Page 89 - Cómo cambiar la luz del horno; Para reemplazar la luz del horno:; Cómo limpiar la bandeja y la rejilla
42 cUIDADO Y LIMPIEZA Cómo cambiar la luz del horno La luz del horno es una bombilla estándar para artefactos de 40 vatios (watts). Se encenderá cuando la puerta del horno esté abierta. Cuando la puerta del horno esté cerrada, presione la tecla M o Q para prender o apagar la luz. Para reemplazar la ...
Page 90 - ANTES DE SOLICITAR SERVICIO TÉCNICO
43 ANTEs DE sOLIcITAR sERVIcIO TÉcNIcO ESP AÑOL ANTES DE SOLICITAR SERVICIO TÉCNICO Síntomas y preguntas Posible causa/ solución Las hornillas superiores no encienden o no prenden de manera pareja. y Asegúrese de que el enchufe eléctrico está correctamente conectado a un tomacorriente con conexión a...
Page 92 - GARANTÍA
45 GARANTíA ESP AÑOL Para probar su cobertura de garantía Conserve la factura de venta del producto para probar la fecha en que lo compró. Deberá presentar la factura de venta en caso de recibir servicio técnico en garantía. Para ubicar el centro de servicio técnico o distribuidor de ventas autoriza...


 LG LSES6338F
User Manual
LG LSES6338F
User Manual
 LG LSGS6338F
User Manual
LG LSGS6338F
User Manual
 LG LSGS6338N
User Manual
LG LSGS6338N
User Manual
 LG LSIS6338F
User Manual
LG LSIS6338F
User Manual
 LG LTEL7337D
User Manual
LG LTEL7337D
User Manual
 LG LCRF0222
User Manual
LG LCRF0222
User Manual
 LG LDE3015SB
User Manual
LG LDE3015SB
User Manual
 LG LDE3015ST
User Manual
LG LDE3015ST
User Manual
 LG LDE3015SW
User Manual
LG LDE3015SW
User Manual
 LG LDE3017SB
User Manual
LG LDE3017SB
User Manual