Page 2 - OWNER’S MANUAL; ELECTRIC DOUBLE
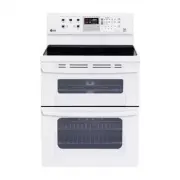
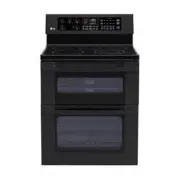
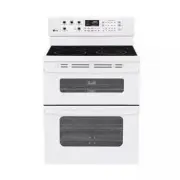
LDE3037ST LDE3037SB LDE3037SW LDE3035ST LDE3035SB LDE3035SW LDE3031ST LDE3037BD www.lg.com OWNER’S MANUAL ELECTRIC DOUBLE OVEN RANGE Please read this guide thoroughly before operating and keep it handy for reference at all times. ENGLISH ESP AÑOL (REV.12 150709)
Page 3 - TABLE OF CONTENTS
2 TABLE OF CONTENTS TABLE OF CONTENTS 3 IMPORTANT SAFETY INSTRUCTIONS 10 OVERVIEW 10 Accessories1 1 Range Overview13 Control Panel Overview 14 FEATURES 14 Settings14 Clock15 Timer On/Off15 Convection Auto Conversion (on some models)15 Oven Temperature Adjustment16 Language (on some models)16 Preheat...
Page 4 - IMPORTANT SAFETY INSTRUCTIONS; ANTI-TIP SAFETY PRECAUTIONS; WARNING
3 ENGLISH IMPORTANT SAFETY INFORMATION IMPORTANT SAFETY INSTRUCTIONS Read and follow all instructions before using your oven to prevent the risk of fire, electric shock, personal injury, or damage when using the range. This guide does not cover all possible conditions that may occur. Always contact ...
Page 5 - SAFETY PRECAUTIONS; • Be careful when removing and lifting the door.; CAUTION
4 IMPORTANT SAFETY INFORMATION • Be certain that your appliance is properly installed and grounded by a qualified technician. • Do not repair or replace any part of the appliance unless specifically recommended in the manual. All other servicing should be performed by a qualified technician. • Alway...
Page 6 - REMOVE FLAMMABLE AND EXPLOSIVE
5 ENGLISH IMPORTANT SAFETY INFORMATION WARNING • DO NOT step or sit on the oven door. Install the anti-tip bracket packed with range. - The range could be tipped and injury might result from spilled hot liquid, food, or the range itself. - If the range is pulled away from the wall for cleaning, serv...
Page 7 - ELECTRICAL SAFETY; cause permanent damage to the oven bottom finish.; DEEP FAT FRYERS; • Use extreme caution when moving or disposing of hot grease.; SAFETY DURING USE; • Do not touch the oven racks while they are hot.
6 IMPORTANT SAFETY INFORMATION ELECTRICAL SAFETY • Protective Liners. Do not use aluminum foil or any other material to line the oven bottom. Improper installation of these liners may result in a risk of electric shock or fire. • Do Not allow aluminum foil or the temperature probe to contact heating...
Page 8 - result in ignition of clothing.; CHILD SAFETY
7 ENGLISH IMPORTANT SAFETY INFORMATION • If an oven fire occur, DO NOT put water or flour on the fire. Flour may be explosive and water can spread a grease fire and cause personal injury. • DO NOT use the broiler pan without the grid. DO NOT cover the grid with aluminum foil. • Do not use plastic to...
Page 9 - GLASS/CERAMIC COOKING SURFACES
8 IMPORTANT SAFETY INFORMATION • Let hot utensils cool in a safe place, out of reach of small children. • Children should not be allowed to play with controls or other parts of the appliance. GLASS/CERAMIC COOKING SURFACES Stand to the side of the range when opening the oven door. The hot air and st...
Page 10 - • DO NOT use scrub pads or abrasive cleaning pads.; - They may damage your glass cooktop surface.; • Do not slide anything metal or glass across the cooktop.; SAFETY WHEN CLEANING; • Make sure oven lights are cool before cleaning.; to malfunction; COOK MEAT AND POULTRY THOROUGHLY
9 ENGLISH IMPORTANT SAFETY INFORMATION • When warming foods do not use containers that seal. Allow venting for heated air to escape. • Some cleaners can produce dangerous fumes if applied to a hot surface. • DO NOT use a steel-wool pad. - It will scratch the surface. • DO NOT use scrub pads or abras...
Page 11 - OVERVIEW; ACCESSORIES; NOTE
10 OVERVIEW OVERVIEW ACCESSORIES Make sure that all parts are included after purchasing this product. Accessories for installation Accessories for maintenance (LDE3037, LDE3035 Model Only) Template Cooktop Cleaner (1ea) Standard rack (3ea) Spray bottle (1ea) Non-scratch Scouring Pad (1ea) Owner’s ma...
Page 12 - RANGE OVERVIEW
11 ENGLISH OVERVIEW RANGE OVERVIEW Make sure to understand the names and function of each part.* Throughout this manual, the features and appearance may vary depending on your model. For model : LDE3037 Warming Zone Element Single element Double element Ceramic glass Name & Rating label Anti-tip...
Page 14 - CONTROL PANEL OVERVIEW
13 ENGLISH OVERVIEW CONTROL PANEL OVERVIEW Cooktop Element Control Features Oven Controls Number Buttons Clear Off Button Start/ Lockout Button Cooktop Element Controls are set up in the same order as the corresponding elements. NOTE HS (Hot Surface) Indicator The HS indicator will appear in the dis...
Page 15 - FEATURES; SETTINGS
14 FEATURES FEATURES SETTINGS Use the SETTING button to set Convection Auto Conversion (on some models), Language (on some models), Adjust oven temperature, Preheating Alarm Light, Beeper Volume and to switch the temperature scale between Fahrenheit and Celsius. CLOCK The clock must be set to the co...
Page 16 - CONVECTION AUTO CONVERSION
15 ENGLISH FEATURES TIMER ON/OFF The UPPER or LOWER TIMER ON/OFF serves as an extra timer in the kitchen that will beep when the set time has run out. It does not start or stop cooking.The UPPER or LOWER TIMER ON/OFF feature can be used during any of the other oven control functions. The UPPER and L...
Page 17 - PREHEATING ALARM LIGHT; LOCKOUT
16 FEATURES LANGUAGE (ON SOME MODELS) The default language of the display is English. It can be changed to Spanish or French. 1. Press the SETTING button until “Lng” appears in the display. Press the 1 button for English, 2 button for Spanish, or the 3 button for French. 2. Press the START button to...
Page 19 - USING THE COOKTOP; COOKING AREAS; USING THE COOKTOP ELEMENTS
18 USING THE COOKTOP USING THE COOKTOP COOKING AREAS The cooking areas on your range are identified by permanent circles on the glass cooktop surface. For the most efficient cooking, fit the pan size to the element size.Pans should not extend more than 1/2 to 1-inch beyond the cooking area.When a co...
Page 21 - The recommended surface cooking setting; Home canning tips
20 USING THE COOKTOP The recommended surface cooking setting Element Temp. Recommended Use Single or Dual 8.5-Hi • Bring liquid to a boil • Start cooking 5.5-8.0 • Hold a rapid boil, frying, deep fat fry • Quickly brown or sear food 3.5-5.0 • Maintain a slow boil • Fry or saute foods • Cook soups, s...
Page 22 - USING THE OVEN; BEFORE USING THE OVEN; OVEN VENT; USING OVEN RACKS; OVEN CONTROLS
21 ENGLISH USING THE OVEN USING THE OVEN BEFORE USING THE OVEN • When using an oven thermometer in the oven cavity, the temperature may differ from the actual set oven temperature. NOTE • It is normal for the convection fan to run while preheating during a regular bake cycle. • The convection fan mo...
Page 23 - BAKE; CONVECTION BAKE
22 USING THE OVEN BAKE BAKE is used to prepare foods such as pastries, breads and casseroles. The oven can be programmed to bake at any temperature from 170°F (77°C) to 550°F (288°C). The default temperature is 350°F (177°C). Setting the BAKE function (example, 375°F): 1. Press the BAKE button. 2. S...
Page 24 - CONVECTION ROAST; RECOMMENDED CONVECTION
23 ENGLISH USING THE OVEN CONVECTION ROAST (ON SOME MODELS) The CONVECTION ROAST feature is designed to give optimum roasting performance. CONVECTION ROAST combines cooking with the convection fan to roast meats and poultry. The heated air circulates around the food from all sides, sealing in juices...
Page 25 - RECOMMENDED BAKING AND
24 USING THE OVEN RECOMMENDED BAKING AND ROASTING GUIDE Baking results will be better if baking pans are centered in the oven as much as possible. If cooking on multiple racks, place the oven racks in positions AS SHOWN BELOW FIGURE. Rack and Pan Placement Rack For model : LDE3037 For model : LDE303...
Page 26 - BROIL
25 ENGLISH USING THE OVEN BROIL The Broil function uses intense heat from the upper heating element to cook food. BROIL works best for tender cuts of meat, fish, and thinly cut vegetables.Some models may feature a hybrid broiler consisting of an inner broiler that utilizes a carbon heating element w...
Page 27 - RECOMMENDED BROILING GUIDE
26 USING THE OVEN RECOMMENDED BROILING GUIDE The size, weight, thickness, starting temperature, and your preference of doneness will affect broiling times. This guide is based on meats at refrigerator temperature. For best results when broiling, use a pan designed for broiling (refer to Fig.1) Fig.1...
Page 28 - Broiling Tips; PROOF
27 ENGLISH USING THE OVEN Broiling Tips Beef • Steaks and chops should always be allowed to rest for five minutes before cutting into them and eating. This allows the heat to distribute evenly through the food and creates a more tender and juicy result. • Consider removing thick pieces of meat from ...
Page 31 - CARE AND CLEANING; CLEANING THE GLASS/CERAMIC
30 CARE AND CLEANING CARE AND CLEANING CLEANING THE GLASS/CERAMIC COOKTOP • DO NOT use scrub pads or abrasive cleaning pads. They may damage your cooktop surface. • For your safety, wear an oven mitt or potholder while cleaning the hot cooking surface. CAUTION Use Ceramic Cooktop Cleaner on the glas...
Page 32 - SELF CLEAN
31 ENGLISH CARE AND CLEANING Metal Marks and Scratches 1. Be careful not to slide pots and pans across the cooktop. Doing so will leave metal markings on the cooktop surface. To help remove these marks, use a ceramic cooktop cleaner with a cleaning pad for ceramic cooktops. 2. If pots with a thin ov...
Page 33 - Setting Self Clean; Setting Self Clean with a delayed
32 CARE AND CLEANING Setting Self Clean The Self- Clean function has cycle times of 3, 4, or 5 hours. Self Clean Soil Guide Soil Level Cycle Setting Lightly Soiled Oven Cavity 3 Hour Self Clean Moderately Soiled Oven Cavity 4 Hour Self Clean Heavily Soiled Oven Cavity 5 Hour Self Clean 1. Remove all...
Page 34 - EasyCleanTM; CLEANING TIPS
33 ENGLISH CARE AND CLEANING EasyClean™ LG’s EasyClean™ enamel technology gives you two cleaning options for the inside of your range. The EasyClean™ feature takes advantage of LG’s new enamel to help lift soils without harsh chemicals, and it runs using ONLY WATER for just 20 minutes in low tempera...
Page 35 - EasyCleanTM INSTRUCTION GUIDE
34 CARE AND CLEANING EasyClean™ INSTRUCTION GUIDE 1. Remove oven racks and accessories from the oven.2. Scrape off and remove any burnt-on debris with a plastic scraper. Suggested plastic scrapers: • Hard plastic spatula • Plastic pan scraper • Plastic paint scraper • Old credit card 3. Fill a spray...
Page 36 - CLEANING THE EXTERIOR; Broiler Pan and Grid
35 ENGLISH CARE AND CLEANING CLEANING THE EXTERIOR Painted and Decorative Trim For general cleaning, use a cloth with hot soapy water. For more difficult soils and built-up grease, apply a liquid detergent directly onto the soil. Leave it on for 30 to 60 minutes. Rinse with a damp cloth and dry. Do ...
Page 37 - REMOVING & REPLACING THE; UPPER OVEN
36 CARE AND CLEANING REMOVING & REPLACING THE LIFT-OFF OVEN DOOR • Be careful when removing and lifting the door.• DO NOT lift the door by the handle. - The door is very heavy. CAUTION UPPER OVEN To remove the door: 1. Fully open the door.2. Lift up and rotate the hinge locks toward the oven fra...
Page 38 - LOWER OVEN; DOOR CARE INSTRUCTIONS
37 ENGLISH CARE AND CLEANING LOWER OVEN To remove the door: 1. Fully open the door.2. Unlock the hinge locks, rotating them as far toward the open door frame as they will go. Slot Lock Unlock Hinge lock 3. Firmly grasp both sides of the door at the top. 4. Close the door to the removal position (app...
Page 39 - FAQs
38 FAQs FAQs What types of cookware are recommended for use with my cook top? • The pans must have a flat bottom and straight sides. • Only use heavy- gauge pans. • The pan size must match the amount of food to be prepared and the size of the surface element. • Use tight fitting lids. • Only use fla...
Page 41 - TROUBLESHOOTING; BEFORE CALLING FOR SERVICE
40 TROUBLESHOOTING TROUBLESHOOTING BEFORE CALLING FOR SERVICE Before you call for service, review this list. It may save you time and expense. The list includes common occurrences that are not the result of defective workmanship or materials in this appliance. Problem Possible Causes / Solutions Ran...
Page 46 - MANUAL DE PROPIETARIO; ESTUFA ELÉCTRICA
LDE3037ST LDE3037SB LDE3037SW LDE3035ST LDE3035SB LDE3035SW LDE3031ST LDE3037BD P/No.: MFL63291204 www.lg.com MANUAL DE PROPIETARIO ESTUFA ELÉCTRICA DE DOBLE HORNO Lea detenidamente estas instrucciones antes utilizar y guárdelas como referencia para el futuro. ESP AÑOL
Page 47 - ÍNDICE
2 ÍNDICE ÍNDICE 3 IMPORTANTES INSTRUCCIONES DE SEGURIDAD 11 DESCRIPCIÓN GENERAL 1 1 Accesorios12 Descripción general de la estufa14 Descripción general del panel de control 15 CARACTERÍSTICAS 15 Configuración15 Reloj16 Temporizador encendido/apagado16 Conversión automática de convección (en algunos ...
Page 48 - IMPORTANTES INSTRUCCIONES DE SEGURIDAD; ADVERTENCIA; ADVERTENCIA
3 ESP AÑOL IMPORTANTES INSTRUCCIONES DE SEGURIDAD IMPORTANTES INSTRUCCIONES DE SEGURIDAD Lea y siga todas las instrucciones antes de usar su horno para evitar riesgos de incendios, descargas eléctricas, lesiones a las personas o daños al utilizar la cocina. Esta guía no incluye todas las situaciones...
Page 49 - • Asegúrese de que un técnico calificado; PRECAUCIONES DE SEGURIDAD
4 IMPORTANTES INSTRUCCIONES DE SEGURIDAD • Asegúrese de que un técnico calificado realice la instalación y puesta a tierra de este electrodoméstico en forma adecuada. • No repare ni reemplace ninguna parte del electrodoméstico, salvo que esté específicamente recomendado en el manual. Cualquier otra ...
Page 50 - PRECAUCIÓN; horno con papel de aluminio o cualquier otro material.; Hacerlo alterará la distribución; repasador u otro paño grueso para quitar la comida.; ELIMINE CUALQUIER MATERIAL FLAMABLE Y
5 ESP AÑOL IMPORTANTES INSTRUCCIONES DE SEGURIDAD PRECAUCIÓN • NO cubra las paredes del horno, estantes, parte inferior, o cualquier otra parte del horno con papel de aluminio o cualquier otro material. Hacerlo alterará la distribución del calor, producirá malos resultados en la cocción y provocará ...
Page 51 - SEGURIDAD ELÉCTRICA; • Revestimiento Protector.; COLOCACIÓN DE LA BANDEJA
6 IMPORTANTES INSTRUCCIONES DE SEGURIDAD • No almacene o use materiales flamables dentro del horno o cerca del cooktop. Materiales flamables incluyen papel, plastico, guantes, ropa, revestimientos para paredes, cortinas, gasolina u otros vapores flamables y liquidos como grasas o aceite para cocinar...
Page 52 - SEGURIDAD DURANTE SU USO; • No toque los estantes del horno cuando estén calientes.
7 ESP AÑOL IMPORTANTES INSTRUCCIONES DE SEGURIDAD SEGURIDAD DURANTE SU USO • No toque los estantes del horno cuando estén calientes. • Si el bastidor debe ser movido mientras el horno está caliente, no permita que la agarradera en contacto con el elemento de calentamiento en el horno caliente. • Sie...
Page 53 - SEGURIDAD DE LOS NIÑOS; SUPERFICIES DE COCCIÓN DE VITROCERÁMICA
8 IMPORTANTES INSTRUCCIONES DE SEGURIDAD SEGURIDAD DE LOS NIÑOS ADVERTENCIA • Mantenga a los niños y a las mascotas lejos del horno. • Nunca permita que un niño se cuelgue de la puerta del horno. • No permita que los niños se arrastren hacia adentro del horno. • Las partes accesibles pueden calentar...
Page 54 - tarea intensa de limpieza.; - Podrían dañar la superficie de vidrio de la estufa.
9 ESP AÑOL IMPORTANTES INSTRUCCIONES DE SEGURIDAD • Limpie la estufa con Precaución. No utilice esponjas o paños para limpiar derrames en una superficie de cocción caliente. Utilice una espátula metálica adecuada. • NO utilice la superficie de vidrio de la estufa como tabla de cortar. • NO coloque n...
Page 55 - SEGURIDAD AL LIMPIAR; • Antes de realizar la auto-limpieza del horno.; COCINAR BIEN LA CARNE Y LAS AVES; • Pescado/Frutos del Mar 145° F
10 IMPORTANTES INSTRUCCIONES DE SEGURIDAD SEGURIDAD AL LIMPIAR PRECAUCIÓN • Abra una ventana y encienda un ventilador o extractor antes de realizar la auto-limpieza. • No Utilizar Limpiadores de Horno. No debe utilizarse ningún limpiador de hornos o protector de recubrimiento del horno comercial de ...
Page 56 - DESCRIPCIÓN GENERAL; ACCESORIOS; NOTA
11 ESP AÑOL DESCRIPCIÓN GENERAL DESCRIPCIÓN GENERAL ACCESORIOS Asegúrese de que todas las piezas estén incluidas antes de comprar el producto. Accesorios para la instalación Accesorios para el mantenimiento (Solo los modelos LDE3037, LDE3035) Plantilla Limpiador para Estufas (1 de cada uno) Bandeja ...
Page 57 - DESCRIPCIÓN GENERAL DE LA ESTUFA
12 DESCRIPCIÓN GENERAL DESCRIPCIÓN GENERAL DE LA ESTUFA Asegúrese de entender los nombres y función de cada pieza. * A lo largo de este manual, las características y apariencia del producto pueden variar dependiendo de su modelo. Para el modelo LDE3037 Elemento de zona de calentamiento Elemento únic...
Page 59 - DESCRIPCIÓN GENERAL DEL PANEL DE CONTROL
14 DESCRIPCIÓN GENERAL Los Controles de las Hornallas de la Estufa están ubicados en el mismo orden que las hornallas correspondientes. NOTA Indicador HS (Superficie Caliente) El error HS aparecerá en la pantalla cuando se haya apagado la hornalla o durante el ciclo de auto-limpieza. El indicador HS...
Page 60 - CARACTERÍSTICAS; CONFIGURACIÓN
15 ESP AÑOL CARACTERÍSTICAS CARACTERÍSTICAS CONFIGURACIÓN Utilice el botón SETTING para configurar la Conversión Automática de Convección (en algunos modelos), el Ajustes para la Temperatura del Horno, el Idioma (en algunos modelos), la Luz de Alarma de Precalentamiento, el Volumen de la Alerta Sono...
Page 63 - HORA DE INICIO (COCCIÓN; TIEMPO DE COCCIÓN (COCCIÓN
18 CARACTERÍSTICAS HORA DE INICIO (COCCIÓN temporizada retardada) El temporizador automático de la función COCCIÓN TEMPORIZADA RETARDADA ENCENDERÁ y APAGARÁ el horno en el horario que usted seleccione. Esta función puede utilizarse únicamente con los: Modos HORNEAR, HORNEADO POR CONVECCIÓN y ASADO P...
Page 64 - USO DE LA ESTUFA; ÁREAS DE COCCIÓN; USO DE LAS HORNALLAS DE LA
19 ESP AÑOL USO DE LA ESTUFA USO DE LA ESTUFA ÁREAS DE COCCIÓN Las áreas de cocción de su estufa están identificadas por círculos permanentes sobre la superficie de vidrio de la estufa. Para una cocción más eficiente, haga coincidir el tamaño del recipiente con el tamaño de la hornalla. Los recipien...
Page 66 - Configuración de cocción de superficie; Consejos para conservas caseras
21 ESP AÑOL USO DE LA ESTUFA Configuración de cocción de superficie recomendada Hornalla Temp. Uso Recomendado Simple o Dual 8,5-Hi • Hacer hervir líquidos • Comenzar la cocción 5,5-8,0 • Realizar un hervor, sumergir o freído rápido • Dorar o sellar los alimentos en forma rápida. 3,5-5,0 • Realizar ...
Page 67 - USO DEL HORNO; SACAR Y VOLVER A COLOCAR LOS; CHIMENEA DEL HORNO; ANTES DE USAR LAS BANDEJAS
22 USO DEL HORNO USO DEL HORNO SACAR Y VOLVER A COLOCAR LOS ESTANTES DEL HORNO • Cuando se utiliza un termómetro de horno en la cavidad del horno, la temperatura puede diferir de la temperatura de ajuste real del horno. NOTA • E s n o r m a l q u e e l v e n t i l a d o r d e c o n v e c c i ó n fun...
Page 68 - CONVECTION BAKE (HORNEADO
23 ESP AÑOL USO DEL HORNO BAKE (HORNEADO) BAKE se usa para preparar alimentos tales como pastelería panes, cazuelas. Puede programarse el horno para que hornee a cualquier temperatura desde 170° F (77° C) hasta 550°F (288° C). La temperatura predeterminada es de 350° F (177° C). Configuración de la ...
Page 69 - CONVECTION ROAST (ASADO POR; GUÍA RECOMENDADA PARA
24 USO DEL HORNO CONVECTION ROAST (ASADO POR CONVECCIÓN) (EN ALGUNOS MODELOS) La caracteristica CONV Roast (rostizado por conveccion) se encuentra disenada para ofrecer un optimo desempeno de rostizado. La caracteristica de rostizado por conveccion combina una coccion con el ventilador de conveccion...
Page 70 - GUÍA DE RECOMENDACIONES
25 ESP AÑOL USO DEL HORNO GUÍA DE RECOMENDACIONES PARA HORNEAR Y ASAR Los resultados de horneado seran mejores si los moldes para hornear se centran en el horno. Si cocina con múltiples bandejas, coloque las bandejas en la posicion COMO SE INDICA EN LA DIBUJO. Colocación del Estante y la Bandeja Ban...
Page 71 - SPEED BROIL (ASADO A LA
26 USO DEL HORNO BROIL (ASADO A LA PARRILLA) La función Asado a la parrilla utiliza el calor intenso de la hornalla superior para cocinar la comida. El ASADO A LA PARRILLA funciona mejor con cortes tiernos de carne, pescado y vegetales finamente cortados.Algunos modelos pueden tener una asadera híbr...
Page 72 - GUÍA DE ASADO RECOMENDADO
27 ESP AÑOL USO DEL HORNO GUÍA DE ASADO RECOMENDADO El tamaño, peso, grosor, temperatura inicial y el punto de cocción preferido afectarán los tiempos de asado. Esta guía está basada en carnes a temperatura de refrigerador. Para mejores resultados durante el asado, utilice un recipiente diseñado par...
Page 73 - Consejos para el Asado a la Parrilla; FERMENTAR
28 USO DEL HORNO Consejos para el Asado a la Parrilla Carne vacuna • Siempre debe dejarse descansar el lomo y las costillas durante cinco minutos antes de cortarlos y comerlos. Esto permite que el calor se distribuya en forma pareja en toda la comida y brindando un resultado más tierno y jugoso. • C...
Page 74 - KIDS MEAL (ALIMENTOS PARA; FAVORITOS
29 ESP AÑOL USO DEL HORNO KIDS MEAL (ALIMENTOS PARA NIÑOS) (EN ALGUNOS MODELOS) Esta función está especialmente diseñada para cocinar los alimentos más populares entre los niños como la pizza de bordes regulares, pizza de bordes levantados, croquetas de pollo, papas fritas y hamburguesas.Al utilizar...
Page 76 - CUIDADO Y LIMPIEZA; LIMPIEZA DE LA ESTUFA DE
31 ESP AÑOL CUIDADO Y LIMPIEZA CUIDADO Y LIMPIEZA LIMPIEZA DE LA ESTUFA DE VITROCERÁMICA • NO utilice esponjas de fibra o esponjas de limpieza abrasivas. Podrían dañar la superficie de su estufa. • Para su seguridad, utilice un guante de cocina o agarradera para limpiar la superficie caliente de la ...
Page 78 - Configuración de la Auto-limpieza
33 ESP AÑOL CUIDADO Y LIMPIEZA Configuración de la Auto-limpieza La función de Auto-Limpieza tiene ciclos que pueden durar 3, 4, o 5 horas. Guía de Suciedad para la Auto-limpieza Nivel de Suciedad Configuración del Ciclo Cavidad del horno levemente sucia Auto-limpieza de 3 Horas Cavidad del horno mo...
Page 79 - CONSEJOS DE LIMPIEZA
34 CUIDADO Y LIMPIEZA EasyClean™ El nuevo horno de LG con tecnología EasyClean™ le otorga dos opciones de limpieza para el interior de su estufa. La función EasyClean™ toma ventaja de la nueva tecnología de esmalte de LG para ayudar a remover suciedades sin químicos severos, y funciona tan solo usan...
Page 80 - GUÍA DE INSTRUCCIÓN EasyCleanTM
35 ESP AÑOL CUIDADO Y LIMPIEZA GUÍA DE INSTRUCCIÓN EasyClean™ 1. Retire bandejas y accesorios del horno.2. Talle y remueva cualquier resto quemado con la espátula de plástico. Espátulas de Plástico Sugeridas: • Paleta de plástico duro • Espátula de plástico de cocina • Espátula de plástico para pint...
Page 81 - LIMPIEZA EXTERIOR; Asadera y Rejilla
36 CUIDADO Y LIMPIEZA LIMPIEZA EXTERIOR Revestimiento Pintado y Decorativo Para la limpieza general, utilice un paño con agua caliente jabonosa. Para suciedades más difíciles y grasa acumulada, aplique detergente líquido directamente sobre la suciedad. Déjelo actuar de 30 a 60 minutos. Enjuague con ...
Page 82 - CÓMO QUITAR Y REEMPLAZAR LA; HORNO SUPERIOR
37 ESP AÑOL CUIDADO Y LIMPIEZA CÓMO QUITAR Y REEMPLAZAR LA PUERTA DEL HORNO DESMONTABLE • Tenga cuidado al quitar y levantar la puerta.• NO levante la puerta de la manija. - La puerta es muy pesada. PRECAUCIÓN HORNO SUPERIOR Para quitar la puerta: 1. Abra la puerta completamente.2. Eleve el cierre d...
Page 83 - HORNO INFERIOR; INSTRUCCIONES PARA EL
38 CUIDADO Y LIMPIEZA HORNO INFERIOR Para retirar la puerta: 1. Abra la puerta completamente.2. Tire de los cierres de las bisagras hacia el marco de la puerta a la posición desbloqueada. Ranura Bloqueo Desbloqueo Cierre de bisagra 3. Sujete con fuerza ambos lados de la puerta desde la parte superio...
Page 84 - PREGUNTAS FRECUENTES
39 ESP AÑOL PREGUNTAS FRECUENTES PREGUNTAS FRECUENTES ¿Qué tipo de recipientes de cocción se recomiendan para usar con mi estufa? • Los recipientes deben tener base plana y lados rectos. • Use únicamente recipientes de gran espesor. • El tamaño de los recipientes de cocción debe ser el adecuado para...
Page 86 - IDENTIFICACIÓN Y SOLUCIÓN DE PROBLEMAS; ANTES DE LLAMAR AL SERVICIO TÉCNICO
41 ESP AÑOL IDENTIFICACIÓN Y SOLUCIÓN DE PROBLEMAS RESOLUCION DE PROBLEMAS IDENTIFICACIÓN Y SOLUCIÓN DE PROBLEMAS ANTES DE LLAMAR AL SERVICIO TÉCNICO Antes de llamar al servicio técnico, examine esta lista. Puede ahorrarle tiempo y dinero. La lista incluye situaciones comunes que no son el resultado...
Page 91 - NOTAS
Page 93 - Register your product Online!
Printed in Mexico www.lg.com Register your product Online! LG Customer Information Center 1-800-243-0000 1-888-542-2623 USA, Consumer UserCANADA


 LG LSES6338F
User Manual
LG LSES6338F
User Manual
 LG LSGS6338F
User Manual
LG LSGS6338F
User Manual
 LG LSGS6338N
User Manual
LG LSGS6338N
User Manual
 LG LSIS6338F
User Manual
LG LSIS6338F
User Manual
 LG LTEL7337D
User Manual
LG LTEL7337D
User Manual
 LG LCRF0222
User Manual
LG LCRF0222
User Manual
 LG LDE3015SB
User Manual
LG LDE3015SB
User Manual
 LG LDE3015ST
User Manual
LG LDE3015ST
User Manual
 LG LDE3015SW
User Manual
LG LDE3015SW
User Manual
 LG LDE3017SB
User Manual
LG LDE3017SB
User Manual