LG LDE3015SW - Manuals
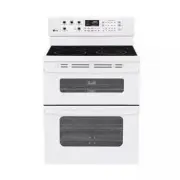
LG LDE3015SW Range – User Manual, Installation Manual, Manual in PDF format online.
Manuals:
User Manual LG LDE3015SW


Summary
2 Staple your receipt here. Product Registration Information Model: Serial Number:Date of Purchase: I N T R O D U C T I O N IMPORTANT SAFETY INFORMATION .... 3-9 SURFACE CONTROLS COOKING Locations of Surface Elements and Controls ............ 10Hot Surface Indicator ....................................
3 ENGLISH I M P O R TA N T S A F E T Y I N F O R M AT I O N SAFETY PRECAUTIONS • This appliance is not intended for use by persons (including children) with reduced physical, sensory or mental capabilities, or lack of experience and knowledge, unless they have been given supervision or instruction c...
5 ENGLISH I M P O R TA N T S A F E T Y I N F O R M AT I O N READ ALL INSTRUCTIONS BEFORE USE ELECTRICAL SAFETY • Protective Liners. Do not use aluminum foil or any other material to line the oven bottoms. Improper installation of these liners may result in a risk of electric shock or fire. • Do Not ...
Installation Manual LG LDE3015SW


Manual LG LDE3015SW


Summary
2 TABLE OF CONTENTS TABLE OF CONTENTS 3 SAFETY 3 Before You Begin 3 Important Safety Instructions 5 Prepare to Install the Range 6 PREPARE TO INSTALL RANGE 6 Installation Drawings 7 ELECTRICAL CONNECTIONS 7 Electrical Connection Requirements 7 Connect Range Cord 8 3-Wire Connection With a Power Supp...
3 ENGLISH SAFETY BEFORE YOU BEGIN Remove all tape and packing materials before using the range. Dispose of all plastic bags after unpacking the range. Never allow children to play with packing materials. You can download the installation and owner’s manual at: http://www.lg.com. IMPORTANT SAFETY INS...
4 SAFETY • Using an extension cord to connect the power is prohibited. The way to connect the power cord and plug directly is strongly recommended. • Electrical ground is required on this appliance.• You should make sure that the power cord is not pinched by the range or heavy objects. - Failure to ...
LG Ranges Manuals
-
 LG LSES6338F
User Manual
LG LSES6338F
User Manual
-
LG LSES6338N
User Manual
-
 LG LSGS6338F
User Manual
LG LSGS6338F
User Manual
-
 LG LSGS6338N
User Manual
LG LSGS6338N
User Manual
-
 LG LSIS6338F
User Manual
LG LSIS6338F
User Manual
-
 LG LTEL7337D
User Manual
LG LTEL7337D
User Manual
-
 LG LCRF0222
User Manual
LG LCRF0222
User Manual
-
LG LCRF0222S
User Manual
-
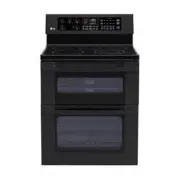 LG LDE3015SB
User Manual
LG LDE3015SB
User Manual
-
LG LDE3015SB
Installation Manual
-
LG LDE3015SB
Manual
-
 LG LDE3015ST
User Manual
LG LDE3015ST
User Manual
-
LG LDE3015ST
Installation Manual
-
LG LDE3015ST
Manual
-
 LG LDE3017SB
User Manual
LG LDE3017SB
User Manual
-
LG LDE3017SB
Manual
-
 LG LDE3017ST
User Manual
LG LDE3017ST
User Manual
-
LG LDE3017ST
Manual
-
 LG LDE3017SW
User Manual
LG LDE3017SW
User Manual