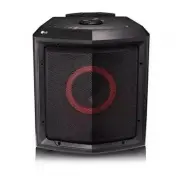
LG FJ5 - Manuals

User Manual LG FJ5


Summary
1 Getting Started Getting Started 2 Getting Star ted 1 Safety Information CAUTION RISK OF ELECTRIC SHOCK DO NOT OPEN CAUTION: TO REDUCE THE RISK OF ELECTRIC SHOCK DO NOT REMOVE COVER (OR BACK) NO USER-SERVICEABLE PARTS INSIDE REFER SERVICING TO QUALIFIED SERVICE PERSONNEL. This lightning flash with ...
Getting Started 3 Getting Star ted 1 CAUTION concerning the Power Cord The Power Plug is the disconnecting device. In case of an emergency, the Power Plug must remain readily accessible.Check the specification page of this owner’s manual to be certain of the current requirements. Do not overload wal...
Table of Contents 4 Table of Contents 1 Getting Started 2 Safety Information 6 Unique Features 7 Playable file Requirement 7 – Music file requirement 7 – Compatible USB Devices 7 – USB device requirement 8 Remote control 10 Top panel 11 Front panel / Rear panel 12 How to place the unit 2 Connecting ...
LG Portable Speakers Manuals
-
 LG CK99
User Manual
LG CK99
User Manual
-
 LG CM4590
User Manual
LG CM4590
User Manual
-
 LG FH2
User Manual
LG FH2
User Manual
-
 LG FJ3
User Manual
LG FJ3
User Manual
-
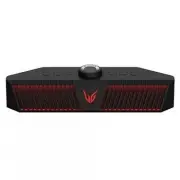
 LG GP3
User Manual
LG GP3
User Manual
-
 LG GP9
User Manual
LG GP9
User Manual
-
 LG ND5630
User Manual
LG ND5630
User Manual
-
 LG ND8630
User Manual
LG ND8630
User Manual
-
 LG NP3530
User Manual
LG NP3530
User Manual
-
 LG NP5550WO
User Manual
LG NP5550WO
User Manual
-
 LG NP7550
User Manual
LG NP7550
User Manual
-
 LG NP8340
User Manual
LG NP8340
User Manual
-
 LG NP8540
User Manual
LG NP8540
User Manual
-
 LG NP8740
User Manual
LG NP8740
User Manual
-
 LG P2
User Manual
LG P2
User Manual
-
 LG P5
User Manual
LG P5
User Manual
-
 LG P7
User Manual
LG P7
User Manual
-
 LG PK3
User Manual
LG PK3
User Manual
-
 LG PK5
User Manual
LG PK5
User Manual
-
 LG PK7
User Manual
LG PK7
User Manual