LG BP135 - Manuals
LG BP135 Player – User Manual in PDF format online.
Manuals:
User Manual LG BP135


Summary
1 Getting Started Getting Started 2 Getting S tar ted 1 Safety Information CAUTION RISK OF ELECTRIC SHOCK DO NOT OPEN CAUTION: TO REDUCE THE RISK OF ELECTRIC SHOCK DO NOT REMOVE COVER (OR BACK) NO USER-SERVICEABLE PARTS INSIDE REFER SERVICING TO QUALIFIED SERVICE PERSONNEL. This lightning flash with...
Getting Started 4 Getting S tar ted 1 Notes on Copyrights y Because AACS (Advanced Access Content System) is approved as content protection system for Blu-ray Disc format, similar to use of CSS (Content Scramble System) for DVD format, certain restrictions are imposed on playback, analog signal outp...
Getting Started 5 Getting S tar ted 1 IMPORTANT SAFETY INSTRUCTIONS 1. Read these instructions. 2. Keep these instructions.3. Heed all warnings. 4. Follow all instructions. 5. Do not use this apparatus near water. 6. Clean only with dry cloth. 7. Do not block any ventilation openings. Install in acc...
LG Players Manuals
-
 LG BP250
User Manual
LG BP250
User Manual
-
 LG BP740
User Manual
LG BP740
User Manual
-
 LG BR629T
User Manual
LG BR629T
User Manual
-
 LG DC379
User Manual
LG DC379
User Manual
-
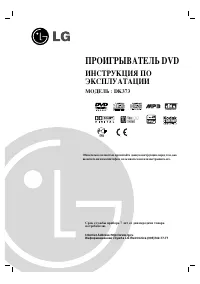 LG DK373
User Manual
LG DK373
User Manual
-
 LG DK377
User Manual
LG DK377
User Manual
-
 LG DK379
User Manual
LG DK379
User Manual
-
 LG DK478
User Manual
LG DK478
User Manual
-
 LG DK487
User Manual
LG DK487
User Manual
-
 LG DP132
User Manual
LG DP132
User Manual
-
LG DP132
Manual
-
 LG DS375
User Manual
LG DS375
User Manual
-
 LG DV374
User Manual
LG DV374
User Manual
-
 LG DV375
User Manual
LG DV375
User Manual
-
 LG DV378
User Manual
LG DV378
User Manual
-
 LG DV3781
User Manual
LG DV3781
User Manual
-
LG DV379
User Manual
-
 LG DVX642H
Manual
LG DVX642H
Manual
-
 LG DVX692H
Manual
LG DVX692H
Manual
-
 LG HR836T
User Manual
LG HR836T
User Manual