Page 2 - Warnings, Cautions and Others; IMPORTANT FOR LASER PRODUCTS; Caution: Proper Ventilation
G-1 Warnings, Cautions and Others CAUTION—STANDBY/ON button! Disconnect the mains plug to shut the power off completely (all lamps and indications go off). The STANDBY/ON button in any position does not disconnect the mains line.• When the unit is on standby, the STANDBY/ON lamp lights in red. • Whe...
Page 3 - Contents
1 Contents Introduction ..................................................... 2 Precautions ...................................................................... 2How to Read This Manual ............................................... 2 Getting Started..................................................
Page 4 - Introduction; Precautions; Installation; How to Read This Manual; briefly
2 Introduction Precautions Installation • Install in a place which is level, dry and neither too hot nor too cold—between 5°C and 35°C. • Install the System in a location with adequate ventilation to prevent internal heat buildup inside the System. • Leave sufficient distance between the System and ...
Page 5 - Getting Started; Step; : Unpack the package and; Step; : Hook up the components such; • DO NOT use an old battery together with a
3 Getting Started Step 1 : Unpack After unpacking, check to be sure that you have all the following items. The number in parentheses indicates the quantity of each piece supplied.• FM antenna (1)• AM loop antenna (1)• Remote control (1)• Batteries (2)If any item is missing, consult your dealer immed...
Page 6 - If you need more detailed information, see page 6.; • This connection only sends the video signals; AV COMPU LINK terminal; Before connecting optical digital cord; OR
4 Step 3 : Hook Up If you need more detailed information, see page 6. TV AUX DECODER LEFT RIGHT AUDIO OUT OPTICAL DIGITAL IN VIDEO INPUT VIDEO INPUT Y P B P R Illustrations of the input/output terminals below are typical examples.When you connect other components, refer also to their manuals since t...
Page 7 - For better FM/AM reception
5 LOW HIGH RGB Y/C Y P B P R FM antenna (supplied)Extend it so that you can obtain the best reception. AM loop antenna (supplied)Turn it until the best reception is obtained. AM loop antennaKeep it connected. Vynile-covered wire (not supplied)Extend it horizontally. Disconnect the supplied FM antenn...
Page 8 - Selecting the Video Signal; VIDEO; PROGRE
6 To connect the AM loop antenna • If the AM loop antenna wire or speaker cords are covered with vinyl, remove the vinyl to expose the tip of the antenna by twisting the vinyl. • Make sure the antenna conductors do not touch any other terminals, connecting cords and power cord. Also, keep the antenn...
Page 9 - Before Operating the System; Playable Disc Types; • The following discs cannot be played back:; DVD Video—digital audio formats; Disc Type; If “
7 Before Operating the System Playable Disc Types This unit has been designed to play back the following discs: In addition to the above discs, this System can play back audio data recorded on CD Text, CD-G (CD Graphics), and CD-Extra. • The following discs cannot be played back: DVD-ROM, DVD-RAM, D...
Page 10 - Display Indicators; ALL
8 Display Indicators The indications on the display teach you a lot of things while you are operating the System.Before operating the System, be familiar with when and how the indicator illuminates on the display. 1 Rhythm Ax indicator• Lights when Rhythm Ax is activated. 2 Daily Timer indicators• :...
Page 11 - Indications on the main display while operating a disc; While playing back a disc:
9 Indications on the main display while operating a disc • If Resume is turned “ON” (see page 36), “RESUME” appears when you stop playback. While playing back a disc: While disc play is stopped: • DVD Video: • By pressing DISPLAY, you can show the current title and chapter numbers for a few seconds....
Page 12 - Daily Operations; —Playback; consumed even while on standby.; For private listening
10 Daily Operations —Playback 1 Turn on the power. The STANDBY/ON lamp on the main unit lights in green.• Without pressing STANDBY/ON , the System turns on by pressing one of the source selecting buttons in the next step. 2 Select the source. Playback automatically starts if the selected source is r...
Page 13 - Listening to the Radio; To tune in to a station; FM
11 Listening to the Radio To select the band (FM or AM) To tune in to a station While FM or AM is selected... Frequency starts changing on the display.When a station (frequency) with sufficient signal strength is tuned in, the frequency stops changing.• When you repeatedly press the button, the freq...
Page 14 - Playing Back a Disc; To insert a disc; On-screen guide icons
12 Playing Back a Disc Before operating a disc, be familiar how a disc is recorded.• DVD Video comprises of “ Titles ” which includes “ Chapters ,” DVD Audio/MP3/WMA/JPEG comprise of “ Groups ” which includes “ Tracks ,” and CD/SVCD/VCD comprise of only “ Tracks .” • For JPEG playback, see “Operatio...
Page 15 - ACTION; To return to the previous menu:
13 To locate an item directly You can select a title/chapter/track directly and start playback.• For DVD Video, you can select a title before starting playback , while you can select a chapter after starting playback . To use 3D Phonic While playing... • The selected mode can only be shown on the TV...
Page 16 - —Sound & Other Adjustments; Adjusting the Volume; To drop the volume in a moment; Adjusting the Sound; To emphasize rhythm feeling—RHYTHM AX; This function emphasizes bass attack feeling, and also; To adjust the tone; You can adjust the bass and treble level from –5 to +5.; To adjust the bass; Remote control; To restore the volume,; adjust the volume level.; RHYTHMAX
14 Daily Operations —Sound & Other Adjustments Adjusting the Volume You can adjust the volume level from level 0 (VOL MIN) to level 50 (VOL MAX). To drop the volume in a moment Adjusting the Sound To emphasize rhythm feeling—RHYTHM AX This function emphasizes bass attack feeling, and also change...
Page 17 - To select a preset picture tone; While playing, display VFP setting screen.; To adjust the picture tone; Select a parameter you want to adjust.; AUTO DIM; NORMAL
15 Presetting Automatic DVD Video Sound Increase Level The DVD Video sound is sometimes recorded at a lower level than for other discs and sources. You can set the increase level for the currently loaded DVD Video, so you do not have to adjust the volume every time you change the source. • Once the ...
Page 18 - Setting the Clock; • If you have already adjusted the clock before, press the; Turning Off the Power; • If you press the button repeatedly, you can change the shut-; Clock; On; Canceled
16 3 Adjust the parameter. 4 Repeat steps 2 to 3 to adjust other parameters. To erase the screen, press VFP again while holding SHIFT. Setting the Clock Without setting the built-in clock, you cannot use Daily Timers (see page 31) and Sleep Timer.• To correct a misentry during the process, press CAN...
Page 19 - Advanced Radio Operations; Receiving FM Stations with RDS; service, the RDS indicator lights on the display.; To show the RDS information; Searching for a Program by; To search for a program using the PTY codes; • For details about each PTY code, see page 19.; PS
17 Advanced Radio Operations Receiving FM Stations with RDS Radio Data System (RDS) allows FM stations to send an additional signal along with their regular program signals.• When tuned to an FM station which provides the RDS service, the RDS indicator lights on the display. This System can receive ...
Page 20 - While listening to an FM station, select the program type.; NEWS; If a station is broadcasting the program of your choice
18 3 Start searching. The receiver searches 30 preset FM stations, stops when it finds the one you have selected, and tunes in to that station.• If no program is found, “NOTFOUND” appears on the display. • To stop searching any time during search, press PTY SEARCH (while holding SHIFT). To continue ...
Page 21 - Description of the PTY codes
19 Description of the PTY codes NEWS News. AFFAIRS Topical program expanding or enlarging upon the news—debate, or analysis. INFO Programs the purpose of which is to impart advice in the widest sense. SPORT Programs concerned with any aspect of sports. EDUCATE Educational programs. DRAMA All radio p...
Page 22 - Unique DVD/VCD Operations; Selecting the View Angle; While playing back a chapter (of DVD; Display the subtitle selection window.; SUB TITLE; SHIFT
20 Unique DVD/VCD Operations Selecting the View Angle While playing back a chapter (of DVD Video) containing multi-view angles, you can view the same scene from different angles.• You can also select the multi-view angles using the on- screen bar (see page 26). While playing... Selecting the Subtitl...
Page 23 - Select the subtitle language.; Selecting the Audio Track; Select the bonus group.
21 2 Select the subtitle language. While playing an SVCD video... Selecting the Audio Track For DVD Video: While playing back a chapter containing audio languages, you can select the language to listen to. For DVD Audio: While playing back a track containing audio channels, you can select the audio ...
Page 24 - Special Effect Playback; Still picture playback.
22 2 Enter the key number. 3 Follow the interactive instructions shown on the screen. To cancel the key number entry, press 7 . Special Effect Playback Still picture playback. Frame-by-frame playback 1 While playing... 2 Advance the still picture frame by frame. To resume normal playback, press DVD/...
Page 25 - Advanced Disc Operations; Programming the Playing Order—; Before starting playback, activate Program Play.; Select a title or group number.; To enter the numbers directly:
23 Advanced Disc Operations Programming the Playing Order— Program Play You can arrange the playing order of the chapters or tracks (up to 99) before you start playback. 1 Before starting playback, activate Program Play. 2 Select chapters or tracks you want for Program Play.• For DVD/MP3/WMA: 1 Sele...
Page 26 - Playing at Random—Random Play; Before starting playback, activate Random Play.; To exit from Random Play; To erase the last step:
24 3 Start playback. To check the programmed contents Before or after playback... • You can also use 4 or ¢ to check the programmed contents. To modify the program Before or after playback... To exit from Program Play Before or after playback... Playing at Random—Random Play You can play all chapter...
Page 27 - Playing Repeatedly; Repeat Play; Prohibiting Disc Ejection—Child Lock
25 Playing Repeatedly • You can also select the repeat mode using the on-screen bar (see page 27). Repeat Play You can repeat playback. • For DVD Video: While playing... • For DVD Audio: While playing or before playback... • For MP3/WMA: While playing or before playback... • For CD/SVCD/VCD: While p...
Page 28 - On-Screen Disc Operations; On-screen Bar Information; Disc type
26 On-Screen Disc Operations On-screen Bar Information You can check the disc information (except for MP3/WMA/JPEG disc) and use some functions through the on-screen bar. 2 OFF 1/3 1/3 1/3 TIME 4 TITLE 14 TOTAL 1:25:58 CHAP 23 DVD-VIDEO TITLE 2 TIME OFF CHAP. 1 / 3 1 / 3 1 / 1 TIME 0:00:58 CHAP 3 8....
Page 29 - Operations Using the On-screen Bar; To change the time information; • Except for DVD Video: Repeat Play can be selected; Goes off; TOTAL
27 Operations Using the On-screen Bar Ex.: Selecting a subtitle (French) for DVD Video While a disc is selected as the source... 1 Display the on-screen bar with the pull-down menu. 2 Select (highlight) the item you want. 3 Display the pop-up window. 4 Select the desired option in the pop-up window....
Page 30 - Time Search
28 4 Select the repeat mode you want. * During Program Play and Random Play, “STEP” appears. 5 Finish the setting. A-B Repeat • See also page 25. 1 While playing, display the on-screen bar with the pull- down menu. 2 Select . 3 Display the pop-up window. 4 Select “A-B.” 5 Select the start point (A)....
Page 31 - CONTROL screen
29 4 Enter the desired chapter/track number. • To correct a misentry, press the 10 keys until the desired number shown in the pop-up window. 5 Finish the setting. Selecting Browsable Still Pictures While playing back a track (of DVD Audio) linked to browsable still pictures (BSP), you can select the...
Page 32 - To start playback; • Once you start playing back a JPEG track, the CONTROL; To repeat slide-show for JPEG; also starts; REP GRP; Repeats the current group.; REP ALL; REP OFF
30 To move the highlight (green) bar between group list and track list: To select a group/track in the list: To start playback • Once you start playing back a JPEG track, the CONTROL screen goes off. • To cancel slide-show, and display the current still picture, press 8 . To repeat slide-show for JP...
Page 33 - Timer Operations; Setting the Timer; • To correct a misentry during process, press CANCEL. You; Make the timer setting as you want.; DAILY TIMER; Main unit; DAILY 1
31 Timer Operations Setting the Timer Using Daily Timer, you can wake up with your favorite music.You can store three Daily Timer settings; however, you can activate only one of the timers at a time.• To exit from the timer setting, press CLOCK/TIMER as required. • To correct a misentry during proce...
Page 34 - • You can select the volume level (“VOL 0” to; To turn on or off the Timer; forget to turn off the System after use.; How Daily Timer actually works; Once the Daily Timer has been set, the timer (; Clock setting
32 2 Set the hour then the minute for off-time. 3 Select the playback source—“TUNER FM,” “TUNER AM,” “DISC,” or “AUX.” 4 For “TUNER FM” and “TUNER AM”: Select a preset channel.For “DISC”: Select the title/group number, then the chapter/track number. 5 Select the volume level. • You can select the vo...
Page 35 - Setup Menu Operations; Operating Procedure; Display the Setup Menu.; SET UP; Setup Menu Icons; LANGUAGE Setup Menu
33 Setup Menu Operations . Operating Procedure You can use the Setup Menus only when a disc is selected as the source and its playback is not yet started. Ex.: Selecting “STILL PICTURE” for “FILE TYPE”: 1 Display the Setup Menu. 2 Select one of the Setup Menus. 3 Select the item you want to adjust. ...
Page 37 - PICTURE SOURCE; SCREEN SAVER; Select one of the following:; FILE TYPE; Select one of the following:; AUDIO Setup Menu; You can adjust the sound settings of the System.; DIGITAL AUDIO OUTPUT; Select one of the following:; • See also “DVD OPTICAL DIGITAL OUT Signals” on; DOWN MIX; Select one of the following:; To play a film source disc.
35 PICTURE SOURCE You can obtain optimal picture quality by selecting an appropriate option—picture source type (either video source or film source). Select one of the following: SCREEN SAVER You can activate or deactivate screen saver while operating the built-in disc player. Select one of the foll...
Page 38 - OTHERS Setup Menu; You can change some other convenient functions.; RESUME; ON SCREEN GUIDE; avoid recording the guide icons on your video tape.; AV COMPU LINK MODE; Best for watching a movie at a low volume level.
36 D. RANGE COMPRESSION You can compress the dynamic range (the difference between the loudest sound and the softest sound) to enjoy a powerful sound even at a low volume level when listening to Dolby Digital software. This is useful at night.• The effectiveness varies depends on a software. Select ...
Page 39 - To set Parental Lock; • See “Country/Area Codes List” on page 43 to find your
37 Restricting the Review —Parental Lock You can restrict playback of DVD Video containing violent scenes and those unsuitable for your family members. Once you have set the rating level, such violent scenes (for which a higher level than you set is assigned) may be skipped or changed to another sce...
Page 40 - To change the setting; Display the PARENTAL LOCK submenu.; To release Parental Lock temporarily
38 To change the setting 1 Display the PARENTAL LOCK submenu. • Follow steps 1 to 4 of “To set Parental Lock.” “PASSWORD” is automatically selected.• You cannot select any item other than “EXIT” until you enter the correct password. 2 Enter your password. • If you enter a wrong password, “– – – –” a...
Page 41 - Additional Information; Learning More about This System; Listening to the Radio:
39 Additional Information Learning More about This System Daily Operations—Playback (see pages 10 to 13) Listening to the Radio: • If you store a new station into an occupied preset number, the previously stored station in that number will be erased. • When you unplug the AC power cord or if a power...
Page 42 - PICTURE—MONITOR TYPE:; Maintenance; Handling discs; To remove the speaker grilles
40 Timer Operations (see pages 31 to 32) • When you unplug the AC power cord or if a power failure occurs, the timer will be canceled. You need to set the clock first, then the timer again. • If you set the Sleep Timer after Daily Timer starts playing the selected source, Daily Timer is canceled. Se...
Page 43 - Troubleshooting; Setup Menu Operations:
41 Troubleshooting If you are having a problem with your System, check this list for a possible solution before calling for service. General: Adjustments or settings are suddenly canceled before you finish. ] There is a time limit. Repeat the procedure again. Operations are disabled. ] The built-in ...
Page 44 - Language Code List
42 Language Code List AA Afar AB Abkhazian AF Afrikaans AM Ameharic AR Arabic AS Assamese AY Aymara AZ Azerbaijani BA Bashkir BE Byelorussian BG Bulgarian BH Bihari BI Bislama BN Bengali, Bangla BO Tibetan BR Breton CA Catalan CO Corsican CS Czech CY Welsh DA Danish DZ Bhutani EL Greek EO Esperanto ...
Page 45 - Country/Area Codes List
43 Country/Area Codes List √ AD Andorra AE United Arab Emirates AF Afghanistan AG Antigua and Barbuda AI Anguilla AL Albania AM Armenia AN Netherlands Antilles AO Angola AQ Antarctica AR Argentina AS American Samoa AT Austria AU Australia AW Aruba AZ Azerbaijan BA Bosnia and Herzegovina BB Barbados ...
Page 46 - DVD OPTICAL DIGITAL OUT Signals
44 NP Nepal NR Nauru NU Niue NZ New Zealand OM Oman PA Panama PE Peru PF French Polynesia PG Papua New Guinea PH Philippines PK Pakistan PL Poland PM Saint Pierre and Miquelon PN Pitcairn PR Puerto Rico PT Portugal PW Palau PY Paraguay QA Qatar RE Réunion RO Romania RU Russian Federation RW Rwanda S...
Page 48 - UX-P550 MICRO COMPONENT SYSTEM; SAFETY INSTRUCTIONS; Do be careful with glass panels or doors on equipment.
VICTOR COMPANY OF JAPAN, LIMITED 0304AIMMDWJEM EN © 2004 VICTOR COMPANY OF JAPAN, LIMITED UX-P550 MICRO COMPONENT SYSTEM SAFETY INSTRUCTIONS “SOME DOS AND DON’TS ON THE SAFE USE OF EQUIPMENT” This equipment has been designed and manufactured to meet international safety standards but, like any elect...


 JVC CA-DXJ20
Manual
JVC CA-DXJ20
Manual
 JVC CA-DXJ30
Manual
JVC CA-DXJ30
Manual
 JVC CA-HXZ1R
Manual
JVC CA-HXZ1R
Manual
 JVC EX-D1
Manual
JVC EX-D1
Manual
 JVC EX-D11
Manual
JVC EX-D11
Manual
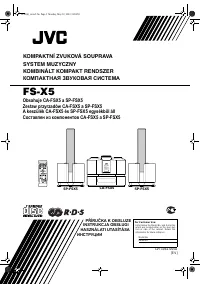 JVC FS-X5
Manual
JVC FS-X5
Manual
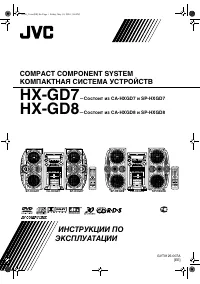 JVC HX-GD7
Manual
JVC HX-GD7
Manual
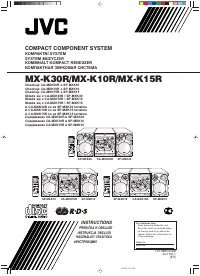 JVC MX-K10R
User Manual
JVC MX-K10R
User Manual
 JVC MX-K15R
User Manual
JVC MX-K15R
User Manual
 JVC MX-K30R
User Manual
JVC MX-K30R
User Manual
 JVC NX-F3
Manual
JVC NX-F3
Manual
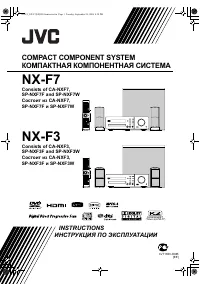 JVC NX-F7
Manual
JVC NX-F7
Manual
 JVC NX-PB10
Manual
JVC NX-PB10
Manual
 JVC NX-PN7
Manual
JVC NX-PN7
Manual
 JVC NX-SA1B (R) (W)
User Manual
JVC NX-SA1B (R) (W)
User Manual
 JVC SP-DW103
User Manual
JVC SP-DW103
User Manual
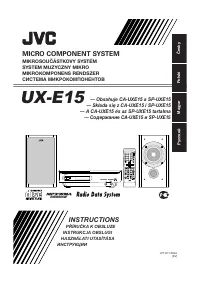 JVC UX-E15
Manual
JVC UX-E15
Manual
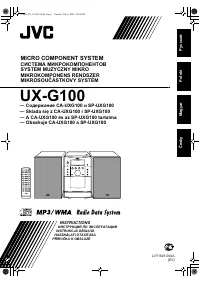 JVC UX-G100
Manual
JVC UX-G100
Manual
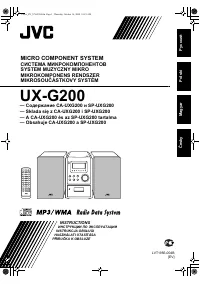 JVC UX-G200
User Manual
JVC UX-G200
User Manual