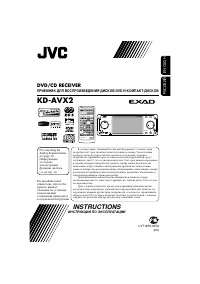
Page 2 - ENGLISH; IMPORTANT FOR LASER PRODUCTS; Caution on volume setting:; How to reset your unit; How to forcibly eject a disc
2 ENGLISH Thank you for purchasing a JVC product. Please read all instructions carefully before operation, to ensure your complete understanding and to obtain the best possible performance from the unit. IMPORTANT FOR LASER PRODUCTS 1. CLASS 1 LASER PRODUCT2. CAUTION: Do not open the top cover. Ther...
Page 3 - How to read this manual; CONTENTS; Remote controller —; Searching for your favorite FM RDS
ENGLISH 3 How to read this manual • Button operations are mainly explained with the illustrations in the table below. • Some related tips and notes are explained in “More about this unit” (see pages 34 – 38). Press briefly. Press repeatedly. Press either one. Press A , then B . Press and hold until ...
Page 4 - How to enter the various menus; Select a menu you want.; Operate as instructed on the screen.; How to detach/attach the control; When using the remote controller
4 ENGLISH How to enter the various menus The main menu contains seven menus (MODE, PSM, SEL, TITLE, BBE, EQ, DSP).• If no operation is done for about 5 seconds, menu screen is canceled. 1 2 Select a menu you want. 3 Enter the selected menu. • To go back to the previous screen or exit the MENU screen...
Page 5 - How to change the display information and patterns; Parts identification; Control panel
ENGLISH 5 How to change the display information and patterns 1 BAND button 2 SOURCE button 3 • Control dial • POWER/ATT (attenuator)/ENTER button 4 MENU button 5 5 (up) / ∞ (down) buttons 6 Display window 7 DISP (display) button 8 USB (Universal Serial Bus) input terminal Parts identification Contro...
Page 6 - Installing the lithium coin battery; Main elements and features
6 ENGLISH Remote controller — RM-RK300 Installing the lithium coin battery (CR2025) Aim the remote controller directly at the remote sensor on the unit. Make sure there is no obstacle in between. Warning: • Do not install any battery other than CR2025 or its equivalent; otherwise, it may explode. • ...
Page 7 - Getting started; Basic operations
ENGLISH 7 Continued on the next page 2 SOURCE button Selects the source. 3 5 (up) / ∞ (down) buttons • For DAB: Changes the service. • For MP3/WMA/SD/USB: Changes the folders. • While listening to an Apple iPod ® or a JVC D. player: – Pauses/stops or resumes playback with ∞ . – Enters the main menu ...
Page 8 - To turn off the power; Basic settings; Setting the clock; Radio operations; Start searching for a station.; To tune in to a station manually; When an FM stereo broadcast is hard
8 ENGLISH To drop the volume in a moment (ATT) To restore the sound, press it again. To turn off the power Basic settings • See also “General settings — PSM” on pages 23 – 26. 1 Enter the PSM menu (see page 4). 2 1 Canceling the display demonstrations Select “Demo,” then “Off.” 2 Setting the clock S...
Page 9 - Tuning in to FM stations with strong; Storing stations in memory; FM station automatic presetting —
ENGLISH 9 4 MO indicator lights up. Reception improves, but stereo effect will be lost. To restore the stereo effect, repeat the same procedure and select “Off” in step 3 . The MO indicator goes off. Tuning in to FM stations with strong signals only—LO (local)/DX (Distance-Extreme) 1 Enter the MODE ...
Page 10 - Select a preset number.
10 ENGLISH 4 5 6 Select a preset number. • You can move to the lists of the other FM bands by turning the control dial. 7 Store the station. When using the remote controller After tuning in to a station you want to preset... Listening to a preset station 1 2 Enter the MODE menu (see page 4). 3 4 5 S...
Page 11 - FM RDS operations; What you can do with RDS; Start searching for your favorite; Storing your favorite programme; Enter the preset list.
11 ENGLISH Continued on the next page FM RDS operations What you can do with RDS RDS (Radio Data System) allows FM stations to send an additional signal along with their regular programme signals.By receiving the RDS data, this unit can do the following:• Programme Type (PTY) Search (see the followi...
Page 12 - Finish the procedure.; Using the standby receptions; TA Standby Reception; To activate TA Standby Reception; To deactivate the TA Standby Reception; PTY Standby Reception; To activate the PTY Standby Reception; Select one of the PTY codes.
12 ENGLISH 5 Store the setting. 6 To store other PTY codes into other preset numbers. 7 Finish the procedure. Using the standby receptions TA Standby Reception TA Standby Reception allows the unit to switch temporarily to Traffic Announcement (TA) from any source other than AM.The volume changes to ...
Page 13 - Tracing the same programme—; Using the message service—; What is RDS Radiotext
13 ENGLISH Tracing the same programme— Network-Tracking Reception When driving in an area where FM reception is not sufficient enough, this unit automatically tunes in to another FM RDS station of the same network, possibly broadcasting the same programme with stronger signals (see the illustration ...
Page 14 - Playing a disc in the unit; To stop play and eject the disc; Playing discs in the CD changer
14 ENGLISH Disc/SD card/USB memory operations Playing a disc in the unit All tracks will be played repeatedly until you change the source or eject the disc. To stop play and eject the disc Note: If a USB memory is attached to the unit, you cannot eject the disc. “Please Eject USB” flashes on the dis...
Page 15 - Attach the control panel.; Playing from a USB memory; About MP3 and WMA tracks
15 ENGLISH Continued on the next page ! Attach the control panel. ⁄ • The control panel goes back to the previous position. Playback starts automatically if tracks are recorded. Playing from a USB memory This unit can play MP3/WMA tracks stored in a USB memory.All tracks in the USB memory will be pl...
Page 16 - To go to the next or previous tracks; Other main functions; Selecting a disc/folder/track on the list; Confirm the selection.
16 ENGLISH To go to the next or previous tracks To go to the next or previous folders (only for MP3/WMA/SD/USB) For MP3 tracks: For WMA tracks: • Holding the buttons can display the Disc List ( ) and Folder List ( / / ), see the following. Other main functions Selecting a disc/folder/track on the li...
Page 17 - Prohibiting disc ejection; Selecting the playback modes; Select one of the playback modes.
17 ENGLISH Prohibiting disc ejection You can lock a disc in the loading slot. 1 2 After making sure “No Eject?” is selected... • “No Eject” flashes, and the disc cannot be ejected. To cancel the prohibition, repeat the same procedure after making sure “Eject OK?” is selected.• “Eject OK” flashes on ...
Page 18 - Precise settings for the DSP modes; Sound adjustments; DSP modes
18 ENGLISH To make more precise settings, see the following. To cancel the acoustic effect, select “Defeat” in step Ÿ . Precise settings for the DSP modes 1 Select a DSP mode. 2 Select the number of the built-in speakers. • For “Defeat” and “V.Cancel,” the speaker number is fixed to “4ch.” 3 Select ...
Page 19 - Using the equalizer—EQ; Selecting preset sound modes—; Sound modes; Activating BBE Digital
19 ENGLISH 3 Finish the procedure. Using the equalizer—EQ You can adjust the sound equalization patterns to your preference by using either Graphic EQ or Parametric EQ.• Adjust the equalizer to match the reproducible frequency range of the connected speakers; otherwise, the adjustments may not be ef...
Page 20 - Storing your own sound modes
20 ENGLISH 3 Select a band. Band1 : 20.0 Hz – 1.2 kHz Band2 : 80.0 Hz – 5.0 kHz Band3 : 315.0 Hz – 20 kHz 4 Adjust the enhanced level for the selected band. 5 Select the frequency. • Band 1/2/3 are required to be preset at least 5 steps (frequencies) away from each other. (Only selectable frequencie...
Page 21 - Activating crossover network; Setting the sound modes—SEL; Select a setting item.; To adjust fader and balance—Fad/Bal
21 ENGLISH Activating crossover network By activating crossover network, you can allocate different frequency range of sound signals to different speakers to match their characteristic. If you have installed the 3-way network speaker system in the car, make sure of the following: • Before using the ...
Page 22 - To adjust reproduced frequency
22 ENGLISH To adjust reproduced frequency level—X-Over This setting is available only when crossover network (see page 21) is activated. 1 Select a filter. HPF(Front/Rear) : Frequencies lower than the selected level are cut-off. LPF (Rear) : Frequencies higher than the selected level are cut-off. 2 ...
Page 23 - General settings — PSM
23 ENGLISH 3 Select or adjust the selected PSM item. 4 Repeat steps 2 and 3 to adjust the other PSM items if necessary. 5 Finish the procedure. You can change PSM (Preferred Setting Mode) items listed in the table that follows. 1 Enter the PSM menu (see page 4). 2 Select a PSM item. General settings...
Page 25 - Set the dimmer end time.; Adjust the dimmer time.; Selecting timer for the dimmer
25 ENGLISH 2 Set the dimmer end time. 24Hours : [0 – 23] 12Hours : [1A (1AM) – 12A (12AM); 1P (1PM) – 12P (12PM)] 4 Finish the procedure. Indications Items Settings, [reference page] Beep Key-touch tone • On [Initial] • Off : Activates the key-touch tone.: Deactivates the key-touch tone. Ext In * 4 ...
Page 26 - Title assignment; Sources; Selecting the graphic theme
26 ENGLISH Title assignment You can assign titles to CDs (both in this unit and in the CD changer) and the external components (LINE-IN and EXT-IN). Sources Maximum number of characters CDs/CD-CH * Up to 32 characters (up to 30 discs) External component Up to 16 characters * You cannot assign names ...
Page 27 - To erase the entire title
27 ENGLISH 3 Move to the next (or previous) character position. 4 Repeat steps 1 and 3 until you finish entering the title. 4 Finish the procedure. • To cancel the title entry without registration, press MENU. To erase the entire title In step 3 ... Available characters In addition to the Roman alph...
Page 28 - Selecting a track from the menu; Select the desired menu.; To pause
28 ENGLISH Selecting a track from the menu 1 Enter the main menu. Now the 5 / ∞ / 4 / ¢ buttons work as the menu selecting buttons * . * The menu selecting mode will be canceled: – If no operations are done for about 5 seconds. – When you confirm the selection of a track. 2 Select the desired menu. ...
Page 29 - DAB tuner operations; Start searching for an ensemble.
29 ENGLISH Selecting the playback modes 1 Enter the MODE menu (see page 4). 2 Select one of the playback modes. 3 Select an item (see table below). 4 Finish the procedure. Repeat play One : Functions the same as “Repeat One” of the iPod or “Repeat Mode = One” for the D. player. All : Functions the s...
Page 30 - To search for your favorite service; Storing DAB services in memory; Select a service you want.; To tune in to an ensemble manually; When surrounding sounds are noisy
30 ENGLISH 4 Finish the procedure. • The DRC indicator will be highlighted only when receiving DRC signals from the tuned service. To search for your favorite service You can search for either Dynamic or Static PTY codes.• Operations are exactly the same as explained on pages 11 and 12 for FM RDS st...
Page 31 - Tuning in to a preset DAB service; Using the Standby Receptions; Reception; Announcement types
31 ENGLISH 5 Store the service. When using the remote controller After tuning in to a service you want to preset... Tuning in to a preset DAB service 1 2 Enter the MODE menu (see page 4). 3 Select “List.” 4 Select a preset number. • You can move to the lists of the other DAB bands by turning the con...
Page 32 - Select an announce type.
32 ENGLISH When shipped from the factory, Alternative Frequency Reception is activated. To deactivate the Alternative Frequency Reception, see page 24. To show the Dynamic Label Segment (DLS) information • The DLS screen will be temporarily canceled when you operate the unit. Lights up when receivin...
Page 33 - Turn on the connected component; Maintenance; How to clean the connectors
33 ENGLISH Continued on the next page Other external component operations You can connect an external component to the LINE IN plugs on the rear or to the CD changer jack on the rear using the Line Input Adapter—KS-U57 (not supplied) or AUX Input Adapter—KS-U58 (not supplied).• For connection, see I...
Page 34 - More about this unit; Turning on the power; Tuner operations; To keep discs clean
34 ENGLISH More about this unit Basic operations Turning on the power • By pressing SOURCE on the unit, you can also turn on the power. If the source is ready, playback also starts. Turning off the power • If you turn off the power while listening to a disc, disc play will start from where playback ...
Page 35 - Caution for DualDisc playback
35 ENGLISH • Message service requires the RDS Radiotext signal. It is available on most major stations. If reception is weak, the service may become unavailable. For any questions regarding the content of this service, please contact your broadcaster. • If you want to know more about RDS, visit «htt...
Page 36 - Changing the source
36 ENGLISH – Romeo * : up to 128 (72) characters – Joliet * : up to 64 (36) characters – Windows long file name * : up to 128 (72) characters * The parenthetic figure is the maximum number of characters for file/folder names in case the total number of files and folders is 313 or more. • This unit c...
Page 37 - Selecting the DSP modes—DSP
ENGLISH 37 Continued on the next page Sound adjustments Selecting the DSP modes—DSP • Effectiveness of “V.Cancel” depends on the recording condition of the sources: – Monaural sources such as AM and monaural FM broadcasting programs. – Multiplex sound sources. – Sources recorded with duets, strong e...
Page 38 - Symptoms; Troubleshooting; Preset frequency level settings for each sound mode; Sound mode
38 ENGLISH Symptoms Remedies/Causes General • Sound cannot be heard from the speakers. • Adjust the volume to the optimum level.• Check the cords and connections. • The unit does not work at all. Reset the unit (see page 2). • “Connect Error” appears on the display. Remove the control panel, wipe th...
Page 42 - Specifications; AUDIO AMPLIFIER SECTION
42 ENGLISH Specifications AUDIO AMPLIFIER SECTION Maximum Power Output: Front/Rear: 50 W per channel Continuous Power Output (RMS): Front/Rear: 19 W per channel into 4 Ω, 40 Hz to 20 000 Hz at no more than 0.8% total harmonic distortion Load Impedance: 4 Ω (4 Ω to 8 Ω allowance) Equalizer Control Ra...
Page 43 - CD PLAYER SECTION
ENGLISH 43 CD PLAYER SECTION Type: Compact disc player Signal Detection System: Non-contact optical pickup (semiconductor laser)Number of Channels: 2 channels (stereo) Frequency Response: 5 Hz to 20 000 Hz Dynamic Range: 98 dB Signal-to-Noise Ratio: 102 dB Wow and Flutter: Less than measurable limit...
Page 44 - DEUTSCH; WICHTIG FÜR LASER-PRODUKTE; Zurücksetzen des Geräts
2 DEUTSCH Wir danken Ihnen für den Kauf eines JVC Produkts. Bitte lesen Sie die Anleitung vollständig durch, bevor Sie das Gerät in Betrieb nehmen, um sicherzustellen, daß Sie alles vollständig verstehen und die bestmögliche Leistung des Geräts erhalten. WICHTIG FÜR LASER-PRODUKTE 1. LASER-PRODUKT D...
Page 45 - Wie Sie diese Anleitung lesen; INHALT; Suche nach bevorzugten UKW-RDS
3 DEUTSCH Wie Sie diese Anleitung lesen • Tastenfunktionen werden im Wesentlichen mit den Abbildungen in der folgenden Tabelle erklärt. • Einige zugehörige Tipps und Hinweise werden unter „Weitere Informationen zu Ihrem Receiver“ gegeben (siehe Seiten 34 bis 38). Kurz drücken. Wiederholt drücken. Ei...
Page 46 - Eingabe der verschiedenen Menüs; Wählen Sie ein gewünschtes Menü.; Anbringen/Abnehmen des Bedienfelds; Bei Verwendung der Fernbedienung
4 DEUTSCH Eingabe der verschiedenen Menüs Das Hauptmenü enthält sieben Menüs (MODE, PSM, SEL, TITLE, BBE, EQ und DSP).• Wenn ca. 5 Sekunden lang keine Bedienung erfolgt, wird der Menü-Bildschirm gelöscht. 1 2 Wählen Sie ein gewünschtes Menü. 3 Rufen Sie das gewählte Menü auf. • Zum Zurückschalten zu...
Page 47 - Ändern von Displayinformation und -mustern; Beschreibung der Teile; Bedienfeld
5 DEUTSCH Ändern von Displayinformation und -mustern 1 BAND-Taste 2 SOURCE-Taste 3 • Steuerregler • POWER/ATT (Stummschaltung)/ ENTER-Taste 4 MENU-Taste 5 5 (höher) / ∞ (niedriger)-Tasten 6 Displayfenster 7 DISP (Display)-Taste 8 USB (Universal Serial Bus) Eingangsterminal Beschreibung der Teile Bed...
Page 48 - Fernbedienung —; Einsetzen der Lithiumknopfbatterie; Hauptelemente und Merkmale
6 DEUTSCH Fernbedienung — RM-RK300 Einsetzen der Lithiumknopfbatterie (CR2025) Richten Sie die Fernbedienung direkt auf den Fernbedienungssensor am Gerät. Stellen Sie sicher, dass sich kein Hindernis dazwischen befindet. Warnung: • Keine anderen Batterien als CR2025 oder entsprechende einsetzen; and...
Page 49 - Erste Schritte; Grundlegende Bedienung; Stellen Sie die Lautstärke ein.
7 DEUTSCH Fortsetzung auf nächster Seite 2 SOURCE-Taste Wählt die Quelle. 3 5 (höher) / ∞ (niedriger)-Tasten • Für DAB: Ändert den Dienst. • Für MP3/WMA/SD/USB: Ändert die Ordner. • Beim Hören von einem Apple iPod ® oder eine JVC D. player: – Pausiert/stoppt oder setzt die Wiedergabe mit ∞ fort. – G...
Page 50 - Zum Ausschalten des Geräts; Grundlegende Einstellungen; Einstellung der Uhr; Bedienung des Tuners; Starten Sie den Sendersuchlauf.; So stellen Sie manuell Sender ein; Wenn Sie Schwierigkeiten haben,
8 DEUTSCH Zum abrupten Senken der Lautstärke (ATT) Um die Lautstärke wieder anzuheben, drücken Sie die Taste erneut. Zum Ausschalten des Geräts Grundlegende Einstellungen • Siehe auch „Allgemeine Einstellungen — PSM“ auf Seiten 23 bis 26. 1 Rufen Sie das PSM-Menü auf (siehe Seite 4). 2 1 Abbrechen d...
Page 51 - Abstimmen von nur UKW-Sendern mit; Speichern von Sendern; Automatische Voreinstellung von
9 DEUTSCH 4 MO-Anzeige leuchtet auf. Der Empfang wird besser, jedoch geht der Stereo-Effekt verloren. Zum Wiederherstellen des Stereoeffekts wiederholen Sie das gleiche Verfahren und wählen „Off“ in Schritt 3 Die MO-Anzeige erlischt. Abstimmen von nur UKW-Sendern mit starken Signalen—LO/DX (Lokal/Fe...
Page 52 - Hören eines Festsenders; Wählen Sie eine Festsendernummer.
10 DEUTSCH 4 5 6 Wählen Sie eine Festsendernummer. • Sie können durch Drehen des Steuerreglers zu den Listen der anderen UKW-Frequenzbereiche gehen. 7 Speichern Sie den Sender. Bei Verwendung der Fernbedienung Nach dem Abstimmen eines als Festsender einzugeben gewünschten Senders... Hören eines Fest...
Page 53 - Funktionen von RDS; Beginnen Sie die Suche nach Ihrer; Speichern Ihrer bevorzugten; Rufen Sie die Vorwahlliste auf.
11 DEUTSCH Fortsetzung auf nächster Seite UKW-RDS-Funktionen Funktionen von RDS Das RDS-Verfahren (Radio Data System) ermöglicht UKW-Sendern, außer dem Programmsignal weitere Informationen zu versenden.Beim Empfang von RDS-Daten sind auf dem Receiver folgende Funktionen verfügbar:• Programmtypsuche ...
Page 54 - Zum Aktivieren des PTY-Standbyempfangs; Beenden Sie den Vorgang.; Speichern Sie die Einstellung.; Verwenden des Standbyempfangs; So aktivieren Sie den TA-Standbyempfang
12 DEUTSCH So deaktivieren Sie den TA-Standbyempfang Die TP-Anzeige erlischt. PTY-Standbyempfang PTY-Standby erlaubt es dem Receiver, von der aktuellen Signalquelle außer AM kurzzeitig auf Ihr bevorzugtes PTY-Programm umzuschalten.• Ist ein DAB-Tuner angeschlossen, so lässt sich über Standbyempfang ...
Page 55 - Verfolgen des gleichen Programms; Verwendung des Meldungsdienstes; Was ist RDS-Radiotext
13 DEUTSCH Verfolgen des gleichen Programms —Network-Tracking-Empfang Wenn Sie in einem Bereich unterwegs sind, in dem kein guter UKW-Empfang möglich ist, sucht dieser Receiver automatisch nach anderen Frequenzen, auf denen das UKW-RDS-Programm möglicherweise besser empfangen werden kann (siehe Abbi...
Page 56 - Abspielen einer Disk im Receiver; Abspielen von einer SD-Karte
14 DEUTSCH Disk/SD-Karte/USB-Speicher-Verfahren Abspielen einer Disk im Receiver Alle Titel werden wiederholt abgespielt, bis Sie die Quelle umschalten oder die Disk ausschieben. Zum Stoppen der Wiedergabe und Auswerfen der Disk Hinweis: Wenn ein USB-Speicher am Gerät angebracht ist, können Sie die ...
Page 57 - Anbringen des Bedienfelds.; So spulen Sie Titel vor oder zurück
15 DEUTSCH Fortsetzung auf nächster Seite ! Anbringen des Bedienfelds. ⁄ • Das Bedienfeld geht zur vorherigen Position zurück. Die Wiedergabe startet automatisch, wenn Titel aufgezeichnet werden. Wiedergabe von einem USB-Speicher Dieses Gerät kann MP3/WMA-Tracks abspielen, die in einem USB-Speicher ...
Page 58 - Weitere Hauptfunktionen; Liste; Wählen Sie einen Listentyp.
16 DEUTSCH So springen Sie zum nächsten oder zum vorherigen Titel Zum Weitergehen zu den nächsten oder vorherigen Ordnern (nur für MP3/WMA/SD/USB) Für MP3-Titel: Für WMA-Titel: • Durch Gedrückthalten dieser Tasten kann die Diskliste ( ) und Ordnerliste ( / / ) angezeigt werden, wie im Folgenden besc...
Page 59 - Auswurfsperre; Auswählen von Wiedergabemodi; Wählen Sie eine der Wiedergabearten.; Wiederholung
17 DEUTSCH Auswurfsperre Sie können für die eingelegte Disk eine Auswurfsperre aktivieren. 1 2 Nachdem sichergestellt ist, dass „No Eject?“ gewählt ist... • Die Meldung „No Eject“ blinkt auf dem Display, und die Disk kann nicht ausgeworfen werden. Zum Aufheben der Sperre wiederholen Sie das gleiche ...
Page 60 - Präzise Einstellungen für die DSP-Modi; Wählen Sie Ihre Hörposition.; Klangeinstellungen; Zum Fertigstellen des Vorgangs
18 DEUTSCH Zur Vornahme genauerer Einstellungen siehe Folgendes. Zum Aufheben des akustischen Defekts wählen Sie „Defeat“ in Schritt Ÿ . Präzise Einstellungen für die DSP-Modi 1 Wählen Sie einen DSP-Modus. 2 Wählen Sie die Anzahl der integrierten Lautsprecher. • Für „Defeat“ und „V.Cancel,“ ist die ...
Page 61 - Wählen der vorgegebenen; Klangmodi; Aktivierung von BBE Digital
19 DEUTSCH 3 Beenden Sie den Vorgang. Verwendung des Equalizers—EQ Sie können die Klangentzerrungsmuster nach Wunsch mit entweder grafischer EQ oder parametrischer EQ einstellen.• Stellen Sie den Equalizer entsprechend dem reproduzierbaren Frequenzbereich der angeschlossenen Lautsprecher ein; andern...
Page 62 - Speichern Ihrer eigenen Klangmodi
20 DEUTSCH 3 Wählen Sie einen Frequenzbereich. Band1 : 20,0 Hz – 1,2 kHz Band2 : 80,0 Hz – 5,0 kHz Band3 : 315,0 Hz – 20 kHz 4 Passen Sie den gesteigerten Pegel für den ausgewählten Bereich an. 5 Wählen Sie die Frequenz. • Die Frequenzbänder 1/2/3 müssen mindestens 5 Stufen (Frequenzen) voneinander ...
Page 63 - Aktivieren des Crossover-Netzes; Einstellen der Klangmodi—SEL; Wählen Sie einen Einstellpunkt.; So stellen Sie Fader und die Balance
21 DEUTSCH Aktivieren des Crossover-Netzes Durch Aktivieren des Crossover-Netzes können Sie verschiedene Frequenzbereiche der Klangsignale entsprechend ihren Eigenschaften zu verschiedenen Lautsprechern zuweisen. Wenn Sie eine 3-Wege-Lautsprecheranlage im Fahrzeug eingebaut haben, überprüfen Sie Fol...
Page 64 - Zur Einstellung des reproduzierten
22 DEUTSCH Zur Einstellung des reproduzierten Frequenzpegels—X-Over Diese Einstellung steht nur zur Verfügung, wenn das Crossover-Netz (siehe Seite 21) aktiviert ist. 1 Wählen Sie einen Filter. HPF(Vorne/Hinten) : Niedrigere Frequenzen als der gewählte Pegel werden unterdrückt. LPF (Hinten) : Höhere...
Page 65 - Wiederholen Sie die Schritte; Allgemeine Einstellungen — PSM
23 DEUTSCH 3 Wählen PSM-Gegenstand oder stellen Sie ihn ein. 4 Wiederholen Sie die Schritte 2 und 3 zur Einstellung der anderen PSM- Gegenstände, wenn erforderlich. 5 Beenden Sie den Vorgang. Sie können die PSM (Präferenzeinstellungs-modus)-Gegenstände in der nachstehenden Tabelle anpassen. 1 Rufen ...
Page 67 - Tastenberührungston; Wählen Sie „Time Set“.; Wählen der Zeit für die Abblendfunktion
25 DEUTSCH 2 Die Endzeit für die Abblendfunktion einstellen. 24Hours : [0 – 23] 12Hours : [1A (1AM) – 12A (12AM); 1P (1PM) – 12P (12PM)] 4 Beenden Sie den Vorgang. Anzeigen Gegenstände Einstellungen, [Bezugsseite] Beep Tastenberührungston • On [Anfänglich] • Off : Aktiviert den Tastenberührungston.:...
Page 68 - Titel zuweisen; Quellen; Wählen Sie das grafische Thema
26 DEUTSCH Titel zuweisen Sie können Betitelungen zu CDs (sowohl in diesem Receiver als auch im CD-Wechsler) und in den externen Komponenten (LINE-IN und EXT-IN) zuweisen. Quellen Maximale Zeichenzahl CDs/CD-CH * Bis zu 32 Zeichen (bis zu 30 Disks) Externe Komponente Bis zu 16 Zeichen * Sie können n...
Page 69 - Wiederholen Sie Schritt; Zum Löschen der gesamten Betitelung
27 DEUTSCH 3 Gehen Sie zur nächsten (oder vorherigen) Zeichenposition. 4 Wiederholen Sie Schritt 1 und 3 , bis die Betitelungseingabe beendet ist. 4 Beenden Sie den Vorgang. • Zum Abbrechen der Betitelungseingabe ohne Registrierung drücken Sie MENU. Zum Löschen der gesamten Betitelung In Schritt 3 ....
Page 70 - Wählen Sie einen Track aus dem Menü; Schalten Sie auf das Hauptmenü.; Wählen Sie das gewünschte Menü.; Zum Pausieren
28 DEUTSCH Wählen Sie einen Track aus dem Menü 1 Schalten Sie auf das Hauptmenü. Jetzt fungieren die Tasten 5 / ∞ / 4 / ¢ als Menüwahltasten * . * Der Menüwahlmodus wird aufgehoben: – Wenn ca. 5 Sekunden lang keine Bedienung erfolgt. – Wenn Sie die Wahl eines Tracks bestätigen. 2 Wählen Sie das gewü...
Page 72 - Zum Suchen Ihres Lieblingsdienstes; Speichern von DAB-Diensten; Wählt einen gewünschten Dienst.; Wählen Sie einen Dienst (primär; Zum manuellen Abstimmen eines Ensembles; Wenn laute Umgebungsgeräusche
30 DEUTSCH 4 Beenden Sie den Vorgang. • Die DRC-Anzeige wird nur hervorgehoben wenn das Gerät DRC-Signale vom eingestellten Dienst empfängt. Zum Suchen Ihres Lieblingsdienstes Sie können entweder dynamische oder statische PTY-Codes suchen.• Die Bedienung ist so, wie auf Seite 11 und 12 für UKW-RDS-S...
Page 73 - Speichern Sie den Dienst.; Empfang eines voreingestellten; Standbyempfang; Ansagetypen; Wählen Sie „Announce“.
31 DEUTSCH 5 Speichern Sie den Dienst. Bei Verwendung der Fernbedienung Nach dem Abstimmen eines als Vorwahldienst einzugeben gewünschten Dienstes... Empfang eines voreingestellten DAB-Dienstes 1 2 Rufen Sie das MODE-Menü auf (siehe Seite 4). 3 Wählen Sie „List“. 4 Wählen Sie eine Festsendernummer. ...
Page 74 - Wählen Sie einen Ansagetyp.; Dynamische Programmverfolgung
32 DEUTSCH 3 Wählen Sie einen Ansagetyp. 4 Beenden Sie den Vorgang. • Wenn die ANN-Anzeige aufleuchtet, ist der Ansagen-Standbyempfang aktiviert. • Wenn die ANN-Anzeige blinkt, ist der Ansagen-Standbyempfang noch nicht aktiviert. Zum Aktivieren müssen Sie einen anderen Dienst einstellen, der diese S...
Page 75 - Schalten Sie die angeschlossene; Wartung; Reinigen der Anschlüsse
33 DEUTSCH Fortsetzung auf nächster Seite Bedienung von anderen externen Komponenten Sie können eine externe Komponente an die LINE IN-Buchse auf der Rückseite anschließen oder über den Line-Eingangsadapter—KS-U57 (nicht mitgeliefert) bzw. AUX-Eingangsadapter—KS-U58 (nicht mitgeliefert) mit der CD-W...
Page 76 - Einschalten; Sauberhalten der Disks
34 DEUTSCH Weitere Informationen zu Ihrem Receiver Grundlegende Bedienung Einschalten • Sie können auch durch Drücken von SOURCE am Receiver einschalten. Wenn die gewählte Quelle startbereit ist, startet auch die Wiedergabe. Ausschalten • Wenn Sie das Gerät beim Hören einer Disk ausschalten, startet...
Page 77 - Achtung bei DualDisc-Wiedergabe
35 DEUTSCH • Meldungsdienst erfordert das RDS-Radiotext- Signal. Es ist bei den meisten wichtigen Sendern vorhanden. Bei schwachem Empfang kann es sein, dass der Dienst nicht zur Verfügung steht. Wenn Sie Fragen bezüglich des Inhalts dieses Dienstes haben, wenden Sie sich an den betreffenden Sender....
Page 78 - Ändern der Quelle
36 DEUTSCH – Romeo * : bis zu 128 (72) Zeichen – Joliet * : bis zu 64 (36) Zeichen – Lange Windows-Dateinamen * : bis zu 128 (72) Zeichen * Die Zahl in Klammern ist die Maximalzahl von Zeichen für Datei/Ordner-Namen falls die Gesamtzahl von Dateien und Ordnern 313 oder mehr beträgt. • Dieser Receive...
Page 79 - Auswählen der DSP-Modi—DSP
37 DEUTSCH Fortsetzung auf nächster Seite Klangeinstellungen Auswählen der DSP-Modi—DSP • Der Wirkungsgrad von „V.Cancel“ hängt vom Aufnahmezustand der Quellen ab: – Mono-Tonquellen wie AM-und Mono- UKW-Ausstrahlungen. – Multiplex-Klangquellen. – Tonquellen, die mit Duetten, starkem Echo, einem Chor...
Page 80 - Symptome; Störungssuche; Vorwahl-Frequenzpegeleinstellungen für jeden Klangmodus; Klangmodus
38 DEUTSCH Symptome Abhilfen/Ursachen Allgemeines • Es kommt kein Ton von den Lautsprechern. • Die Lautstärke auf den optimalen Pegel einstellen.• Prüfen Sie die Kabel und Verbindungen. • Dieser Receiver funktioniert überhaupt nicht. Nehmen Sie einen Reset am Receiver vor (siehe Seite 2). • „Connect...
Page 84 - Technische Daten; AUDIO-VERSTÄRKERSEKTION; 0 W pro Kanal
42 DEUTSCH Technische Daten AUDIO-VERSTÄRKERSEKTION Max. Ausgangsleistung: Vorne/Hinten: 50 W pro Kanal Sinus-Ausgangsleistung (eff.): Vorne/Hinten: 19 W pro Kanal an 4 Ω, 40 Hz bis 20 000 Hz bei nicht mehr als 0,8% Klirrfaktor Lastimpedanz: 4 Ω (4 Ω bis 8 Ω Toleranz) Equalizer-Steuerbereich: Freque...
Page 85 - Gleichlaufschwankungen:; ALLGEMEINES; Negative Masse
43 DEUTSCH CD-SPIELER-SEKTION Typ: CD-Spieler Signalerkennungssystem: Kontaktfreier optischer Tonabnehmer (Halbleiterlaser)Kanäle: 2 Kanäle (Stereo) Frequenzgang: 5 Hz bis 20 000 Hz Dynamikumfang: 98 dB Signal-Rauschabstand: 102 dB Gleichlaufschwankungen: Unter der Messgrenze MP3: Bit-Rate: 32 kbps ...
Page 86 - РУCCKИЙ; ВАЖНО ДЛЯ ЛАЗЕРНОЙ АППАРАТУРЫ; Как перенастроить Ваше
2 РУCCKИЙ Благодарим Вас за приобретение изделия JVC. Перед тем, как приступать к эксплуатации, пожалуйста, внимательно прочитайте все инструкции с тем, чтобы полностью изучить и обеспечить оптимальную работу этого устройства. ВАЖНО ДЛЯ ЛАЗЕРНОЙ АППАРАТУРЫ 1. ЛАЗЕРНАЯ АППАРАТУРА КЛАССА 12. ПРЕДУПРЕЖ...
Page 87 - CОДЕРЖАНИЕ
РУCCKИЙ 3 Как пользоваться данным руководством • Операции, выполняемые с использованием кнопок, в основном обозначаются рисунками, приведенными в следующей таблице. • Некоторые советы и примечания приведены в разделе “Дополнительная информация о приемнике” (см. стр. 34 до 38). Нажать кратковременно....
Page 88 - Вход в различные меню; Выберите необходимое меню.; Отсоединение и подключение
4 РУCCKИЙ Вход в различные меню В главном меню содержатся семь меню (MODE, PSM, SEL, TITLE, BBE, EQ, DSP).• Если в течение 5 секунд не будет введена ни одна команда, экран меню удаляется. 1 2 Выберите необходимое меню. 3 Войдите в выбранное меню. • Для возврата к предыдущему экрану или выхода из экр...
Page 89 - Смена режимов отображения и информации на дисплее; Расположение кнопок; Панель управления
РУCCKИЙ 5 Смена режимов отображения и информации на дисплее 1 Кнопка BAND 2 Кнопка SOURCE 3 • Диск управления • Кнопка POWER/ATT (аттенюатор)/ ENTER 4 Кнопка MENU 5 Кнопки 5 (вверх) / ∞ (вниз) 6 Окно дисплея 7 Кнопка DISP (дисплей) 8 Вход USB (универсальная последовательная шина) Расположение кнопок...
Page 90 - Пульт дистанционного управления —; Установка литиевой батареи-; Основные элементы и функции
6 РУCCKИЙ Пульт дистанционного управления — RM-RK300 Установка литиевой батареи- таблетки (CR2025) Направьте пульт дистанционного управления непосредственно на телеметрический датчик приемника. Убедитесь в том, что между ними нет никаких препятствий. Предупреждение: • Не устанавливайте никаких аккум...
Page 91 - Начало работы; Основные операции; Настройте громкость.
РУCCKИЙ 7 Продолжение не следующей странице 2 Кнопка SOURCE Осуществляет выбор источника звука. 3 Кнопки 5 (вверх) / ∞ (вниз) • Для DAB: смена службы. • Для MP3/WMA/SD/USB: смена папок. • При прослушивании проигрывателя Apple iPod ® или JVC D.: – Пауза/останов или возобновление воспроизведения с пом...
Page 92 - Выключение питания; Основные настройки; Настройка часов; Операции с радиоприемником; Начните поиск радиостанции.; Настройка на радиостанцию вручную; При слабом стереофоническом
8 РУCCKИЙ Мгновенное снижение громкости (ATT) Для восстановления звука нажмите еще раз. Выключение питания Основные настройки • См. также раздел “Общие настройки — PSM” на стр. 23 до 26. 1 Войдите в меню PSM (см. стр. 4). 2 1 Отмена демонстрации функций дисплея Выберите “Demo”, затем “Off”. 2 Настро...
Page 93 - Настройка только на радиостанции; Сохранение радиостанций; Автоматическое программирование
РУCCKИЙ 9 4 Загорается индикатор MO. Прием улучшается, но стереоэффект будет потерян. Для восстановления стереоэффекта повторите ту же процедуру и выберите “Off” в действии 3 . Индикатор MO гаснет. Настройка только на радиостанции FM с сильным сигналом—LO (местные)/DX (дальние расстояния) 1 Войдите ...
Page 94 - Сохраните радиостанцию.; Прослушивание
10 РУCCKИЙ 4 5 6 Выберите запрограммированный номер. • Можно перейти к спискам других диапазонов FM, вращая ручку управления. 7 Сохраните радиостанцию. При использовании пульта дистанционного управления После настройки на радиостанцию, которую необходимо запрограммировать... Прослушивание запрограмм...
Page 95 - Операции с FM RDS; Что можно делать с помощью RDS; Запустите поиск любимой; Сохранение любимых программ
11 РУCCKИЙ Продолжение не следующей странице Операции с FM RDS Что можно делать с помощью RDS Система RDS (Radio Data System) позволяет FM-радиостанциям отправлять дополнительный сигнал вместе с обычными сигналами программ.При приеме данных RDS приемник может выполнять следующие операции:• Поиск тип...
Page 96 - Использование функции; Резервный прием TA; Резервный прием PTY; Активация функции резервного приема PTY; Выберите один из кодов PTY.
12 РУCCKИЙ 5 Сохраните настройку. 6 Для сохранения других кодов PTY с другими запрограммированными номерами. 7 Завершите процедуру. Использование функции резервного приема Резервный прием TA Резервный прием TA позволяет временно переключаться на передачу сообщений о движении на дорогах (TA) с любого...
Page 97 - Отслеживание той же программы; Что такое радиотекст RDS
13 РУCCKИЙ Отслеживание той же программы (сеть-отслеживающий прием) При поездке по региону, где невозможен качественный прием в диапазоне FM, данный приемник автоматически настраивается на другую радиостанцию FM RDS в той же сети, которая может передавать в эфир ту же программу с помощью более сильн...
Page 98 - Воспроизведение с SD-карты
14 РУCCKИЙ Операции с диском, SD-картой или USB-памятью Воспроизведение диска в приемнике Все дорожки будут воспроизводиться последовательно до тех пор, пока не произойдет смена источника или не будет извлечен диск. Останов воспроизведения и извлечение диска Примечание: Если к устройству подключена ...
Page 99 - Подключите панель управления.; О дисках MP3 и WMA
15 РУCCKИЙ Продолжение не следующей странице ! Подключите панель управления. ⁄ • Панель управления возвращается в прежнее положение. Если дорожки записаны, воспроизведение начинается автоматически. Воспроизведение из USB-памяти Данное устройство может воспроизводить дорожки MP3/WMA, сохраненные в US...
Page 100 - Другие основные функции; списка; Начало воспроизведения.
16 РУCCKИЙ Переход к следующим или предыдущим дорожкам Переход к следующей или предыдущей папке (только для MP3/WMA/SD/USB) Для дорожек MP3: Для дорожек WMA: • С помощью удерживания этих кнопок нажатыми можно отобразить список дисков ( ) и список папок ( / / ), см. далее. Другие основные функции Выб...
Page 101 - Запрещение извлечения диска; Выбор режимов воспроизведения
17 РУCCKИЙ Запрещение извлечения диска Можно заблокировать диск в загрузочном отсеке. 1 2 После выбора “No Eject?”... • Мигает надпись “No Eject”, и диск невозможно извлечь. Для отмены блокировки повторите ту же процедуру после выбора “Eject OK?”.• На дисплее мигает надпись “Eject OK”. Выбор режимов...
Page 102 - Точные настройки режимов DSP; Настройки звучания; Режимы DSP; Выберите один из режимов DSP.
18 РУCCKИЙ Для выполнения более точных настроек см. далее. Для отмены акустических эффектов выберите “Defeat” в действии Ÿ . Точные настройки режимов DSP 1 Выберите режим DSP. 2 Выберите количество встроенных динамиков. • Для режимов “Defeat” и “V.Cancel”, число динамиков фиксировано (“4ch”, 4 канал...
Page 103 - Выбор запрограммированных; Режимы звучания; Выберите режим звучания.; Включение функции BBE Digital; Выберите уровень эффекта.
19 РУCCKИЙ 3 Завершите процедуру. Использование эквалайзера —EQ Для коррекции звука по своему желанию можно использовать шаблоны, настраивая их в графическом (Graphic EQ) или параметрическом (Parametric EQ) режиме.• При настройке эквалайзера необходимо учитывать воспроизводимый диапазон частот подкл...
Page 104 - Сохранение собственных режимов; Настройка режима “Parametric EQ”
20 РУCCKИЙ 3 Выберите диапазон. Band1 : 20,0 Гц – 1,2 кГц Band2 : 80,0 Гц – 5,0 кГц Band3 : 315,0 Гц – 20 кГц 4 Настройте повышенный уровень для выбранного диапазона частот. 5 Выберите частоту. • Расстояние между этими тремя диапазонами (1/2/3) должно составлять не менее 5 делений (частот). (На дисп...
Page 105 - Завершите процедуру.; Выберите элемент настройки.; Настройка уровня сигнала и баланса
21 РУCCKИЙ Включение разделительного фильтра Путем включения разделительного фильтра можно назначать различные диапазоны частот разным динамикам для соответствия их характеристикам. Если в автомобиле установлена трехполосная система динамиков, выполните следующие настройки: • Перед использованием си...
Page 106 - Настройка уровня
22 РУCCKИЙ Настройка уровня воспроизводимых частот — X-Over Эта настройка доступна только тогда, когда разделительный фильтр включен (см. стр. 21). 1 Выберите фильтр. HPF(Передние/Задние) : Частоты ниже выбранного уровня отсекаются. LPF (Задние) : Частоты выше выбранного уровня отсекаются. 2 Выберит...
Page 107 - Общие настройки — PSM; Индикация
23 РУCCKИЙ 3 Выберите или настройте выбранный элемент PSM. 4 Повторите действия 2 и 3 для настройки других параметров PSM, если необходимо. 5 Завершите процедуру. Можно изменять параметры PSM (предпочитаемый режим настройки), которые перечислены в таблице ниже. 1 Войдите в меню PSM (см. стр. 4). 2 В...
Page 109 - Установите время отключения; Выберите “Dimmer” из меню PSM.; Выбор таймера затемнения
25 РУCCKИЙ 2 Установите время отключения функции затемнения. 24Hours : [0 – 23] 12Hours : [1A (1AM) – 12A (12AM); 1P (1PM) – 12P (12PM)] 4 Завершите процедуру. Индикация Элементы Настройки, [страница для справки] Beep Звук нажатия кнопки • On [По умолчанию] • Off : Включение звука нажатия кнопки.: В...
Page 110 - Присвоения названия; Источники; Выбор графической темы; Выберите “Theme” из меню PSM.
26 РУCCKИЙ Присвоения названия Вы можете присваивать названия компакт-дискам (как в данном приемнике, так и в устройстве автоматической смены компакт-дисков), а также внешним устройствам (подключенным через линейный вход или вход для внешних устройств). Источники звука Максимальное число символов Ко...
Page 111 - Повторяйте действия; Удаление названия полностью
27 РУCCKИЙ 3 Перейдите к положению следующего (предыдущего) символа. 4 Повторяйте действия 1 и 3 , пока не завершите ввод названия. 4 Завершите процедуру. • Для отмены элемента заголовка без регистрации нажмите MENU. Удаление названия полностью В действии 3 ... Допустимые символы Кроме букв латинско...
Page 112 - Выбор дорожки из меню; Перейдите главное меню.; Приостанов
28 РУCCKИЙ Выбор дорожки из меню 1 Перейдите главное меню. Теперь кнопки 5 / ∞ / 4 / ¢ функционируют как кнопки выбора меню * . * Режим выбора меню будет отменен: – если в течение 5 секунд не будет выполнена ни одна операция; – при подтверждении выбора дорожки. 2 Выберите необходимое меню. Для iPod:...
Page 113 - Повторное воспроизведение; Операции с тюнером DAB; Что такое система “DAB”?; Запустите поиск блока трансляции.
29 РУCCKИЙ Выбор режимов воспроизведения 1 Войдите в меню MODE (см. стр. 4). 2 Выберите один из режимов воспроизведения. 3 Выберите элемент (см. нижеприведенную таблицу). 4 Завершите процедуру. Повторное воспроизведение One : Функции, аналогичные функциям “Repeat One” проигрывателя iPod или “Режим п...
Page 114 - Поиск предпочитаемой службы; Сохранение служб DAB в памяти; Выберите необходимую службу.; Настройка на блок трансляции вручную; Шум при прослушивании
30 РУCCKИЙ 4 Завершите процедуру. • Индикатор DRC будет выделен на дисплее только тогда, когда устройством приняты сигналы DRC от службы, на которую выполнена настройка. Поиск предпочитаемой службы Можно выполнить поиск кодов PTY “Dynamic” или “Static”.• Операции в точности соответствуют описанию дл...
Page 115 - Настройка на; Резервный прием TA (сообщений о; Типы сообщений
31 РУCCKИЙ 5 Сохраните службу. При использовании пульта дистанционного управления После настройки на службу, которую необходимо запрограммировать... Настройка на запрограммированную службу DAB 1 2 Войдите в меню MODE (см. стр. 4). 3 Выберите “List”. 4 Выберите запрограммированный номер. • Можно пере...
Page 116 - Выберите тип оповещения.; Отслеживание той же
32 РУCCKИЙ В исходных настройках, выполненных на заводе-изготовителе, режим альтернативного приема включен. Информацию о деактивации приема на альтернативных частотах см. на стр. 24. Отображение информации динамического сегмента метки (DLS) • При управлении устройством экран DLS будет временно удале...
Page 117 - Включите подключенное; Обслуживание; Очистка разъемов; Как обращаться с дисками
33 РУCCKИЙ Продолжение не следующей странице Другие операции с внешним устройством Внешнее устройство можно подключить к разъему LINE IN, расположенному на задней панели устройства, а также к разъему устройства автоматической смены компакт-дисков, расположенному на задней панели, с помощью адаптера ...
Page 118 - Включение питания; Операции с тюнером; Хранение дисков в чистом виде
34 РУCCKИЙ Дополнительная информация о приемнике Основные операции Включение питания • Для включения питания приемника также можно использовать кнопку SOURCE. Если источник готов, воспроизведение также начинается. Выключение питания • Если питание отключается во время прослушивания диска, при послед...
Page 119 - Общие сведения
35 РУCCKИЙ • Службе сообщений необходим сигнал радиотекста RDS. Его передает большинство станций. При низком уровне сигнала служба может стать недоступной. По всем вопросам, касающимся этой службы, обращайтесь на радиостанцию. • Дополнительную информацию об услуге RDS см. на стран ице «http://www.rd...
Page 120 - Смена источника звука
36 РУCCKИЙ – Romeo * : до 128 (72) символов – Joliet * : до 64 (36) символов – Длинное имя файла Windows * : до 128 (72) символов * Значение в скобках представляет собой максимально допустимое число символов для имен файлов/папок в случае, если суммарное количество файлов и папок составляет 313 или ...
Page 121 - Выбор режимов DSP—DSP
РУCCKИЙ 37 Продолжение не следующей странице Настройки звучания Выбор режимов DSP—DSP • Эффективность режима “V.Cancel” зависит от качества записи источника: – Монофонические вещательные программы на частотах AM и FM. – Сложные источники звука. – Источники, на которых записано пение дуэтом или хором...
Page 122 - Симптомы; Устранение проблем; Режим звучания
38 РУCCKИЙ Симптомы Способы устранения/Причины Общие сведения • Не слышен звук динамиков. • Установите оптимальный уровень громкости.• Проверьте кабели и соединения. • Приемник не работает. Перенастройте приемник (см. стр. 2). • На дисплее появляется надпись “Connect Error”. Извлеките панель управле...
Page 126 - Технические характеристики; БЛОК УСИЛИТЕЛЕЙ ЗВУКА
42 РУCCKИЙ Технические характеристики БЛОК УСИЛИТЕЛЕЙ ЗВУКА Максимальная выходная мощность: Передние/Задние: 50 Вт на каждый канал Длительная выходная мощность (RMS): Передние/Задние: 19 Вт на канал в при 4 Ω, от 40 Гц до 20 000 Гц и не более чем 0,8% общего гармонического искажения Импеданс нагрузк...
Page 127 - ОБЩИЕ ТРЕБОВАНИЯ
РУCCKИЙ 43 SD-КАРТА Формат: FAT 12/16 Емкость: 8 Мб – 512 Мб Формат воспроизводимого звука: MP3/WMA MP3: Скорость передачи данных: 8 кбит/с – 320 кбит/с Частота дискретизации: MPEG-1: 48 кГц, 44,1 кГц, 33 кГц MPEG-2: 24 кГц, 22,05 кГц, 16 кГц WMA: Скорость передачи данных: 8 кбит/с – 192 кбит/с Част...
Page 128 - Having TROUBLE with operation?; Please reset your unit; Refer to page of How to reset your unit; Haben Sie PROBLEME mit dem Betrieb?; Bitte setzen Sie Ihr Gerät zurück; Siehe Seite Zurücksetzen des Geräts; Затруднения при эксплуатации?; Пожалуйста, перезагрузите Ваше устройство; Для получения информации о перезагрузке Вашего устройства
EN, GE, RU 0106DTSMDTJEIN Having TROUBLE with operation? Please reset your unit Refer to page of How to reset your unit Haben Sie PROBLEME mit dem Betrieb? Bitte setzen Sie Ihr Gerät zurück Siehe Seite Zurücksetzen des Geräts Затруднения при эксплуатации? Пожалуйста, перезагрузите Ваше устройство Дл...


 JVC KD-AV7001
User Manual
JVC KD-AV7001
User Manual
 JVC KD-AVX1
Manual
JVC KD-AVX1
Manual
 JVC KD-AVX11
User Manual
JVC KD-AVX11
User Manual
 JVC KD-AVX12
User Manual
JVC KD-AVX12
User Manual
 JVC KD-AVX2
User Manual
JVC KD-AVX2
User Manual
 JVC KD-AVX20
User Manual
JVC KD-AVX20
User Manual
 JVC KD-AVX22
User Manual
JVC KD-AVX22
User Manual
 JVC KD-AVX33
User Manual
JVC KD-AVX33
User Manual
 JVC KD-AVX40
User Manual
JVC KD-AVX40
User Manual
 JVC KD-AVX44
User Manual
JVC KD-AVX44
User Manual
 JVC KD-AVX55
User Manual
JVC KD-AVX55
User Manual
 JVC KD-AVX77
User Manual
JVC KD-AVX77
User Manual
 JVC KD-BT1
User Manual
JVC KD-BT1
User Manual