Honeywell HWAC-2417S - Manuals
User Manual Honeywell HWAC-2417S


Summary
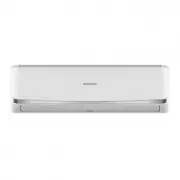
2 CONTENTS Thank you for purchasing the HWAC-1217S, HWAC-1817S, or HWAC-2417S Mini-Split Air Conditioner. This manual will provide you with safety information, installation steps, instructions for optimal use, and proper care and maintenance for your product. Please read this manual carefully before...
MODEL HWAC-1217S HWAC-1817S HWAC-2417S Cooling Capacity Heating Capacity 12,000 BTU Cooling 12,300 BTU Heating 18,000 BTU Cooling 18, 4 00 BTU Heating 24,000 BTU Cooling 24,000 BTU Heating SEER Rating 17 17 17 Room Size (Sq. ft.) 300-500 600-800 900-1,200 Voltage / Frequency 115V / 60 Hz 230V / 60 H...
Always be careful when using the machine. To reduce the risk of fire, electrical shock, or other injuries, keep these safety considerations in mind when installing, using, and maintaining your machine. . WARNING 1. The air conditioner must be properly grounded on a level surface. Do not connect the ...
Honeywell Air Conditioners Manuals
-
 Honeywell HF0CESVWK6
User Manual
Honeywell HF0CESVWK6
User Manual
-
 Honeywell HF0CESVWK6R
User Manual
Honeywell HF0CESVWK6R
User Manual
-
 Honeywell HF2CESVWK8
User Manual
Honeywell HF2CESVWK8
User Manual
-
 Honeywell HF8CESVWK5
User Manual
Honeywell HF8CESVWK5
User Manual
-
 Honeywell HJ0CESWK7
User Manual
Honeywell HJ0CESWK7
User Manual
-
 Honeywell HJ2CESWK8
User Manual
Honeywell HJ2CESWK8
User Manual
-
 Honeywell HM0CESAWK6
User Manual
Honeywell HM0CESAWK6
User Manual
-
 Honeywell HM2CESAWK8
User Manual
Honeywell HM2CESAWK8
User Manual
-
 Honeywell HW2CESAWW9
User Manual
Honeywell HW2CESAWW9
User Manual
-
 Honeywell HW4CEDAWW0
User Manual
Honeywell HW4CEDAWW0
User Manual
-
 Honeywell HW4CEDVWW0
User Manual
Honeywell HW4CEDVWW0
User Manual
-
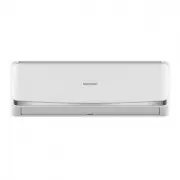 Honeywell HWAC-1817S
User Manual
Honeywell HWAC-1817S
User Manual
-
 Honeywell MN1CFSBB8
User Manual
Honeywell MN1CFSBB8
User Manual
-
 Honeywell MN1CFSWW8
User Manual
Honeywell MN1CFSWW8
User Manual
-
 Honeywell MN4CFS0
User Manual
Honeywell MN4CFS0
User Manual
-
 Honeywell MN4CFS9
User Manual
Honeywell MN4CFS9
User Manual
-
 Honeywell MN4CFSBB0
User Manual
Honeywell MN4CFSBB0
User Manual
-
 Honeywell MN4CFSBB9
User Manual
Honeywell MN4CFSBB9
User Manual
-
 Honeywell MN4CFSWW0
User Manual
Honeywell MN4CFSWW0
User Manual
-
 Honeywell MN4CFSWW9
User Manual
Honeywell MN4CFSWW9
User Manual