Hisense LCDC0028 - Manuals
Hisense LCDC0028 – User Manual in PDF format online.
Manuals:
User Manual Hisense LCDC0028


Summary
E F ATTENTION : POUR RÉDUIRE LE RISQUE DE CHOC ÉLECTRIQUE, NE PAS ENLEVER LE COUVERCLE OU LE DOS. AUCUNE PIÈCE À ÊTRE ENTRETENUE PAR L'UTILISATEUR NE SE TROUVE À L'INTÉRIEUR. POUR L’ENTRETIEN, CONSULTER LE PERSONNEL DE SERVICE QUALIFIÉ. L'éclair accompagné d'une flèche dans des triangles équilatérau...
G 14. Pour toute réparation, consultez un personnel de service qualifié. Des réparations sont requises lorsque l'appareil a été endommagé d'une façon ou d'une autre, par exemple lorsque le cordon d'alimentation est endommagé, si du liquide a été renversé ou si des objets sont tombés dans l'appareil,...
I Formats spéciaux qui ne couvrent pas l’écran entier. Par exemple, visualiser le format boîte aux lettres (16:9) sur écran normal (4:3) (barres noires en haut et en bas de l'écran) ou vue normale (4:3) sur grand écran (16:9) (barres noires sur la gauche et la droite de l'écran). Les symptômes suiva...
Hisense Manuals
-
 Hisense HL3216CE
User Manual
Hisense HL3216CE
User Manual
-
 Hisense BR0021
User Manual
Hisense BR0021
User Manual
-
 Hisense PX3 PRO
Installation Manual
Hisense PX3 PRO
Installation Manual
-
Hisense PX3 PRO
Manual
-
 Hisense AEH W41H1
User Manual
Hisense AEH W41H1
User Manual
-
 Hisense HRCD640G
User Manual
Hisense HRCD640G
User Manual
-
Hisense HRCD640GB
User Manual
-
Hisense HRCD640TB
User Manual
-
 Hisense HRCD640TBW
User Manual
Hisense HRCD640TBW
User Manual
-
Hisense HRCD640TS
User Manual
-
Hisense HRCD640TSW
User Manual
-
 Hisense HT007E
User Manual
Hisense HT007E
User Manual
-
 Hisense HS205G
User Manual
Hisense HS205G
User Manual
-
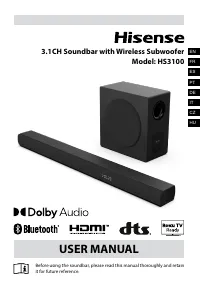 Hisense HS3100
User Manual
Hisense HS3100
User Manual
-
 Hisense HS5100
User Manual
Hisense HS5100
User Manual
-
 Hisense HRSBS540BW
User Manual
Hisense HRSBS540BW
User Manual
-
Hisense HRSBS540SW
User Manual
-
 Hisense BR0019
User Manual
Hisense BR0019
User Manual
-
 Hisense AHW0823CW1W
User Manual
Hisense AHW0823CW1W
User Manual
-
 Hisense AHP1022TW1GD
User Manual
Hisense AHP1022TW1GD
User Manual