Page 2 - English; QUICK SETUP GUIDE; Before using the TV, please read this guide thoroughly
English ES-A190305-1 QUICK SETUP GUIDE Before using the TV, please read this guide thoroughly and retain it for future reference. For more detailed instructions, please see the User Manual. 58R5
Page 3 - Declaration
Page 4 - Important Safety Precautions; Disposal of Used Electrical & Electronic Equipment; ATTENTION
B Important Safety Precautions This symbol alerts user about the presence of a dangerous voltage not isolated inside the product which can be sufficiently powerful to constitute a risk of electrocution.This symbol alerts user about the p r e s e n c e o f i m p o r t a n t o p e r a t i n g instruct...
Page 5 - Warning; as above should be applied.
C Important Safety Precautions Warning Never place a television set in an unstable location. A television set may fall, causing serious personal injury or death. Many injuries, particularly to children, can be avoided by taking simple precautions such as: Using stands recommended by the manufacturer...
Page 6 - Safeguards
D Important Safety Precautions Safeguards Please read the following safeguards for your TV and retain for future reference.Always follow all warnings and instructions marked on the television. 1. A note about safety and operating instructionsRead and follow all safety and operating instructions, and...
Page 8 - to have the wall socket and power plug readily accessible.
F Important Safety Precautions To fully disconnect the TV, remove power plug from wall socket. Be sure to have the wall socket and power plug readily accessible. Do not mix and use new batteries with old batteries, or batteries with different types. Do not expose batteries to heat such as direct sun...
Page 9 - Contents
1 Contents Contents TV Base Stand Quick Setup Guide Power cord AAA Battery × 2 Remote Control Screw × 4 Accessories List The following accessories are included with TV: OK VOLC BACK EXIT INPUT Subtitle T.shift EPG CH.List CH APP Info APP (Actual product may vary in appearance.) Figures and illustrat...
Page 10 - CAUTION; Installing the Stand; Installing the Stand or Wall Mount Bracket; TV or scratching to the screen.; Base Stand
2 CAUTION Be sure to disconnect the A/C power cord before removing a base stand or installing Wall-Mount brackets.The screen display is very fragile, and must be protected at all times when installing the base stand. Be sure that no hard or sharp object, or anything that could scratch or damage the ...
Page 11 - Wall-Mount screw size; NOTE; Follow instructions provided with the Wall mount bracket.; Installing the Wall Mount Bracket (not included)
3 Installing the Stand or Wall Mount Bracket Wall-Mount hole pattern (mm) 400 × 200 Wall-Mount screw size M6 9.5~11.5mm Wall-Mount Bracket Screw Spacer The TV's rear cover NOTE Follow instructions provided with the Wall mount bracket. Installing the Wall Mount Bracket (not included)
Page 12 - TV Front; Item; Remote sensor; Joystick button
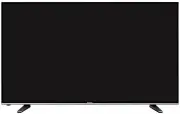
4 TV Front TV Front NOTE Powering on the TV requires several seconds to load program. Do not rapidly turn the TV off as it may cause the TV to work abnormally. Item Description Remote sensor Receive remote signals from the remote control. Do not put anything near the sensor, as its function may be a...
Page 13 - TV Rear; Power Input; NOTES; used by our factory for testing
5 TV Rear TV Rear ANT HDMI 3 ( 4K@30Hz ) HDMI 2 ARC ( 4K@60Hz ) HEADPHONE HDMI 1 ( 4K@60Hz ) DC 5V 0.5A(MAX) USB 1 DC 5V 1A(MAX) USB 2 Power Input VIDEO L R AV IN LAN NOTES Check the jacks for position and type before making any connections. Loose connections can result in image or color problems. M...
Page 14 - Making Connections; ANT; INPUT
6 Making Connections ANT Connect an outdoor VHF/UHF antenna or cable. TV JACK Outdoor Antenna Antenna Cable (75Ω) or ANT OUT Cable VHF/UHF Antenna ANT (not included) HDMI / AV Connect a HDMI / AV cable from an external AV equipment. No sound connection is needed for HDMI to HDMI connection. If the s...
Page 15 - DIGITAL AUDIO OUT; HEADPHONE
7 Making Connections DIGITAL AUDIO OUT Connect to an external digital audio system. Before connecting a digital audio system to the DIGITAL AUDIO OUT jack, you should decrease the volume of both the TV and the system to avoid that the volume suddenly becomes bigger. TV JACK DIGITAL AUDIO cable (not ...
Page 16 - USB; supported current may result in damage or data loss.
8 Making Connections LAN (Wired setup) Connect your TV to your network by connecting the LAN port on the back of your TV to an external modem or router using a LAN (Ethernet/Cat 5) cable. See the illustration below. · We recommend you to use a modem or router that supports Dynamic Host Configuration...
Page 17 - Wireless setup
9 Making Connections Wireless setup Connect your TV to your wireless network, you need a wireless router or modem. See the illustration below. · The TV’s built-in Wireless LAN Adapter supports the IEEE 802.11 b/g/n communication protocols. Wireless router with DHCP LAN Cable Wireless LAN Adapterbuil...
Page 18 - What is Freeview Plus?; Freeview Plus service only available in Australia territories.
10 Making Connections What is Freeview Plus? Freeview Plus is a new television service delivered via broadband providing a state of the art Electronic Program Guide (EPG) and seamless access to catch-up TV across the free-to-air networks with the simple press of a button. How does it work? First ens...
Page 19 - Remote Control; Display the Electronic; NOTE: The button is AD; OK; Quick access buttons to; Info
11 Remote Control Mute and restore sound Display the Electronic Program Guide (DTV mode) CH.List: Display the channel list on the screen (Thailand) AD: Set the Audio Description on or off NOTE: The button is AD for Thailand area. Display the current program information Exit the menu or exit the appl...
Page 20 - Remote Control Operation Range; Installing Batteries in the Remote Control
12 Remote Control Operation Range Remote Control Installing Batteries in the Remote Control NOTES Product image is only for reference, actual product may vary in appearance.Dispose of your batteries in a designated disposal area. Do not throw the batteries into fire.Do not mix battery types or combi...
Page 21 - Turning the TV on for the First Time
13 Turning the TV on for the First Time Turning the TV on for the First Time 1. Connect the mains cable to the mains socket after you have completed all the connections. 2. The first time you turn the TV on, it will go straight to the Installation Guide. 3. Press the [ / / < / > ] to navigate ...
Page 22 - Specifications; troubleshooting tips in the User Manual.; Please refer to the rating label.
14 Specifications Features, appearance and specifications are subject to change without notice.If you encountered difficulty when setting up your TV, we suggest you refer to the troubleshooting tips in the User Manual. Item 58" Dimension (mm) Without Stand (W × H × D) 1292 × 749 × 68 With Stand ...