Page 3 - Table of Contents
Table of Contents INTRODUCTION ............................................... 2 Contact Info.................................................... 2Manual Accuracy ........................................... 2Identification ................................................... 3Controls & Component...
Page 4 - INTRODUCTION; Manual Accuracy; Contact Info
-2- Model G0817 (Mfd. Since 05/16) INTRODUCTION We are proud to provide a high-quality owner’s manual with your new machine! We made every effort to be exact with the instruc-tions, specifications, drawings, and photographs in this manual. Sometimes we make mistakes, but our policy of continuous imp...
Page 5 - Identification
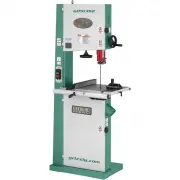
Model G0817 (Mfd. Since 05/16) -3- Identification Become familiar with the names and locations of the controls and features shown below to better understand the instructions in this manual. For Your Own Safety, Read Instruction Manual Before Operating Saw. a) Wear eye protection. b) Do not remove ja...
Page 6 - Components; Control Panel
-4- Model G0817 (Mfd. Since 05/16) Controls & Components Fence & Miter Gauge Figure 2. Fence and miter gauge controls. D. Fence: Used for ripping or resawing. Distance from blade determines width of cut. Can be used in vertical position (as shown in Figure 2) for normal workpieces, or in hor...
Page 7 - Guide Post; Blade Tension & Tracking
Model G0817 (Mfd. Since 05/16) -5- Guide Post H K I J Figure 4. Guide post controls. H. Guide Post Handwheel: Adjusts height of guide post above workpiece, using a rack-and-pinion system. I. Guide Post w/Scale: Houses upper blade guides and support bearing, and shields operator from upper portion of...
Page 8 - Foot Brake
-6- Model G0817 (Mfd. Since 05/16) Table Tilt S T U V Figure 8. Table tilt controls. S. Table Tilt Indicator: Shows table tilt angle. T. Table Tilt Lock Lever: Secures table tilt position on trunnion. Must be loosened before table tilt can be adjusted. U. Trunnion w/Table Tilt Scale: Functions as a ...
Page 9 - Machine Data Sheet; MACHINE DATA; BANDSAW WITH FOOT BRAKE
Model G0817 (Mfd. Since 05/16) -7- Machine Data Sheet The information contained herein is deemed accurate as of 3/26/2019 and represents our most recent product specifications. Due to our ongoing improvement efforts, this information may not accurately describe items previously purchased. PAGE 1 OF ...
Page 11 - NOTICE; Safety Instructions for Machinery
Model G0817 (Mfd. Since 05/16) -9- ELECTRICAL EQUIPMENT INJURY RISKS. You can be shocked, burned, or killed by touching live electrical components or improperly grounded machinery. To reduce this risk, only allow qualified service personnel to do electrical installation or repair work, and always di...
Page 13 - Additional Safety for Bandsaws
Model G0817 (Mfd. Since 05/16) -11- Serious cuts, amputation, or death can occur from contact with the moving saw blade during operation or if blade breakage occurs. To reduce this risk, anyone operating this machine MUST completely heed the hazards and warnings below. BLADE CONTROL. To avoid risk o...
Page 14 - SECTION 2: POWER SUPPLY; Availability
-12- Model G0817 (Mfd. Since 05/16) SECTION 2: POWER SUPPLY Availability Before installing the machine, consider the avail-ability and proximity of the required power supply circuit. If an existing circuit does not meet the requirements for this machine, a new circuit must be installed. To minimize ...
Page 15 - Extension Cords
Model G0817 (Mfd. Since 05/16) -13- Improper connection of the equipment-grounding wire can result in a risk of electric shock. The wire with green insulation (with or without yellow stripes) is the equipment-grounding wire. If repair or replacement of the power cord or plug is nec-essary, do not co...
Page 16 - Converting Voltage
-14- Model G0817 (Mfd. Since 05/16) 4. Connect wires as indicated in Figure 14. Secure wire connections with wire nuts, and wrap them with electrical tape so they will not vibrate loose during operation. 5. Close and secure motor junction box. 6. Remove 110V magnetic switch assembly (see Figure 15),...
Page 17 - Unpacking; Needed for Setup
Model G0817 (Mfd. Since 05/16) -15- SECTION 3: SETUP This machine was carefully packaged for safe transport. When unpacking, separate all enclosed items from packaging materials and inspect them for shipping damage. If items are damaged, please call us immediately at (570) 546-9663. IMPORTANT: Save ...
Page 18 - Inventory
-16- Model G0817 (Mfd. Since 05/16) Figure 16. Box 1 inventory. B C Figure 17. Box 2 inventory. D E F G Figure 18. Loose item inventory. H I J Inventory The following is a list of items shipped with your machine. Before beginning setup, lay these items out and inventory them. If any non-proprietary ...
Page 19 - Hardware Recognition Chart
Model G0817 (Mfd. Since 05/16) -17- Hardware Recognition Chart USE THIS CHART TO MATCH UPHARDWARE DURING THE INVENTORYAND ASSEMBLY PROCESS. 5mm 5 mm Flat Head Cap Screw
Page 20 - Cleanup
-18- Model G0817 (Mfd. Since 05/16) T23692—Orange Power DegreaserA great product for removing the waxy ship-ping grease from the non-painted parts of the machine during clean up. The unpainted surfaces of your machine are coated with a heavy-duty rust preventative that prevents corrosion during ship...
Page 21 - Site Considerations; Weight Load; Space Allocation
Model G0817 (Mfd. Since 05/16) -19- Site Considerations Figure 20. Minimum working clearances. Keep Workpiece Unloading Area Unobstructed Keep Workpiece Loading AreaUnobstructed = Electrical Connection 28¾" 32½" Weight Load Refer to the Machine Data Sheet for the weight of your machine. Make...
Page 23 - Anchoring to Floor; Anchoring to Concrete Floors; Assembly
Model G0817 (Mfd. Since 05/16) -21- Anchoring to Floor Anchoring machinery to the floor prevents tipping or shifting and reduces vibration that may occur during operation, resulting in a machine that runs slightly quieter and feels more solid. If the machine will be installed in a commercial or work...
Page 26 - Dust Collection
-24- Model G0817 (Mfd. Since 05/16) Dust Collection Minimum CFM at each Dust Port: 400 CFMDo not confuse this CFM recommendation with the rating of the dust collector. To determine the CFM at the dust port, you must consider these variables: (1) CFM rating of the dust collector, (2) hose type and le...
Page 29 - Test Run
Model G0817 (Mfd. Since 05/16) -27- Test Run Once assembly is complete, test run the machine to ensure it is properly connected to power and safety components are functioning correctly. If you find an unusual problem during the test run, immediately stop the machine, disconnect it from power, and fi...
Page 30 - Tensioning Blade
-28- Model G0817 (Mfd. Since 05/16) A properly tensioned blade is essential for mak-ing accurate cuts, maximizing blade life, and making other bandsaw adjustments. However, a properly tensioned blade will not compensate for cutting problems caused by excessive feed rate, hardness variations between ...
Page 32 - Fine Tune Tracking
-30- Model G0817 (Mfd. Since 05/16) Fine Tune Tracking During setup, the blade was tracked without the machine connected to power (refer to Page 25). In this procedure, the bandsaw is turned ON to perform fine tuning of the tracking. Make small changes with the blade tracking knob as you monitor the...
Page 35 - Installing
Model G0817 (Mfd. Since 05/16) -33- Installing "Euro-Style" Roller-Disc Guides 3. Loosen both guide bearing adjustment cap screws (see Figure 49), then position guide bearings so they are close to —but not quite touching—sides of blade. Note: When the blade guide bearings are properly adjust...
Page 36 - Adjusting
-34- Model G0817 (Mfd. Since 05/16) 3. Loosen two cap screws on guide post that secure upper blade guide assembly, remove upper blade guide assembly, and replace it with upper "Euro-style" roller-disc guide assembly (see Figure 52). Adjusting "Euro-Style" Roller-Disc Guides The "...
Page 38 - Aligning Table; Adjusting Miter Slot Parallelism
-36- Model G0817 (Mfd. Since 05/16) Aligning Table To ensure cutting accuracy, the table should be aligned so that the miter slot is parallel to the bandsaw blade, and that the table is perpendicu-lar (front to back) to the blade. These procedures work best with a wide ( 3 ⁄ 4 ") blade installed...
Page 39 - Aligning Fence
Model G0817 (Mfd. Since 05/16) -37- 5. Loosen trunnion bolts that secure table (see Figure 60). Figure 60. Location of trunnion bolts. Trunnion Bolts (3 of 4) 6. Adjust table until distance between straight- edge and miter slot is the same at front and back of table. 7. Retighten trunnion bolts, the...
Page 41 - SECTION 4: OPERATIONS; Operation Overview
Model G0817 (Mfd. Since 05/16) -39- SECTION 4: OPERATIONS Operation Overview The purpose of this overview is to provide the nov-ice machine operator with a basic understanding of how the machine is used during operation, so the machine controls/components discussed later in this manual are easier to...
Page 42 - Workpiece
-40- Model G0817 (Mfd. Since 05/16) Basic Functions of a Bandsaw A properly adjusted bandsaw can be safer to operate than most other saws and performs many types of cuts with ease and accuracy. It is capable of performing the following types of cuts: Straight Cuts • Miters • Angles • Compound Angles...
Page 43 - Blade Terminology
Model G0817 (Mfd. Since 05/16) -41- Setting Upper Blade Guide Height When cutting, the blade guides must always be positioned so they just clear (no more than 1 ⁄ 4 ") the workpiece. The guide post, shown in Figure 64, allows the upper blade guide assembly to be quickly adjusted for height. To a...
Page 44 - Tooth Style
-42- Model G0817 (Mfd. Since 05/16) Blade Dimensions Length Range ................................... 120"–120 1 ⁄ 2 " Width Range ............................................. 1 ⁄ 8 "– 3 ⁄ 4 " Blade Length Measured by the blade circumference, blade lengths are specific to each bands...
Page 45 - Tooth Set; Tooth Pitch
Model G0817 (Mfd. Since 05/16) -43- Bi-metal Blade: A strip of high-speed tool steel is precision welded to a flexible carbon blade, then teeth are ground into the blade to provide good edge-holding qualities for blades taking a lot of abuse (see Figure 70). Carbon Steel Blade Weld High-Speed Steel ...
Page 46 - Blade Selection Chart
-44- Model G0817 (Mfd. Since 05/16) Blade Selection Chart Cutting Operation Blade Width Narrow ( 1 ⁄ 8 " – 1 ⁄ 4 ") Medium ( 3 ⁄ 16 "– 1 ⁄ 2 ") Wide ( 1 ⁄ 2 "– 3 ⁄ 4 ") Resawing R H S C Ripping Thin Stock R H S M Ripping Thick Stock R H S C Ripping Round Stock R H S M R H S M...
Page 47 - Blade Breakage; Blade Care
Model G0817 (Mfd. Since 05/16) -45- Blade Breakage Many conditions may cause a bandsaw blade to break. Blade breakage is unavoidable in some cases, since it is the natural result of the peculiar stresses that bandsaw blades are subjected to. Blade breakage is also due to avoidable circum-stances. Av...
Page 48 - Changing Blade; Installing Blade
-46- Model G0817 (Mfd. Since 05/16) Changing Blade Disconnect bandsaw from power BEFORE changing blade. Serious personal injury could occur if machine is started during this procedure. LACERATION HAZARD ! Bandsaw blades are sharp and difficult to handle. Wear heavy leather gloves while handling to r...
Page 49 - Tilting Table
Model G0817 (Mfd. Since 05/16) -47- Tilting Table The table can be tilted from 5° left–45° right to make beveled cuts. A table tilt scale with pointer is provided on the trunnion, and a positive stop is provided for quickly returning the table back to 0° from a right-tilt setting (see Figure 73). No...
Page 50 - Checking/Calibrating Positive Stop; Ripping
-48- Model G0817 (Mfd. Since 05/16) To check /calibrate positive stop: 1. Tilt table to approximately 10° right-tilt. 2. Set positive stop to up position (see Figure 74). 3. Test positive stop setting by tilting table all the way left. — If table stops at 0, no further adjustments are necessary. — I...
Page 51 - Crosscutting; Resawing
Model G0817 (Mfd. Since 05/16) -49- Crosscutting Crosscutting is the process of cutting across the grain of wood. For plywood and other processed wood, crosscutting simply means cutting across the width of the material. Crosscuts can be 90° or angled using the miter gauge. Compound cross-cuts are th...
Page 52 - Cutting Curves; Stacked Cuts
-50- Model G0817 (Mfd. Since 05/16) Cutting Curves When cutting curves, simultaneously feed and turn the stock carefully so the blade follows the layout line without twisting. If curves are sharp or tight, use a narrower blade with more TPI (teeth per inch) and make relief cuts to avoid having to ba...
Page 53 - SECTION 5: ACCESSORIES; order online at
Model G0817 (Mfd. Since 05/16) -51- SECTION 5: ACCESSORIES ACCESSORIES Installing unapproved accessories may cause machine to malfunction, resulting in serious personal injury or machine damage. To reduce this risk, only install accessories recommended for this machine by Grizzly. NOTICE Refer to ou...
Page 54 - Recommended Metal Protectants
-52- Model G0817 (Mfd. Since 05/16) Recommended Metal Protectants G5562—SLIPIT ® 1 Qt. Gel G5563—SLIPIT ® 12 oz Spray G2871—Boeshield ® T-9 12 oz Spray G2870—Boeshield ® T-9 4 oz Spray H3788—G96 ® Gun Treatment 12 oz Spray H3789—G96 ® Gun Treatment 4.5 oz Spray Figure 86. Recommended products for pr...
Page 55 - SECTION 6: MAINTENANCE; Protecting; Lubrication
Model G0817 (Mfd. Since 05/16) -53- SECTION 6: MAINTENANCE To reduce risk of shock or accidental startup, always disconnect machine from power before adjustments, maintenance, or service. Cleaning & Protecting For optimum performance from your machine, follow this maintenance schedule and refer ...
Page 57 - Troubleshooting
Model G0817 (Mfd. Since 05/16) -55- Review the troubleshooting procedures in this section if a problem develops with your machine. If you need replacement parts or additional help with a procedure, call our Technical Support. Note: Please gather the serial number and manufacture date of your machine...
Page 58 - Operating Machine
-56- Model G0817 (Mfd. Since 05/16) Motor & Electrical (Continued) Symptom Possible Cause Possible Solution Machine has vibration or noisy operation. 1. Motor or component loose. 2. Blade at fault. 3. V-belt worn or loose.4. Motor fan rubbing on fan cover.5. Motor mount loose/broken.6. Pulley lo...
Page 63 - Blade Lead
Model G0817 (Mfd. Since 05/16) -61- To correct blade lead: 1. Make sure blade is properly tensioned and blade guides are adjusted correctly. 2. Make sure miter slot and fence are parallel to blade line (see Aligning Table and Aligning Fence procedures for detailed information). 3. Perform test cut w...
Page 65 - Checking/Adjusting Guide Post
Model G0817 (Mfd. Since 05/16) -63- 5. Rotate blade tension quick-release lever counterclockwise to down position to apply tension to blade. 6. Tighten tension adjustment screw (see Figure 98) until it contacts wheel block plate, then back it off 1-2 turns. 7. Retighten jam nut. Adjusting Guide Post...
Page 68 - Aligning Wheels; Checking Wheel Alignment
-66- Model G0817 (Mfd. Since 05/16) Aligning Wheels The following adjustment was performed at the factory and should not need to be performed again unless there is a wheel alignment problem, or one or more wheels are replaced. When wheels are coplanar (see Figure 105), the bandsaw is more likely to ...
Page 73 - Wiring Safety Instructions
Model G0817 (Mfd. Since 05/16) -71- SHOCK HAZARD. Working on wiring that is con-nected to a power source is extremely dangerous. Touching electrified parts will result in personal injury including but not limited to severe burns, electrocution, or death. Disconnect the power from the machine before ...
Page 76 - Electrical Component Wiring Photos
-74- Model G0817 (Mfd. Since 05/16) READ ELECTRICAL SAFETY ON PAGE 71! Electrical Component Wiring Photos Figure 116. Motor junction box wiring. Figure 117. Start and run capacitors. Figure 119. Magnetic switch wiring 110V. Figure 120. Magnetic switch wiring 220V. Figure 121. Foot brake limit switch...
Page 78 - Main Parts List
-76- Model G0817 (Mfd. Since 05/16) REF PART # DESCRIPTION REF PART # DESCRIPTION 1 P0817001 DOOR SEAL 10 X 760 X 1MM 41 P0817041 ON BUTTON YIAN KUANG YS-F1-G 2 P0817002 CAP SCREW M6-1 X 20 42 P0817042 OFF BUTTON YIAN KUANG YS-K1 3 P0817003 BUSHING 43 P0817043 SWITCH PLATE 4 P0817004 EYE BOLT M10-1....
Page 79 - Main Parts List Continued
Model G0817 (Mfd. Since 05/16) -77- REF PART # DESCRIPTION REF PART # DESCRIPTION 86 P0817086 BUTTON HD CAP SCR M8-1.25 X 20 130-5 P0817130-5 MOTOR CORD 14G 3W 22" 87 P0817087 STRAIN RELIEF PLATE 130-6 P0817130-6 CONTROL CORD 16G 3W 60" 88 P0817088 TAP SCREW M4 X 8 134 P0817134 PHLP HD SCR M...
Page 82 - Fence
-80- Model G0817 (Mfd. Since 05/16) 121-1 121-2 121-3 121-4 121-5 121-6 121-7 121-8 121-9 121-10 121-11 121-12 121-13 121-15 121-16 121-17 121-18 121-20 121-21 121-22 121-24 121-25 121-26 121-27 121-28 121 145 145-1 145-7 145-15 145-8 145-9 145-14 145-13 145-4 145-5 145-11 145-10 145-12 145-3 145-2 ...
Page 85 - WARRANTY CARD
C U T A LO N G D O T T E D LI N E Name _____________________________________________________________________________ Street _____________________________________________________________________________City _______________________ State _________________________ Zip _____________________Phone # _____...


 Grizzly Industrial G0513A40
User Manual
Grizzly Industrial G0513A40
User Manual
 Grizzly Industrial G0513X2
User Manual
Grizzly Industrial G0513X2
User Manual
 Grizzly Industrial G0513X2BF
User Manual
Grizzly Industrial G0513X2BF
User Manual
 Grizzly Industrial G0514X
User Manual
Grizzly Industrial G0514X
User Manual
 Grizzly Industrial G0514X2B
User Manual
Grizzly Industrial G0514X2B
User Manual
 Grizzly Industrial G0531B
User Manual
Grizzly Industrial G0531B
User Manual
 Grizzly Industrial G0555
User Manual
Grizzly Industrial G0555
User Manual
 Grizzly Industrial G0555LX
User Manual
Grizzly Industrial G0555LX
User Manual
 Grizzly Industrial G0561
User Manual
Grizzly Industrial G0561
User Manual
 Grizzly Industrial G0568
User Manual
Grizzly Industrial G0568
User Manual
 Grizzly Industrial G0613
User Manual
Grizzly Industrial G0613
User Manual
 Grizzly Industrial G0636X
User Manual
Grizzly Industrial G0636X
User Manual
 Grizzly Industrial G0640X
User Manual
Grizzly Industrial G0640X
User Manual
 Grizzly Industrial G0701
User Manual
Grizzly Industrial G0701
User Manual
 Grizzly Industrial G0803Z
User Manual
Grizzly Industrial G0803Z
User Manual