Grizzly Industrial G0636X - Manuals

User Manual Grizzly Industrial G0636X


Summary
-2- G0636X/XB Update (Mfd. Since 06/16) Installing Fence Figure 4. Fence handle components. Pivot Block Hex Nut Fence Handle Figure 5. Example of attaching resaw fence to standard fence. Moving Plate Resaw Fence Resaw Lock Handle 7. Tighten the resaw lock handle. 8. Pull the fence handle up and plac...
G0636X/XB Update (Mfd. Since 06/16) -3- G0636XB Wiring Diagram ( Replaces Page 63 ) PWR ON OFF CONTROL PANEL (viewed from behind) A RESET 96 98 1/2 T1/2 T3/6 16 3/4 T2/4 L1/1 L3/5 15 L2/3 5/6 95 18 22 26 13 SDE 14 MAGNETIC SWITCH Ground Ground Ground LIMIT SWITCH 230V MOTOR 13 14 14 22 13 14 13 21 2...
Table of Contents INTRODUCTION ............................................... 2 Manual Accuracy ........................................... 2Contact Info.................................................... 2Machine Data Sheet ...................................... 3Identification .....................
Grizzly Industrial Band Saws Manuals
-
 Grizzly Industrial G0513A40
User Manual
Grizzly Industrial G0513A40
User Manual
-
 Grizzly Industrial G0513X2
User Manual
Grizzly Industrial G0513X2
User Manual
-
 Grizzly Industrial G0513X2BF
User Manual
Grizzly Industrial G0513X2BF
User Manual
-
Grizzly Industrial G0513X2BF
Manual
-
 Grizzly Industrial G0514X
User Manual
Grizzly Industrial G0514X
User Manual
-
Grizzly Industrial G0514X
Manual
-
 Grizzly Industrial G0514X2B
User Manual
Grizzly Industrial G0514X2B
User Manual
-
 Grizzly Industrial G0531B
User Manual
Grizzly Industrial G0531B
User Manual
-
Grizzly Industrial G0531B
Manual
-
 Grizzly Industrial G0555
User Manual
Grizzly Industrial G0555
User Manual
-
Grizzly Industrial G0555
Manual
-
 Grizzly Industrial G0555LX
User Manual
Grizzly Industrial G0555LX
User Manual
-
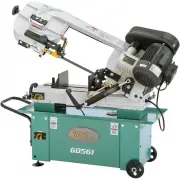 Grizzly Industrial G0561
User Manual
Grizzly Industrial G0561
User Manual
-
 Grizzly Industrial G0568
User Manual
Grizzly Industrial G0568
User Manual
-
Grizzly Industrial G0568
Manual
-
 Grizzly Industrial G0613
User Manual
Grizzly Industrial G0613
User Manual
-
 Grizzly Industrial G0640X
User Manual
Grizzly Industrial G0640X
User Manual
-
 Grizzly Industrial G0701
User Manual
Grizzly Industrial G0701
User Manual
-
 Grizzly Industrial G0803Z
User Manual
Grizzly Industrial G0803Z
User Manual
-
 Grizzly Industrial G0807
User Manual
Grizzly Industrial G0807
User Manual