Page 3 - Table of Contents
G0555LX (Mfg. Since 3/13) -1- Table of Contents INTRODUCTION ............................................... 2 Manual Accuracy ........................................... 2Contact Info.................................................... 2Machine Description ...................................... 2Id...
Page 4 - INTRODUCTION; Machine Description; Contact Info; Manual Accuracy
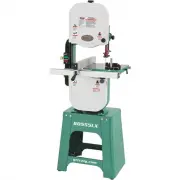
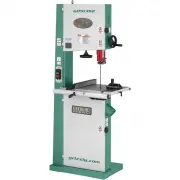
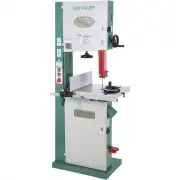
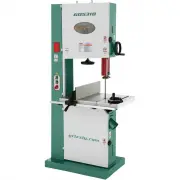
-2- G0555LX (Mfg. Since 3/13) INTRODUCTION The bandsaw is a versatile woodworking tool that is used to perform a wide variety of cuts in wood stock, such as rip cuts, cross cuts, bevel cuts, miter cuts, circular cuts, contour cuts, stacked pattern cuts, etc. The bandsaw blade is a continuous metal b...
Page 5 - Identification
G0555LX (Mfg. Since 3/13) -3- Identification For Your Own Safety, Read Instruction Manual Before Operating Bandsaw a) Wear eye protection. b) Do not remove jammed cutoff pieces until blade has stopped. c) Maintain proper adjustment of blade tension, blade guides, and thrust bearings. d) Adjust upper...
Page 6 - Machine Data Sheet
-4- G0555LX (Mfg. Since 3/13) The information contained herein is deemed accurate as of 8/16/2017 and represents our most recent product specifications. Due to our ongoing improvement efforts, this information may not accurately describe items previously purchased. PAGE 1 OF 3 Model G0555LX MACHINE ...
Page 8 - NOTICE; Safety Instructions for Machinery
-6- G0555LX (Mfg. Since 3/13) ELECTRICAL EQUIPMENT INJURY RISKS. You can be shocked, burned, or killed by touching live electrical components or improperly grounded machinery. To reduce this risk, only allow qualified service personnel to do electrical installation or repair work, and always disconn...
Page 10 - Additional Safety for Bandsaws
-8- G0555LX (Mfg. Since 3/13) Additional Safety for Bandsaws BLADE CONDITION. Do not operate with dull, cracked or badly worn blade. Dull blades require more effort to perform the cut. Inspect blades for cracks and missing teeth before each use. HAND PLACEMENT. Never position fingers or hands in lin...
Page 11 - SECTION 2: POWER SUPPLY; Availability
G0555LX (Mfg. Since 3/13) -9- SECTION 2: POWER SUPPLY Availability Before installing the machine, consider the avail-ability and proximity of the required power supply circuit. If an existing circuit does not meet the requirements for this machine, a new circuit must be installed. To minimize the ri...
Page 12 - Grounding Requirements
-10- G0555LX (Mfg. Since 3/13) Improper connection of the equipment-grounding wire can result in a risk of electric shock. The wire with green insulation (with or without yellow stripes) is the equipment-grounding wire. If repair or replacement of the power cord or plug is nec-essary, do not connect...
Page 15 - Inventory
G0555LX (Mfg. Since 3/13) -13- Inventory The following is a list of items shipped with your machine. Before beginning setup, lay these items out and inventory them. If any non-proprietary parts are missing (e.g. a nut or a washer), we will gladly replace them; or for the sake of expediency, replacem...
Page 16 - Cleanup
-14- G0555LX (Mfg. Since 3/13) The unpainted surfaces of your machine are coated with a heavy-duty rust preventative that prevents corrosion during shipment and storage. This rust preventative works extremely well, but it will take a little time to clean. Be patient and do a thorough job cleaning yo...
Page 17 - Site Considerations
G0555LX (Mfg. Since 3/13) -15- Site Considerations Figure 7. Minimum working clearances. 27" 30" Weight Load Refer to the Machine Data Sheet for the weight of your machine. Make sure that the surface upon which the machine is placed will bear the weight of the machine, additional equipment t...
Page 18 - Assembly
-16- G0555LX (Mfg. Since 3/13) Assembly Some sheet metal parts may have sharp edges that can cause minor cuts. Please use care while han- dling them. To assemble the bandsaw: 1. Lay one stand side flat on a piece of card- board to prevent scratching the paint, then attach the upper and lower stand b...
Page 21 - Adjustment
G0555LX (Mfg. Since 3/13) -19- 17. Install the table insert and table pin, as show in Figure 20. Important: Make sure you re-install the table pin. This pin keeps the table surfaces on either side of the slot even with the chang-es in operating pressures and temperature changes. Figure 20. Table pin...
Page 22 - Blade Tracking
-20- G0555LX (Mfg. Since 3/13) Blade Centered on Peak of Crown Blade Centered on Wheel PROPER TRACKING Wheel or Parallel But Not Coplanar Parallel And Coplanar Coplanar But Not Parallel Not Coplanar or Parallel Figure 21. Blade centered on the crown of the wheel. Figure 22. Wheel alignment and misal...
Page 24 - Power Connection; Connecting Power
-22- G0555LX (Mfg. Since 3/13) Figure 25. 4" dust hose attached to dust port. To connect a dust collection hose: 1. Fit the dust hose over the dust port, as shown in Figure 25, and secure it in place with a hose clamp. 2. Gently pull the hose to make sure it does not come off. A tight fit is nec...
Page 25 - Test Run; Tensioning Blade
G0555LX (Mfg. Since 3/13) -23- Test Run Once the assembly is complete, test run your machine to make sure it runs properly and is ready for regular operation. The test run consists of verifying the following: 1) The motor powers up and runs correctly, and 2) the safety disabling mechanism on the swi...
Page 26 - The Flutter Method
-24- G0555LX (Mfg. Since 3/13) The deflection method is much more subjective than the flutter method. Each blade will deflect differently and every user will determine what "moderate pressure" means. The following are general guidelines for tensioning the blade with this method. To tension t...
Page 28 - Adjusting Blade
-26- G0555LX (Mfg. Since 3/13) Tip: To quickly gauge this setting, fold a crisp dollar bill in half twice (when folded tightly, four thicknesses of a dollar bill is approxi-mately 0.016"). Place the folded dollar bill between the support bearing and the blade, as shown in Figure 32. 8. Tighten t...
Page 29 - Table Tilt Calibration
G0555LX (Mfg. Since 3/13) -27- 4. Loosen both cap screws behind the guide bearings, then rotate the adjustment cap screws so the bearings evenly and lightly touch the sides of the blade (see the illustra-tion in Figure 35) without deflecting it one way or the other. Note: When the blade guide bearin...
Page 30 - Aligning Table
-28- G0555LX (Mfg. Since 3/13) 5. Completely raise the upper blade guide assembly, then place the machinist's square flat on the table and against the side of the blade, as illustrated in Figure 37. Positive Stop Jam Nut Table Square Figure 37. Using a square to adjust the table perpendicular to the...
Page 31 - Aligning Fence
G0555LX (Mfg. Since 3/13) -29- 5. Use the fine ruler to measure the distance between the straightedge and miter slot at the front and back of the table (see Figure 39). — If the distances are the same, no further adjustments are required. — If the distances are different, continue with Step 6. 6. Lo...
Page 32 - SECTION 4: OPERATIONS; Operation Overview
-30- G0555LX (Mfg. Since 3/13) SECTION 4: OPERATIONS Operation Overview The purpose of this overview is to provide the nov-ice machine operator with a basic understanding of how the machine is used during operation, so the machine controls/components discussed later in this manual are easier to unde...
Page 33 - Switch
G0555LX (Mfg. Since 3/13) -31- The bandsaw is one of the most versatile wood cutting tools in the shop. It is capable of perform-ing the following types of cuts: Straight Cuts • Miters • Angles • Compound Angles • Resawing • Ripping • Crosscutting Irregular Cuts • Simple and Complex Curves • Duplica...
Page 34 - Guide Post
-32- G0555LX (Mfg. Since 3/13) Workpiece Inspection Some workpieces are not safe to cut or may require modification before they are safe to cut. Before cutting, inspect all workpieces for the following: • Material Type: This machine is intended for cutting natural and man-made wood prod-ucts, lamina...
Page 36 - Blade Information; Blade Length; Blade Dimensions
-34- G0555LX (Mfg. Since 3/13) 3. Pivot the motor so the upper cap screw slides to the right of the slot. This releases the belt tension. 4. Position the belt in the pulley grooves needed (see Figure 46) for the desired speed. 1800 FPM Motor Pulley Wheel Pulley 3100 FPM Figure 46. Belt positions for...
Page 37 - Tooth Style; Tooth Pitch
G0555LX (Mfg. Since 3/13) -35- • Straight Cutting: Use the largest width blade that you own. Large blades excel at cutting straight lines and are less prone to wander. Tooth Style Figure 49 illustrates the three main blade tooth styles: • Raker: Considered to be the standard because the tooth size a...
Page 38 - Changing Blade
-36- G0555LX (Mfg. Since 3/13) The most common causes of blade breakage are: • Faulty alignment/adjustment of the guides. • Forcing/twisting a wide blade around a short radius. • Feeding the workpiece too fast. • Dull teeth or damaged tooth set. • Over-tensioned blade. • Upper blade guide assembly s...
Page 39 - Ripping
G0555LX (Mfg. Since 3/13) -37- 8. Position the blade so that the teeth are facing to the right and down toward the table, then slide it through the table slot. Note: If the teeth will not point downward in any orientation, the blade is inside out. Remove the blade and twist it right-side out. 9. Rot...
Page 40 - Crosscutting; Resawing
-38- G0555LX (Mfg. Since 3/13) Crosscutting is the process of cutting across the grain of wood. For plywood and other processed wood, crosscutting simply means cutting across the width of the material. Crosscuts can be 90° or angled using the miter gauge. Compound cross-cuts are those where the mite...
Page 41 - Cutting Curves; Stacked Cuts
G0555LX (Mfg. Since 3/13) -39- Cutting Curves When cutting curves, simultaneously feed and turn the stock carefully so the blade follows the layout line without twisting. If curves are sharp or tight, use a narrower blade with more TPI (teeth per inch) and make relief cuts to avoid having to back th...
Page 42 - SECTION 5: ACCESSORIES; Grizzly Bandsaw Blades; Order Online at grizzly.com
-40- G0555LX (Mfg. Since 3/13) SECTION 5: ACCESSORIES ACCESSORIES Figure 57. T25555 Extension Block Kit. T25555— 6" Extension Block KitIncrease your cutting capacity from 6" to 12" cut-ting height with this bolt-on 6" extension block kit. Includes all necessary hardware plus extended...
Page 43 - Timberwolf
G0555LX (Mfg. Since 3/13) -41- Timberwolf ® 93 1 ⁄ 2 " Bandsaw Blades H7587—Re-Saw Fence Retrofit KitThis retrofit kit allows you to upgrade your exist-ing aluminum fence for the G0555LX bandsaw to a cast-iron fence with the 6" high re-saw fence. Simply unbolt your existing aluminum fence (4...
Page 44 - Basic Eye Protection
-42- G0555LX (Mfg. Since 3/13) G5562—SLIPIT ® 1 Qt. Gel G5563—SLIPIT ® 12 oz Spray G2871—Boeshield ® T-9 12 oz Spray G2870—Boeshield ® T-9 4 oz Spray H3788—G96 ® Gun Treatment 12 oz Spray H3789—G96 ® Gun Treatment 4.5 oz Spray Figure 63. Recommended lubricants for protect- ing unpainted cast iron/st...
Page 45 - SECTION 6: MAINTENANCE; Lubricating; Daily; Monthly; Schedule
G0555LX (Mfg. Since 3/13) -43- SECTION 6: MAINTENANCE Always disconnect power to the machine before performing maintenance. Failure to do this may result in serious person- al injury. Protect the unpainted cast iron surfaces on the table by wiping the table clean after every use—this ensures moistur...
Page 46 - Troubleshooting
-44- G0555LX (Mfg. Since 3/13) Review the troubleshooting and procedures in this section if a problem develops with your machine. If you need replacement parts or additional help with a procedure, call our Technical Support at (570) 546-9663. Note: Please gather the serial number and manufacture dat...
Page 48 - Checking V-Belt Tension
-46- G0555LX (Mfg. Since 3/13) V-Belt Tension To ensure optimum power transmission from the motor to the blade, the V-belt must be in good condition and operate under proper tension. V-belt tension should be checked at least every month—more often if the bandsaw is used daily. If the belt shows sign...
Page 49 - Shimming Table
G0555LX (Mfg. Since 3/13) -47- Replacing V-Belt Tools Needed Qty Hex Wrench 6mm .............................................. 1Wrench or Socket 13mm ................................... 1Replacement V-Belt (Part No. P0555LX068) .... 1 To replace the V-belt: 1. DISCONNECT BANDSAW FROM POWER! 2. Put o...
Page 50 - Wheel Alignment; Checking Wheel Alignment
-48- G0555LX (Mfg. Since 3/13) Wheel Alignment Wheel alignment is important for optimal perfor-mance from your bandsaw. Wheels are properly aligned when they are parallel with each other and in the same plane or “coplanar” (see the illustra-tion in the figure to the right). When wheels are coplanar,...
Page 51 - Shimming a Wheel; Upper Wheel Lateral Adjustment
G0555LX (Mfg. Since 3/13) -49- 8. Perform the previous Checking Wheel Alignment procedure. If necessary to make the wheels parallel, repeat this procedure. 9. Close the wheel covers. Shimming a Wheel A wheel that is parallel with the other wheel, but is not coplanar, must be shimmed by the distance ...
Page 52 - Blade Lead
-50- G0555LX (Mfg. Since 3/13) 3. Using a white crayon or other light color marker, mark the upper and lower wheels to indicate the measuring locations, as illus-trated in Figure 72. B2 A2 A1 B1 Upper Wheel Lower Wheel Figure 72. Example of marking upper and lower wheels for consistent measurements....
Page 53 - Fence Scale
G0555LX (Mfg. Since 3/13) -51- 5. Make a few cuts using the fence. — If blade lead is still present, repeat Steps 1–4 until the blade and fence are parallel with each other. — Or, shift the table, as instructed in the fol- lowing procedure. To shift the table: 1. On a scrap piece of wood, mark a lin...
Page 54 - Blade Tensioner
-52- G0555LX (Mfg. Since 3/13) Blade Tensioner The blade tensioner may need to be reset for one of the following reasons: • The blade tension quick release lever will not move to the right position when the tension scale is correctly adjusted for the installed blade. • You have installed a blade of ...
Page 55 - Wiring Safety Instructions
G0555LX (Mfg. Since 3/13) -53- SHOCK HAZARD. Working on wiring that is con-nected to a power source is extremely dangerous. Touching electrified parts will result in personal injury including but not limited to severe burns, electrocution, or death. Disconnect the power from the machine before servi...
Page 56 - Electrical Locations
-54- G0555LX (Mfg. Since 3/13) READ ELECTRICAL SAFETY ON PAGE 53! Electrical Locations Figure 77. G0555LX ON/OFF switch. Motor Switch
Page 60 - Main Parts List
-58- G0555LX (Mfg. Since 3/13) Main Parts List REF PART # DESCRIPTION REF PART # DESCRIPTION 1 P0555LX001 BASE 42 PLN16 LOCK NUT 1/2-20 THIN 2 PB64 HEX BOLT 5/8-11 X 2-1/2 43 PR21M INT RETAINING RING 35MM 3 PW14 FLAT WASHER 5/8 44 P6202-2RS BALL BEARING 6202-2RS 4 PN04 HEX NUT 5/8-11 45 P0555LX045 L...
Page 64 - Labels
-62- G0555LX (Mfg. Since 3/13) Labels REF PART # DESCRIPTION REF PART # DESCRIPTION 215 P0555LX215 MACHINE ID LABEL CSA 221 PPAINT-11 TOUCH UP PAINT-PUTTY 216 PLABEL-23 BLADE DOOR LABEL 222 PLABEL-62A DISCONNECT POWER LABEL 217 PLABEL-19B BANDSAW BLADE LABEL 223 PLABEL-14A ELECTRICITY LABEL 218 PPAI...
Page 65 - WARRANTY CARD
C U T A LO N G D O T T E D LI N E Name _____________________________________________________________________________ Street _____________________________________________________________________________City _______________________ State _________________________ Zip _____________________Phone # _____...
Page 67 - WARRANTY AND RETURNS
WARRANTY AND RETURNS Grizzly Industrial, Inc. warrants every product it sells for a period of 1 year to the original purchaser from the date of purchase. This warranty does not apply to defects due directly or indirectly to misuse, abuse, negligence, accidents, repairs or alterations or lack of main...


 Grizzly Industrial G0513A40
User Manual
Grizzly Industrial G0513A40
User Manual
 Grizzly Industrial G0513X2
User Manual
Grizzly Industrial G0513X2
User Manual
 Grizzly Industrial G0513X2BF
User Manual
Grizzly Industrial G0513X2BF
User Manual
 Grizzly Industrial G0514X
User Manual
Grizzly Industrial G0514X
User Manual
 Grizzly Industrial G0514X2B
User Manual
Grizzly Industrial G0514X2B
User Manual
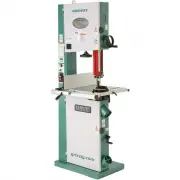
 Grizzly Industrial G0531B
User Manual
Grizzly Industrial G0531B
User Manual
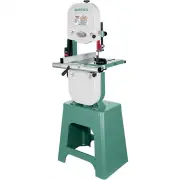 Grizzly Industrial G0555
User Manual
Grizzly Industrial G0555
User Manual
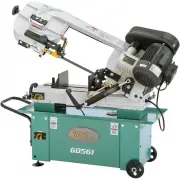 Grizzly Industrial G0561
User Manual
Grizzly Industrial G0561
User Manual
 Grizzly Industrial G0568
User Manual
Grizzly Industrial G0568
User Manual
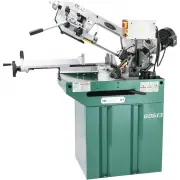 Grizzly Industrial G0613
User Manual
Grizzly Industrial G0613
User Manual
 Grizzly Industrial G0636X
User Manual
Grizzly Industrial G0636X
User Manual
 Grizzly Industrial G0640X
User Manual
Grizzly Industrial G0640X
User Manual
 Grizzly Industrial G0701
User Manual
Grizzly Industrial G0701
User Manual
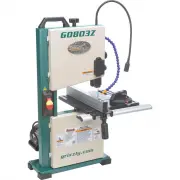 Grizzly Industrial G0803Z
User Manual
Grizzly Industrial G0803Z
User Manual
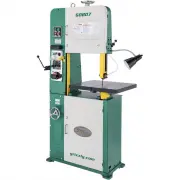 Grizzly Industrial G0807
User Manual
Grizzly Industrial G0807
User Manual