Grizzly Industrial G0513A40 - Manuals
User Manual Grizzly Industrial G0513A40
Summary
Table of Contents INTRODUCTION ............................................... 2 Contact Info.................................................... 2G0513 Series Combination Manual ............... 2Manual Accuracy ........................................... 2Controls & Components ....................
-2- G0513 Series Bandsaws (Mfd. Since 08/22) INTRODUCTION We are proud to provide a high-quality owner’s manual with your new machine! We made every effort to be exact with the instruc-tions, specifications, drawings, and photographs in this manual. Sometimes we make mistakes, but our policy of cont...
G0513 Series Bandsaws (Mfd. Since 08/22) -3- Figure 1. Control panel with START/STOP buttons. Controls & Components To reduce your risk of serious injury, read this entire manual BEFORE using machine. Control Panel Refer to the following figures and descriptions to become familiar with the basic...
G0513 Series Bandsaws (Mfd. Since 08/22) -7- ELECTRICAL EQUIPMENT INJURY RISKS. You can be shocked, burned, or killed by touching live electrical components or improperly grounded machinery. To reduce this risk, only allow qualified service personnel to do electrical installation or repair work, and...
G0513 Series Bandsaws (Mfd. Since 08/22) -9- Additional Safety for Bandsaws Serious cuts, amputation, or death can occur from contact with the moving saw blade during operation or if blade breakage occurs. Serious injury or death can also occur from getting fingers, hair, or clothing entangled in mo...
-10- G0513 Series Bandsaws (Mfd. Since 08/22) SECTION 2: POWER SUPPLY Availability Before installing the machine, consider the avail-ability and proximity of the required power supply circuit. If an existing circuit does not meet the requirements for this machine, a new circuit must be installed. To...
G0513 Series Bandsaws (Mfd. Since 08/22) -11- Figure 5. Typical 6-15 plug and receptacle. Grounding Pin Current Carrying Prongs 6-15 PLUG GROUNDED 6-15 RECEPTACLE Grounding Requirements This machine MUST be grounded. In the event of certain malfunctions or breakdowns, grounding reduces the risk of e...
-12- G0513 Series Bandsaws (Mfd. Since 08/22) Grounding Requirements for 110V: The plug specified under “Circuit Requirements for 110V Operation” on the previous page has a grounding prong that must be attached to the equipment-grounding wire inside the specified power cord. The plug must only be in...
G0513 Series Bandsaws (Mfd. Since 08/22) -13- SECTION 3: SETUP This machine was carefully packaged for safe transport. When unpacking, separate all enclosed items from packaging materials and inspect them for shipping damage. If items are damaged, please call us immediately at (570) 546-9663. IMPORT...
-14- G0513 Series Bandsaws (Mfd. Since 08/22) Hardware Recognition Chart USE THIS CHART TO MATCH UPHARDWARE DURING THE INVENTORYAND ASSEMBLY PROCESS. 5mm 5 mm Flat Head Cap Screw
G0513 Series Bandsaws (Mfd. Since 08/22) -15- Inventory The following is a list of items shipped with your machine. Before beginning setup, lay these items out and inventory them. If any non-proprietary parts are missing (e.g. a nut or a washer), we will gladly replace them; or for the sake of exped...
G0513 Series Bandsaws (Mfd. Since 08/22) -19- T23692—Orange Power DegreaserA great product for removing the waxy ship-ping grease from the non-painted parts of the machine during clean up. Figure 15. T23692 Orange Power Degreaser. The unpainted surfaces of your machine are coated with a heavy-duty r...
-20- G0513 Series Bandsaws (Mfd. Since 08/22) Lifting & Placing Bandsaw Special care should be taken when moving this bandsaw. To reduce your risk of injury or acciden-tal damage, use one of the following methods to lift or move the bandsaw. Using Forklift & Eye Bolt 1. Use a forklift to mov...
G0513 Series Bandsaws (Mfd. Since 08/22) -21- Using Forklift & Wood Blocks 1. Use a forklift to move the crate to a prepared location, then remove the crate from the ship-ping pallet. 2. Unbolt the bandsaw from the pallet. 3. Carefully place the forklift forks under the head. Insert a 1x4 block ...
-22- G0513 Series Bandsaws (Mfd. Since 08/22) 4. Loosen blade tension by rotating quick- release tension lever clockwise, as shown in Figure 22. Figure 22. Quick-release tension lever. Tighten Loosen 5. Adjust upper and lower blade guides away from blade. Refer to Adjusting Blade Guides beginning on...
-26- G0513 Series Bandsaws (Mfd. Since 08/22) Figure 36. Dust hose attached to bottom dust port. Dust Collection To connect a dust collection hose: 1. Fit a 4" dust hose over each dust port and secure them in place with a hose clamp (see Figure 36). Recommended CFM at Dust Port: 400 CFMDo not co...
-30- G0513 Series Bandsaws (Mfd. Since 08/22) Test Run Once assembly is complete, test run the machine to ensure it is properly connected to power and safety components are functioning correctly. If you find an unusual problem during the test run, immediately stop the machine, disconnect it from pow...
-32- G0513 Series Bandsaws (Mfd. Since 08/22) Tensioning Blade A properly tensioned blade is essential for mak-ing accurate cuts, maximizing blade life, and making other bandsaw adjustments. However, a properly tensioned blade will not compensate for cutting problems caused by excessive feed rate, h...
G0513 Series Bandsaws (Mfd. Since 08/22) -33- The deflection method is much more subjective than the flutter method. Each blade will deflect differently and every user will determine what "moderate pressure" means. The following are general guidelines for tensioning the blade with this metho...
-38- G0513 Series Bandsaws (Mfd. Since 08/22) Aligning Table To ensure cutting accuracy, the table should be aligned so that the miter slot is parallel to the bandsaw blade, and that the table is perpendicu-lar (front to back) to the blade. These procedures work best with a wide ( 3 ⁄ 4 ") blade...
G0513 Series Bandsaws (Mfd. Since 08/22) -39- Aligning Fence 1. DISCONNECT MACHINE FROM POWER! 2. Place a square on the table and against the back of the blade, as shown in Figure 57. The table should be perpendicular to the back of the blade. — If the table is perpendicular to the back of the blade...
-40- G0513 Series Bandsaws (Mfd. Since 08/22) Model G0513X2BF 1. DISCONNECT MACHINE FROM POWER! 2. Make sure the table is aligned with the blade (see Aligning Table on Page 38 for detailed instructions). 3. Install the fence and lock it in place next to the miter slot. 4. Loosen the end knobs and th...
-42- G0513 Series Bandsaws (Mfd. Since 08/22) SECTION 4: OPERATIONS Operation Overview The purpose of this overview is to provide the nov-ice machine operator with a basic understanding of how the machine is used during operation, so the machine controls/components discussed later in this manual are...
-44- G0513 Series Bandsaws (Mfd. Since 08/22) Workpiece Inspection Some wood workpieces are not safe to cut or may require modification before they are safe to cut. Before cutting wood, get in the habit of inspecting all workpieces for the following: • Material Type: This machine is intended for cut...
G0513 Series Bandsaws (Mfd. Since 08/22) -45- Tilting Table Model Tilt Specifications G0513, G0513A40 .................... 10° left, 45° rightG0513X2, G0513X2BF ............... 5° left, 45° right Models G0513X2 & G0513X2BF To tilt the table: 1. DISCONNECT MACHINE FROM POWER! 2. Loosen the lock l...
-46- G0513 Series Bandsaws (Mfd. Since 08/22) Figure 67. Guide post controls. Guide Post Lock Knob Guide Post Handwheel Blade Guide Assembly Blade Guard Guide Post Blade Selection Selecting the right blade requires a knowledge of the various blade characteristics to match the blade with the particul...
G0513 Series Bandsaws (Mfd. Since 08/22) -47- Blade Dimensions Length Range ................................ 130 1 ⁄ 2 "–131 1 ⁄ 2 " Width Range .............................................. 1 ⁄ 8 "– 1" Blade Length Measured by the blade circumference, blade lengths are specific to ...
-48- G0513 Series Bandsaws (Mfd. Since 08/22) Bi-metal Blade: A strip of high-speed tool steel is precision welded to a flexible carbon blade, then teeth are ground into the blade to provide good edge-holding qualities for blades taking a lot of abuse (see Figure 73). Carbon Steel Blade Weld High-Sp...
G0513 Series Bandsaws (Mfd. Since 08/22) -49- Blade Selection Chart Cutting Operation Blade Width Narrow ( 1 ⁄ 8 " – 1 ⁄ 4 ") Medium ( 3 ⁄ 16 "– 1 ⁄ 2 ") Wide ( 1 ⁄ 2 "– 3 ⁄ 4 ") Resawing R H S C Ripping Thin Stock R H S M Ripping Thick Stock R H S C Ripping Round Stock R H S...
-50- G0513 Series Bandsaws (Mfd. Since 08/22) Blade Breakage Many conditions may cause a bandsaw blade to break. Blade breakage is unavoidable in some cases, since it is the natural result of the peculiar stresses that bandsaw blades must endure. Blade breakage is also due to avoidable circum-stance...
G0513 Series Bandsaws (Mfd. Since 08/22) -51- Changing Blade Figure 75. Placing blade on the wheels. 4. Tighten the blade tension lever. 5. Adjust the blade tension (refer to Page 32) and blade tracking (refer to Page 33). 6. Adjust the upper/lower guides and the sup- port bearings (refer to instruc...
G0513 Series Bandsaws (Mfd. Since 08/22) -53- Ripping "Ripping" means cutting with the grain of the wood stock. For plywood and other processed wood, ripping simply means cutting down the length of the workpiece. Beveled rip cuts may be performed by tilting the table. To make a rip cut: 1. A...
-54- G0513 Series Bandsaws (Mfd. Since 08/22) 2. Use widest blade the bandsaw will accept. 3. Install resaw fence (see Figure 82), set it to desired width of cut, and lock it in place. 4. Support ends of board as necessary. 5. Turn machine ON. 6. Using push paddles and a push stick, keep pressure ag...
G0513 Series Bandsaws (Mfd. Since 08/22) -55- Using Drift Bar 1. Secure drift bar on resaw fence with adjustable handle. Make sure drift bar is flat against fence face and is straight up and down. 2. Slide resaw fence over moving plate on fence assembly and tighten lock handle. 3. Move resaw fence u...
-56- G0513 Series Bandsaws (Mfd. Since 08/22) Cutting Curves When cutting curves, simultaneously feed and turn the stock carefully so the blade follows the layout line without twisting. If curves are sharp or tight, use a narrower blade with more TPI (teeth per inch) and make relief cuts to avoid ha...
G0513 Series Bandsaws (Mfd. Since 08/22) -57- SECTION 5: ACCESSORIES ACCESSORIES 131 1 ⁄ 2 " Carbon Steel Replacement Blades Model Width TPI Type Gauge H4803 1 ⁄ 8 " 14 Raker 0.025 H4804 1 ⁄ 4 " 6 Hook 0.025 H4805 1 ⁄ 4 " 18 Raker 0.025 H4806 3 ⁄ 8 " 10 Raker 0.025 H4807 1 ⁄ 2 ...
-58- G0513 Series Bandsaws (Mfd. Since 08/22) Recommended Metal Protectants G5562—SLIPIT ® 1 Qt. Gel G5563—SLIPIT ® 12 Oz. Spray G2871—Boeshield ® T-9 12 Oz. Spray G2870—Boeshield ® T-9 4 Oz. Spray H3788—G96 ® Gun Treatment 12 Oz. Spray Figure 90. Recommended products for protect-ing unpainted cast ...
G0513 Series Bandsaws (Mfd. Since 08/22) -61- SECTION 6: MAINTENANCE Cleaning & Protecting Cleaning the bandsaw is relatively easy. Vacuum excess wood chips and sawdust, and wipe off the remaining dust with a dry cloth. If any resin has built up, use a resin dissolving cleaner to remove it. Prot...
G0513 Series Bandsaws (Mfd. Since 08/22) -63- Review the troubleshooting procedures in this section if a problem develops with your machine. If you need replacement parts or additional help with a procedure, call our Technical Support. Note: Please gather the serial number and manufacture date of yo...
G0513 Series Bandsaws (Mfd. Since 08/22) -67- "Blade Lead" means that the blade does not cut straight when using the fence or miter gauge (see Figure 105). This is a common condition with all bandsaws. Worn or damaged blades may cause lead, and replacing them will fix the problem. Still, if ...
G0513 Series Bandsaws (Mfd. Since 08/22) -71- Aligning Wheels Components and Hardware Needed: Qty 56" Long 2x4 ..................................................... 1 Tools Needed:Hex Wrenches 4, 6mm ................................. 1 EaWrench 13mm .................................................
-72- G0513 Series Bandsaws (Mfd. Since 08/22) — If the wheels are coplanar (Figure 116, A), the straightedge will evenly touch the top and bottom of both wheels. — If the wheels are not coplanar (Figure 116, B), place the straightedge on the lower wheel first (ensuring that it touches both the top a...
G0513 Series Bandsaws (Mfd. Since 08/22) -73- 8. When the wheels are coplanar, place a mark on each wheel where you held the straight-edge. This assures repeated accuracy every time you adjust your wheels. Note: When wheels are properly coplanar, the blade may not be centered on the crown of the whe...
-74- G0513 Series Bandsaws (Mfd. Since 08/22) SHOCK HAZARD. Working on wiring that is con-nected to a power source is extremely dangerous. Touching electrified parts will result in personal injury including but not limited to severe burns, electrocution, or death. Disconnect the power from the machi...
G0513 Series Bandsaws (Mfd. Since 08/22) -79- BUY PARTS ONLINE AT GRIZZLY.COM ! Scan QR code to visit our Parts Store. G0513 & G0513A40 Table, Trunnion & Lower Blade Guides 113 110 105 116 116 106 99 163 103 98 104 102 100 139 101 111 103 107 109 108 120 121 122 148 123 119 114 115 115 112 1...
-82- G0513 Series Bandsaws (Mfd. Since 08/22) BUY PARTS ONLINE AT GRIZZLY.COM ! Scan QR code to visit our Parts Store. G0513 & G0513A40 Upper Blade Guides & Miter Gauge 165 174V2 150 160 137 142 136 140 141 145 144 143 147 134 146 149 171 138 138-1 172 168 170 169 6 163 167 166 162 161V2 163...
G0513 Series Bandsaws (Mfd. Since 08/22) -83- BUY PARTS ONLINE AT GRIZZLY.COM ! Scan QR code to visit our Parts Store. G0513 & G0513A40 Upper Blade Guides & Miter Gauge Parts List REF PART # DESCRIPTION REF PART # DESCRIPTION 6 P0513006 SET SCREW M5-.8 X 5 163 P0513163 LOCK WASHER 8MM 134 P0...
-94- G0513 Series Bandsaws (Mfd. Since 08/22) BUY PARTS ONLINE AT GRIZZLY.COM ! Scan QR code to visit our Parts Store. G0513X2 & G0513X2BF Guides & Trunnions Parts List REF PART # DESCRIPTION REF PART # DESCRIPTION 98 P0513X2098 CAP SCREW M10-1.5 X 35 151-6 P0513X2151-6 CAP SCREW M6-1 X 16 1...
Grizzly Industrial Band Saws Manuals
-
Grizzly Industrial G0513X2
User Manual
-
Grizzly Industrial G0513X2BF
User Manual
-
Grizzly Industrial G0513X2BF
Manual
-
Grizzly Industrial G0514X
User Manual
-
Grizzly Industrial G0514X
Manual
-
Grizzly Industrial G0514X2B
User Manual
-
Grizzly Industrial G0531B
User Manual
-
Grizzly Industrial G0531B
Manual
-
Grizzly Industrial G0555
User Manual
-
Grizzly Industrial G0555
Manual
-
Grizzly Industrial G0555LX
User Manual
-
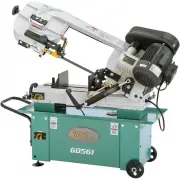
Grizzly Industrial G0561
User Manual
-
Grizzly Industrial G0568
User Manual
-
Grizzly Industrial G0568
Manual
-
Grizzly Industrial G0613
User Manual
-
Grizzly Industrial G0636X
User Manual
-
Grizzly Industrial G0640X
User Manual
-
Grizzly Industrial G0701
User Manual
-
Grizzly Industrial G0803Z
User Manual
-
Grizzly Industrial G0807
User Manual