Graco 237859 - Manuals
Graco 237859 – User Manual, Manual in PDF format online.
Manuals:
User Manual Graco 237859


Summary
2 308–626 Table of Contents Symbols 2 . . . . . . . . . . . . . . . . . . . . . . . . . . . . . . . . . . . . . . Installation 6 . . . . . . . . . . . . . . . . . . . . . . . . . . . . . . . . . . . Required Accessories 6 . . . . . . . . . . . . . . . . . . . . . . . . Electrical Grounding 6 . . . ....
4 308–626 WARNING INJECTION HAZARD Spray from the spray gun, hose leaks or ruptured components can inject fluid into your body andcause extremely serious injury, including the need for amputation. Splashing fluid in the eyes or on theskin can also cause can also cause serious injury. D Fluid injecte...
Manual Graco 237859
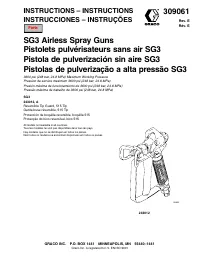


Summary
2 309061 Fluid injection and high pressure hazard: High pressure spray or leaks can inject fluid into the body. To help prevent injection, always: D Engage trigger safety latch when not spraying. D Keep clear of nozzle and leaks. D Never spray without a tip guard. D Do PRESSURE RELIEF if you stop sp...
309061 5 26–32 ft–lb (19–24 N.m) 3/4 PRIME SPRAYER AMORCER LEPULVÉRISATEUR CEBAR ELPULVERIZADOR FERRAR A BOMBA RELEASE RELACHER SOLTAR SOLTAR IFSISISE THENALORSDESPUÉSENTÃO ADJUST NEEDLE / RÉGLER LE POINTEAU / AJUSTAR AGUJA / REGULAR AGULHA THENAORSDESPUÉSENTÃO SQUEEZE APPUYER APRETAR APERTAR IFSISI...
6 309061 Parts Drawing / Pièces / Diagrama de piezas / Desenho das peças 6 ti1432a n 2 n 15 33 22 6 8 7 n 26 1 Included with 1Compris dans 1Incluido con 1Fornecido com 1 243012, A 23 24 5 10 3 2 2 Included with 33Compris dans 33Incluido con 33Fornecido com 33 1 1 32 14 2 2 Parts List / Liste de pièc...
Graco Manuals
-
 Graco 04511 10F
Manual
Graco 04511 10F
Manual
-
 Graco 9AU100
User Manual
Graco 9AU100
User Manual
-
 Graco 26D281
User Manual
Graco 26D281
User Manual
-
 Graco 17C721
User Manual
Graco 17C721
User Manual
-
 Graco 17N163
User Manual
Graco 17N163
User Manual
-
 Graco 17P185
User Manual
Graco 17P185
User Manual
-
 Graco 17P186
User Manual
Graco 17P186
User Manual
-
Graco 17P212
User Manual
-
 Graco 243080
User Manual
Graco 243080
User Manual
-
Graco 243080
Manual
-
 Graco 25D492
User Manual
Graco 25D492
User Manual
-
Graco 25D492
Manual
-
 Graco 288817
User Manual
Graco 288817
User Manual
-
 Graco LTS 15
User Manual
Graco LTS 15
User Manual
-
Graco LTS 15
Manual
-
Graco 17A226
User Manual
-
Graco 17A226
Manual
-
 Graco 17A466
User Manual
Graco 17A466
User Manual
-
Graco 17D889
User Manual
-
Graco 17D889
Manual