Page 4 - SAFETY WARNINGS; HIGH PRESSURE SPRAY CAN CAUSE SERIOUS INJURY.; FLUID INJECTION HAZARD; General Safety; Safety Latch; Spray Tip Safety
4 307–758 SAFETY WARNINGS HIGH PRESSURE SPRAY CAN CAUSE SERIOUS INJURY. FOR PROFESSIONAL USE ONLY. OBSERVE ALL WARNINGS Read and understand all instruction manuals before operating equipment. FLUID INJECTION HAZARD General Safety This equipment generates very high fluid pressure. Spray fromthe gun, ...
Page 5 - Fluid and Solvent Compatibility; HOSE SAFETY; Hose Grounding Continuity; FIRE OR EXPLOSION HAZARD; Grounding; Flushing Safety; IMPORTANT
307–758 5 MOVING PARTS HAZARD Moving parts can pinch or amputate your fingers or other bodyparts. KEEP CLEAR of moving parts when starting or operatingthe sprayer. Follow the Pressure Relief Procedure on page 2before checking or servicing any part of the sprayer, to preventit from starting accidenta...
Page 6 - AVERTISSEMENT; RISQUES D’INJECTION; Consignes generales de sécurité; Verrou de sécurité; Marche à Suivre pour Détendre la Pression
6 307–758 AVERTISSEMENT La pulvérisation à haute pression peut causer des blessures très graves. Réservé exclusivement à l’usage professionnel. Observer toutes les consignes de sécurité. Bien lire et bien comprendre tous les manuels d’instructions avant d’utiliser le matériel. RISQUES D’INJECTION Co...
Page 7 - RISQUES D’INCENDIE OU D’EXPLOSIÓN
307–758 7 RISQUES EN CAS DE MAUVAISE UTILISATION DU MATERIEL Consignes générales de sécurité Toute utilisation anormale de l’appareil de pulvérisation ou desaccessoires comme, par exemple, la mise sous une pressionexcessive, les modifications de pièces, l’utilisation de produitschimiques et de matiè...
Page 8 - ADVERTENCIA; PELIGRO DE INYECCIÓN DE FLUIDO
8 307–758 ADVERTENCIA EL ROCIADO a ALTA PRESIÓN PUEDE CAUSAR GRAVES LESIONES. SOLO PARA USO PROFESIONAL. RESPETE LOS AVISOS DE ADVERTENCIA. Lea y entienda todo el manual de instrucciónes antes de manejar el equipo. PELIGRO DE INYECCIÓN DE FLUIDO Seguridad general Este equipo genera un fluido a una p...
Page 9 - PELIGRO POR MAL USO DEL EQUIPO; Seguridad general; SEGURIDAD EN EL USO DE LAS MANGUERAS; Peusta a tierra; Seguridad durante el lavado
307–758 9 PELIGRO POR MAL USO DEL EQUIPO Seguridad general Cualquier mal uso del equipo pulverizador o los accesorios, talcomo sobre presurización, modificación de piezás, uso dematériales y productos quimicos incompatibles, o utilización depiezás dañadas o desgastadas, puede hacen que se rompany ca...
Page 10 - SETUP; WARNING; NOTE: See Fig 11–1 while doing the setup.; b. Do not remove the grounding prong of the power
10 307–758 SETUP WARNING To reduce the risk of serious bodily injury from staticsparking, fluid injection, or over pressurization andrupture of the hose or gun, all hoses must be electri-cally conductive, the gun must have a tip guard, andeach part must be rated for at least 2750 psi (195bar) Maximu...
Page 12 - OPERATION; Close the pressure drain valve.; CAUTION; a. Open the pressure drain valve. Turn on the; Install the spray tip and tip guard. Engage the gun; b. If more coverage is needed, use a larger tip
12 307–758 OPERATION Use this procedure each time you start the sprayer tohelp ensure the sprayer is ready to operate and that youstart it safely. WARNING To reduce the risk of serious injury, follow the illus-trated Pressure Relief Procedure warning onpage 4 whenever you are instructed to relieve p...
Page 13 - MAINTENANCE; Cleaning a Clogged Tip; Clean the front of the tip frequently during the day’s; Disengage the gun safety latch and trigger the gun
307–758 13 MAINTENANCE Cleaning a Clogged Tip WARNING To reduce the risk of serious injury, follow the illus-trated Pressure Relief Procedure warning onpage 4 whenever you are instructed to relieve pres-sure. WARNING To reduce the risk of serious bodily injury from fromfluid injection: NEVER operate...
Page 14 - SHUTDOWN AND CARE; Clean the fluid filter often and whenever the spray-; Coil the hose and hang it on the hose rack when
14 307–758 SHUTDOWN AND CARE WARNING To reduce the risk of serious injury, follow the illus-trated Pressure Relief Procedure warning onpage 4 whenever you are instructed to relieve pres-sure. 1. Check the packing nut/wet-cup daily. First relieve pressure. Keep the wet-cup 1/3 full of TSL at all time...
Page 15 - FLUSHING GUIDELINES
307–758 15 FLUSHING GUIDELINES NOTE: Several flushes are often required to thoroughly clean the system and prepare it for the next fluid to be sprayed, or to store the sprayer. Use this chart to determine the required flushing order for the fluid you areusing, and then follow the procedure below for...
Page 16 - TROUBLESHOOTING GUIDE; If you suspect that the spray tip or hose is com; MOTOR WON’T OPERATE; TYPE OF PROBLEM
16 307–758 TROUBLESHOOTING GUIDE WARNING Pressure Relief ProcedureTo reduce the risk of serious bodily injury, includingfluid injection, injury from splashing fluid or solvent inthe eyes or on the skin, moving parts or electricshock, always follow this procedure whenever youshut off the sprayer, whe...
Page 17 - Condition B
307–758 17 TYPE OF PROBLEM WHAT TO CHECK If check is OK, go to next check WHAT TO DOWhen check is not OK refer to this column 1 . Check leads from bridge (308) to motor to be sure they are securely fastened and properlymated. 1. Replace loose terminals; crimp to leads. Be sure male terminal blades a...
Page 19 - LOW OUTPUT; Low Output
307–758 19 LOW OUTPUT TYPE OF PROBLEM WHAT TO CHECK If check is OK, go to next check WHAT TO DOWhen check is not OK refer to this column Low Output 1. Check for worn spray tip. 1. Follow Pressure Relief Procedure Warn- ing then replace tip. See your separate gunor tip manual. 2. Check to see that pu...
Page 20 - NO OUTPUT; EXCESSIVE PRESSURE FLUCTUATIONS
20 307–758 NO OUTPUT TYPE OF PROBLEM WHAT TO CHECK If check is OK, go to next check WHAT TO DOWhen check is not OK refer to this column Motor runs and pump strokes 1. Check paint supply. 1. Refill and reprime pump. 2. Check for clogged intake strainer. 2. Remove and clean, then reinstall. 3. Check f...
Page 21 - MOTOR IS HOT AND RUNS INTERMITTENTLY; ELECTRICAL SHORT
307–758 21 MOTOR IS HOT AND RUNS INTERMITTENTLY TYPE OF PROBLEM WHAT TO CHECK If check is OK, go to next check WHAT TO DOWhen check is not OK refer to this column 1. Determine if sprayer was operated at high pressure with small tips, which causes lowmotor RPM and excessive heat build up. 1. Decrease...
Page 22 - SPIN TEST
22 307–758 SPIN TEST WARNING To reduce the risk of serious injury, follow the illus-trated Pressure Relief Procedure warning onpage 24 whenever you are instructed to relievepressure. For checking armature, motor winding and brush electri-cal continuity. Setup Relieve pressure. Remove the drive housi...
Page 23 - BRIDGE TEST; BRIDGE WIRES
307–758 23 BRIDGE TEST WARNING To reduce the risk of serious injury, follow the illus-trated Pressure Relief Procedure warning onpage 24 whenever you are instructed to relievepressure. Remove the bridge from the pressure control box andperform this test to determine if the bridge is functional.See B...
Page 24 - GENERAL REPAIR INFORMATION; Pressure Relief Procedure
24 307–758 GENERAL REPAIR INFORMATION Pressure Relief Procedure To reduce the risk of serious bodily injury, including fluid in-jection, splashing fluid or solvent in the eyes or on the skin,or injury from moving parts or electric shock, always followthis procedure whenever you shut off the sprayer,...
Page 25 - MOTOR BRUSH REPLACEMENT; NOTE: Replace the brushes when they have worn to; NOTE: Read the GENERAL REPAIR INFORMATION; on page 24 before doing this procedure.; Place the spring on the brush as shown in Fig 25–4.
307–758 25 MOTOR BRUSH REPLACEMENT NOTE: Replace the brushes when they have worn to less than 1/2 in. See STEP 1, Fig 25–3. Note thatthe brushes wear differently on each side of themotor, so check them both. Brush Repair Kit220–853 is available. A new spring clip, P/N110–816 may be purchased separat...
Page 26 - POWER SUPPLY CORD REPLACEMENT; ON/OFF SWITCH REPLACEMENT
26 307–758 POWER SUPPLY CORD REPLACEMENT WARNING To reduce the risk of serious injury, follow the illus-trated Pressure Relief Procedure warning onpage 24 whenever you are instructed to relievepressure. NOTE: Read the GENERAL REPAIR INFORMATION on page 24 before doing this procedure. NOTE: Refer to ...
Page 27 - BRIDGE RECTIFIER REPLACEMENT; Connect all wires properly and route them carefully.; BRIDGE INSTALLATION DETAIL; CIRCUIT BREAKER REPLACEMENT; NOTE: Refer to Fig 27–1 for this procedure.; Install the new circuit breaker in the reverse order.
307–758 27 BRIDGE RECTIFIER REPLACEMENT WARNING To reduce the risk of serious injury, follow the Pres-sure Relief Procedure warning on page 24 when-ever you are instructed to relieve pressure. NOTE: Read the GENERAL REPAIR INFORMATION on page 24 before doing this procedure. NOTE: The most common cau...
Page 28 - CIRCUIT BOARD REPLACEMENT; NOTE: Refer to Fig 28–1 and 28–2 for this procedure.; Remove the pressure control cover.
28 307–758 CIRCUIT BOARD REPLACEMENT WARNING To reduce the risk of serious injury, follow the illus-trated Pressure Relief Procedure warning onpage 24 whenever you are instructed to relievepressure. NOTE: Read the GENERAL REPAIR INFORMATION on page 24 before doing this procedure. NOTE: Refer to Fig ...
Page 29 - PRESSURE CONTROL REPLACEMENT; NOTE: Read the GENERAL REPAIR; Hold the hex of the pressure control; Install the new pressure control assembly; Perform the PRESSURE CONTROL
307–758 29 PRESSURE CONTROL REPLACEMENT WARNING To reduce the risk of serious injury,follow the illustrated Pressure ReliefProcedure warning on page 24 when-ever you are instructed to relieve pres-sure. NOTE: Read the GENERAL REPAIR INFORMATION on page 24 beforedoing this procedure. NOTE: Refer to F...
Page 30 - PRESSURE CONTROL ADJUSTMENT
30 307–758 PRESSURE CONTROL ADJUSTMENT This procedure sets the sprayer to 2750 psi (195 bar)MAXIMUM WORKING PRESSURE and sets theoverpressurization switch (microswitch) to approxi-mately 3600 psi (242 bar). Perform this procedure whenever the pressure con-trol assembly is removed and reinstalled or ...
Page 31 - Adjust the Overpressurization Switch; slowly turn the pres-; Maximum Working Pressure Adjustment
307–758 31 PRESSURE CONTROL ADJUSTMENT 6. Plug in the sprayer. 7. Turn the pressure control knob (B) to the minimum setting (fully counterclockwise), and turn the sprayerON. THE DISPLACEMENT PUMP SHOULD NOTCYCLE If it does cycle, remove the plug (15) from thebottom of the pressure control. Insert a ...
Page 32 - DRIVE HOUSING, CONNECTING ROD & CRANKSHAFT REPLACEMENT
32 307–758 DRIVE HOUSING, CONNECTING ROD & CRANKSHAFT REPLACEMENT WARNING To reduce the risk of serious injury, follow the illus-trated Pressure Relief Procedure warning onpage 24 whenever you are instructed to relievepressure. NOTE: Read the GENERAL REPAIR INFORMATION on page 24 before doing th...
Page 33 - Screw the displacement pump about 3/4 of the way
FILL CAVITY WITH SAE 10 NON–DETERGENT MOTOR OIL Fig 33–2 39 68 8 71 8 75 18 14 58 69a 69 69b 73 18 25 70 57 22 41 43 42 63 LUBRICATE LIBERALLY PACKWITH GREASE LIBERALLY PACKWITH GREASE LIBERALLY PACK WITH GREASE 01580 60 44 33 32 30 307–758 33 DRIVE HOUSING, CONNECTING ROD & CRANKSHAFT REPLACEME...
Page 34 - MOTOR REPLACEMENT
34 307–758 MOTOR REPLACEMENT WARNING To reduce the risk of serious injury, follow the illus-trated Pressure Relief Procedure warning onpage 24 whenever you are instructed to relievepressure. NOTE: Read the GENERAL REPAIR INFORMATION on page 24 before doing this procedure. NOTE: See Fig 35–1 except w...
Page 35 - DETAIL
307–758 35 MOTOR REPLACEMENT Fig 35–1 32 345 1 DETAIL Shows position of conduit seal (26) in conduit connector (345) 26 345 68 8 7 9 57 25 18 73 69a 69 71 69b 75 18 54 58 39 or 5 01581 WIRING DIAGRAM 01221 MOTORLEADS AC1 AC2 G1 G2 _ + WHITE BLUE YELLOW RED GREEN BLACK WHITE GROUND WIRE BLACK POWER S...
Page 36 - DISPLACEMENT PUMP REPAIR; Disassembling the Pump; See page 38 to remove the pump.
36 307–758 DISPLACEMENT PUMP REPAIR WARNING To reduce the risk of serious injury, follow the Pres-sure Relief Procedure warning on page 24 when-ever you are instructed to relieve pressure. NOTE: Read the GENERAL REPAIR INFORMATION on page 24 before doing this procedure. Fig 36–1 204* 221* 220 219 20...
Page 37 - Place the flats at the top of the rod in a vise.; NOTE: The tapered end of the sleeve is the bottom of it.
307–758 37 DISPLACEMENT PUMP REPAIR 3. Tighten the packing retaining nut (211) against thepiston valve (222) to 19 ft-lb (27 N.m). Note the alignment of the piston (222) to the pack-ing retainer nut (211). Maintain this alignmentthrough Steps 5, 6 and 7. 4. Place the ball (225) on the piston valve (...
Page 38 - Slide the sleeve/piston rod assembly INTO THE; tight at the bottom of the external cylinder threads.; REMOVING AND INSTALLING A PUMP; Remove the pump
38 307–758 DISPLACEMENT PUMP REPAIR 219 PISTON ASSEMBLY 218 TAPERED END Fig 38-1 0030 12. Slide the sleeve/piston rod assembly INTO THE BOTTOM OF THE CYLINDER. This is to preventpacking damage during reassembly. See Fig 38–1. 13. Screw down the cylinder locknut (41) until it is finger tight at the b...
Page 39 - PARTS DRAWING & LIST – DISPLACEMENT PUMP; Sleeved Displacement Pump; ACCESSORIES; Must be purchased separately; NOTE: Be sure you order the correct
307–758 39 PARTS DRAWING & LIST – DISPLACEMENT PUMP Model 222–584, Series A Sleeved Displacement Pump Includes items 202 to 225 REF NO. PART NO. DESCRIPTION QTY 202 108–954* PACKING, o–ring, PTFE 2 203 105–522* SEAL, u–cup, polyurethane 1 204 105–445* BALL, sst 1 205 180–656 PLUG 1 206 176–749* ...
Page 40 - PARTS – COMPLETE SPRAYER
40 307–758 PARTS – COMPLETE SPRAYER Model 231–032, Series C Basic Sprayer with Upright CartIncludes items 1 to 98 Model 231–041, Series B Complete Sprayer with Upright CartIncludes items 1 to 102 100 101 102 42 43 68 39 41 74 44 60 63 22 70 25 18 73 69b 8 69 71 69a 37 11 49,12 67b REF 95 76 38 46 67...
Page 41 - PARTS DRAWING – UPRIGHT SPRAYER; DESCRIPTION
307–758 41 PARTS DRAWING – UPRIGHT SPRAYER Model 231–032, Series CIncludes items 1 to 98 Model 231–041, Series BIncludes items 1 to 102 REFNO. PART NO. DESCRIPTION QTY REFNO. PART NO. DESCRIPTION QTY 1 065–099 CONDUIT, specify length when ordering 0.8 ft 7 110–963 SCREW, serrated flange, hex hd,5/16...
Page 42 - PARTS DRAWING – LO-BOY SPRAYER
42 307–758 PARTS DRAWING – LO-BOY SPRAYER Model 231–054, Series DBasic Sprayer with Lo-Boy CartIncludes items 1 to 98 Model 231–055, Series BComplete Sprayer with Lo-Boy CartIncludes items 1 to 102 01554 55 ID LABEL, THIS SIDE 56 ID LABEL, OTHER SIDE 58 DANGER LABEL 47 33 30 DANGER LABEL 40 14 18 75...
Page 43 - PARTS LIST – LO-BOY SPRAYER
307–758 43 PARTS LIST – LO-BOY SPRAYER Model 231–054, Series DIncludes items 1 to 98 Model 231–055, Series BIncludes items 1 to 102 REFNO. PART NO. DESCRIPTION QTY REFNO. PART NO. DESCRIPTION QTY 1 065–099 CONDUIT, specify length when ordering 0.8 ft 3 154–636 WASHER, 5/8” ID 2 5 156–823 UNION, 1/4 ...
Page 44 - PARTS DRAWING & LIST – PRESSURE CONTROL; PRESSURE CONTROL ASSEMBLY; Includes all items listed below, except the terminals.
44 307–758 PARTS DRAWING & LIST – PRESSURE CONTROL PRESSURE CONTROL ASSEMBLY 220–455 Includes all items listed below, except the terminals. The terminals are included with the circuit board (item72). The terminals listed in this parts list are shown on thewiring diagram on page 45. Part numbers ...
Page 47 - Upright Cart; Height; GRACO PHONE NUMBERS
307–758 47 TECHNICAL DATA Power Requirements 120 VAC, 60Hz, . . . . . . . . . . . . . . . . . . . 1 phase, 15 amp minimum or 2500 Watt generator Motor 1/2 HP, DC . . . . . . . . . . . . . . . . . . . . . . . . . . . . . . . . . . . . . . Working Pressure Range 0 – 2750 psi (0 – 195 bar) . . . . . . ...
Page 48 - THE GRACO WARRANTY AND DISCLAIMERS
48 307–758 THE GRACO WARRANTY AND DISCLAIMERS WARRANTY Graco warrants all equipment manufactured by it and bearing its name to be free from defects in material and workman-ship on the date of sale by an authorized Graco distributor to the original purchaser for use. As purchaser’s sole remedyfor bre...


 Graco 04511 10F
Manual
Graco 04511 10F
Manual
 Graco 9AU100
User Manual
Graco 9AU100
User Manual
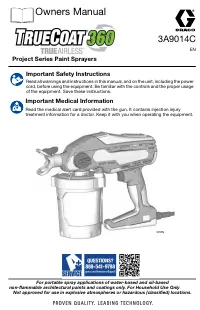 Graco 26D281
User Manual
Graco 26D281
User Manual
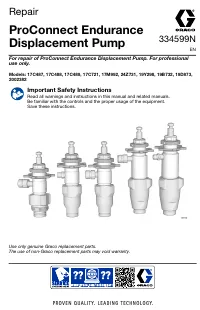 Graco 17C721
User Manual
Graco 17C721
User Manual
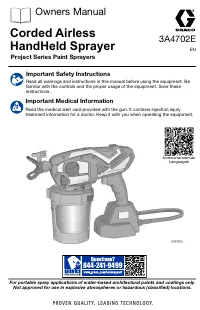 Graco 17N163
User Manual
Graco 17N163
User Manual
 Graco 17P185
User Manual
Graco 17P185
User Manual
 Graco 17P186
User Manual
Graco 17P186
User Manual
 Graco 243080
User Manual
Graco 243080
User Manual
 Graco 25D492
User Manual
Graco 25D492
User Manual
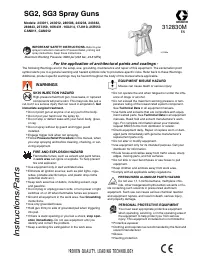 Graco 288817
User Manual
Graco 288817
User Manual
 Graco LTS 15
User Manual
Graco LTS 15
User Manual
 Graco 17A466
User Manual
Graco 17A466
User Manual