Page 2 - SAFETY PRECAUTIONS; PROPER DISPOSAL OF THE REFRIGERATOR; Refrigerants; DANGER! RISK OF CHILD ENTRAPMENT; USE OF EXTENSION CORDS
IMPORTANT SAFETY INFORMATION.READ ALL INSTRUCTIONS BEFORE USING. WARNING! Use this appliance only for its intended purpose as described in this Owner’s Manual. SAFETY PRECAUTIONS When using electrical appliances, basic safety precautions should be followed, including the following: ■ ■ This refriger...
Page 3 - Mains lead replacement
3 READ AND FOLLOW THIS SAFETY INFORMATION CAREFULLY. SAVE THESE INSTRUCTIONS WARNING! HOW TO CONNECT ELECTRICITY The power cord of this appliance is equipped withan earthing plug which mates with a standardearthed wall outlet to minimize the possibility ofelectric shock hazard from this appliance. H...
Page 4 - About the controls with temperature settings.; SET; For Controls Inside the Refrigerator:; Changing the Temperature; If this film was not removed during installation, remove it now.
-18 3 4 About the controls with temperature settings. The temperature controls are preset in the factory at 3°C for the refrigerator compartment and -18°C for the freezer compartment. Allow 24 hours for the temperature to stabilize to the preset recommended settings. The temperature controls can dis...
Page 6 - Filter Bypass Plug; About the water filter.
Water Filter Cartridge The water filter cartridge is located in the back upper right corner of the refrigeratorcompartment. When to Replace the Filter There is a replacement indicator light for the water filter cartridge on the temperaturedisplay. This light will turn orange to tell youthat you need...
Page 7 - About the shelves and bins.; Not all features are on all models.; Slide-Out Spillproof Shelf
7 Rearranging the Shelves To remove: Remove all items from the shelf. Tilt the shelf up at the front. Lift the shelf up at the back and bring the shelf out. To replace: While tilting the shelf up, insert the top hook at the back of the shelf in a slot on the track. Lower the front of the shelf until...
Page 8 - Non-Adjustable Bins on the Door; Adjustable Bins on the Door; About the additional features.; Non-Adjustable Beverage Rack
Non-Adjustable Bins on the Door To remove: Lift the bin straight up, then pull out. To replace: Engage the bin in the molded supports on the door and push down. It will lockin place. Adjustable Bins on the Door Adjustable bins can easily be carried fromrefrigerator to work area. To remove: Lift bin ...
Page 9 - About the crispers and pans.; Fruit and Vegetable Crisper; Adjustable Temperature Deli Pan
9 About the crispers and pans. Not all features are on all models. Fruit and Vegetable Crisper Excess water that may accumulate in thebottom of the drawers or under the drawersshould be wiped dry. Adjustable Humidity Crisper (on some models) Slide the control all the way to the HIGH setting to provi...
Page 10 - Freezer Shelves and Baskets; Basket Removal
10 Freezer Shelves and Baskets A shelf above the ice storage bin A half-width basket A shallow full-width basket A deep full-width basket An ice storage bin can be used to store other food items. Basket Removal To remove the shallow full-width basket: Pull the basket out to the stop location. Lift t...
Page 11 - About the freezer compartment.
11 Loading the Freezer Compartment Load so that at least 15 mm of space remainsclear between stacks of packages and 15 mm to25 mm of space between the top of any stackand any shelf or basket above it. Packages mayhang over the front of shelves but must remain15 mm from doors. ■ Food to be frozen mus...
Page 12 - About the automatic icemaker.; Automatic Icemaker; Icemaker Accessory Kit; Door Alarm
12 About the automatic icemaker. Automatic Icemaker (on some models) The icemaker will produce seven cubes per cycle—approximately 100–130 cubes in a 24-hour period, depending on freezercompartment temperature, room temperature,number of door openings and other useconditions. See below for how to ac...
Page 13 - Care and cleaning of the refrigerator.; Cleaning the Outside; Cleaning the Inside; Behind the Refrigerator; Preparing for Vacation
Care and cleaning of the refrigerator. Cleaning the Outside The door handles and trim. Clean with a cloth dampened with soapy water. Dry with a soft cloth.Do not use wax on the door handles and trim. Keep the outside clean. Wipe with a clean cloth lightly dampened with kitchen appliance wax ormild l...
Page 14 - Refrigerator Lights; Freezer Light; Replacing the light bulbs.; Turning the control to the
14 Refrigerator Lights CAUTION: Light bulbs may be hot. Unplug the refrigerator. To remove the light shield, grasp the shield at the back and pull out to release the tabs at the back. Rotate the shield down and then forward to release the tabs at the front of the shield. After replacing with an appl...
Page 15 - Trim kits and decorator panels.; Read these instructions completely and carefully.; Before You Begin; Panels less than 6.3 mm thick; For panel required models
15 Trim kits and decorator panels. Read these instructions completely and carefully. Before You Begin Some models are equipped with trim kits that allow you to install door panels. Panels less than 6.3 mm thick When installing wood panels less than 6.3 mm thick, you need to create a filler panel, su...
Page 16 - mm or Raised Panel; Dimensions for Custom Wood Panels
16 Trim kits and decorator panels. 19.1 mm or Raised Panel A raised panel design screwed or glued to a 6.3 mm thick backing, or a 19.1 mm routed board can be used.The raised portion of the panel must be fabricated to permit clearances of at least 5.1 cm from the handleside for fingertip clearance. P...
Page 17 - BEFORE YOU BEGIN; IMPORTANT; Note to Installer –; PREPARATION; Reversing the Door Swing; MATERIALS YOU MAY NEED; For Anti-Tip Bracket Mounted on CONCRETE Floors Only; TOOLS YOU MAY NEED
Installation Refrigerator Instructions Models 21 and 25 BEFORE YOU BEGIN Read these instructions completely and carefully. • IMPORTANT — Save these instructions for local inspector’s use. • IMPORTANT — Observe all governing codes and ordinances. • Note to Installer – Be sure to leave these instructi...
Page 18 - WARNING; Injury to persons can result.; Figure 1 – Installation Overview; Installation Instructions
LOCATING THE ANTI-TIP FLOOR BRACKET Place the anti-tip floor bracket locatortemplate (included inside the anti-tip kit)onto the floor up against the rear wall,within W, and in line with the desiredlocation of the RH side of the refrigerator(see Figure 1). Place the anti-tip floor bracket onto theloc...
Page 19 - Figure 2 – Acceptable Screw; CONCRETE Wall and Floor Construction:; ANTI-TIP BRACKET INSTALLATION; WOOD Wall and Floor Construction:; Figure 3 – Attachment to
Installation Instructions LOCATING THE ANTI-TIP FLOOR BRACKET (cont.) 2 Preferred Installation – Wood Preferred Installation – Concrete Minimum Acceptable #1 – Wall Plate Stud Minimum Acceptable #2 – Wood Floor Minimum Acceptable #3 – Concrete Floor Figure 2 – Acceptable Screw Placement Locations CO...
Page 20 - REFRIGERATOR LOCATION; REINSTALL DOORS, DRAWERS AND TOP CAP; Ensure the door is; CLEARANCES; Models
Installation Instructions INSTALLING THE REFRIGERATOR REFRIGERATOR LOCATION • Do not install the refrigerator where thetemperature will go below 16°C because it will notrun often enough to maintain proper temperatures. • Do not install the refrigerator where thetemperature will go above 37°C because...
Page 22 - PUT THE REFRIGERATOR IN PLACE; hex wrench; hex wrench with; PLUG IN THE REFRIGERATOR; Set the icemaker power switch to the; START THE ICEMAKER
INSTALLING THE REFRIGERATOR (cont.) Installation Instructions 22 PUT THE REFRIGERATOR IN PLACE Move the refrigerator to its final location. Makesure the back side of the refrigerator engages theanti-tip bracket properly. The anti-tip floor bracketshould line up with the cutout in the back bottomof t...
Page 23 - Allen; Stainless steel and plastic handles:; Allen wrench and
Installation Instructions REMOVE THE FRESH FOOD DOOR HANDLE (For placement in the installation location orreversal of the handles – on some models) Stainless steel (on some models): REMOVING THE DOORHANDLE: Loosenthe set screwswith the 3/32 ″ Allen wrench and remove the handle. NOTE: For Double Door...
Page 24 - INSTALLING THE REFRIGERATOR; Stainless steel handle:
INSTALLING THE REFRIGERATOR (cont.) ATTACH THE FREEZER DOORHANDLE Stainless steel and plastic handles: Attach the handle firmly to the mountingfasteners and tighten the set screws on thebottom of the handle with a 1/8 ″ Allen wrench. A Installation Instructions 24 ATTACH THE FRESH FOOD DOOR HANDLE S...
Page 25 - LEVEL THE REFRIGERATOR; Turn the leveling legs; clockwise to raise; the; counterclockwise to lower; SET THE CONTROLS
LEVEL THE REFRIGERATOR The leveling legs have 2 purposes:1) Leveling legs adjust so the refrigeratoris firmly positioned on the floor anddoes not wobble. 2) Leveling legs serve as a stabilizingbrake to hold the refrigerator securelyin position during operation andcleaning. The leveling legs also pre...
Page 26 - REMOVE THE BASKET
26 Installation Instructions REMOVING THE FREEZER DRAWER (on some models) REMOVE THE BASKET Open the freezer drawer until it stops.Cut the 2 wire ties off of the basket withwire cutters.The freezer basket rests inside 4 tabs onthe freezer slides. Lift the basket up andout of the 4 tabs.Tilt the fron...
Page 27 - REPLACE THE FREEZER BASKET
27 Installation Instructions REPLACING THE FREEZER DRAWER (on some models) ATTACH AND SECURE THEDRAWER FRONT TO THE SLIDES Pull out the rail assemblies to the fulllength on each side of the cabinet. Drive the top screw into the door on eachside until it is 1/2 way in. Hang the drawer front onto open...
Page 28 - TOOLS YOU WILL NEED; IMPORTANT NOTES; Unplug the refrigerator from its electrical outlet.
TOOLS YOU WILL NEED Installation Instructions REVERSING THE DOOR SWING (Single Door Refrigerator Models only) IMPORTANT NOTES When reversing the door swing: NOTE: Door swing is not reversible on stainless steel models. • Read the instructions all the way throughbefore starting. • Parts are included ...
Page 29 - REMOVE CENTER HINGE; A new hinge will be required for the
Installation Instructions REMOVE CENTER HINGE Using a 5/16 ″ socket ratchet/driver, remove the bolts securing the centerhinge to the cabinet. Set the hinge and bolts aside. 2 29 INSTALL CENTER HINGE Transfer the plug button and screw holecover in the hinge holes on the left side tothe right side. In...
Page 30 - REHANG REFRIGERATOR DOOR; INSTALL THE LOGO BADGE; REVERSING THE DOOR SWING
REHANG REFRIGERATOR DOOR Lower the refrigerator door onto thecenter hinge pin. Ensure that the plastichinge pin thimble is on the center hingepin or inside door hinge pin hole locatedin the bottom of the door. Insert the top hinge pin into the hinge holeon top of the refrigerator door. Make surethe ...
Page 31 - Door swing is not reversible.
Installation Instructions REMOVING THE DOORS (Double Door Refrigerator Models only) IMPORTANT NOTES NOTE: Door swing is not reversible. • Read the instructions all the way throughbefore starting. • Handle parts carefully to avoid scratchingpaint. • Set screws down by their related parts toavoid usin...
Page 32 - REMOVE OPPOSITE DOOR; REMOVING THE DOORS
REMOVE THEREFRIGERATOR DOORS (cont.) Remove the hinge cover on top of therefrigerator door by removing the Phillipshead screws and pulling it up.Using a 5/16 ″ socket ratchet/driver, remove the bolts securing the top hinge tothe cabinet. Then lift the hinge straight upto free the hinge pin from the ...
Page 33 - INSTALL CENTER HINGE; Install the center hinge on each side.; REHANG REFRIGERATOR DOORS; ALIGN DOUBLE DOORS; Allen wrench to turn the pin.; REPLACE FREEZER DRAWER
Installation Instructions REPLACING THE DOORS (Double Door Refrigerator Models only) INSTALL CENTER HINGE Install the center hinge on each side. REHANG REFRIGERATOR DOORS Lower the refrigerator door onto thecenter hinge pin. Ensure that the plastichinge pin thimble is on the center hingepin or insid...
Page 34 - CRACKS and SNAPS; Do you hear what I hear? These sounds are normal.; Problem
34 Normal operating sounds. Before you call for service… Troubleshooting Tips Save time and money! Review the charts on the followingpages first and you may not need to call for service. Newer refrigerators sound different from older refrigerators. Modern refrigerators have more features and use new...
Page 36 - Before you call for service...; Troubleshooting Tips
36 Before you call for service… Troubleshooting Tips Problem Possible Causes What To Do Ice cubes have Food transmitting odor/taste • Wrap foods well. odor/taste to ice cubes. Interior of refrigerator • See Care and cleaning. needs cleaning. • Keep an open box of baking soda in the refrigerator; rep...
Page 39 - Special Safety Instructions for Australia and New Zealand.; (in addition to other information in Owner’s Manual); IMPORTANT SAFETY INSTRUCTIONS
39 Special Safety Instructions for Australia and New Zealand. (in addition to other information in Owner’s Manual) IMPORTANT SAFETY INSTRUCTIONS To reduce the risk of personal injury or damage to property, follow basic safety precautions when using thisrefrigerator, including the following: When usi...
Page 40 - Installing the Water Line; Shut Off the Main Water Supply
40 Special Installation Instructions for Australia and New Zealand. Installing the Water Line For Australian and New Zealand installation, read these instructions completely and carefully. ■ ■ IMPORTANT: Government legislation and Codes in most States and Territories of Australia require installatio...
Page 41 - Connecting the Tubing to the Shutoff Valve; Connecting the Tubing to the Refrigerator
41 Attach the fitting with the male thread suppliedwith the water supply kit to the shutoff valve (orpressure limiting valve, if fitted), and tighten. NOTE: PTFE tape should be used for a water tight seal when assembling all the above fittings. Route the tubing through a hole drilled in the sideof t...
Page 42 - Turn the Water On; Plug In the Refrigerator
42 Special Installation Instructions for Australia and New Zealand. Turn the water On at the shutoff valve. Tighten any connection that leaks. Replace the access cover and tighten all screws (on some models). Turn the Water On Plug in the refrigerator to the Power Outlet andturn On . IMPORTANT: Alwa...
Page 43 - Performance Data Sheet; Operating Specifications; Special Notices; NSF
43 Manufactured for: General Electric Company, Louisville, KY 40225 Performance Data Sheet SmartWater Filtration System GSWF Cartridge This system has been tested according to NSF/ANSI 42/53 for reduction of the substances listed below.The concentration of the indicated substances in water entering ...
Page 44 - Water Treatment Device
44 State of California Department of Health Services Water Treatment Device Certificate Number Date Issued: April 28, 2003 Trademark/Model Designation Replacement Elements 1559 03 - GE GSWF GSWF Manufacturer: General Electric Consumer Products The water treatment device(s) listed on this certificate...
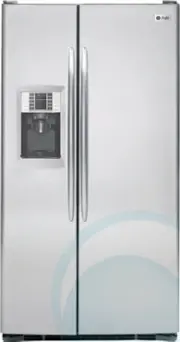


 GE GBE17HYRFS
User Manual
GE GBE17HYRFS
User Manual
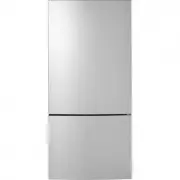
 GE GBE21DYKFS
User Manual
GE GBE21DYKFS
User Manual
 GE GCE06GSHSB
User Manual
GE GCE06GSHSB
User Manual
 GE GDE03GGKBB
User Manual
GE GDE03GGKBB
User Manual
 GE GDE03GLKLB
User Manual
GE GDE03GLKLB
User Manual
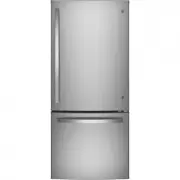
 GE GDE21EGKWW
User Manual
GE GDE21EGKWW
User Manual
 GE GDE21EMKES
User Manual
GE GDE21EMKES
User Manual
 GE GDE21EYKFS
User Manual
GE GDE21EYKFS
User Manual
 GE GDE25ESKSS
User Manual
GE GDE25ESKSS
User Manual
 GE GDE25EYKFS
User Manual
GE GDE25EYKFS
User Manual
 GE GFD28GELDS
User Manual
GE GFD28GELDS
User Manual
 GE GFD28GYNFS
User Manual
GE GFD28GYNFS
User Manual
 GE GFE24JYKFS
User Manual
GE GFE24JYKFS
User Manual
 GE GFE26JEMDS
User Manual
GE GFE26JEMDS
User Manual
 GE GFE26JGMBB
User Manual
GE GFE26JGMBB
User Manual
 GE GFE26JGMWW
User Manual
GE GFE26JGMWW
User Manual
 GE GFE26JMMES
User Manual
GE GFE26JMMES
User Manual
 GE GFE26JYMFS
User Manual
GE GFE26JYMFS
User Manual
 GE GFE28GELDS
User Manual
GE GFE28GELDS
User Manual
 GE GFE28GMKES
User Manual
GE GFE28GMKES
User Manual