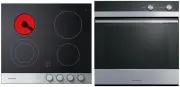
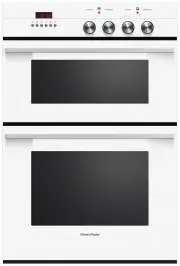
Page 3 - CONTENTS; Registration
3 CONTENTS Safety and warnings 5 Before you begin 9 First use 10 Using the oven light 22 Using the kitchen timer 23 Changing the time 25 Locking the control panel 26 Unlocking the control panel 27 Cooking options 28 Delayed cook 29 Auto off 30 Food probe 31 Guided cooking 34 Cooking guide 36 Cooking...
Page 5 - SAFETY AND WARNINGS; Electric Shock Hazard; Fire Hazard; Failure to follow this advice may result in; Cut Hazard; Failure to use caution could result in injury.; IMPORTANT SAFETY INSTRUCTIONS
5 SAFETY AND WARNINGS ! WARNING! Electric Shock Hazard Failure to follow this advice may result in electric shock or death. • Turn the oven off at the wall before replacing the oven lamp. ! WARNING! Fire Hazard Failure to follow this advice may result in overheating, burning, and injury. • Do not pl...
Page 6 - Hot Surface Hazard; Failure to follow this advice could result in
6 SAFETY AND WARNINGS ! WARNING! Hot Surface Hazard Failure to follow this advice could result in burns and scalds. • To avoid burns and scalds, keep children away from this appliance. • Surfaces of the appliance may become hot enough to cause burns. Examples include the oven vent, the surface near ...
Page 7 - READ AND SAVE THIS GUIDE; Installation
7 SAFETY AND WARNINGS READ AND SAVE THIS GUIDE WARNING! To reduce the risk of fire, electrical shock, injury to persons or damage when using the oven, follow the important safety instructions listed below. Read all the instructions before using the oven. Use the oven only for its intended purpose as...
Page 8 - Cleaning
8 SAFETY AND WARNINGS z Always keep oven vents unobstructed. Do not wear loose fitting or hanging garments when using the appliance. They could ignite or melt if they touch an element or hot surface and you could be burned. z Do not change or modify the wireless communication device in any way. Chan...
Page 9 - BEFORE YOU BEGIN; Oven features and accessories
9 BEFORE YOU BEGIN z Make sure the installer has completed the ‘Final checklist’ in the Installation guide. z Read this guide, taking special note of the ‘Safety and warnings’ section. z Remove all internal and external packaging and dispose of it responsibly. Recycle items that you can. z Refit the...
Page 10 - Control panel; FIRST USE; Control panel features
10 10:45 COOK BY FUNCTION COOK BY FOOD TYPE COOK BY RECIPE 10:45 COOK BY FUNCTION COOK BY FOOD TYPE COOK BY RECIPE 10:45 COOK BY FUNCTION COOK BY FOOD TYPE COOK BY RECIPE 10:45 COOK BY FUNCTION COOK BY FOOD TYPE COOK BY RECIPE *some models only Touch screen display Your oven is operated using an int...
Page 11 - OFF; then; CONFIRM; then select; Setting the clock and mains supply voltage
11 Set the clock format. Choose between 24 HOUR , 12 HOUR or OFF then select CONFIRM . Scroll to set the correct time then select CONFIRM . Select the mains supply voltage for your home. Choose between 208V and 240V then select CONFIRM. FIRST USE Setting the clock and mains supply voltage You’ll nee...
Page 12 - Oven racks; Remove all cable ties and packaging holding the shelves in place.
12 FIRST USE Oven racks Your oven comes with the shelves positioned and secured inside. The following shows you how to remove and reposition them to your preferred position. Remove shelves from the oven 1 Remove all cable ties and packaging holding the shelves in place. 2 Remove all the shelves, tak...
Page 13 - Replace shelving in your preferred positions
13 To replace sliding shelves 1 Grip the shelf at the front (making sure you are holding the wire shelf and the sliding frame together). 2 Make sure the shelf is level and facing the right way with the guard rail at the back. 3 Place the shelf on top of the side racks at the desired height, hooking ...
Page 14 - Water tank compartment; Select
14 FIRST USE Water tank compartment Some parts of the water tank compartment have protective packaging. The following shows you how to access the water tank compartment and remove the protective wrap. 1 2 3 Touch the menu icon in the top left corner of the screen. Remove protective wrap from the con...
Page 15 - Set the function to; After 30 minutes change the function to; AERO BROIL; and heat for 5 minutes.; TRUE AERO; and heat for a further; Conditioning the oven
15 After conditioning: There will be a distinctive smell and a small amount of smoke during the conditioning process as manufacturing residue is burnt off. This is normal, but make sure the kitchen is well ventilated. Once cooled, wipe out the oven with a damp cloth and mild detergent, and dry thoro...
Page 16 - Setting the water hardness level; Select your water hardness level:; DESCALE: WATER HARDNESS; Enter the settings menu.
16 Setting the water hardness level Before using any steam functions for the first time, the water hardness level should be set. If you are unsure on your water hardness level, contact your local water supplier. We do not recommend using this product with water hardness above 450ppm. FIRST USE Selec...
Page 17 - Filling the water tank; FILL TANK
17 o F OPTIONS START STEAM 12:02 am 210 205 FILL TANK To guarantee perfect results, we recommend filling the tank with fresh water before cooking. SKIP Filling the water tank Before using any steam functions, you’ll need to fill the water tank. For best results, we recommend filling the tank with fr...
Page 18 - Expanding a description
18 FIRST USE Expanding a description For more information on each function or category, touch the description underneath each function or category name. Selecting a function To select and use a function, enter the function category menu before touching the function name or icon to select. Functions ...
Page 19 - to; Setting a function and temperature; COOK BY FUNCTION; Rapid preheating stage
19 Scroll through the functions and select the desired option. To adjust the preset temperature, swipe left or right or use the dial. Touch START to heat the oven and begin cooking. A red bar will show on the screen while the oven is heating. When the oven has reached the set temperature, a tone wil...
Page 20 - Editing or cancelling cooking; CANCEL; and then; at
20 FIRST USE Editing or cancelling cooking Touch the function name or temperature at any point during cooking to adjust. To stop cooking and turn the oven off, press CANCEL and then CONFIRM at any point Changing the temperature Changing the function Turning the oven off CONVECTION FUNCTIONS BAKE TRU...
Page 21 - Post steam drying; product and warranty will be void.
21 FIRST USE Post steam drying After running a steam function, there may be some moisture left in the oven. Wait for the oven to cool, then wipe out the base of the cavity with a sponge or soft cloth.You may also be prompted to run a dry cycle after you have finished cooking.During this stage, the f...
Page 22 - or; USING THE OVEN LIGHT; Turning the oven light; ON; or
22 Touch the menu icon in the top left corner of the display. Select LIGHT. Select ON or OFF as required and then select CONFIRM . USING THE OVEN LIGHT Turning the oven light ON or OFF 1 2 3 10:45 COOK BY FUNCTION COOK BY FOOD TYPE COOK BY RECIPE OVEN LIGHT CONFIRM OFF ON MENU TIMER LOCK LIGHT SETTI...
Page 23 - TIMER; USING THE KITCHEN TIMER; AUTO OFF; timer or; DELAYED COOK; Setting the timer
23 Touch the menu icon in the top left corner of the screen. Select TIMER . Scroll to set the timer length then select START . You can set the timer up to 11 hours 59 minutes. The timer countdown will show on the screen. USING THE KITCHEN TIMER 1 2 3 4 z Use the kitchen timer to keep track of cookin...
Page 24 - Adjust the timer as needed and select; to cancel the; CLOSE; to return to the home; ADD TIME; to set another; Editing or cancelling the timer
24 Touch the timer countdown in the upper right of the screen. Adjust the timer as needed and select CONFIRM , or touch CANCEL to cancel the timer completely. At the end of the timer a tone will sound intermittently. Select CLOSE to return to the home screen, or touch ADD TIME to set another timer. ...
Page 25 - CHANGING THE TIME; Touch the menu icon in the top left corner.; CLOCK SET TIME
25 CHANGING THE TIME Touch the menu icon in the top left corner. Select SETTINGS . Select CLOCK SET TIME . 1 2 3 Scroll to change the time then select CONFIRM . 4 10:45 COOK BY FUNCTION COOK BY FOOD TYPE COOK BY RECIPE 1 11 26 24 : pm am SET CLOCK CONFIRM SETTINGS CLOCK SET TIME CLOCKFORMAT UNITSTEM...
Page 26 - LOCK; LOCKING THE CONTROL PANEL
26 Touch the menu icon in the top left corner of the screen. Select LOCK . Select CONFIRM . The control panel is now locked. The controls will remain unresponsive until it is unlocked. LOCKING THE CONTROL PANEL 1 2 3 4 Lock the oven controls to prevent accidental use of the oven by children or when ...
Page 27 - UNLOCKING THE CONTROL PANEL
27 Press anywhere on the screen and hold until the bar fills to unlock the oven. UNLOCKING THE CONTROL PANEL 1 Press and hold to unlock Unlocked
Page 28 - COOKING OPTIONS
28 Select COOK BY FUNCTION followed by the desired function category. Select the function you want to cook with. Touch OPTIONS at the bottom of the screen and select either: DELAYED COOK , AUTO OFF or FOOD PROBE . COOKING OPTIONS 1 2 3 Your oven comes with a number of automatic cooking options to he...
Page 31 - FOOD PROBE; Tips for using the food probe; You can still use the kitchen timer when the probe is in use.; Internal temperatures and food safety
31 FOOD PROBE Tips for using the food probe z You can still use the kitchen timer when the probe is in use. z You cannot use the food probe with DELAYED COOK or AUTO OFF . z The internal temperature of meat will continue to rise by a few degrees after you have removed it from the oven, so allow for ...
Page 32 - Setting FOOD PROBE; Go to the; menu and
32 3 50 o F DELAYED COOK AUTO OFF FOOD PROBE OPTIONS OPTIONS START 10:45 ROAST 10:45 START CHICKEN WHOLE: LAMB MEDIUM RARE LAMB MEDIUM LAMB WELL DONE CHICKEN PIECES BEEF WELL DONE BEEF MEDIUM WELL 185 167 140 149 131 135 122 o FOOD PROBE Setting FOOD PROBE Select your function and temperature and pr...
Page 33 - and select
33 FOOD PROBE FOOD PROBE is now set. Your oven will cook until the set temperature is reached and then turn off automatically. To edit or cancel Touch OPTIONS and select FOOD PROBE at any point to edit or cancel. When the end time is reached The oven will automatically turn off and a tone will sound...
Page 34 - From the home screen, select; GUIDED COOKING; Using COOK BY FOOD TYPE; COOK BY FOOD TYPE
34 From the home screen, select COOK BY FOOD TYPE . Scroll through the various food types and select the type of food you want to cook. Follow the instructions onscreen for what accessories and cookware to use and how to set up your oven. Select the cooking option you want to use.For more informatio...
Page 35 - Using COOK BY RECIPE; COOK BY RECIPE
35 GUIDED COOKING Using COOK BY RECIPE Select COOK BY RECIPE . Scroll to look through the recipe collection and select your favourite.Follow the instructions onscreen for ingredients and method, and oven set up. 1 2 10:45 COOK BY FUNCTION COOK BY FOOD TYPE COOK BY RECIPE 10:45 COOK BY FUNCTION COOK ...
Page 36 - COOKING GUIDE; General guidelines; OVERVIEW IMAGE; Oven elements; Baking; Single shelf cooking:
36 COOKING GUIDE General guidelines This oven has been designed to utilise its four elements and rear fan in different combinations to provide you with enhanced performance. The wide range of functions allow you to cook all food types to perfection. OVERVIEW IMAGE Oven elements 1 upper outer element...
Page 37 - Reheating; STEAM REGENERATE; Proofing; STEAM PROOF; Steaming; Maximum steam cooking times; If large volumes of water are allowed to build
37 COOKING GUIDE Reheating z Never reheat food more than once. z Use STEAM REGENERATE or CRISP REGENERATE to reheat food, or follow the instructions in COOK BY FOOD TYPE. z Always reheat food to piping hot, or to a minimum internal temperature of 185°F (85°C). This reduces the risk of contamination....
Page 38 - Steam functions; Steam is generated from the rear of the oven and distributed; Precise and evenly controlled temperature using steam; SOUS VIDE
38 COOKING GUIDE Steam functions Steam cooking will increase the quantity of steam emitted from the product when the door is opened. Use caution when opening the door and allow any excess hot air and steam to dissipate before removing or replacing food. TRUE AERO LOW STEAM TRUE AERO MEDIUM STEAM TRU...
Page 39 - Prevents dough from drying; STEAM DEFROST; Defrosts without drying
39 COOKING GUIDE TRUE AERO LOW STEAM TRUE AERO MEDIUM STEAM TRUE AERO HIGH STEAM STEAM STEAM DEFROST VENT BAKE SOUS VIDE STEAM REGENERATE CRISP REGENERATE TRUE AERO LOW STEAM TRUE AERO MEDIUM STEAM TRUE AERO HIGH STEAM STEAM STEAM DEFROST VENT BAKE SOUS VIDE STEAM REGENERATE CRISP REGENERATE TRUE AE...
Page 40 - For best results, preheat oven fully before cooking; CRISP REGENERATE; providing moisture for delicate cooking.; TRUE AERO + MEDIUM STEAM; promoting browning and soft textures.; TRUE AERO + LOW STEAM; promoting thin crust and colour baked dishes.
40 Convection + Steam functions For best results, preheat oven fully before cooking CRISP REGENERATE Fan circulates air from rear element with optimized steam Ideal for: pastries and breads. z Heat and steam create perfect conditions to regenerate pastries, breads, pizza & pies as if they were j...
Page 41 - Convection functions; MAXI BROIL; Generates intense heat from the top elements only; LO; Distributes heat evenly by natural convection; Distributes heat evenly by fan
41 Convection functions For best results, preheat oven fully before cooking COOKING GUIDE BAKE GRILL VENT BAKE FAN FORCED FAN GRILL PASTRY BAKE CLASSIC BAKE DEHYDRATE WARM MAXI BROIL Generates intense heat from the top elements only Ideal for: toasting bread or for top-browning to finish off dishes....
Page 42 - Fan circulates intense heat from top elements; AERO BAKE; Oven fan circulates air from top and bottom; VENT BAKE; Distributes heat from upper and lower elements
42 AERO BROIL Fan circulates intense heat from top elements Ideal for: whole chicken, beef tenderloin or broiling fish or steak. z Uses the intense heat from the elements for top-browning and the fan to ensure even cooking of foods. z Meat, poultry and vegetables cook beautifully; food is crisp and ...
Page 43 - PIZZA BAKE; Optimized for roasting; PASTRY BAKE; Oven fan circulates heat from lower element
43 PIZZA BAKE Oven fan circulates heat from lower element Ideal for: crisp-based pizzas. This function will preheat for around 8 minutes to 355°F (180°C). z The fan circulates heat from the lower element throughout the entire oven. z Excellent for cooking pizza as it crisps the base beautifully with...
Page 44 - SLOW COOK; Fan circulates heat from rear element; CLASSIC BAKE; Provides heat from lower element; AIR FRY; Fan circulates heat from upper outer and inner elements
44 SLOW COOK Fan circulates heat from rear element Ideal for: slow-cooked dishes such as casseroles, stews and braises. z The fan circulates heat from the rear element to gently cook food. z This function has low energy consumption — oven lights will remain off and vents will remain closed for the d...
Page 45 - Upper outer and lower elements plus venting; COOK; to heat the food piping hot, then change to; WARM; , as this function alone will not bring cold food up to
45 WARM Upper outer and lower elements plus venting Ideal for: keeping cooked food hot, or to warm plates and serving dishes. z Provides a constant low heat to keep food hot. z To reheat food from cold, use another function or COOK BY FOOD TYPE to heat the food piping hot, then change to WARM , as t...
Page 46 - COOKING CHARTS; BAKING; BISCUITS
46 Shelf positions z Position shelves before you turn the oven on. z Shelf positions are counted from the base up, with 1 being the lowest shelf position and 6 the highest. During cooking z Preheat the oven to the required temperature. z The broil element may come on while the oven is heating up. z ...
Page 47 - MERINGUES
47 BAKING SHELVES FUNCTION SHELF POSITION TEMP (°F) TEMP (°C) TIME (MIN) MUFFINS/CUPCAKES Single Aero Bake 3 365 185 13 - 18 Multi True Aero 2 and 4 340 170 13 - 18 MERINGUES Single Vent Bake 2 210 - 250 100 - 120 60 BREAD Rolls Single True Aero + Low Steam 2 320- 375 160- 190 15 - 25 Loaf Single Tr...
Page 48 - BROILING
48 COOKING CHARTS BROILING SHELVES FUNCTION SHELF POSITION TEMP (°F) TEMP (°C) TIME (MIN) BEEF Steak, rare Single Aero Broil 4 445 230 10 - 15 Steak, medium Single Aero Broil 4 445 230 15 - 20 Burgers Single Maxi Broil 4 HI HI 12 - 15 Meatballs Single Maxi Broil 4 HI HI 12 - 15 LAMB Chops, medium Si...
Page 49 - SAVOURY
49 COOKING CHARTS SAVOURY SHELVES FUNCTION SHELF POSITION TEMP (°F) TEMP (°C) TIME (MIN) CORNBREAD Single Aero Bake 3 400 - 425 200-220 20 - 25 VEGETABLES Single Vent Bake 3 350 - 375 175 - 190 30 - 50 LASAGNE Single True Aero + Low Steam 3 350 - 375 175 - 190 35 - 40 QUICHE Single Pastry Bake 2 350...
Page 50 - ROASTING; PRIME RIB ROAST
50 COOKING CHARTS ROASTING SHELVES* FUNCTION SHELF POSITION TEMP (°F) TEMP (°C) TIME** (MIN) BEEF, BONELESS (times per 1lb/450g) Rare Single* Roast/True Aero + Medium Steam 2 320- 340 160- 170 18 - 32 Medium Single* Roast/True Aero + Medium Steam 2 320-340 160- 170 25 - 40 Well done Single* Roast/Tr...
Page 52 - STEAMING; VEGETABLES
52 COOKING CHARTS STEAMING SHELVES FUNCTION SHELF POSITION TEMP (°F) TEMP (°C) TIME (MIN) VEGETABLES Root (Potatoes, carrots, beets, yams) Single*** Steam 2 210 100 20-30 Leafy (Spinach, kale, chard) Single*** Steam 2 210 100 6-10 PROTEIN Eggs (in shell) Single*** Sous Vide 2 145 63 60-65 Steak, 10 ...
Page 53 - Brown in frying pan first; and; collect cooking juices.; DESSERTS
53 COOKING CHARTS 1 Start at 430˚F (220˚C) for 10 minutes, and lower to 320˚F (160˚C) for further 50 minutes 2 Brown in frying pan first * If multiple shelves are required (eg roasting vegetables at the same time), use TRUE AERO and shelf positions 2 and 4. ** Alternatively use the food probe and in...
Page 54 - USER PREFERENCE SETTINGS
54 USER PREFERENCE SETTINGS The settings menu allows you to adjust your user preferences to: z Change the time z Change the clock format (12 hours, 24 hours or off) z Display the temperature in degrees Celsius or Fahrenheit z Adjust the volume of audio feedback z Turn timer alarms on or off z Turn a...
Page 55 - Changing the settings
55 USER PREFERENCE SETTINGS Changing the settings Touch the menu icon in the top left corner of the screen. Select SETTINGS . Select the setting you want to change, adjust as needed then select CONFIRM . 1 2 3 10:45 COOK BY FUNCTION COOK BY FOOD TYPE COOK BY RECIPE METRIC IMPERIAL UNITS WEIGHT CONFI...
Page 56 - WIFI CONNECTION AND REMOTE MODE; Getting started; Connecting to your home wifi; WIFI CONNECT; On your mobile device:
56 Select SETTINGS . WIFI CONNECTION AND REMOTE MODE Your oven can be connected to your home wireless network and operated remotely using the app. Getting started z Ensure your home WiFi network is turned on. z You will be given step by step guidance on both your oven and mobile device. z It may tak...
Page 57 - Enabling Remote Mode; then press; REMOTE MODE
57 WIFI CONNECTION AND REMOTE MODE Enabling Remote Mode Touch the menu icon in the top left corner of the screen. Select REMOTE. Select ON then press CONFIRM. REMOTE MODE is now enabled. 1 2 3 10:45 COOK BY FUNCTION COOK BY FOOD TYPE COOK BY RECIPE REMOTE ON OFF CONFIRM MENU FILL TANK TIMER LOCK LIG...
Page 58 - Setting Sabbath Mode; SABBATH MODE; Sabbath Mode is now set.; While your oven is in Sabbath Mode:
58 HEAT LEVEL APPROXIMATE TEMP (°C) APPROXIMATE TEMP (°F) APPLICATION Low 75 – 100 170 – 210 Keep hot food warm Moderate 155 – 180 310 – 360 Reheat cooked food from cold High 185 – 210 360 – 410 Cooking raw food SABBATH MODE This setting is designed for religious faiths that observe a ‘no work’ requ...
Page 59 - Cancelling Sabbath Mode; SABBATH MODE CANCELLED; will appear
59 SABBATH MODE Cancelling Sabbath Mode Touch and hold the screen until the bar fills. SABBATH MODE CANCELLED will appear and you can now use your oven normally. 1 2 AUDIO ALARMS AUDIOTONES SABBATHMODE DISPLAYLANGUAGE SETTINGS On On Off English Press and hold to cancel SABBATH MODE SABBATH MODE CANC...
Page 60 - CARE AND CLEANING; ALWAYS; Never use a steam cleaner.; Manual cleaning
60 CARE AND CLEANING ALWAYS NEVER • Before any manual cleaning or maintenance, first wait for the oven to cool down to a safe temperature to touch, then turn its power supply off at the wall. • Read these cleaning instructions and the “Safety and warnings” section before you start cleaning your oven...
Page 61 - Oven cavity
61 CARE AND CLEANING WHAT? HOW? IMPORTANT! Oven door frame and plastic corner clips Clean with a solution of mild detergent and hot water, then wipe dry. Oven cavity To clean light soiling off the enamelled surfaces: • Wipe with a damp cloth and a solution of hot water and mild detergent or an ammon...
Page 62 - Oven seal
62 CARE AND CLEANING WHAT? HOW? IMPORTANT! Oven seal Do not clean this part. • Take care not to rub, damage or move the oven seal. • Do not remove this part. Oven door glass(after every use) Use a soft cloth and a mixture of warm water and dishwashing liquid to remove soiling after every use. For st...
Page 63 - Removing the side racks; Remove the side racks to make cleaning the oven easier.
63 CARE AND CLEANING Removing the side racks Remove the side racks to make cleaning the oven easier. Always turn the oven off at the wall first. Ensure the oven has cooled down completely before starting. Slide out all shelves and remove. 1 Unscrew and remove the fixing nut at the front of the side ...
Page 64 - Refitting the side racks
64 CARE AND CLEANING Refitting the side racks Slide the rear tabs of the side rack back onto the mounting studs, ensuring the rack is firmly pushed up against the side wall of the oven. 1 Fit the side rack front tab over the fixing screw.Replace the fixing nut. You may use a coin to tighten the nut....
Page 65 - Replacing the oven light bulbs; Oven bulb replacement is not covered by your warranty.
65 CARE AND CLEANING Replacing the oven light bulbs z Your oven uses G9 halogen bulbs with the specifications 120V, 50Hz and 25W. z To replace the oven light bulbs, contact Customer Care or go to our website www.fisherpaykel.com z Oven bulb replacement is not covered by your warranty.
Page 66 - Removing and refitting the oven door.; To remove the door
66 CARE AND CLEANING Removing and refitting the oven door. To remove the door Take care, the oven door is heavy . Open the door fully.Locate the two small metal locking levers on both door hinges either side. Push each locking lever up fully to release the door from the hinge. Holding the door on bo...
Page 67 - To refit the door; Ensure the levers are both fully locked
67 CARE AND CLEANING To refit the door Holding the door on both sides, line up the holes in the base of the door with the hinges and slide the door on. Ensure the door is firmly in place on the hinges. Open the door fully again and push each locking lever down to lock the door onto the hinge. Ensure...
Page 68 - DESCALING THE OVEN; takes approximately 40 minutes.; STEAM DESCALE; Touch; NEXT
68 DESCALING THE OVEN Descale your ovens steam generator as soon as possible after the descale alert is shown. Failure to do this may cause the steam functions to become unusable. The descale process takes approximately 40 minutes. 1 Touch the menu icon at the top left corner of the home screen. 10:...
Page 69 - to complete the
69 DESCALING THE OVEN 5 Fill tank with 4 cups (1L) of descaling solution* and select FILL TANK to begin process. Fill tank with 4 cups (1L) of fresh water and select FILL TANK to flush the tank. *3 oz (80 grams) (1/3 cup) of citric acid powder to 4 cups (1L) of warm water. Take care when handling ci...
Page 70 - USING STEAM CLEAN; STEAM CLEAN; Fill tank with 1L of fresh water and select
70 To help lift stubborn spills, run the steam clean cycle before wiping out the oven. For best results, oven should be around room temperature before beginning. USING STEAM CLEAN 1 2 3 4 Touch the menu icon at the top left corner of the home screen. Select CLEAN . Select STEAM CLEAN , then NEXT to ...
Page 71 - The oven does not work.; The control panel is locked.; TROUBLESHOOTING; General
71 PROBLEM POSSIBLE CAUSES WHAT TO DO The oven does not work. No power. Check that the mains powersupply (wall switch) is turned on, the fuse has not tripped and there is no power outage in your area. The oven does not work but the screen is on. The oven is in Demo Mode. Call Customer Care. The ligh...
Page 72 - The oven is set to; button is unavailable.
72 PROBLEM POSSIBLE CAUSES WHAT TO DO The oven fan comes on when I select a function that does not use a fan (eg BAKE or CLASSIC BAKE). This is normal. The fan comes on while the oven is preheating. It may turn off when the oven has reached the set temperature. Wait until the red heating bar on the ...
Page 73 - PROBLEM; • Wait for oven to cool then wipe
73 General TROUBLESHOOTING PROBLEM POSSIBLE CAUSES WHAT TO DO Water present in the bottom of the oven after running a steam function This is normal. • Wait for oven to cool then wipe out base of cavity. • Always run a dry cycle after using a steam function. Burnt smell coming from cavity base. • Bur...
Page 74 - ALERT CODES; What to do if an alert code is displayed; ALERT CODE POSSIBLE CAUSES; Allow the oven to cool down.
74 ALERT CODES What to do if an alert code is displayed 1 If the beeping hasn’t stopped already, touch the display and press the little audio button in the bottom right to mute it. 2 Make a note of the alert code displayed. You may need this information. 3 Follow the instructions on the screen to re...
Page 75 - WARRANTY AND SERVICE; Before you call for service or assistance
75 WARRANTY AND SERVICE Before you call for service or assistance Check the things you can do yourself. Refer to the installation instructions and your user guide and check that: z Your product is correctly installed. z You are familiar with its normal operation. If after checking these points you s...


 Fisher & Paykel CE604CBX1OB60SC5CEX1
User Manual
Fisher & Paykel CE604CBX1OB60SC5CEX1
User Manual
 Fisher & Paykel CG604CWCX1OB60SC5CEX
User Manual
Fisher & Paykel CG604CWCX1OB60SC5CEX
User Manual
 Fisher & Paykel OB24SD11PLX1
User Manual
Fisher & Paykel OB24SD11PLX1
User Manual
 Fisher & Paykel OB24SDPTDX2
User Manual
Fisher & Paykel OB24SDPTDX2
User Manual
 Fisher & Paykel OB30DDPTDX2
User Manual
Fisher & Paykel OB30DDPTDX2
User Manual
 Fisher & Paykel OB30DPPTX1
User Manual
Fisher & Paykel OB30DPPTX1
User Manual
 Fisher & Paykel OB30SCEPX3N
User Manual
Fisher & Paykel OB30SCEPX3N
User Manual
 Fisher & Paykel OB30SD14PLX1
User Manual
Fisher & Paykel OB30SD14PLX1
User Manual
 Fisher & Paykel OB30SD17PLX1
User Manual
Fisher & Paykel OB30SD17PLX1
User Manual
 Fisher & Paykel OB60B77CEW3
User Manual
Fisher & Paykel OB60B77CEW3
User Manual
 Fisher & Paykel OB60B77CEX3
User Manual
Fisher & Paykel OB60B77CEX3
User Manual
 Fisher & Paykel OB60B77DEX3
User Manual
Fisher & Paykel OB60B77DEX3
User Manual
 Fisher & Paykel OB60DDEX4
User Manual
Fisher & Paykel OB60DDEX4
User Manual
 Fisher & Paykel OB60NC9DEX1
User Manual
Fisher & Paykel OB60NC9DEX1
User Manual
 Fisher & Paykel OB60SC5CEW1
User Manual
Fisher & Paykel OB60SC5CEW1
User Manual