Page 3 - SAVE THESE INSTRUCTIONS; Contents
1 Safety and warnings 2 Installation instructions - GAS COOKTOP MODELS 6 Installation instructions - CERAMIC GLASS COOKTOP MODELS 15 FOUR-FUNCTION MODELS WITH GAS COOKTOP Using your oven for the first time 20 Using your oven 21 Cooking functions 22 Using your gas cooktop 23 Cooktop troubleshooting 2...
Page 4 - Safety and warnings; Electrical Shock Hazard; Failure to do so may result in death or electrical shock.; Important safety instructions; General; Models with gas cooktop are registered:; Installation; Cut Hazard
2 Safety and warnings WARNING! Electrical Shock Hazard Always disconnect the cooker from the mains electricity supply beforecarrying out any maintenance operations or repairs.Models with ceramic glass cooktop: If the ceramic glass cooktop surface becomes cracked, switch the appliance off at the main...
Page 5 - Electrical; installed in the active (phase) conductor of the fixed wiring.
3 Electrical This cooker is to be installed and connected to the electricity supply only by an authorised person. If the installation requires alterations to the domestic electrical system, call a qualified electrician. The electrician should also check that the electrical system is suitable for the...
Page 6 - Operation; Hot Surface Hazard
4 Operation Your freestanding cooker has been carefully designed to operate safely during normal cooking procedures. Please keep the following guidelines in mind when you are using it: Safety and warnings WARNING! Hot Surface Hazard Accessible parts may become hot when this cooker is in use.To avoid...
Page 7 - Do not line the walls with aluminium foil.
5 Safety and warnings Important safety instructions Never leave the appliance unattended when in use. Boilover causes smoking and greasy spillovers that may ignite. Isolating switch: make sure this cooker is connected to a circuit which incorporates an isolating switch providing full disconnection f...
Page 8 - Dimensions and clearances; Overhead Clearances; Installation instructions; Four-function models; FOUR FUNC
6 750 mm 500 mm 105 mm 450 mm Dimensions and clearances Installation clearances and protection of combustible surfaces shall comply with the current local regulations eg. AG 601 (AS 5601/NZS 5261) Gas Installations code. Installation shall comply with the dimensions in Fig. 1, bearing in mind the fo...
Page 9 - Levelling the cooker; Fixing the backguard; efore assembling, remove any protective film/
7 Installation instructions Levelling the cooker Important! Using the supplied adjustable feet is MANDATORY. For safety reasons and to ensure adequate ventilation, the cooker chassis MUST NOT sit directly on the floor, a plinth, or other support surface. To fit the adjustable feet: 1 Rest the rear o...
Page 10 - Fitting the anti-tilt bracket
8 Installation instructions FOUR FUNC TION MODELS GAS C OOK T OP MODELS 365 235 600 mm min 105 max 120 0 + 15 + 15 (Cavity width) 1 2 Fitting the anti-tilt bracket (four-function models) Important! To restrain the appliance and prevent it tipping accidentally, fit a bracket to its rear to fix it sec...
Page 12 - Connecting the cooker to the gas supply; Installation with a flexible hose assembly; Gas connection for
10 Installation instructions FOUR FUNC TION MODELS GAS C OOK T OP MODELS Connecting the cooker to the gas supply The gas connection must be carried out by an authorised person according to the relevant standards. B efore connecting the appliance to the gas main, mount the brass conical adaptor onto ...
Page 13 - Flexible hose assemblies should be AS/NZS 1869 Class; Leak-testing and flame-testing the cooker; Do not use a naked flame to test for leaks.
11 Ca p A or B de p ending on models Installation instructions FOUR FUNC TION MODELS GAS C OOK T OP MODELS Fig. 9 Adjusting the connection pipe Fig. 10 Gas supply inlets It is important that the hose does not come in contact with the metal of the appliance and is secured as per appropriate gas insta...
Page 14 - Converting to a different gas type; Replacing the injectors; Remove the trivets and burners from the cooktop.; Adjusting the minimum burner setting
12 Installation instructions FOUR FUNC TION MODELS GAS C OOK T OP MODELS Converting to a different gas type This appliance is suitable for use with Natural gas or LPG (check the “gas type” sticker attached to the appliance). To convert from one gas type to another, you need to replace the injectors,...
Page 15 - Natural gas
13 Installation instructions Natural gas LPG Test Point Pressure [kPa] 1.0 2.75 B URNER Injector Orifice Dia. [mm] Gas Consumption [MJ/h] Injector Orifice Dia. [mm] Gas Consumption [MJ/h] Auxiliary 0.85 3.60 0.53 3.60 Semi-rapid 1.12 6.30 0.70 6.30 Triple-ring wok 1.60 12.70 0.95 11.90 FOUR FUNC TIO...
Page 17 - Do not install the cooker near flammable materials (eg curtains).
15 Installation instructions FOUR FUNC TION MODELS CER AMIC GLASS C OOK T OP MODELS Dimensions and clearances The cooker must be installed at least 50 mm away from any side walls higher than the cooktop. The cabinetry surrounding the cooker must be made of heat-resistant material and must be able to...
Page 20 - Connecting the power supply cable; Note: the earth wire must be left about 30 mm longer than the others.; Voltage and power consumption
18 Installation instructions FOUR FUNC TION MODELS CER AMIC GLASS C OOK T OP MODELS Connecting the power supply cable Important! This cooker must be connected to the electricity supply only by an authorised person. To connect the power supply cable to the cooker, it is necessary to: 1 Remove the scr...
Page 21 - CER; CIR
19 Wiring diagram CER AMIC GLASS C OOK T OP MODELS Installation instructions M S2 T F2 F4 F3 F5 P3 P4 P2 P1 PR TS CR TL S1 F1 C G S V CIR TM CF LF 5 4 3 2 1 H H SS22 44 S1 S1 S1 S1 S2 S2 S2 S2 44 44 P1 P1 P1 P1 P2 P2 P2 P2 PILOT 22 22 4A H S2 4 4 4A HS 2 4a 4a PILOT N/7 1 1a L/8 1 6 1a 6a 4 9 4a 9a ...
Page 22 - Using your oven for the fi rst time
20 Using your oven for the fi rst time Fig. 20 Control panel B efore using your new oven, please: 1 Read this user guide, taking special note of the ‘Safety and warnings’ section. 2 Remove all accessories and packaging. Peel the protective film off all surfaces and accessories. 3 Condition the oven:...
Page 23 - Using your oven
21 Using your oven 1 Select the function by turning the function knob. The oven light will come on. 2 Select the temperature by turning the temperature control knob clockwise. The oven temperature indicator light, above the oven control knobs on the control panel, will glow until the oven has reache...
Page 24 - Cooking functions; OVEN LAMP
22 Cooking functions OVEN LAMP Only the oven light comes on. It remains on in all the cooking functions. BAKE The upper and lower heating elements come on. B AKE is the traditional method of cooking. It is best to cook on only one shelf at a time in this function. Ideal for large cakes and dishes th...
Page 25 - Using your gas cooktop; Gas burners
23 Using your gas cooktop Gas burners The knob controls the flow of gas through the safety valve. = closed valve (OFF) = maximum flow = minimum flow You can choose to cook at any heat between and , but never between and 0 (OFF). 1 Auxiliary burner 2 Semi-rapid burner 3 Triple-ring wok burner 0 Fig. ...
Page 26 - Before using your cooktop
24 Using your gas cooktop Before using your cooktop B efore using your new cooktop, please: Read this user guide, taking special note of the ‘Safety and warnings’ section. Turn the power to the cooker on at the wall. Make sure all controls are turned off. Using the gas burners 1 Choose the control k...
Page 27 - If a burner does not light; The cooker is plugged in and the electricity is switched on.; If the flame is irregular; positioned correctly. See ‘Care and cleaning’.; Ignitor
25 If a burner does not light Check that: The cooker is plugged in and the electricity is switched on. The gas is turned on. The gas bottle is not empty (if you are using bottled gas). The ignitors are sparking. If the ignitors are not sparking, they may be dirty or wet. Clean them with a toothbrush...
Page 28 - urners; Matching cookware to burner
26 Using your gas cooktop B urners Minimum Maximum Auxiliary 12 cm (6 cm with small pan support) 14 cm Semi-rapid 16 cm 24 cm Triple-ring wok 26 cm 28 cm Maximum diameter for woks 36 cm Matching cookware to burner Use flat-bottomed pans, and make sure they match the size of the burner, as shown in t...
Page 29 - Cooktop troubleshooting; Problem
27 Cooktop troubleshooting Problem Possible solutions A burner does not light. Check the cooker is switched on at the wall.Check the gas supply valve is turned on and the supply to the house is working. You should hear the gas when you turn a burner on.Check the gas bottle is not empty.The ignitors ...
Page 30 - Care and cleaning; Before you start cleaning your cooker, please:; General advice; Wipe down the cooktop and wipe out the oven after every use.; Cleaning the outside of the cooker; Maintenance Period; Daily
28 Care and cleaning Important! Before you start cleaning your cooker, please: Read these cleaning instructions and the ‘Safety and warnings’ section at the start of this user guide. Turn the power to the cooker off at the wall. Make sure the cooker is a safe temperature to touch. Do not use a steam...
Page 31 - Cap; Burner parts and trivets; Carefully replace the burner parts as per the following Figs.
29 Care and cleaning Cap Ignitor Flame spreader Burner parts and trivets You can remove and clean these parts with hot soapy water or non-abrasive detergents. Clean spills regularly before they become burnt on. Do not wash these parts in a dishwasher. After cleaning, check that the burners and their...
Page 32 - Replacing the triple-ring wok burner
30 Care and cleaning Replacing the triple-ring wok burner Fit the burner ring to the housing as shown by the arrow in the Fig. following. Make sure the burner is not able to rotate (Fig.31). Fig. 31 Correct positioning of cap and ring - triple-ring wok burner Ignitor Fig. 32 Incorrect and correct po...
Page 33 - Cleaning the inside of your oven; ring to the boil and leave to soak for at least 30 minutes.; Cleaning the oven door glass; The drawer comes out like a normal drawer.
31 Care and cleaning Cleaning the inside of your oven Do not use abrasive cleaners, cloths or pads to clean the enamel. Clean the enamel on the inside of the oven when it has cooled down, using household detergents or an ammonia-based cleaner. You may use ‘off the shelf ’ oven cleaners, if you caref...
Page 34 - Removing the oven door; Open the door completely.
32 Care and cleaning Removing the oven door The oven door can easily be removed as follows: 1 Open the door completely. 2 Hook the swivel retainers of the right-hand and left-hand hinges (Fig. 37a) onto the metal bar above them (Fig. 37b). 3 Lift the oven door slightly. The notch on the bottom of th...
Page 35 - Replacing the oven lamp
33 A B Care and cleaning Replacing the oven lamp 1 Turn the power to the cooker off at the wall. 2 Let the oven cavity and the heating elements cool down. 3 Remove the protective cover “ B ”. 4 Unscrew and replace the bulb “A” with a new one suitable for high temperatures (300 o C) with the followin...
Page 36 - Shelf positions; Guard rail
34 Using your oven for the fi rst time FOUR FUNC TION MODELS SE VEN-FUNC TION MODELS WITH GAS C OOK T O P Fig. 39 Control panel 1 Control buttons 2 Clock display 3 Temperature knob 4 Temperature indicator light 5 Function knob 1 3 5 6 7 8 9 2 4 6 Front left (auxiliary) burner knob 7 Rear left (semi-...
Page 37 - Buttons; AUTO; See instructions below.; See section ‘Automatic cooking’; steadily lit; See section ‘Using the electronic timer’; flashing and beeping; Oven controls and setting the clock
35 FOUR FUNC TION MODELS SE VEN-FUNC TION MODELS WITH GAS C OOK T O P Fig. 41 Clock display and control buttons Buttons sets the timer sets the cooking time for automatic cooking sets the stop time for automatic cooking sets the clock, returns oven to manual mode, cancels automatic cooking decreases...
Page 38 - The upper and lower heating elements come on.
36 Cooking functions FOUR FUNC TION MODELS SE VEN-FUNC TION MODELS WITH GAS C OOK T O P OVEN LAMP Only the oven light comes on. It remains on in all the cooking functions. BAKE The upper and lower heating elements come on. B AKE is the traditional method of cooking. It is best to cook on only one sh...
Page 40 - Using the electronic timer; The timer does NOT turn the oven off.; To set the timer
38 FOUR FUNC TION MODELS SE VEN-FUNC TION MODELS WITH GAS C OOK T O P Using the electronic timer You can use the timer at any time, even when the oven is not in use. Important! The timer does NOT turn the oven off. To set the timer 1 Press . 0 . 00 will show and the symbol will start flashing. 2 Pre...
Page 41 - Automatic cooking; To set the oven for automatic cooking; Set the cooking time:
39 FOUR FUNC TION MODELS SE VEN-FUNC TION MODELS WITH GAS C OOK T O P Automatic cooking To set the oven for automatic cooking 1 Set the oven: Check the clock shows the correct time (eg 12:07). Select the function and set the temperature. The oven will turn on. 2 Set the cooking time: Decide how long...
Page 42 - Gas
40 FOUR FUNC TION MODELS SE VEN-FUNC TION MODELS WITH GAS C OOK T O P Using your gas cooktop Fig. 44 Cooktop layout Fig. 45 Burner control knob 1 Auxiliary burner 2 Semi-rapid burner 3 Triple-ring wok burner Gas burners The knob controls the flow of gas through the safety valve. 0 = closed valve (OF...
Page 44 - them with a toothbrush and methylated spirits, as shown in Fig. 46.; Flame failure probe
42 FOUR FUNC TION MODELS SE VEN-FUNC TION MODELS WITH GAS C OOK T O P Using your gas cooktop If a burner does not light Check that: The cooktop is plugged in and the electricity is switched on. The gas is turned on. The gas bottle is not empty (if you are using bottled gas). You have held down the k...
Page 45 - WRONG
43 Using your gas cooktop FOUR FUNC TION MODELS SE VEN-FUNC TION MODELS WITH GAS C OOK T O P Fig. 47b Effi cient and ineffi cient saucepan bottoms Fig. 47a Correct and incorrect matching of cookware and burner size Fig. 48a Small pan support Fig. 48b Correct placement of wok stand Matching cookware ...
Page 50 - Cleaning the inside of the oven; Drop-down grill element; fixing
48 FOUR FUNC TION MODELS SE VEN-FUNC TION MODELS WITH GAS C OOK T O P Care and cleaning Cleaning the inside of the oven Do not use abrasive cleaners, cloths or pads to clean the enamel. Do not use any oven cleaners, abrasive cleaners, ammonia-based cleaners, products containing acids or alkalis, or ...
Page 51 - Cleaning the enamel cavity; Do not use abrasive cleaners, cloths or pads to clean the enamel.; Clean the enamel on the inside; Caring for the catalytic panels; When you replace the panels, make sure that:; Cleaning the fat filter; ring to the boil and leave to soak for
49 FOUR FUNC TION MODELS SE VEN-FUNC TION MODELS WITH GAS C OOK T O P Care and cleaning Cleaning the enamel cavity Do not use abrasive cleaners, cloths or pads to clean the enamel. Clean the enamel on the inside of the oven when it has cooled down, using household detergents or an ammonia-based clea...
Page 52 - Sliding shelf supports; To remove the sliding shelf supports:; Screw the side rack onto the oven wall.
50 FOUR FUNC TION MODELS SE VEN-FUNC TION MODELS WITH GAS C OOK T O P Care and cleaning Sliding shelf supports The telescopic sliding shelf supports make it safer and easier to insert and remove the oven shelves and trays. They stop when they are pulled out to the maximum position. Wipe the supports...
Page 53 - Lock the door open:
51 FOUR FUNC TION MODELS SE VEN-FUNC TION MODELS WITH GAS C OOK T O P Care and cleaning Cleaning the oven door glass Do not use harsh abrasive cleaners or sharp metal scrapers to clean the oven door glass since they scratch the surface, which may result in shattering of the glass. Removing the inner...
Page 54 - Remove the middle pane:
52 FOUR FUNC TION MODELS SE VEN-FUNC TION MODELS WITH GAS C OOK T O P Care and cleaning 3 Remove the middle pane: Gently unlock the middle pane of glass from the bottom clamps by moving it as in Fig. 59b. Gently lift the bottom edge of the pane (arrow 1 in Fig. 59c) and remove it by pulling it out f...
Page 55 - Make sure the door is locked open (see
53 FOUR FUNC TION MODELS SE VEN-FUNC TION MODELS WITH GAS C OOK T O P Replacing the middle and inner panes of glass 1 Make sure the door is locked open (see Figs. 58a - 58c). 2 Replace the middle pane: Check that the four rubber pads are in place (“M” in Fig. 60a). Check that you are holding the pan...
Page 57 - ” of the
55 FOUR FUNC TION MODELS SE VEN-FUNC TION MODELS WITH GAS C OOK T O P Care and cleaning Removing the oven door The oven door can easily be removed as follows: 1 Open the door to its full extent (Fig. 62a). 2 Open the lever “A” completely on the left and right hinges (Fig. 62b). 3 Hold the door (Fg. ...
Page 59 - Storage; Do not store flammable material in the drawer.
57 Care and cleaning FOUR FUNC TION MODELS SE VEN-FUNC TION MODELS WITH GAS C OOK T O P Storage drawer The drawer comes out like a normal drawer. A safety notch stops it from sliding out. The handle is concealed at the bottom of the front panel. To remove the drawer, proceed as per Fig. 65. To repla...
Page 66 - Using your ceramic glass cooktop; Ceramic glass cooktop; the cooking areas are clearly marked.
64 Using your ceramic glass cooktop FOUR FUNC TION MODELS MODELS WITH CER AMIC GLASS C OOK T O P Fig. 71 Ceramic glass cooktop layout 1 1200 W element 2 2000/1100 W dual oval element (round or oval cookware) 3 1200 W element 4 2200/750 W dual element (largest pots and frying pans/smallest pots) 1 4 ...
Page 67 - Using the elements; Using the single elements; To turn on the; inner zone of a dual element; , turn its knob clockwise to a setting between 1; both zones of a dual element; , turn its knob fully clockwise to the; return to using only the inner zone of a dual element
65 Using your ceramic glass cooktop FOUR FUNC TION MODELS MODELS WITH CER AMIC GLASS C OOK T O P Using the elements Using the single elements To turn on a single element, turn its knob clockwise to a setting between 1 (minimum) and 12 (maximum). Adjust the heat during cooking by turning the knob in ...
Page 68 - Tips for using the elements; Elements usage table
66 Using your ceramic glass cooktop FOUR FUNC TION MODELS MODELS WITH CER AMIC GLASS C OOK T O P Tips for using the elements The ‘Element on’ indicator light (Fig. 66, no.10) glows red whenever an element is on. After an element has been turned off, its ‘Hot surface’ indicator light (Fig. 66, no. 11...
Page 69 - Cookware tips; Never use plastic or aluminium foil dishes on the cooktop.; Energy saving tips; Place cookware on the element before turning it on.
67 Using your ceramic glass cooktop FOUR FUNC TION MODELS MODELS WITH CER AMIC GLASS C OOK T O P Cookware tips Cooking results are influenced by pot quality and size. It is essential for the base of the pot to be smooth and sit flat against the glass. Also, pot size should match the diameter of the ...
Page 70 - There is a metal sheen on the glass.
68 Cooktop troubleshooting FOUR FUNC TION MODELS MODELS WITH CER AMIC GLASS C OOK T O P Problem Possible solutions There is a metal sheen on the glass. This could be caused by copper or aluminium- bottomed pots. Ceramic glass cleaner should remove this. If the cooktop is not cleaned regularly and th...
Page 71 - Do not use cleaning products with a chlorine or acidic base.
69 Care and cleaning FOUR FUNC TION MODELS MODELS WITH CER AMIC GLASS C OOK T O P Important! Before you start cleaning your cooker, please: Read these cleaning instructions and the ‘Safety and warnings’ section at the start of this user guide. Turn the cooker off at the wall. Make sure the cooker is...
Page 72 - Caring for your cooktop; blade scraper suitable for ceramic glass surfaces.; Metallic stains; Clean the following spillovers; immediately; , using a razor blade scraper suitable for ceramic
70 FOUR FUNC TION MODELS MODELS WITH CER AMIC GLASS C OOK T O P Care and cleaning Caring for your cooktop Important! Some heavy-duty and nylon scourers can scratch the ceramic glass of your cooktop. Always read the label to check if your scourer is suitable for ceramic glass cooktops. Use ceramic gl...
Page 82 - Warranty and service; Your product is correctly installed.; Product details
80 Warranty and service Before you call for service or assistance ... Check the things you can do yourself. Refer to the installation instructions and your user guide and check that: 1 Your product is correctly installed. 2 You are familiar with its normal operation. If after checking these points y...
Page 84 - NZ AU
NZ AU 05.2012 F&P PN - 599915 B F&P ITALY PN - 1104120-ß1 www.fi sherpaykel.co.nz www.fi sherpaykel.com.au Copyright © Fisher & Paykel 2012. All rights reserved. The product specifications in this booklet apply to the specific products and models described at the date of issue. Under our...
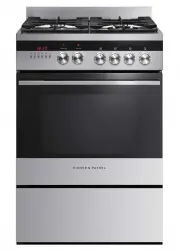


 Fisher & Paykel CE604CBX1OB60SC5CEX1
User Manual
Fisher & Paykel CE604CBX1OB60SC5CEX1
User Manual
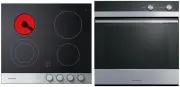
 Fisher & Paykel CG604CWCX1OB60SC5CEX
User Manual
Fisher & Paykel CG604CWCX1OB60SC5CEX
User Manual
 Fisher & Paykel OB24SD11PLX1
User Manual
Fisher & Paykel OB24SD11PLX1
User Manual
 Fisher & Paykel OB24SDPTDX2
User Manual
Fisher & Paykel OB24SDPTDX2
User Manual
 Fisher & Paykel OB30DDPTDX2
User Manual
Fisher & Paykel OB30DDPTDX2
User Manual
 Fisher & Paykel OB30DPPTX1
User Manual
Fisher & Paykel OB30DPPTX1
User Manual
 Fisher & Paykel OB30SCEPX3N
User Manual
Fisher & Paykel OB30SCEPX3N
User Manual
 Fisher & Paykel OB30SD14PLX1
User Manual
Fisher & Paykel OB30SD14PLX1
User Manual
 Fisher & Paykel OB30SD17PLX1
User Manual
Fisher & Paykel OB30SD17PLX1
User Manual
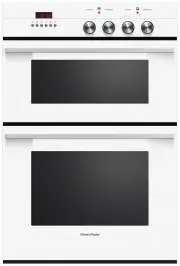 Fisher & Paykel OB60B77CEW3
User Manual
Fisher & Paykel OB60B77CEW3
User Manual
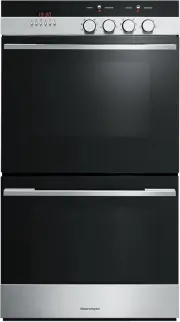
 Fisher & Paykel OB60B77CEX3
User Manual
Fisher & Paykel OB60B77CEX3
User Manual
 Fisher & Paykel OB60B77DEX3
User Manual
Fisher & Paykel OB60B77DEX3
User Manual
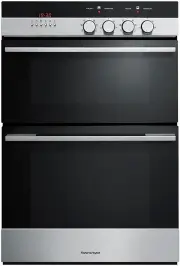
 Fisher & Paykel OB60DDEX4
User Manual
Fisher & Paykel OB60DDEX4
User Manual
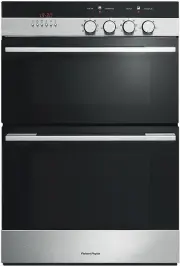
 Fisher & Paykel OB60NC9DEX1
User Manual
Fisher & Paykel OB60NC9DEX1
User Manual
 Fisher & Paykel OB60SC5CEW1
User Manual
Fisher & Paykel OB60SC5CEW1
User Manual