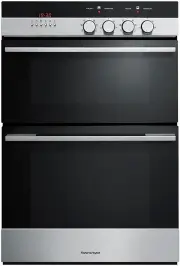
Fisher & Paykel OB76SDEPX2 - Manuals

User Manual Fisher & Paykel OB76SDEPX2


Summary
1 Contents Safety and warnings 2 Introduction 5 Using your oven - before you start Setting the clock 6 Using the oven controls 7 Oven functions 8 Using your oven Positioning the shelves 10 Choosing the right bakeware 11 Selecting function and temperature 12 Preheating your oven 12 Using the oven fun...
2 Operation Your oven has been carefully designed to operate safely during normal cooking procedures. Please keep the following guidelines in mind when you are using your oven: WARNING! Hot Surface Hazard Accessible parts may become hot when in use. To avoid burns and scalds, keep children away. Use...
3 Safety and warnings Important safety instructions To reduce the risk of fire, electrical shock, injury to persons, or damage when using the oven, follow the important safety precautions listed below: Read all the instructions before using the oven. Use the oven only for its intended purpose as des...
Fisher & Paykel Ovens Manuals
-
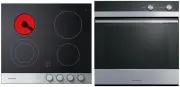 Fisher & Paykel CE604CBX1OB60SC5CEX1
User Manual
Fisher & Paykel CE604CBX1OB60SC5CEX1
User Manual
-
 Fisher & Paykel CG604CWCX1OB60SC5CEX
User Manual
Fisher & Paykel CG604CWCX1OB60SC5CEX
User Manual
-
 Fisher & Paykel OB24SD11PLX1
User Manual
Fisher & Paykel OB24SD11PLX1
User Manual
-
Fisher & Paykel OB24SD16PLX1
User Manual
-
 Fisher & Paykel OB24SDPTDX2
User Manual
Fisher & Paykel OB24SDPTDX2
User Manual
-
 Fisher & Paykel OB30DDPTDX2
User Manual
Fisher & Paykel OB30DDPTDX2
User Manual
-
 Fisher & Paykel OB30DPPTX1
User Manual
Fisher & Paykel OB30DPPTX1
User Manual
-
 Fisher & Paykel OB30SCEPX3N
User Manual
Fisher & Paykel OB30SCEPX3N
User Manual
-
 Fisher & Paykel OB30SD14PLX1
User Manual
Fisher & Paykel OB30SD14PLX1
User Manual
-
 Fisher & Paykel OB30SD17PLX1
User Manual
Fisher & Paykel OB30SD17PLX1
User Manual
-
Fisher & Paykel OB30SDPTB1
User Manual
-
Fisher & Paykel OB30SDPTDB1
User Manual
-
Fisher & Paykel OB30SDPTDX2
User Manual
-
Fisher & Paykel OB30SPPTX1
User Manual
-
 Fisher & Paykel OB60B77CEW3
User Manual
Fisher & Paykel OB60B77CEW3
User Manual
-
 Fisher & Paykel OB60B77CEX3
User Manual
Fisher & Paykel OB60B77CEX3
User Manual
-
 Fisher & Paykel OB60B77DEX3
User Manual
Fisher & Paykel OB60B77DEX3
User Manual
-
 Fisher & Paykel OB60DDEX4
User Manual
Fisher & Paykel OB60DDEX4
User Manual
-
 Fisher & Paykel OB60NC9DEX1
User Manual
Fisher & Paykel OB60NC9DEX1
User Manual
-
 Fisher & Paykel OB60SC5CEW1
User Manual
Fisher & Paykel OB60SC5CEW1
User Manual