Fisher & Paykel OB60DDEX4 - Manuals
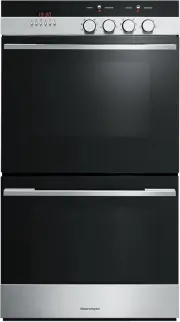
User Manual Fisher & Paykel OB60DDEX4


Summary
1 Contents Safety and warnings 2 Oven controls and setting manual mode 4 Oven controls and setting the clock 5 First use 8 Using your oven 9 Oven functions 10 Baking charts 12 Cooking with ‘auto-off ’ 16 Using the electronic timer 18 Automatic cooking 19 Care and cleaning 20 Troubleshooting 32 Warra...
2 Safety and warnings Your built-in oven has been carefully designed to operate safely during normal cooking procedures. Please keep the following guidelines in mind when you are using your oven: WARNING! Hot Surface Hazard Accessible parts may become hot when this oven is in use.To avoid burns and ...
3 Safety and warnings Important safety instructions Isolating switch: make sure this oven is connected to a circuit which incorporates an isolating switch providing full disconnection from the power supply. Household appliances are not intended to be played with by children. Children, or persons wit...
Fisher & Paykel Ovens Manuals
-
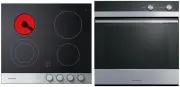 Fisher & Paykel CE604CBX1OB60SC5CEX1
User Manual
Fisher & Paykel CE604CBX1OB60SC5CEX1
User Manual
-
 Fisher & Paykel CG604CWCX1OB60SC5CEX
User Manual
Fisher & Paykel CG604CWCX1OB60SC5CEX
User Manual
-
 Fisher & Paykel OB24SD11PLX1
User Manual
Fisher & Paykel OB24SD11PLX1
User Manual
-
Fisher & Paykel OB24SD16PLX1
User Manual
-
 Fisher & Paykel OB24SDPTDX2
User Manual
Fisher & Paykel OB24SDPTDX2
User Manual
-
 Fisher & Paykel OB30DDPTDX2
User Manual
Fisher & Paykel OB30DDPTDX2
User Manual
-
 Fisher & Paykel OB30DPPTX1
User Manual
Fisher & Paykel OB30DPPTX1
User Manual
-
 Fisher & Paykel OB30SCEPX3N
User Manual
Fisher & Paykel OB30SCEPX3N
User Manual
-
 Fisher & Paykel OB30SD14PLX1
User Manual
Fisher & Paykel OB30SD14PLX1
User Manual
-
 Fisher & Paykel OB30SD17PLX1
User Manual
Fisher & Paykel OB30SD17PLX1
User Manual
-
Fisher & Paykel OB30SDPTB1
User Manual
-
Fisher & Paykel OB30SDPTDB1
User Manual
-
Fisher & Paykel OB30SDPTDX2
User Manual
-
Fisher & Paykel OB30SPPTX1
User Manual
-
 Fisher & Paykel OB60B77CEW3
User Manual
Fisher & Paykel OB60B77CEW3
User Manual
-
 Fisher & Paykel OB60B77CEX3
User Manual
Fisher & Paykel OB60B77CEX3
User Manual
-
 Fisher & Paykel OB60B77DEX3
User Manual
Fisher & Paykel OB60B77DEX3
User Manual
-
 Fisher & Paykel OB60NC9DEX1
User Manual
Fisher & Paykel OB60NC9DEX1
User Manual
-
 Fisher & Paykel OB60SC5CEW1
User Manual
Fisher & Paykel OB60SC5CEW1
User Manual
-
 Fisher & Paykel OB60SC5CEX1
User Manual
Fisher & Paykel OB60SC5CEX1
User Manual